
Raspberry pi 4 не работает ethernet
Waiting for external input Waiting for a comment from the originator of the issue, or a collaborator.
Raspberry pi ethernet not working
Problems: Network connection is lost
The problem descriptions are as follows:
- Raspberry Pi connects to the network after booting without any problems. However, the connection leaves after some time and will not be restored.
- After some time, remote access will stop working. Then just pull the plug.
Analysis
90% of all network problems related to connection problems are related to the power supply.
- A too long or unsuitable USB cable between power supply and Raspberry Pi.
- The power supply is too weak or unsuitable for operation on Raspberry Pi with heavily fluctuating power consumption from additional USB devices.
Often network issues with Raspberry Pi are related to an unstable power supply. So it can happen that at a low operating voltage, below 5 volts, Raspberry Pi for stabilization, reduces the power consumption by switching off individual components. For example, the USB. Not only the usual peripheral devices are connected to them, but also the Ethernet port internally. If the internal USB goes out of order, then this also affects the network connection. The goes back to operation at stable operating voltage. But that does not mean that after that everything will work again as desired.
Solution
For sporadic failures and network problems, you should first swap the power supply. Especially if the network configuration has worked before, and then suddenly not more. Often then the power supply is guilty.
What if all that did not help?
Sometimes there are very complicated constellations in whose processes one simply can not look. This means that you can not find a bug, but still have a network problem. Then it is recommended to really use another power supply. Even if that does not help, you have to resort to unusual means.
The following tips for resolving network issues with Raspberry Pi are just a last straw. It may well be that it helps in one way or another, but it does not have to. So there is no guarantee of success.
Sometimes it just helped to do an update.
Basically, one should not rule out that the problem is not s.Raspberry Pi, but perhaps in the local network to look for, even if there are no problems with other devices.
You should also take a look at your own internet router. Maybe this will help restart or something is wrongly configured. Many internet routers have already played crazy.
Tashreef Shareef is a software developer turned tech writer. He discovered his interest in technology after reading a tech magazine accidentally. Now he writes about everything tech from Windows to iOS and streaming services. Read more
- If your Raspberry Pi is not connecting to WiFi, this guide will prove very useful.
- To start resolving this problem, remove the underscore sign in your SSID, and restart your home network.
- Don't hesitate to visit our extensive Developer Tools section for more in-depth information on the subject.
- It could never hurt to have useful information easily-accessible, so don't forget to bookmark our detailed Raspberry Pi Errors Hub.
To fix various PC problems, we recommend DriverFix:
This software will keep your drivers up and running, thus keeping you safe from common computer errors and hardware failure. Check all your drivers now in 3 easy steps:
If your Raspberry Pi is not connecting to WiFi or Ethernet, you need to check your WiFi router if the internet is working or not. If the internet is not working, try resetting the WiFi router or the modem to resolve the issue. In case the issue persists, the problem is most likely with your Raspberry Pi.
Several users have reported similar issues in the official Raspberry Pi forum:
My RPi 3 B+, which I’ve had for a couple years now, has recently refused to connect to the internet. I have it connected to ethernet because the wifi connection is weak in this part of the house. I cannot successfully ping its hostname or IP from any other computer in the house.
In this article, we have listed a couple of troubleshooting tips to help you fix Raspberry Pi not connecting to WiFi and Ethernet issues.
Videocore information
Aug 15 2019 12:05:53
Copyright (c) 2012 Broadcom
version 9f8431fb7839c7f00f52b81f5822ddab2b31d0db (clean) (release) (start_x)
alloc failures: 0
compactions: 0
legacy block fails: 0
ralphrmartin commented Aug 31, 2019 •
Is this the right place for my bug report?
I believe so, unless I just have some kind of hardware issue.
Describe the bug
Ethernet sometimes fails to start (no carrier) on Raspberry Pi 4 on kernel 4.19.66-v7l+
To reproduce
Reboot. RPi 4 is connected via Ethernet to an EdgeRouter X
Expected behaviour
Ethernet should start early in the boot.
Actual behaviour
Sometimes ethernet starts OK. Other times it fails as follows:
Aug 31 10:47:32 www kernel: bcmgenet fd580000.genet: failed to get enet clock
Aug 31 10:47:32 www kernel: bcmgenet fd580000.genet: GENET 5.0 EPHY: 0x0000
Aug 31 10:47:32 www kernel: bcmgenet fd580000.genet: failed to get enet-wol clock
Aug 31 10:47:32 www kernel: bcmgenet fd580000.genet: failed to get enet-eee clock
Aug 31 10:47:32 www kernel: bcmgenet: Skipping UMAC reset
It may or may not then find the carrier later in the boot. (in example below, it did).
If not, there is no network on reaching the CLI
Even if it does, various services may not be working properly due to lack of networking when starting up.
cmdline.txt
coherent_pool=1M 8250.nr_uarts=1 cma=64M bcm2708_fb.fbwidth=1280 bcm2708_fb.fbheight=1024 bcm2708_fb.fbswap=1 smsc95xx.macaddr=DC:A6:32:03:F7:50 vc_mem.mem_base=0x3ec00000 vc_mem.mem_size=0x40000000 dwc_otg.lpm_enable=0 console=ttyAMA0,115200 console=tty1 root=/dev/sda2 rootfstype=ext4 fsck.repair=yes elevator=deadline rootwait net.ifnames=0
Raspberry pi Duplicate IP
Problem: Duplicate IPv4 addresses
A popular bug is that Raspberry Pi has two IPv4 addresses on a network interface. An effect may be that an interface has two IP addresses or an IP configuration that was not intended.
Sometimes you do not notice it. And it does not necessarily have any effect. Nevertheless, one must expect network problems.
Analysis
This is because one unknowingly runs two different types of IPv4 configuration in parallel. Despite or even because of a static IP configuration, Raspberry Pi has two IP addresses. One you forgave yourself and a second, which was somehow allocated via DHCP. Both can be pinged and connected via SSH (sometimes not).
It’s important to note that since Raspbian Wheezy of 2015-05-05 and Raspbian Jessie, the network configuration has been done via the DHCP client Deamon (DHCPCD) and not in the file “/etc/network/interfaces”. If you do it anyway, the DHCPCD has a habit of replacing or adding the network configuration that is listed in the /etc/network/interfaces file (depending on the configuration).
To determine if the problem really exists, we check to see if a DHCP client is installed and running.
Solution 1: Disable DHCPCD (not recommended)
If you still want to or have to do the network configuration in the file “/etc/network/interfaces”, then it is recommended to deactivate the DHCPCD.
Note: This solution is not recommended. However, there are network configurations that can only be made in the file “/etc/network/interfaces”. You then have to live with the advantages and disadvantages.
Solution 2: Network configuration via DHCPCD
The basic recommendation is to leave the configuration in the file “/etc/network/interfaces” in the original and to do it in the file “/etc/dhcpcd.conf” in the future. It must be remembered that the syntax differs from each other.
Solution 3: Coexistence of DHCPCD and the / etc / network / interfaces file
An alternative to the previous one-or-two solutions would be an as-well as solution. In which the network configuration of DHCPCD and the file “/etc/ network/interfaces” can coexist. If you do not want to deactivate the DHCPCD because you need it for an interface, you can also exclude or explicitly release the configuration for an interface. Note: That would be the best of all solutions.
Solution 4: Uninstall other DHCP clientsIt may happen that the DHCPCD is already uninstalled. And yet Raspberry Pi gets an IP address from somewhere via DHCP. In that case, one should prophylactically uninstall all possible DHCP clients.
Contents of the original file “/ etc / network / interfaces” (for solution 2)
Occasionally it happens that you have completely destroyed your network configuration and just want to restore the original file.
The contents of the file “/ etc / network / interfaces” looks like this in the original state (before Raspbian Wheezy from 2015-05-05):
dmesg log
Logs
If applicable, add the relevant output from dmesg or similar.
I'm having an ethernet connectivity problem on a freshly installed Raspbian Buster Lite (2019-07-10)
I'm able to find the rpi4 on the network, but ssh is slow to connect and feels very laggy when typing.
DNS doesn't work out of the box. After specifying it manually, rpi4 finds the servers, but the speed is terribly slow ~1kb/s and connection often gets interrupted.
I tried WiFi, which works well, but my intended setup requires an ethernet connection. I used different cables, checked settings on my router, restarted it, but problem still persisted.
I swapped the same system on a sd card into my older raspberry pi 3b+ and it works without any problem – full speed no lag.
I decided to ask for replacement unit, but the new one I've got has the same problem.
This leads me to the conclusion that it's an issue related to my router.
Since I can't replace it, and my older rpi3b+ works well in that setup, I'm hoping some on this forum could help me finding a workaround to this issue.
Hot-swapping the cables doesn't fix it. SSH still laggy, server names still not found.
What's worth noting is that I also tried static ip configurations which didn't help much as well.
What brand/model switch is it?
Run "ifconfig". Are the error counters for eth0 all zero?
It's a rather unknown docsis 3.0 modem/router Technicolor EPC3940 from my cable provider.
I tested static ip config, with manually entered `static domain_name_servers=` in `/etc/dhcpcd.conf`. Pings seem low, but I had to wait 20 seconds to see the first ping result:
Looks like you are losing lots of incoming packets. Repeat the ping test but to the IP of the router/modem.
I plan to test it with different router on a different network, but that won't solve my problem at all.
What could be the reason that rpi3b+ works fine but two rpi4 units, all tried with the same sd card, are not working on my network?
Edit their dhcpcd.conf files to give each RPi a static address. Connect them together with an ethernet cable. (Crossover cable not required.) Do the ping tests. If not losing packets, time to look more closely at the router. If losing packets something up with the RPi4B.
Wow, this is exactly like my situation (thread over here).
I have an "EPC3940ADL EuroDocsis 3.0 2-PORT Voice Gateway" acting as my router, and I experienced packet losses of approximately 40%.
Static IP didn't help. Disabling IPv6 didn't help. I presume the ethernet interfaces try to reach gigabit speed, but start losing packets / frames at that speed.
I temporarily switched to WiFi and disconnected from Ethernet to suppress the problem. Since WiFi is overcrowded here, I am intending to add a separate WiFi router/switch to my network today.
Looks like this is a Cisco device, rebranded by ISPs.
Found a user guide at random on the Internet, found nothing obvious.
(Seems to operate as modem router only, not a bridged modem.)
Update: I put a TP-Link wireless router downstream of it ( with routing functionality disabled in the TP-Link, so essentially my TP-Link is a switch with antennas or an access point ). Raspberries started working fine, even ping -f loses no packets.
Seems to be a compatibility issue with these Cisco devices.
You should see if it's possible to set the ISP supplied modem/router gateway into bridge mode, then connect a better router.
A few years ago I was in a rental with an ISP supplied gateway that was crap. Their tech support said it wasn't possible to set their router/modem device into bridge mode, but after some searching I found it was possible. After setting the ISP gateway to bridge mode and connecting my own router, it got an external IP and everything worked great.
Or check with the ISP to see if they have a modem only device with an Ethernet jack (my old cable TV ISP had modems without routers).
My mind is like a browser. 27 tabs are open, 9 aren't responding,
lots of pop-ups, and where is that annoying music coming from?
The problem turned out to be compatibility issue between rpi4 and my ISP branded Cisco router.
I connected my rpi4 to another network with a gigabit switch and immediately noticed an improvement during connecting and typing commands over ssh. No ping packet losses and decent internet speeds when using speedtest-cli. I connected an external usb3 hdd and tried transferring files over smb (~35MBytes/s) and sftp (~40MBytes/s). Not a gigabit-speed, but still an usb3 upgrade that I wanted to achieve.
I know that with a bit of hack I can trick my router into bridge mode and put a new router behind it, but that's rather a workaround to my problem. I will try to persuade my ISP to let me use a third-party modem/router which I was planning to buy for some time now (my current EPC3940 drops wifi speed over short range).
It's still a bit disappointing since this is not a purely hardware problem. After all, rpi3b+ works perfectly all this time, which leaves the only possibility that rpi4 uses different mode or parameters that cause the incompatibility. I strongly believe there should be a way to change them on the rpi4 itself without the need of the new hardware.
If someone has any suggestions what config options can potentially work as a fix, please post it here, I'll be glad to try it out.
I am using a Raspberry Pi that is connected to the router directly with an ethernet cable but the device will not connect to the internet. All the network lights light up but I cannot access the internet and cURL, wget, and ping commands are all unable to resolve host address. When I connect the cable to my laptop my laptop can connect to the internet fine.
The Raspberry Pi worked fine at my house, but now when I am setting it up at a friend's house it is not connecting (even with a fresh image). They have a pretty old router (only one ethernet slot).
My question is how can I debug this further to find the problem? Is there some way (for instance) that I could test TCP/IP or something? I have taken a networking class in college and understand the theory but I don't know how to actually dig into a networking problem.
If you want help you need to describe the problem, and what you have tried. What does ifconfig on the Pi say? What are the laptop internet settings?
Frequently Asked Questions
Open the terminal on your Raspberry Pi and type sudo nano /etc/wpa_supplicant/wpa_supplicant.conf. Delete the WiFi network that you want to reset. Press Ctrl + X, and then enter Y to save the file.
Yes, the Raspberry Pi 4 comes with a built-in WiFi adapter that allows you to connect to your home and another wireless network easily. You can connect to the network via terminal or by clicking the wireless symbol in the top-right corner of the Pi’s desktop.
Raspberry pi eth0 link is down
Problem: Network interface “eth0” is missing
When configuring the network, you notice that the internal network interface “eth0” is missing. Instead, there is an interface called “enx …”.
Since Raspbian Jessie, for USB adapters, the network interfaces “eth0” etc., as well as “wlan0”, etc. are replaced by “enx …” or “wlx …” plus MAC address. This binds the interface name to the hardware interface and avoids confusion. Unfortunately, this has the disadvantage that the usual shortcuts no longer work.
One solution would be to first determine the individual name and make the network configuration based on the individual name. Another solution would be to change the naming process to the old one.
System
System Information
Raspberry Pi 4 Model B Rev 1.1
PRETTY_NAME="Raspbian GNU/Linux 10 (buster)"
NAME="Raspbian GNU/Linux"
VERSION_ID="10"
VERSION="10 (buster)"
vcdbg log messages
002255.713: arasan: arasan_emmc_open
002257.903: arasan: arasan_emmc_set_clock C0: 0x00000000 C1: 0x000ef447 emmc: 200000000 actual: 200000 div: 0x000001f4 target: 200000 min: 100000 max: 400000 delay: 10
002374.653: arasan: arasan_emmc_set_clock C0: 0x00000000 C1: 0x000ef447 emmc: 200000000 actual: 200000 div: 0x000001f4 target: 200000 min: 100000 max: 400000 delay: 10
002381.808: arasan: arasan_emmc_set_clock C0: 0x00000f00 C1: 0x000e01c7 emmc: 200000000 actual: 130039 div: 0x00000301 target: 130000 min: 100000 max: 400000 delay: 15
002422.833: arasan: arasan_emmc_set_clock C0: 0x00000f06 C1: 0x000e0307 emmc: 200000000 actual: 33333333 div: 0x00000003 target: 40000000 min: 0 max: 40000000 delay: 1
002701.053: brfs: File read: /mfs/sd/config.txt
002701.723: brfs: File read: 1473 bytes
002731.619: bootloader_eeprom_find_files unexpected length: 0xffffffffn
002741.657: brfs: File read: /mfs/sd/config.txt
002942.208: gpioman: gpioman_get_pin_num: pin DISPLAY_DSI_PORT not defined
002944.678: *** Restart logging
002944.716: brfs: File read: 1473 bytes
002948.532: hdmi: HDMI:hdmi_get_state is deprecated, use hdmi_get_display_state instead
002965.759: HDMI0: hdmi_pixel_encoding: 300000000
002965.773: HDMI1: hdmi_pixel_encoding: 300000000
USB Information
/: Bus 03.Port 1: Dev 1, Driver=dwc_otg/1p, 480M
/: Bus 02.Port 1: Dev 1, Driver=xhci_hcd/4p, 5000M
|__ Port 2: Dev 2, If 0, Driver=hub/4p, 5000M
/: Bus 01.Port 1: Dev 1, Driver=xhci_hcd/1p, 480M
|__ Port 1: Dev 2, If 0, Driver=hub/4p, 480M
|__ Port 2: Dev 3, If 0, Driver=hub/4p, 480M
|__ Port 1: Dev 4, If 0, Storage, Driver=uas, 480M
|__ Port 4: Dev 5, If 0, Driver=hub/4p, 480M
|__ Port 2: Dev 6, If 0, Driver=hub/3p, 480M
|__ Port 3: Dev 8, If 0, Interface Device, Driver=usbhid, 1.5M
|__ Port 2: Dev 7, If 0, Interface Device, Driver=usbhid, 1.5M
|__ Port 2: Dev 7, If 1, Interface Device, Driver=usbhid, 1.5M
2. Check your home network for issues
Reboot the router
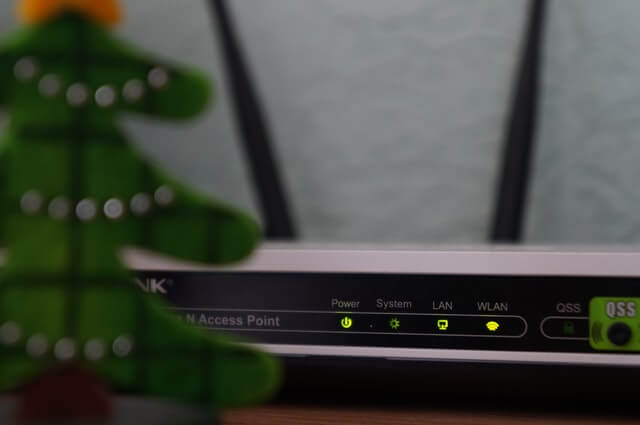
- Turn off the router and unplug the power from the wall outlet.
- Turn off your WiFi router if you are using one.
- Disconnect the Ethernet cable connected to your modem.
- Leave the router idle for a minute.
- Reconnect the power and turn on the modem and your WiFi router.
- Once all the lights stop blinking, connect Raspberry Pi, and check for any improvements.
Check Ethernet port and cable
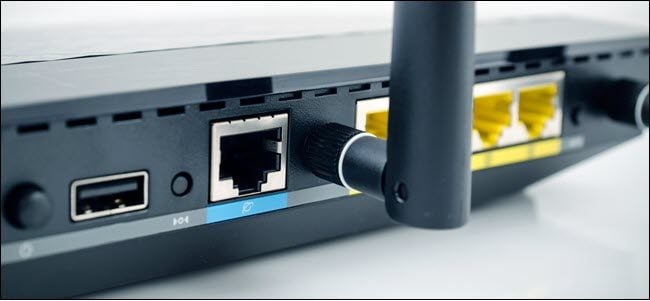
- Make sure the Ethernet cable is working by connecting directly to your PC.
- If the Ethernet cable is not working, consider replacing the cable.
- Try using a different Ethernet port on your router to check for issues with the port.
If the issue persists, consider updating your WiFi router’s firmware. Restoring the router settings to factory default and then reconfiguring the network device can also help if the issue is due to your home network and not Raspberry pi.
1. Check for issues with SSID

- If the Raspberry Pi has an issue connecting to your WiFi network, check the SSID for invalid characters.
- Make sure your network name (SSID) does not have an underscore in it.
- Remove the underscore, and then try to connect your Raspberry Pi to the WiFi network.
- Removing the underscore has helped several users resolve the issue.
Additionally, if your router supports both 2.4GHz and 5GHz wireless network, try using the 2.4GHz network. Try connecting the device to the network again and check for any improvements.
raspi-gpio settings
BANK0 (GPIO 0 to 27):
GPIO 0: level=1 fsel=0 func=INPUT pull=UP
GPIO 1: level=1 fsel=0 func=INPUT pull=UP
GPIO 2: level=1 fsel=4 alt=0 func=SDA1 pull=UP
GPIO 3: level=1 fsel=4 alt=0 func=SCL1 pull=UP
GPIO 4: level=1 fsel=0 func=INPUT pull=UP
GPIO 5: level=1 fsel=0 func=INPUT pull=UP
GPIO 6: level=1 fsel=0 func=INPUT pull=UP
GPIO 7: level=1 fsel=0 func=INPUT pull=UP
GPIO 8: level=1 fsel=0 func=INPUT pull=UP
GPIO 9: level=0 fsel=0 func=INPUT pull=DOWN
GPIO 10: level=0 fsel=0 func=INPUT pull=DOWN
GPIO 11: level=0 fsel=0 func=INPUT pull=DOWN
GPIO 12: level=0 fsel=0 func=INPUT pull=DOWN
GPIO 13: level=0 fsel=0 func=INPUT pull=DOWN
GPIO 14: level=1 fsel=4 alt=0 func=TXD0 pull=NONE
GPIO 15: level=1 fsel=4 alt=0 func=RXD0 pull=UP
GPIO 16: level=0 fsel=0 func=INPUT pull=DOWN
GPIO 17: level=0 fsel=0 func=INPUT pull=DOWN
GPIO 18: level=0 fsel=0 func=INPUT pull=DOWN
GPIO 19: level=0 fsel=0 func=INPUT pull=DOWN
GPIO 20: level=0 fsel=0 func=INPUT pull=DOWN
GPIO 21: level=0 fsel=0 func=INPUT pull=DOWN
GPIO 22: level=0 fsel=0 func=INPUT pull=DOWN
GPIO 23: level=0 fsel=0 func=INPUT pull=DOWN
GPIO 24: level=0 fsel=0 func=INPUT pull=DOWN
GPIO 25: level=0 fsel=0 func=INPUT pull=DOWN
GPIO 26: level=0 fsel=0 func=INPUT pull=DOWN
GPIO 27: level=0 fsel=0 func=INPUT pull=DOWN
BANK1 (GPIO 28 to 45):
GPIO 28: level=1 fsel=2 alt=5 func=RGMII_MDIO pull=UP
GPIO 29: level=0 fsel=2 alt=5 func=RGMII_MDC pull=DOWN
GPIO 30: level=1 fsel=0 func=INPUT pull=DOWN
GPIO 31: level=1 fsel=0 func=INPUT pull=DOWN
GPIO 32: level=1 fsel=0 func=INPUT pull=DOWN
GPIO 33: level=1 fsel=0 func=INPUT pull=DOWN
GPIO 34: level=1 fsel=0 func=INPUT pull=UP
GPIO 35: level=1 fsel=0 func=INPUT pull=UP
GPIO 36: level=1 fsel=0 func=INPUT pull=UP
GPIO 37: level=1 fsel=0 func=INPUT pull=UP
GPIO 38: level=1 fsel=0 func=INPUT pull=UP
GPIO 39: level=1 fsel=0 func=INPUT pull=UP
GPIO 40: level=0 fsel=4 alt=0 func=PWM1_0 pull=NONE
GPIO 41: level=0 fsel=4 alt=0 func=PWM1_1 pull=NONE
GPIO 42: level=0 fsel=1 func=OUTPUT pull=UP
GPIO 43: level=1 fsel=0 func=INPUT pull=UP
GPIO 44: level=1 fsel=5 alt=1 func=SDA0 pull=UP
GPIO 45: level=1 fsel=5 alt=1 func=SCL0 pull=UP
BANK2 (GPIO 46 to 53):
GPIO 46: level=0 fsel=0 func=INPUT pull=DOWN
GPIO 47: level=0 fsel=0 func=INPUT pull=DOWN
GPIO 48: level=0 fsel=0 func=INPUT pull=DOWN
GPIO 49: level=0 fsel=0 func=INPUT pull=DOWN
GPIO 50: level=0 fsel=0 func=INPUT pull=DOWN
GPIO 51: level=0 fsel=0 func=INPUT pull=DOWN
GPIO 52: level=0 fsel=0 func=INPUT pull=DOWN
GPIO 53: level=0 fsel=0 func=INPUT pull=DOWN
What to do if my Raspberry Pi is not connecting to Ethernet/WiFi?
Problem: Missing IPv4 configuration
For some reason, a DHCP request does not seem to occur at boot time. The commands “ip a” and “ifconfig” showed that no IPv4 configuration was done.
Analysis: Check formatting
A missing IP configuration can result from having a format error in one of the configuration files, so they could not be processed correctly. Thus, invisible control characters may have been inserted by editing with an inappropriate editor.
You can see nicely if there is a sign somewhere where none belong.
Analysis: Check the DHCP client
Assuming there is a network connection at all, you can check which DHCP client is running.
If so, then you can try the following solutions.
Solution 1
There is no “auto eth0” or “allow-hotplug eth0” in the / etc / network / interfaces file.
Solution 2 (temporary)
Commission the network interface:
Then the interface should get the IP configuration via DHCP.
Solution 3
If you want to quickly make an IPv4 configuration without editing files, you can do that with a few commands on the command line. The settings are then gone but after a restart.
The IPv4 addresses of the following examples are to be adapted to the respective requirements.
IP address and subnet mask:
The DNS server must be permanently entered in the file “/etc/resolv.conf”:
Note: This configuration will be lost after a reboot.
Problem: Error messages on the command line because of the hostname
The following or similar error messages appear continuously on the command line:
Why is this and what should be done?
analysis
The reason is that the host name has changed. And the error message states that the hostname could not be resolved. That’s because somewhere else a wrong hostname is entered.
There are a total of three clues as to where to look for the mistake.
One of these files contains an incorrect host name.
solution
Basically, it is recommended to use the tool “raspi-config” to change the host name and then to reboot.
Change hostname of a Raspberry Pi
Problem: No internet connection
The default gateway is in a network the transition to the Internet or the next higher part of the network that leads to the Internet. As a rule, this is the access network of your own Internet provider. The connection to the Internet is only possible if a host knows the IP address of the standard gateway. Without this IP address, only connections in the local network are possible.
Analysis: Check standard gateway
The output should be something like this:
Kernel IP routing table
The output should be something like this:
Kernel IP routing table
Target router Genmask Flags MMS window irtt Iface
default 192.168.1.1 0.0.0.0 UG 0 0 0 eth0
192.168.1.0 * 255.255.255.0 U 0 0 0 eth0
The first line in both tables is important. It starts with “0.0.0.0” or “default”. This is the default or default route, ie the destination that always applies if the host does not know the route to the destination address. The default gateway is then responsible for the data packet. But, the IP address of the default gateway must be known to the host. This is the case if the IP address is entered here. In the case exemplarily “192.168.1.1”.
If there is no line with “0.0.0.0” or “default”, or an incorrect IP address is entered here, then usually no connection to the Internet will be possible.
The reason for the absence of the default gateway is an incomplete manual IP configuration or the DHCP server has submitted an incomplete IP configuration. Or there was no IP configuration.
If the table has a default route and the IP address is the same as the default gateway, and you still can not connect to the Internet, the default gateway may be disconnected from the Internet or turned off. This can be clarified with a ping on the default gateway.
If the default gateway is reachable then the configuration regarding the standard gateway is correct.
If still no Internet connection is possible, then it may be due to a non-working name resolution.
As a rule, the output should also result in a line with “nameserver” and an IP address. This IP address is usually the same as the IP address of the default gateway. In small local networks, the default gateway is also the DNS server or name server.
It often happens that an old IP address or none is entered from previous IP configurations. In such a case you should check the IP configuration (manually or via DHCP).
Note: It often happens that Raspberry Pi suddenly no longer gets an internet connection. The reason is, at the initial installation, Raspberry Pi pulls the IP configuration via DHCP. The DNS server is written to the file “/etc/resolv.conf”. At some point later, the DHCP client will be disabled and the IP configuration will be manually created. The information for the name server is forgotten. The entry in the file “/etc/resolv.conf” is still preserved. At some point, the file will be overwritten for some reason. And suddenly, no internet connection is possible because the name resolution no longer works.
Solution: Make correct network configuration
Filesystem information
Filesystem 1K-blocks Used Available Use% Mounted on
/dev/root 960092932 158847672 752405496 18% /
devtmpfs 439796 0 439796 0% /dev
tmpfs 473588 0 473588 0% /dev/shm
tmpfs 473588 15356 458232 4% /run
tmpfs 5120 0 5120 0% /run/lock
tmpfs 473588 0 473588 0% /sys/fs/cgroup
/dev/mmcblk0p1 15637504 49184 15588320 1% /boot
tmpfs 94716 0 94716 0% /run/user/1000
Filename Type Size Used Priority
/var/swap file 1912828 0 -2
config.txt
arm_freq=1500
audio_pwm_mode=514
config_hdmi_boost=5
core_freq=500
core_freq_min=250
disable_camera_led=1
disable_commandline_tags=2
disable_l2cache=1
display_hdmi_rotate=-1
display_lcd_rotate=-1
enable_gic=1
enable_uart=1
force_eeprom_read=1
force_pwm_open=1
framebuffer_ignore_alpha=1
framebuffer_swap=1
gpu_freq=500
gpu_freq_min=500
init_uart_clock=0x2dc6c00
lcd_framerate=60
pause_burst_frames=1
program_serial_random=1
hdmi_force_cec_address:0=65535
hdmi_force_cec_address:1=65535
hdmi_group:0=2
hdmi_mode:0=16
hdmi_pixel_freq_limit:0=0x11e1a300
hdmi_pixel_freq_limit:1=0x11e1a300
device_tree=-
hdmi_cvt:0=
hdmi_cvt:1=
hdmi_edid_filename:0=
hdmi_edid_filename:1=
hdmi_timings:0=
hdmi_timings:1=
Comments
Networking Information
/usr/bin/raspinfo: line 67: ifconfig: command not found
Relevant output from ip addr is
2: eth0: mtu 1500 qdisc mq state UP group default qlen 1000
link/ether dc:a6:32:03:f7:50 brd ff:ff:ff:ff:ff:ff
Problem: Delay at boot
When booting, the boot process stops with the error message “A start Job is running for dhcpcd on all interfaces”. In addition to this error message, red colored stars appear. Behind it runs a counter that counts about 1 minute and 30 seconds down. Nothing happens until then, which increases the total boot time of the Raspberry Pi by this time.
Analysis
It is about the service “dhcpcd”. This is the DHCP Client Daemon (DHCPCD), which is responsible for ensuring that all network interfaces get an IP configuration. The reason why this does not continue here is that one of the network interfaces still has no connection to the network. It may be that the network cable is not yet plugged in and / or that a WLAN adapter is not configured for a WLAN connection or that the configured WLAN network is unreachable.
The problem also occurs when there is a network configuration but there is no network connection.
Solution 1: Shorten boot delay with DHCPCD
To do this, make a change in the following file:
Enter the following line there (in seconds):
Solution 2: Connect to the network
There is only one real solution. You have to connect Raspberry Pi to the network. Either by cable or WiFi. The fastest way is by cable, because the interface is then ready at boot time. For wifi, it can take longer, because the interface must first authenticate against the wifi access point.
Package version information
raspberrypi-ui-mods:
Installed: 1.20190717
raspberrypi-sys-mods:
Installed: 20190730
openbox:
Installed: 3.6.1-8+rpt2
lxpanel:
Installed: 0.10.0-2+rpt6
pcmanfm:
Installed: 1.3.1-1+rpt8
rpd-plym-splash:
Installed: 0.19
2 Answers 2
[Most of this answer is outdated and will not be useful with versions of Raspbian beyond the first one, "jessie".]
If all the ethernet lights are on when the cable is in, and you can connect a monitor and keyboard or a serial line as John suggests, you should be able to get the connection up.
First, just run ifconfig . Possibly eth is not up, and you will just see:
You may also see eth0 listed. If not, don't worry about it for the moment; before doing anything else, it might be worthwhile disabling the network automation since obviously that's not working for you:
These will start again next boot/runlevel change. If you don't want the services to start again at boot, use disable instead of stop , in which case you will have to make your own arrangements or do all this manually every time. The second one (ifplugd) is supposed to raise a connection whenever an ethernet cable is inserted. 1
Now that's out of the way, if you did not see eth0 listed earlier, sudo ifconfig eth0 up , otherwise just ifconfig again to make sure it is still up. Next, sudo dhclient -r which should stop any running instances; to be sure, sudo killall -9 dhclient then ps -A | grep dhc to check for other dhcp client software, since I think debian uses dhcpcd (instead of dhclient ) by default. If so, you need to kill that off. Beware that if you have not disabled the networking service as above, it will probably keep coming back.
Once that's done, you should be able to get connected with sudo dhclient -v eth0 . If that doesn't work, add the output to your question.
1. Which may not be desirable for everyone. It seemed to be very pernicious to me even when the service was supposedly stopped, and I uninstalled it with sudo apt-get remove ifplugd .
The following notes are intended to help with a number of typical Raspberry Pi network problems.
- Network interface “eth0” is missing
- Network connection is extinguished
- Delay at boot
- The file “/etc/resolv.conf” is overwritten
- Duplicate IPv4 addresses
- Missing IPv4 configuration
- Error messages on the command line because of the hostname
- No internet connection anymore
Problem: The file “/etc/resolv.conf” is overwritten after the reboot
After rebooting the system, the file “/etc/resolv.conf” always contains an incorrect IP address. If the correct DNS server is then entered manually, the file is overwritten after a reboot.
How can I ensure that the correct DNS server is automatically entered in the file “/etc/resolv.conf”?
Analysis
Basically, the file “/etc/resolv.conf” is generated automatically. Making manual changes has only temporary effects. Most of the changes are gone after a reboot. Sometimes they also last for hours or days. Which is the exception.
There are services that configure this file. And that’s good in principle. The question now is, what do you do when you do a static configuration? Then such services are counterproductive.
The first thing to do is find out which service spits you into the soup. There are multiple possibilities. You can choose between various DHCP clients and network managers. For example, “dhcpcd”. Both have the task of providing the network interfaces with an IP configuration. For IPv4 via DHCP and for IPv6 via SLAAC or DHCPv6.
That’s why we’re interested in which DHCP client is running:
Solution 1: Turn off the DHCP service
Basically, you solve the problem by turning off these services or completely removed (conditionally recommended).
Is the “dhcpcd” installed? If yes, then disable. After that, a reboot is recommended.
Solution 2: Write protection for /etc/resolv.conf
A quick & dirty solution would be to set the file “/etc/resolv.conf” to readonly. Before you have to enter the DNS server manually.
But that does not fix the basic configuration error. This solution should be chosen only in exceptional cases.
Solution 3: Turn off resolvconf (not recommended)
An alternative would be to uninstall “resolvconf” and then maintain the file “/etc/resolv.conf” manually. If the system is not mobile, that would not be a big disadvantage.
3. Reinstall Raspbian image

- Download the latest version Raspberry Pi imager to your computer.
- Run the installer to install the Raspberry Pi imager.
- Connect an SD card reader with an SD card inside to your computer.
- Open Raspberry Pi imager, and make sure the SD card is detected.
- Choose the required OS from the list presented.
- Choose the SD card you wish to install the OS on.
- Click Write to begin the installation.
- Once installed, reconnect the SD card to your Raspberry Pi and check for any improvements.
If reinstalling the latest version of Raspbian did not help, try downgrading to an older version to see if that works.
Check for hardware issues
- If the issue persists, check your Raspberry Pi Ethernet port for hardware issues.
- Connect an external Ethernet adapter to the device and check if the internet works.
- In case the internet works, the Ethernet port on your Raspberry Pi is faulty.
Your Raspberry Pi device may stop connecting to the WiFi if it detects issues with the SSID or other network configuration. However, when the issue is with your Ethernet connection, it is usually a dead Ethernet port that is causing the issue.

Still having issues? Fix them with this tool:
Restoro has been downloaded by 0 readers this month.
Читайте также: