
Poweredge 1950 обновление bios
I decided I would update my Dell PowerEdge 1950 server to the latest BIOS version and also if possible update the firmware for the RAID card, disks, network adapters and so on.
I thought this would be pretty straightforward, oh how I was wrong! I never knew it would be so hard to actually figure out which tool to download and how to use it!
I'm writing this because I may forget what I did and I assume others will also find it useful..
After spending way too much time figuring out all the different ways, the best way I found is to use Dell Repository Manager..
I'd never heard of Dell Repository Manager before and to be honest it did not sound like what I was looking for. However it's perfect (well not quite but it does the job)!
Because my server is an VMware ESXi server I cannot install Windows or Linux firmware updates from it. So I wanted a CD/DVD that I could boot from with all the BIOS and firmware updates on it.
Dell Repository Manager is a Windows based piece of software (which I installed on my Windows 8 desktop).
Once installed there is a datacenter version for rack, tower and blade servers and a client version for desktops and laptops.
So this can be used to update everything from a Dell PE 1950 rack server, to a M620 blade or even a Dell Vostro laptop!
It then can produce a bootable ISO you can burn to CD or DVD and boot your server from and it even runs through all the BIOS and other firmware updates for you one-by-one automatically, while you have a cup of coffee!
First things first..
1. Download and Install "Dell Repository Manager" on a Windows desktop or server (at least vista/2008 for ISO creation to work)
Note: At time of writing the latest I used was 1.5 A00 (released 12/12/2012)
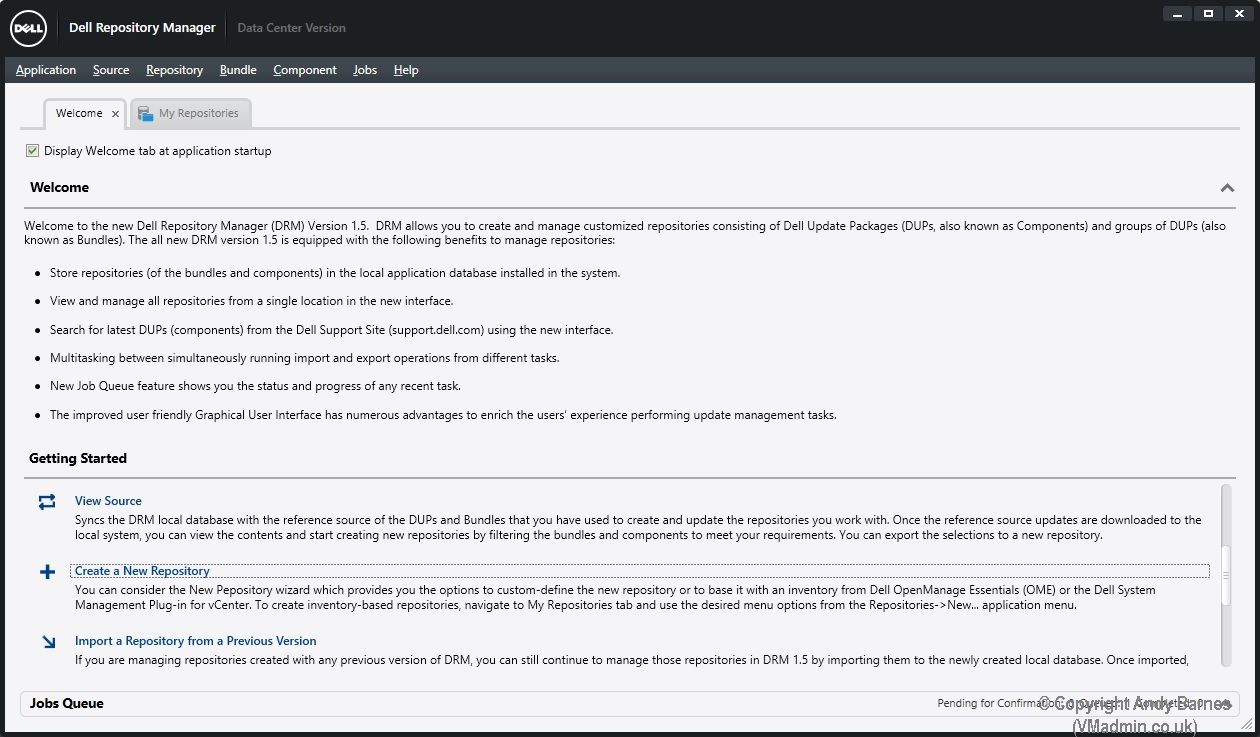
2. Now start the Dell Respoitory Manager Data Center Version
3. Click Create a New Repository
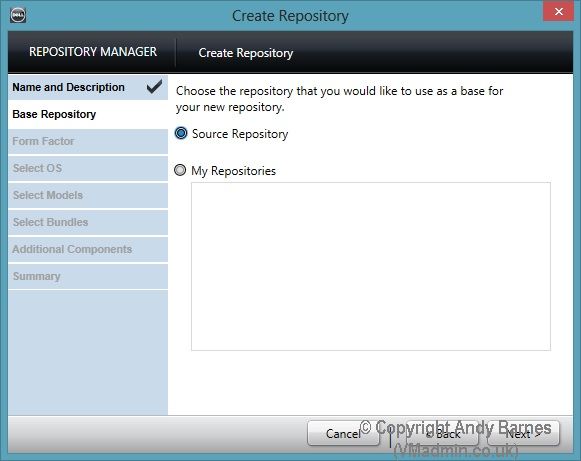
4. Give your repository a name.
As I'm only wanting Dell PE 1950 updates I'll call it 1950!

5. Leave the source repository selected and click Next.
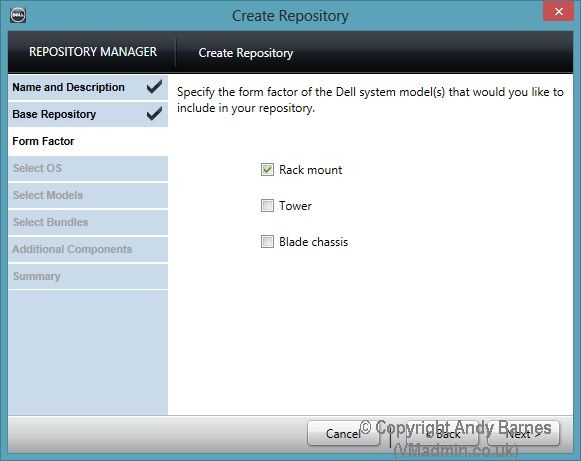
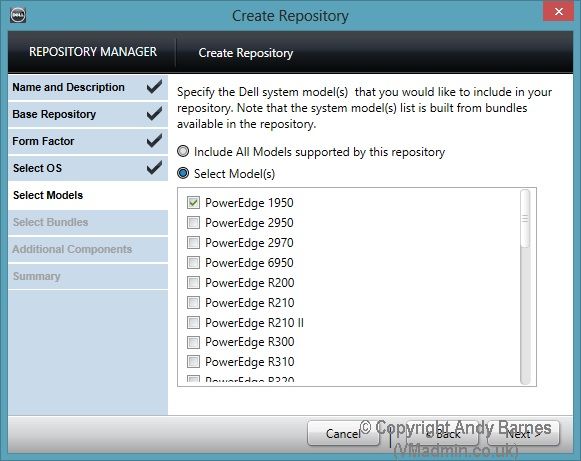
6. Select the form factor your server model belongs to.
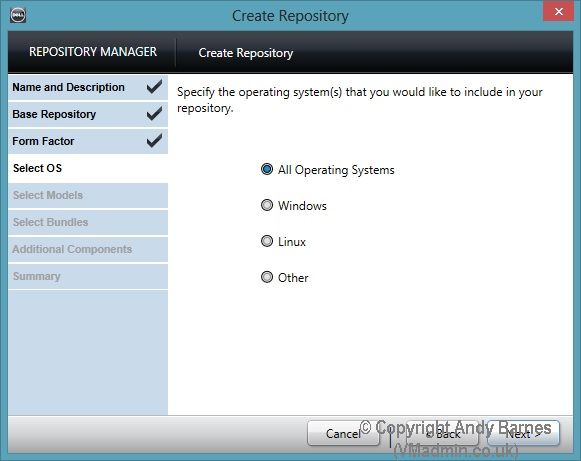
7. Select the OS. Choose all operatings systems.
8. Select the models you want to include on the CD/DVD.
Note: The more models you select will ultimatley result in a larger CD/DVD image
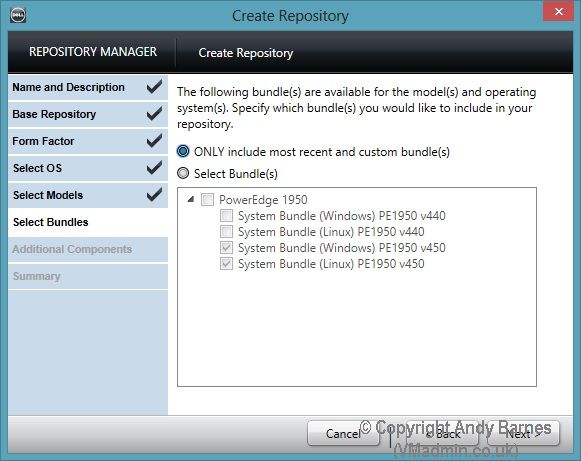
9. Select ONLY include the most recent and custom bundles. Click Next.
10. We are not going to select any additional files. Click Next.

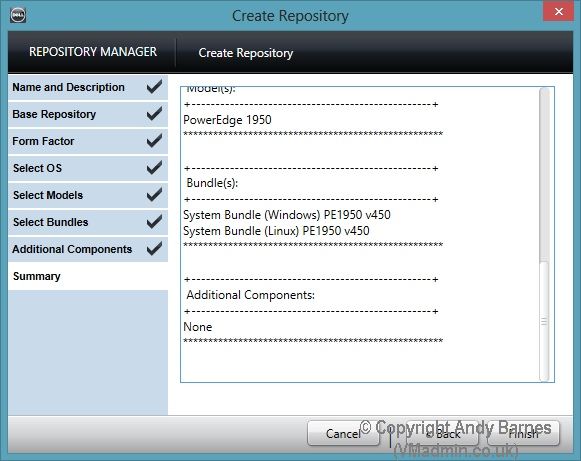
11. Review your repo settings and click Finish.
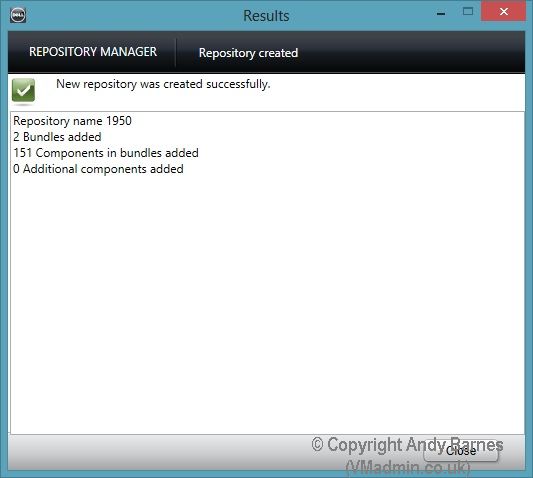
12. Your repository will be created..
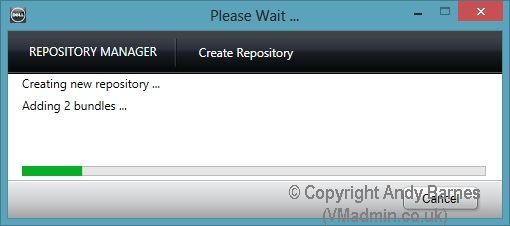
13. Notice the number of components, this is the firmware updates!
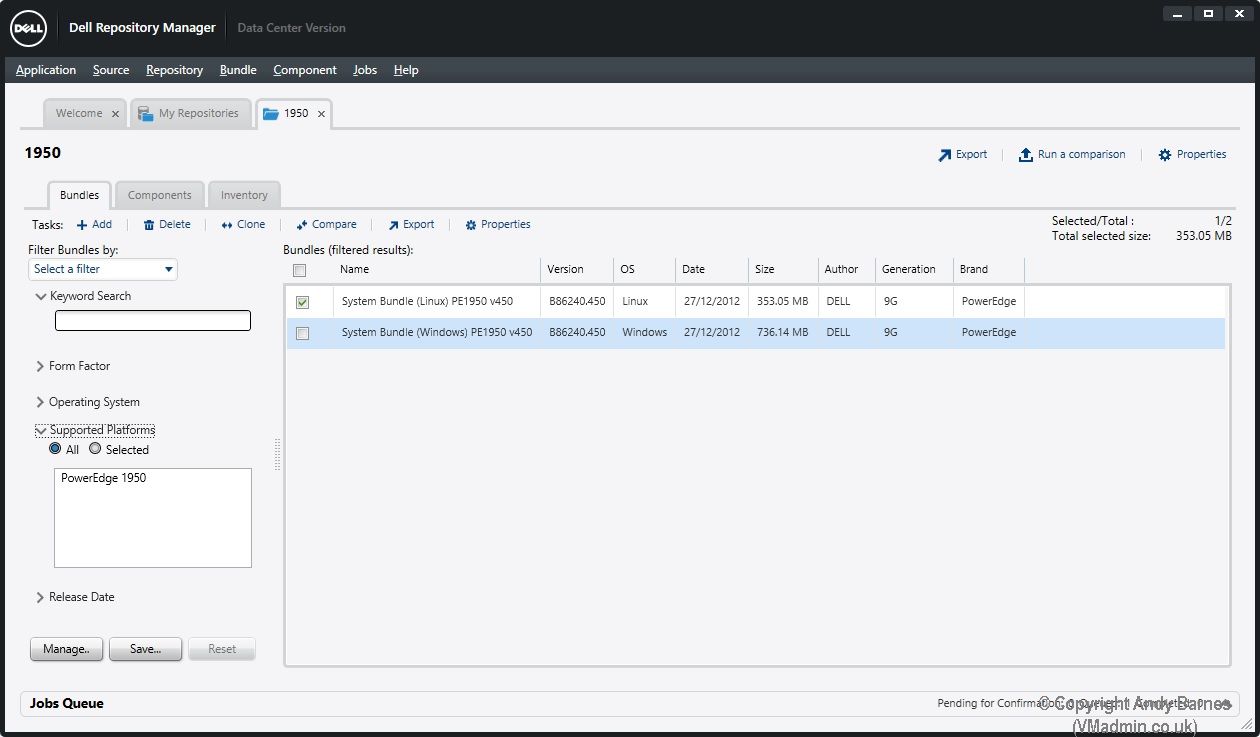
14. Click on your repository and it will open in it's own tab.
15. Select the Linux System Bundle for your server model.
Note: Don't worry yes we are updating an ESXi server (not Linux), by selecting Linux we will create a bootable (linux based) ISO!
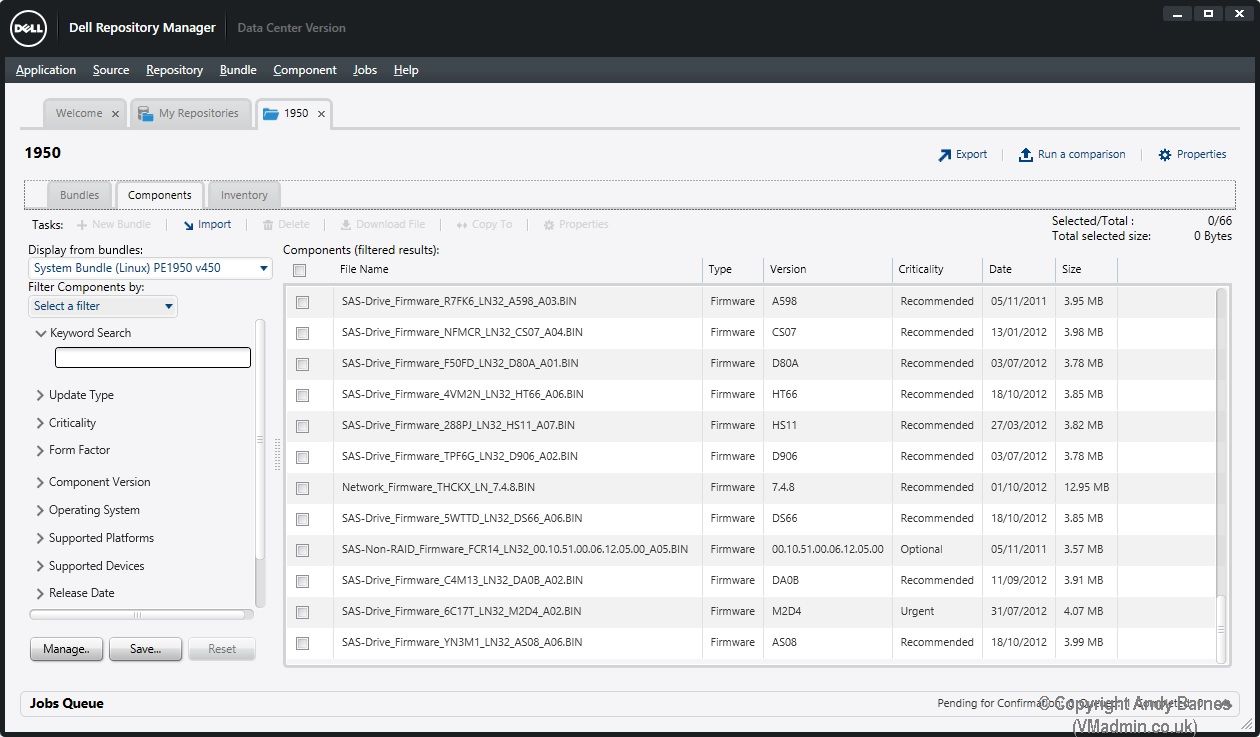
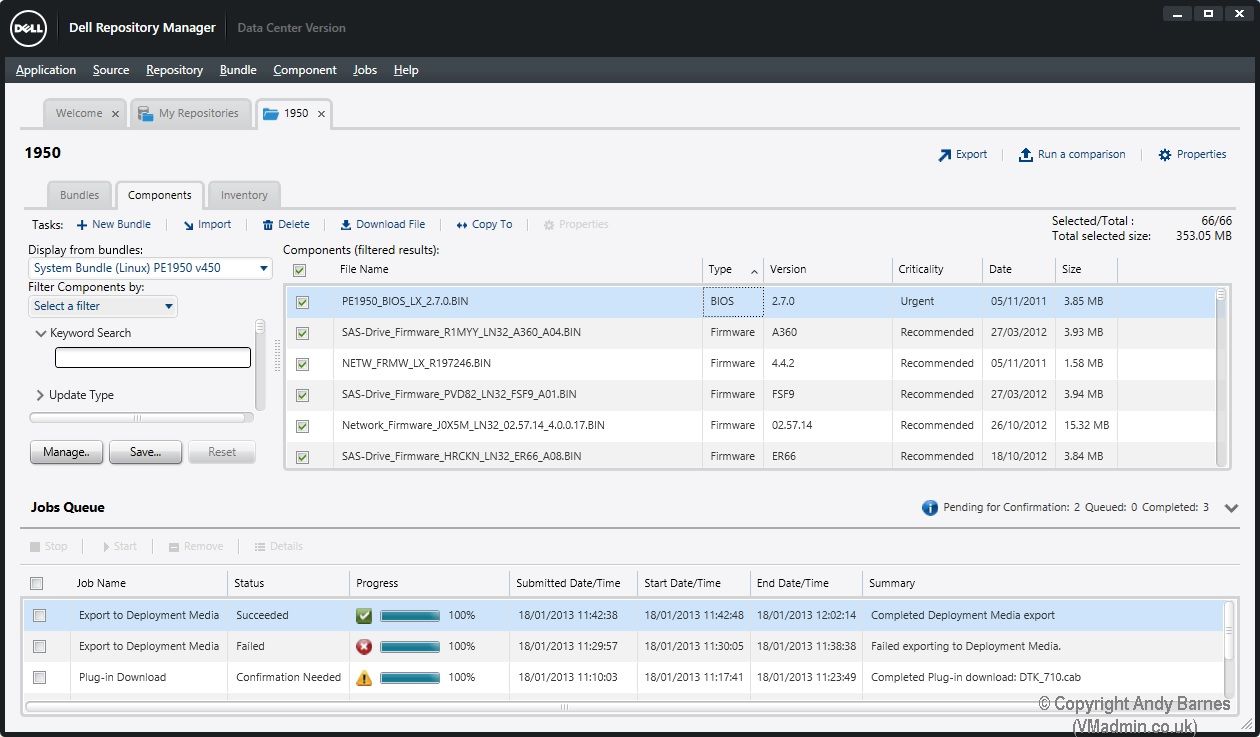
16. If you click on the Components tab you will then see all the individual updates such as the RAID and SAS drive firmware shown here, there should also be a BIOS update.
17. Select all the components (or the ones you want) I did them all!
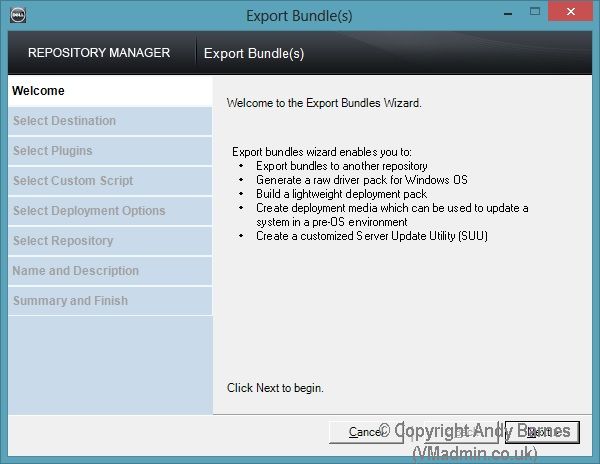
18. Go back to the "Bundles" tab and Click "Export".
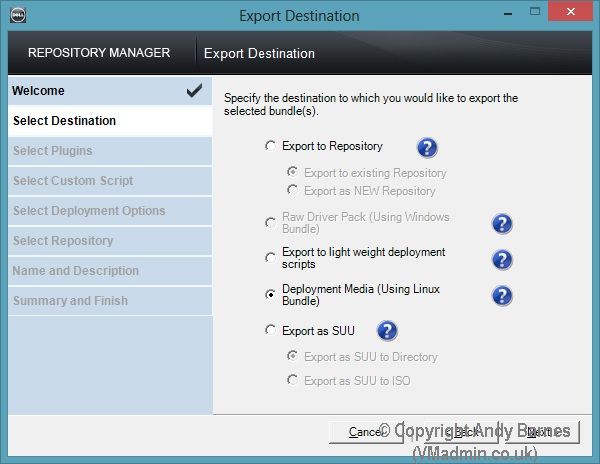
19. We are now going to export all the updates to an ISO. Click Next.
20. Select "Deployment Media (Using Linux Bundle)
Note: This is important to get our bootable ISO.
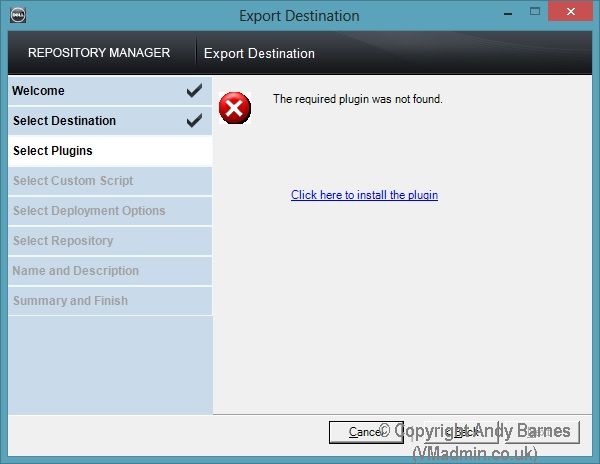
21. You will then get an error message "The required plugin was not found". Click in to install the plugin and wait for it to download and install. This took 2 attempts before it worked for me.
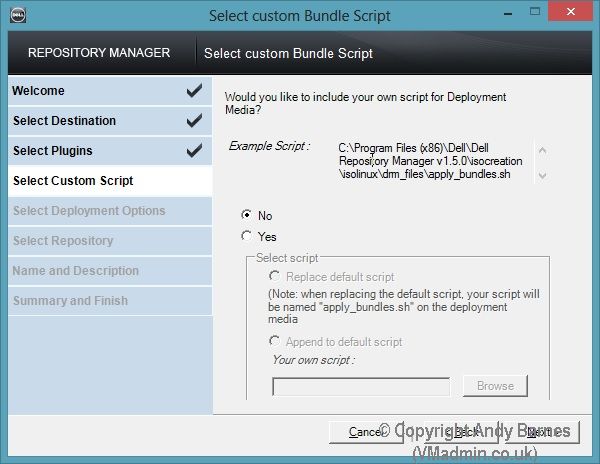
22. Select NO for your own script. It will run it's own script to automatically install all the firmware updates.
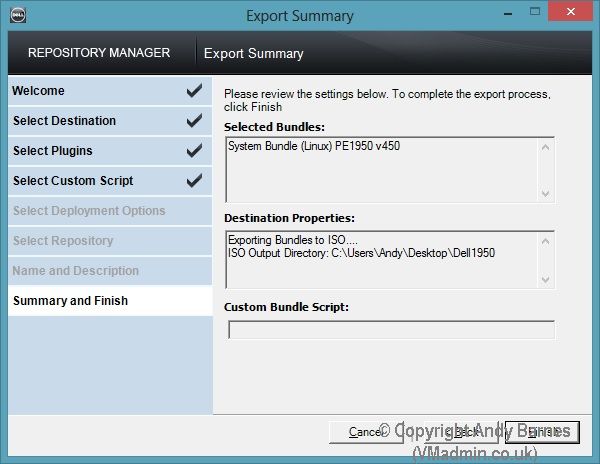
23. Review the summary and the location the ISO will be output to. Click Finish.
24. In the job queue you will notice a task to export deployment media.
Again this bit also took 2 attempts for me before it produced the ISO, not sure why I just put it down to a crap tool!
25. Et voilia! We now have a bootable ISO image. For this one server model it's small enough to fit on a CD too.
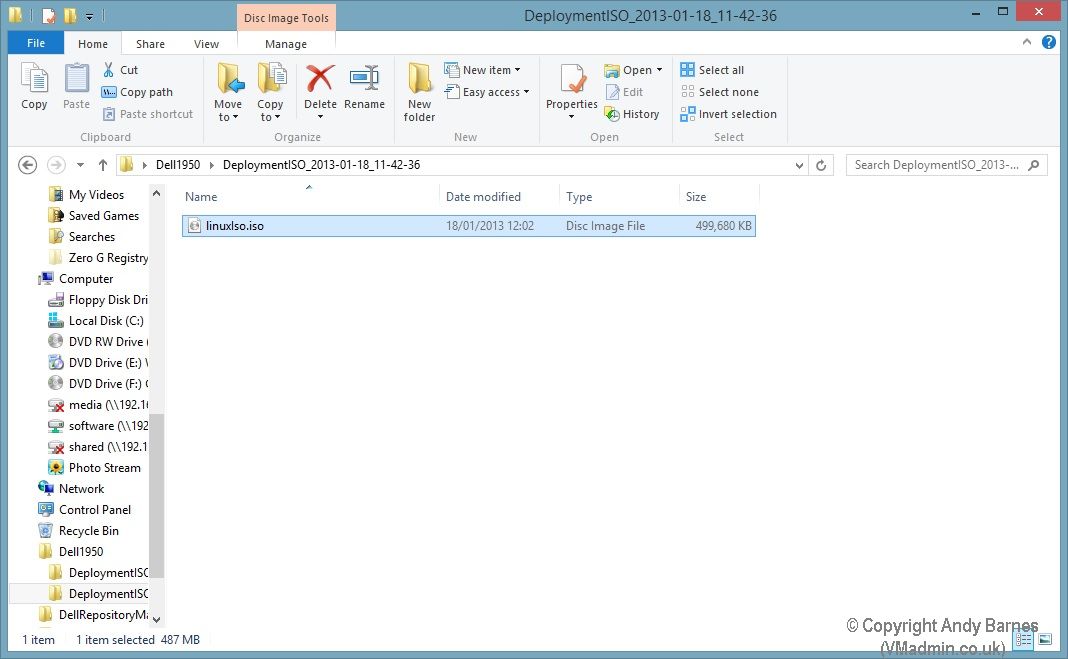
26. Burn with Windows 7/8 builtin ISO burner or your 3rd party tool to a CD/DVD.
27. As this is an ESXi server we are updating, put your host in maintenance mode, vMotion your VMs to other hosts in the cluster (if you have a cluster) or shutdown the VMs.
Then power off the server and boot from the CD.
28. When it boots from the CD you need to press "1" and it will then run through all the BIOS and firmware updates automatically for you.
I hope you found this useful and it saved you from losing the will to live! :-)
I'm closing in on purchasing a Dell PowerEdge R710 rack server and am curious to know the difference between Dell's power saving bios setting and their performance bios setting. Should I be concerned about choosing the power saving setting? I'll be using this rack for terminal services and definitely want performance when performance is needed. That being said, for the other 3/4's of the day when employees have gone home I'd prefer it if this server wasn't running at 110%.
Thanks in advance.
4 Answers 4
I don't know the details but the R710 has a BIOS Power/Performance options page. In it you can select to turn on and off features which will either save power and boost performance.
You can change these settings so I wouldn't worry about it.
That said, I think it's really awesome that dell offers this option rather than just shipping the random collection of arbitrary bios settings most vendors seem to use.
Below you can find some relevant pieces of information mentioned in the whitepaper:
Each profile simply enables/disables some BIOS features, the table below provides an overview of the features. This is documentation for 12th generation servers, while the R710 is 11th generation. But I'm quite sure DAPC (Dell Active Power Controller) is similar to what Power saving mode is in the 11th generation servers, but can't confirm.

It goes in depth on the different profiles.
Performance-per-watt (DAPC) profile is the default, and represents an excellent mix of performance balanced with power consumption reduction. Dell Active Power Control (or DAPC), relies on a BIOS-centric power control mechanism which offers excellent power efficiency advantages with minimal performance impact in most environments, and is the CPU Power Management choice for this overall System Profile.
Performance-per-watt (OS), otherwise known as “OS Control”, is similar to the DAPC profile for all sub-options except for the CPU Power Management. The power management scheme used for this profile is called “OS DBPM”, which allows the Operating System to manipulate processor frequencies for higher power efficiency. However, the effectiveness of this profile for reducing overall system power consumption is based on how well the Operating System is able to effectively control hardware resources, so the impacts are mixed across all supported Operating Systems.
Performance profile provides potentially increased performance by maximizing processor frequency and the disabling certain power saving features such as C-states and. Although not optimal for all environments, this is an excellent starting point for performance optimization baseline comparisons.
Dense Configuration enhances reliability features and reduces power consumption at the cost of considerable performance. This profile is targeted for operating environments where enhanced reliability is desired and temperatures may exceed the thresholds encountered in less densely-packed data centers.
There are some performance vs watt comparisons in the paper, i didn't read the analysis, but at first glance it seems that only the DENSE option has significant implications. Someone with more time/technical background might be able to fill in on this.
Судя по веб-сайту Dell, казалось, что единственными вариантами обновления BIOS являются поддерживаемые операционные системы (Windows, Red Hat и т. Д.). Я хочу подключиться к компьютеру через vpn в другой сети. Мой компьютер (Debian 7.11) находится в сети 192.168.2.0/24. Мой шлюз (192.168.2.1) - это VPN-маршрутизатор. Он подключается к .

Привет, Я хочу подключиться к компьютеру через vpn в другой сети.
Мой компьютер (Debian 7.11) находится в сети 192.168.2.0/24. Мой шлюз (192.168.2.1) - это VPN-маршрутизатор. Он подключается к другому VPN-маршрутизатору 192.168.33.1.
Из 192.168.2.2 я могу пинговать и подключаться к 192.168.2.59, 192.168.33.1, 192.168.33.2, 192.168.33.59
Теперь у меня есть другой компьютер 10.0.1.8 который я хочу подключить, который физически подключен к сети 192.168.33.0/24.
Я пытаюсь добавить маршрут в 192.168.2.2, но он не работает:
Как мне добраться до 10.0.1.8 из 192.168.2.2?
Димитар имеет первую часть процесса, но не вторую. Это правда, что VPN-маршрутизатор с правой стороны должен присутствовать в сети 10.0.1.0 (я предполагаю, что это / 24), но если ваша сетевая диаграмма точна и полная, и 10.0.1.8 уже может достичь Интернет, вероятно, он уже есть.
Туннели IPSec устанавливаются между заданными диапазонами адресов источника и назначения; нельзя просто относиться к ним как к трубам, в которые можно вливать произвольный трафик. Вам нужно будет установить туннель между 10.0.1.0/24 и 192.168.2.0/24 на обоих VPN-маршрутизаторах.
Если присутствие маршрутизатора RHS VPN 10.0.1 равно , а не 10.0 .1.8 маршрут по умолчанию, вам нужно будет возиться с таблицами маршрутизации в 10.1.0.8, но это после того, как у нас будет правильный туннель (туннели).
Я нашел МОЕ решение!
На FVS338 вы можете настроить вторую сеть LAN. Поэтому я установил 10.0.1.250 в качестве второго IP-адреса моего правого VPN-маршрутизатора. Затем я сделал правило перенаправлять нужные мне порты с общедоступного IP-адреса на 10.0.1.8. Теперь я могу подключиться к 10.0.1.8!
Если это что-то вроде удаленного подключения к машине для сеанса RDP или что-то в этом роде, вы можете использовать что-то вроде LOGMEIN или аналогичного, особенно если у вас нет контроля или доступа ко всей информации под рукой.
Пока обе машины могут подключаться к Интернету, вы должны иметь возможность подключаться к ним от одного к другому, используя программное обеспечение для создания «туннеля» для вас и удаленного совместного использования экрана и совместного использования файлы от одного к другому.

Загрузить драйверы
Dell Computer BIOS PowerEdge 1950
Обновление драйверов BIOS PowerEdge 1950 вручную:
Эти стандартные драйверы BIOS PowerEdge 1950 можно найти в %%os%% или загрузить из обновления Windows®. Хотя эти драйверы Motherboard являются базовыми, они поддерживают основные аппаратные функции. Наши инструкции по обновлению драйверов Dell Computer содержат все необходимые шаги.
Используйте автоматическое средство для обновления драйверов BIOS PowerEdge 1950:
Рекомендация: Если у вас нет опыта обновления драйверов устройства Dell Computer Материнская плата вручную, мы настоятельно рекомендуем скачать DriverDoc [DriverDoc - Продукт от Solvusoft], который обновит ваши драйверы Dell Computer BIOS PowerEdge 1950. DriverDoc — это утилита, которая автоматически скачивает и обновляет драйверы PowerEdge 1950, гарантируя установку надлежащей версии драйвера для вашей операционной системы.
Кроме того, вы получите доступ к базе данных драйверов DriverDoc, которая содержит более 2 150 000 уникальных драйверов, благодаря чему все драйверы вашего ПК будут обновляться автоматически.
PowerEdge 1950 Часто задаваемые вопросы относительно обновления
Как узнать, когда обновлять драйверы PowerEdge 1950?
Обычной рекомендацией является обновление драйверов PowerEdge 1950 после крупных обновлений Windows.
Каков процесс обновления драйверов PowerEdge 1950?
Обновления драйверов BIOS PowerEdge 1950 устройств можно выполнить вручную с помощью Device Manager (диспетчер устройств) или автоматически с помощью утилиты для обновления драйверов.
Почему люди не обновляют драйверы PowerEdge 1950?
Многие люди не видят необходимости обновления драйверов устройств PowerEdge 1950, поэтому они никогда не обновляются.
Каковы риски и преимущества обновлений драйверов PowerEdge 1950?
Преимущества обновления драйверов PowerEdge 1950 включают повышение производительности и расширение возможностей аппаратного обеспечения, а также повышение его общей функциональной совместимости. Потенциальные риски установки неверных драйверов Материнская плата включают нестабильность ПК, снижение производительности и случайные сбои.
Обновления драйверов устройств
Ошибки BIOS PowerEdge 1950 могут быть связаны с поврежденными или устаревшими системными драйверами. Драйверы устройств могут сломаться необъяснимо, по разным причинам. Захватывающая новость заключается в том, что вы, скорее всего, можете обновить драйверы устройств Материнская плата, чтобы избежать неисправностей.
Это не просто, чтобы получить драйверы BIOS PowerEdge 1950 из-за большого и запутанного официального сайта Dell Computer. Тем не менее, даже если вы хорошо найдете, устанавливаете и обновляете драйверы для BIOS PowerEdge 1950, вы все равно можете тратить много времени и быть очень разочарованы этим начинанием. Установка неправильного драйвера или просто несовместимой версии правильного драйвера может усугубить ваши проблемы.
Как правило, рекомендуется использовать программное обеспечение драйвера, поскольку обновления могут занимать много времени и сложными. Утилиты обновления драйверов гарантируют наличие правильных драйверов, совместимых с вашим оборудованием, а также гарантирует наличие резервной копии текущих драйверов перед внесением изменений в программное обеспечение/оборудование. Резервное копирование драйверов обеспечивает безопасность, зная, что вы можете откатить любой драйвер к предыдущей версии, если что-то пойдет не так.
Can anyone tell me how to update a 1950 PowerEdge Bios and firmware With a USB ?

Cyber-as-a-Service
2022-05-12 14:00:00 UTC Webinar Webinar:Knowbe4 Cyber-as-a-Service: Its Evolution &What You Can Do to Fight Back Event Details View all events

Brand Representative for Dell
Yes, there is a way to update the bios and firmware from a USB key.
Create a bootable USB key using the diagnostics package after its installed on your PC.
Download the hard drive version of the bios update, rename the file to biosupd.exe
Copy the file to the root of the USB key.
Boot the server with the USB key to the 32 bit diagnostic menu
Choose option 4 to exit the menu
You will be at a DIAG>D: prompt
Change to DIAG>C:
Run the biosupd.exe from the root of the key.
You can do the same with the controller firmware as well, download the hard drive version and extract the files, and then copy them to the root of the USB key as well and then run the update.bat file using the same steps as above.
4 Replies
Brand Representative for Dell
Yes, there is a way to update the bios and firmware from a USB key.
Create a bootable USB key using the diagnostics package after its installed on your PC.
Download the hard drive version of the bios update, rename the file to biosupd.exe
Copy the file to the root of the USB key.
Boot the server with the USB key to the 32 bit diagnostic menu
Choose option 4 to exit the menu
You will be at a DIAG>D: prompt
Change to DIAG>C:
Run the biosupd.exe from the root of the key.
You can do the same with the controller firmware as well, download the hard drive version and extract the files, and then copy them to the root of the USB key as well and then run the update.bat file using the same steps as above.
Nice one, ill do that later.
Worked like you said!!


Ivan (Dell)
Brand Representative for Dell
Thank you for providing great answer!
Great to hear that your issue was resolved.

Thanks for this, I was able to update the RAID controller firmware on a 1950 with this method. Works great.
This topic has been locked by an administrator and is no longer open for commenting.
To continue this discussion, please ask a new question.
Spark! Pro Series - 10 May 2022
Today in History: 10 May1291 - Scottish nobles recognize authority of English King Edward I1497 - Italian navigator Amerigo Vespucci leaves for his first voyage to the new world (disputed)1534 - French navigator Jacques Cartier reaches Newfoundland176.
Snap! BIG-IP vuln, Lincoln College, instant messaging, Google I/O, & space!
Your daily dose of tech news, in brief. You need to hear this. Hackers are actively exploiting BIG-IP vulnerability with a 9.8 severity rating We spotlighted this last week but it is back in the news. Shortly after F5 released patches for a c.
If you could take an extended break from work, what would you do with the time? Not only that, but how intentional would you be in planning for that break? In part 2 of the interview with Mike Wood we explore the planning and thought processes that went.
And how was your Monday
Had a 3rd party ask me to stop at one of their clients and diagnose a connection issue.The UPS was not connected to anything or even plugged in so I am guessing dead batteries there.The DSL system had been upgraded but they never removed the old DSL modem.
IT staff to Employee Ratio
Hi all, I'm curious to get thoughts on the following: IT staff to employee ratio for help desk types of services Numbers/Types of Back end IT Staff for supporting infrastructure (Is this in addition to helpdesk staff?) The environment I am looking at is a.
Читайте также: