
Драйвер для xiaomi redmi note 9s подключение к пк через usb
If you are an owner of Xiaomi Redmi Note 9S and looking out for usb drivers to connect your device with the computer then you have landed on the right page. Download Xiaomi Redmi Note 9S USB driver from here, install it in your computer and connect your device with PC or Laptop successfully.
Here, we have provided two usb drivers for your Xiaomi Redmi Note 9S.

Download Xiaomi Redmi Note 9S USB Driver
USB Driver Type: Qualcomm Driver
USB Driver Purpose: For flashing Stock firmware on your device.
File Size: 11 MB
USB Driver Type: ADB Driver
USB Driver Purpose: For connecting your device to a computer.
File Size: 8.3 MB
Steps To Install Xiaomi Redmi Note 9S Qualcomm Driver In Computer
Video Tutorial
If you don’t like this video tutorial or if you would like to get more instructions, then continue reading.
Step 1: To get started, download the driver and extract it on your desktop.

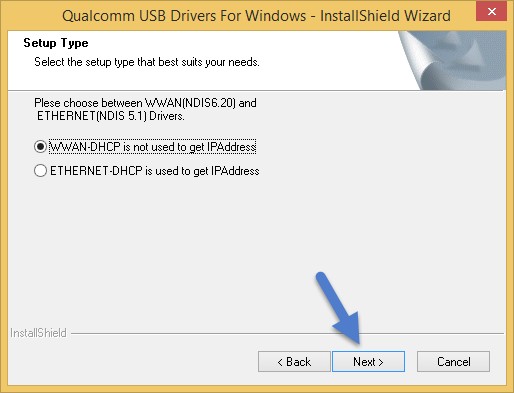
Step 2: Open the extracted file, choose the setup type and click “Next” in the setup wizard.
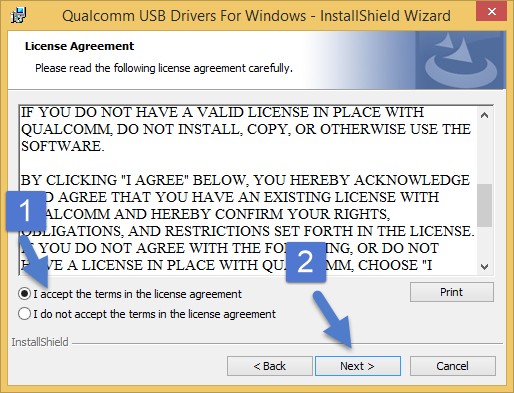
Step 3: Then, select “I accept the terms in the licence agreement” and click “Next”.
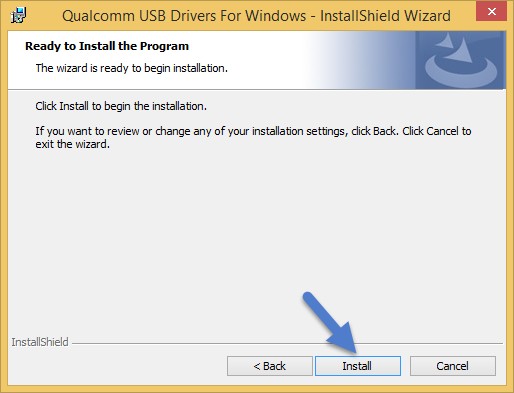
Step 4: Now to start installing your new hardware, click “Install” in the InstallShield Wizard.
Step 5: Once done, click “Finish” to complete the installation process.
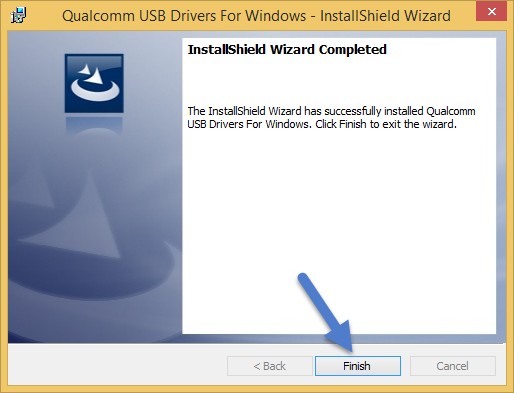
That’s it. Your device driver is now successfully installed on your computer.
Steps To Install Xiaomi Redmi Note 9S ADB Driver In Computer
Video Tutorial
If you don’t like this video tutorial or if you would like to get more instructions, then continue reading.
Step 1: To get started, download the driver and extract it on your desktop.

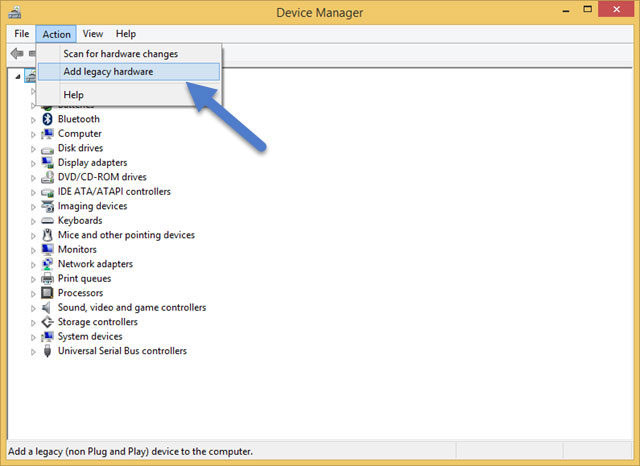
Step 2: Now, open Device Manager > Action > Add legacy hardware.
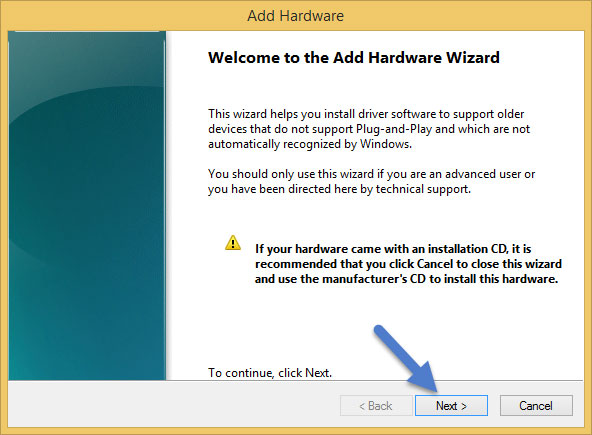
Step 3: Next, click “Next” in the Add legacy hardware wizard.
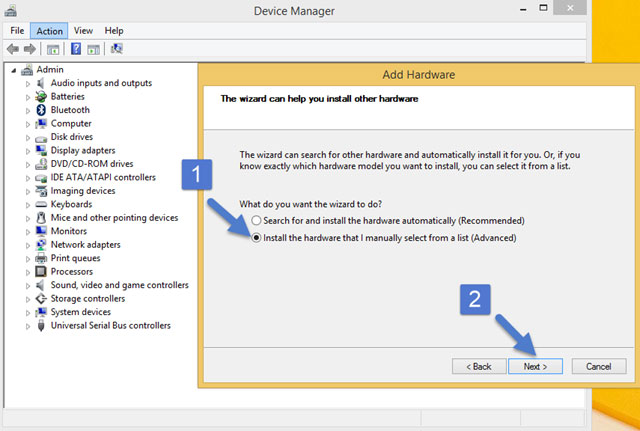
Step 4: Now choose “Install the hardware that I manually select from the list (Advanced)” and click “Next“.
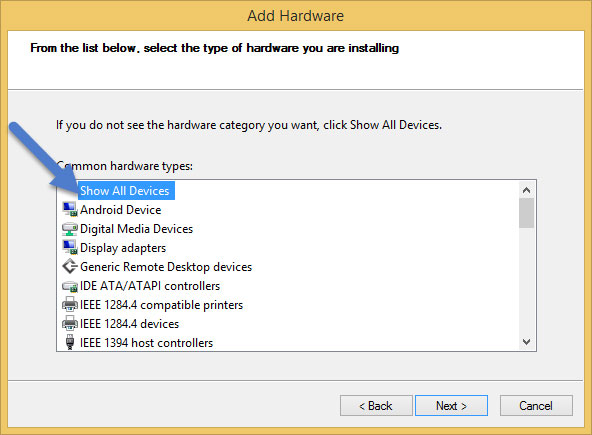
Step 5: Once done choose “Show all devices“, click “Next” and select the extracted file manually from your computer.
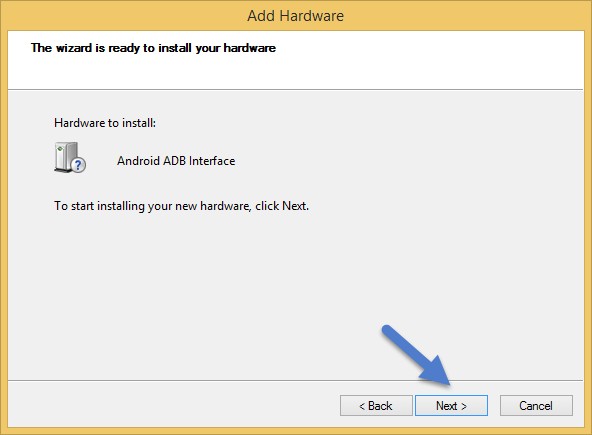
Step 6: Now to start installing your new hardware, click “Next” again.
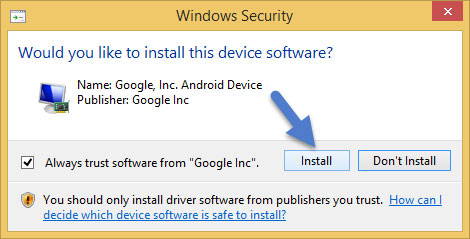
Step 7: Click “Install” in the Windows security prompt window.
Step 8: Next, click “Finish” to complete installation.

That’s it. Now you have successfully finished installing ADB driver on your computer. If you encounter any issues while following this tutorial, do let me know via comments.
Note: If you have corrupted or bricked your Xiaomi Redmi Note 9S, download Xiaomi Redmi Note 9S stock ROM and flash it on your device using an Android flash tool.
If you are an owner of Xiaomi Redmi Note 9 and looking out for usb drivers to connect your Android device with the Windows computer, then you have landed in the right place. Download Xiaomi Redmi Note 9 USB driver from here, install it in your computer and connect your device with PC or Laptop successfully.
Here, we have provided two usb drivers for your Xiaomi Redmi Note 9 Android device.

Download Xiaomi Redmi Note 9 USB Driver
USB Driver Type: Mediatek Driver
USB Driver Purpose: For flashing Stock firmware on your device.
File Size: 10 MB
USB Driver Type: ADB Driver
USB Driver Purpose: For connecting your device to a computer.
File Size: 8.3 MB
Steps To Install Xiaomi Redmi Note 9 Mediatek Driver In Computer
Video Tutorial
If you don’t like this video tutorial or if you would like to get more instructions, then continue reading.
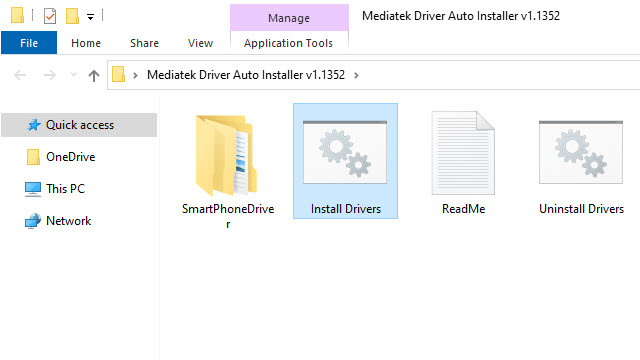
Step 1: To get started, download MediaTek driver and extract it on your desktop.

Step 2: Now, open the driver folder and click “Install Drivers” to initiate the installation process.
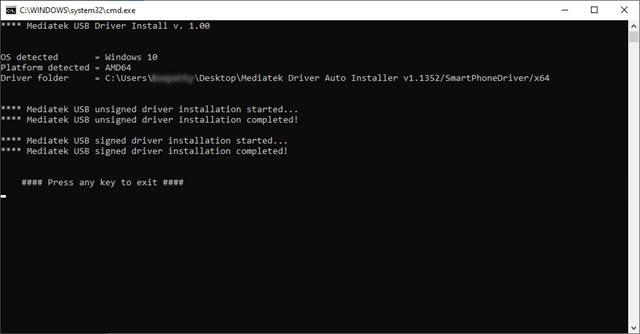
Step 3: In the Setup Command Prompt Window, press any key from the keyboard to start the installation process.
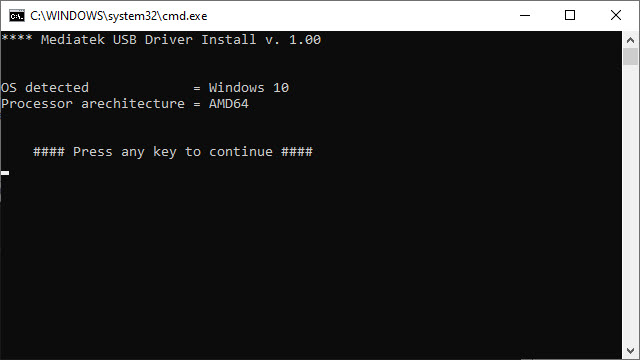
Step 4: You will see the Driver Installation Completed message, after successful installation of the MediaTek Driver on your Windows computer.
Step 5: Now, press any key from the keyboard to exit the Setup Window.
Step 6: To finish, restart your computer.
That’s it. You have successfully installed the MediaTek Driver on your Windows computer.
Steps To Install Xiaomi Redmi Note 9 ADB Driver In Computer
Video Tutorial
If you don’t like this video tutorial or if you would like to get more instructions, then continue reading.
Step 1: To get started, download ADB driver and extract it on your desktop.
Step 2: Now, open Device Manager > Action > Add legacy hardware.
Step 3: Next, click “Next” in the Add legacy hardware wizard.
Step 4: Now choose “Install the hardware that I manually select from the list (Advanced)” and click “Next“.
Step 5: Once done, choose “Show all devices“, click “Next” and select the extracted file manually from your computer.
Step 6: Now to start installing your new hardware, click “Next” again.
Step 7: Click “Install” in the Windows security prompt window.
Step 8: Next, click “Finish” to complete installation.
That’s it. Now you have successfully finished installing ADB driver on your computer. If you encounter any issues while following this tutorial, do let me know via comments.
Note: If you have corrupted or bricked your Xiaomi Redmi Note 9, download Xiaomi Redmi Note 9 stock firmware and flash it on your device using an Android flash tool.
If you are an owner of Xiaomi Redmi Note 9 Pro and looking out for usb drivers to connect your device with the computer then you have landed on the right page. Download Xiaomi Redmi Note 9 Pro USB driver from here, install it in your computer and connect your device with PC or Laptop successfully.
Here, we have provided two usb drivers for your Xiaomi Redmi Note 9 Pro.

Download Xiaomi Redmi Note 9 Pro USB Driver
USB Driver Type: Qualcomm Driver
USB Driver Purpose: For flashing Stock firmware on your device.
File Size: 11 MB
USB Driver Type: ADB Driver
USB Driver Purpose: For connecting your device to a computer.
File Size: 8.3 MB
Steps To Install Xiaomi Redmi Note 9 Pro Qualcomm Driver In Computer
Video Tutorial
If you don’t like this video tutorial or if you would like to get more instructions, then continue reading.
Step 1: To get started, download the driver and extract it on your desktop.
Step 2: Open the extracted file, choose the setup type and click “Next” in the setup wizard.
Step 3: Then, select “I accept the terms in the licence agreement” and click “Next”.
Step 4: Now to start installing your new hardware, click “Install” in the InstallShield Wizard.
Step 5: Once done, click “Finish” to complete the installation process.
That’s it. Your device driver is now successfully installed on your computer.
Steps To Install Xiaomi Redmi Note 9 Pro ADB Driver In Computer
Video Tutorial
If you don’t like this video tutorial or if you would like to get more instructions, then continue reading.
Step 1: To get started, download the driver and extract it on your desktop.
Step 2: Now, open Device Manager > Action > Add legacy hardware.
Step 3: Next, click “Next” in the Add legacy hardware wizard.
Step 4: Now choose “Install the hardware that I manually select from the list (Advanced)” and click “Next“.
Step 5: Once done choose “Show all devices“, click “Next” and select the extracted file manually from your computer.
Step 6: Now to start installing your new hardware, click “Next” again.
Step 7: Click “Install” in the Windows security prompt window.
Step 8: Next, click “Finish” to complete installation.
That’s it. Now you have successfully finished installing ADB driver on your computer. If you encounter any issues while following this tutorial, do let me know via comments.
Note: If you have corrupted or bricked your Xiaomi Redmi Note 9 Pro, download Xiaomi Redmi Note 9 Pro stock ROM and flash it on your device using an Android flash tool.

Часто люди сталкиваются с проблемой, что не могут подключить смартфон к ПК через USB, при этом, в строке состояния, не появится то Push-уведомление для выбора протокола подключения. При этом пользователь пробует различные способы и винит при этом или провод, или входное гнездо USB Type A, или выходное гнездо Micro USB/USB Type C. Но вот где решение проблемы:
Изначально входим в Настройки и нажимаем вкладку "О телефоне":

avatar.jpg (18.67 KB, Downloads: 70)
2019-09-02 01:33:01 Upload
Далее тапнем 7 раз по версии MIUI. На оболочке Android One тапнем 7 раз по Номеру сборки (Build Number) чтоб активировать меню "Для Разработчиков":

avatar.jpg (20.49 KB, Downloads: 71)
2019-09-02 01:34:40 Upload
Вернемся назад на главную страницу настроек телефона и выбираем вкладку "Расширенные настройки"
avatar.jpg (14.47 KB, Downloads: 65)
2019-09-02 01:35:43 Upload
После, выбираем вкладку "Для разработчиков":

avatar.jpg (10.08 KB, Downloads: 78)
2019-09-02 01:36:41 Upload
В меню "Для разработчиков", листаем и выбираем вкладку "Конфигурация по USB":

avatar.jpg (32.46 KB, Downloads: 81)
2019-09-02 01:37:48 Upload
Как и у меня, так и у вас будет стоять протокол передачи медиа данных, но вы подключите телефон к ПК и тапните по нём и выбирайте этот же протокол еще раз:

Xiaomi USB Drivers allow you to connect your Phone to a PC, whether it’s a smartphone or a tablet so that the computer can easily recognize the device via the USB port. In this article, We will publish links for Xiaomi Redmi Note 9S USB Driver to transfer files from Your Phone to your computer or you will be able to update your Xiaomi to latest Android OS.
You must download and install the Xiaomi Redmi Note 9S USB Driver on your computer device if you want to connect the phone with your computer for data transfer, Root Xiaomi, Install official Rom and Custom Rom, backup, or restore and retrieve data.
Xiaomi USB Driver was compatible with Windows 7, 8 and Windows 10.
Download Xiaomi Redmi Note 9S USB Driver
Download Xiaomi USB Driver For connecting your device to a computer:
Download Mi PC Suite:
Download ADB Driver:
How To Install Xiaomi ADB Driver In Computer
1- Download ADB Driver to your computer and unzip it.
2- Open Device Manager on your computer

3- Click on Action and Select to add the legacy hardware

4- To Continue, Select Next.

5- Choose to Install The Hardware That I manually select from a list (advanced) and Click Next.

6- Select Show all devices, and click on Next

7- Select Have Disk. Then select the Browse


9- Click OK
10- Tap the Android ADB interface and click on Next

12- click on Next

13- click on Finish

Well done, the Xiaomi USB Driver is installed on your computer.
How To Install Xiaomi Qualcomm Driver In Computer
1- Download the Xiaomi Qualcomm Driver and Open Qualcomm USB Driver Setup File
2- After That choose, WWAN DHCP is not used to get IPAddress And select Next

3- Click Next

4- Choose Modify, After That Click on next
Читайте также: