
Corel photo paint что это
Corel PHOTO-PAINT comes with CorelDRAW Graphics Suite: your all-in-one photo editing and graphic design suite.
Professional photo editing at your fingertips
Edit and perfect any type of image with advanced photo-editing features in Corel PHOTO-PAINT™. Designed to complement CorelDRAW®, this photo editing software offers professional image editing tools and support for PSD files.
Top reasons to try Corel PHOTO-PAINT
1 Create complex compositions
Powerful, non-destructive layer-based editing makes working with multiple images and objects easy and forgiving.
2 Fix imperfections
Clone, sharpen, remove red eye, dust, scratch marks, and more, with powerful retouching and restoration tools.
3 Paint, draw, and add text
Modify images or create on a blank canvas with a variety of drawing and painting tools like lines, shapes and brushstrokes. Incorporate text and interesting text effects to photos with typography tools.
4 Make quick corrections
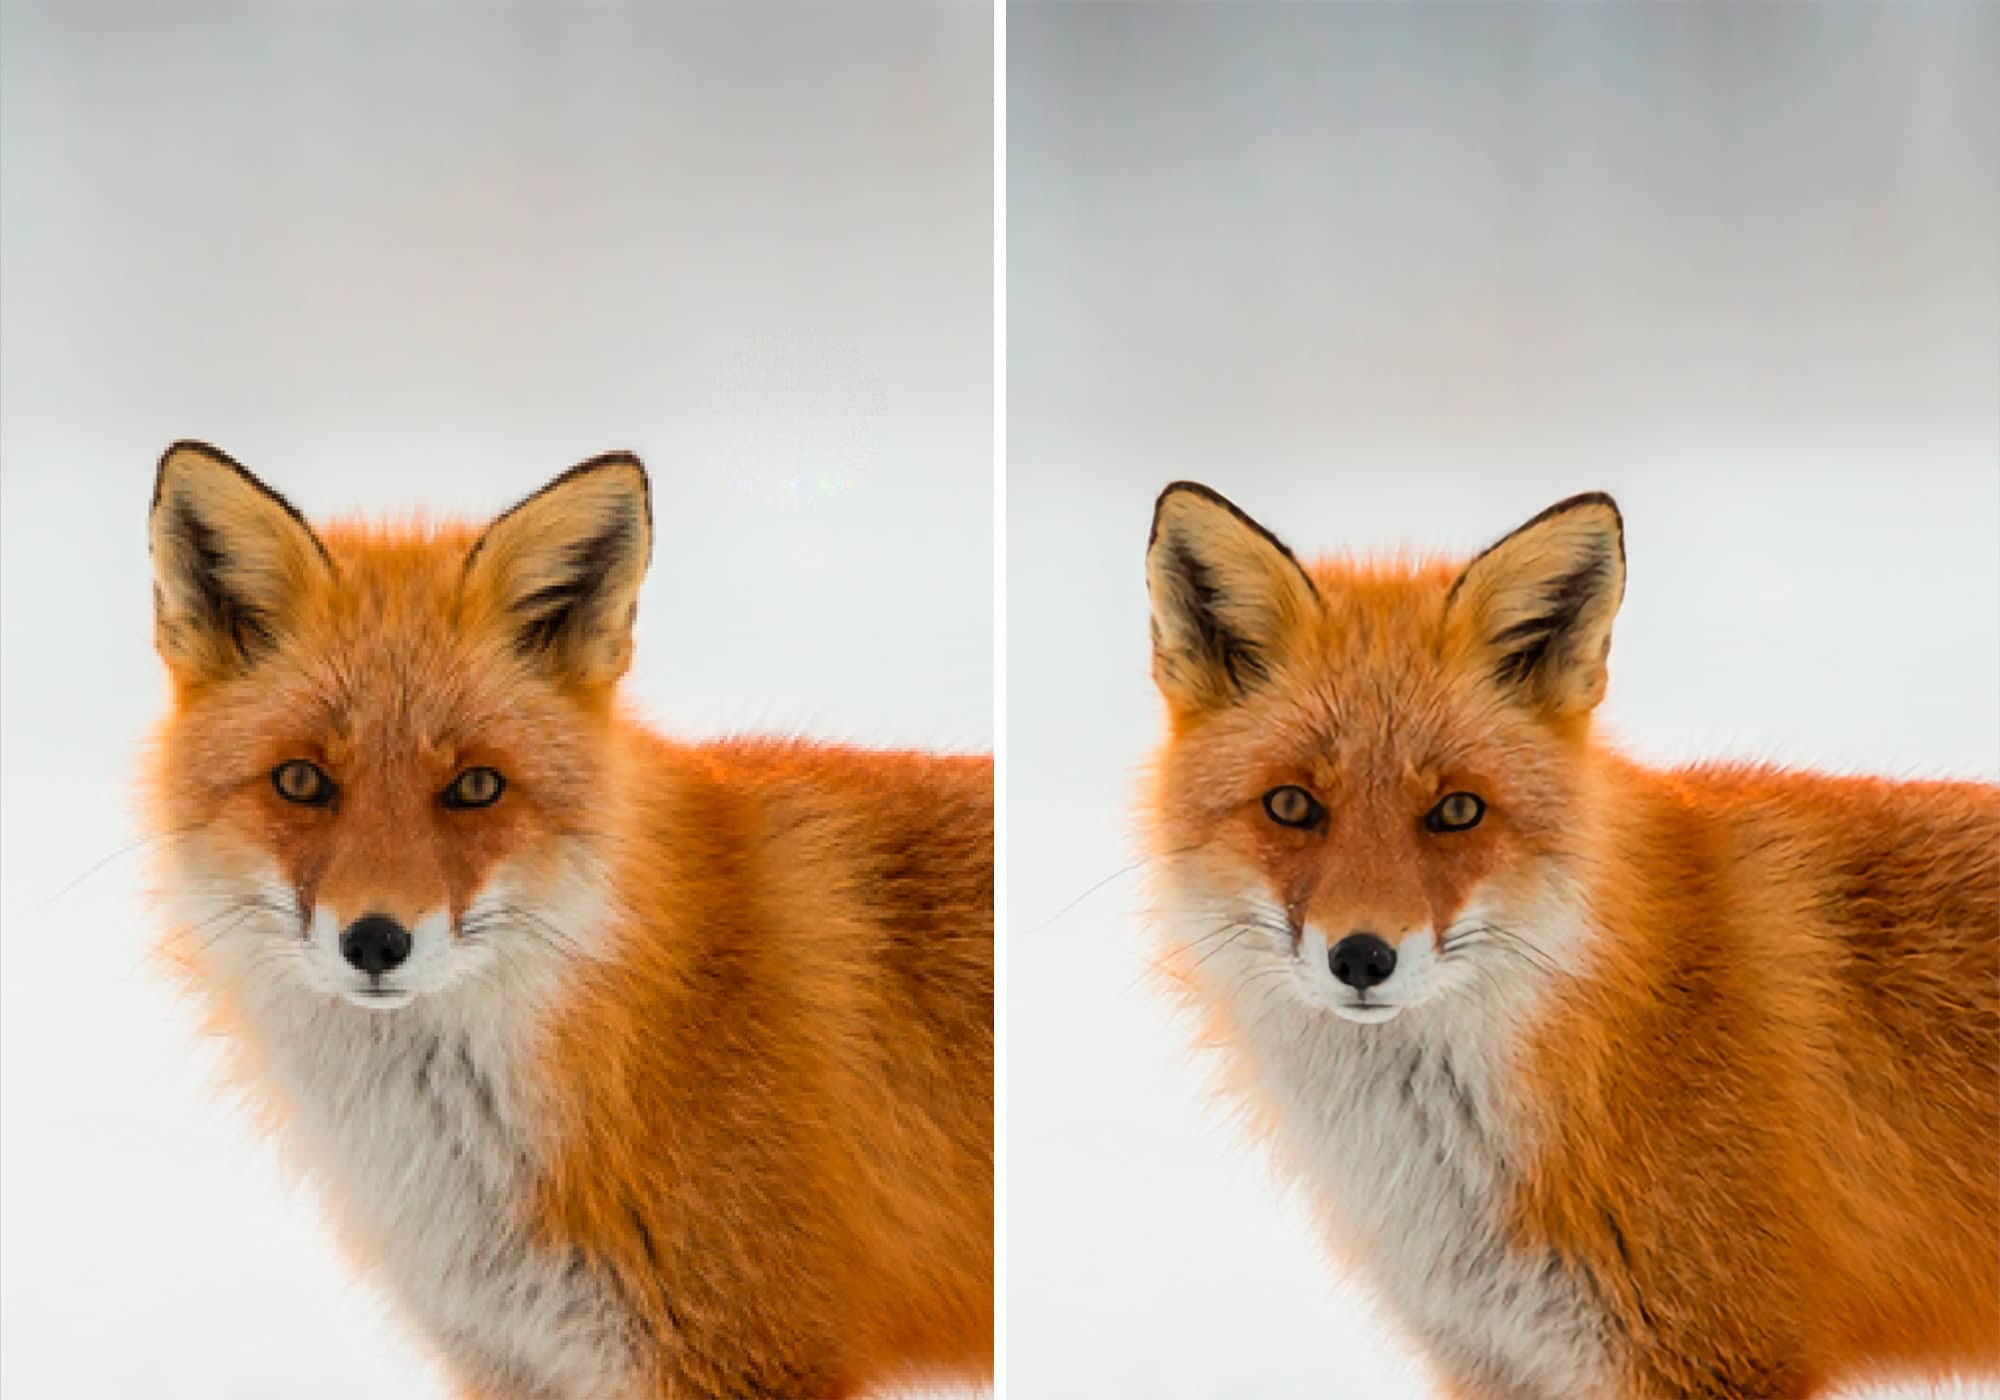
Improve the size and quality of images quickly with the help of machine learning. Easily correct color, tone and more with automatic and manual controls.
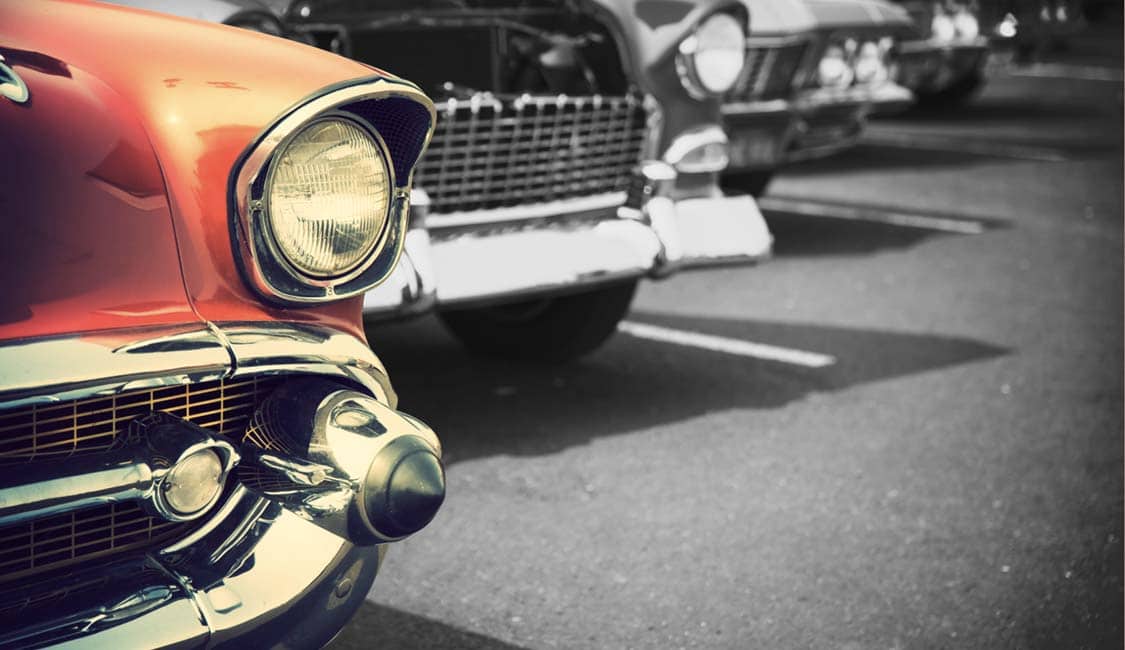
5 Add special effects
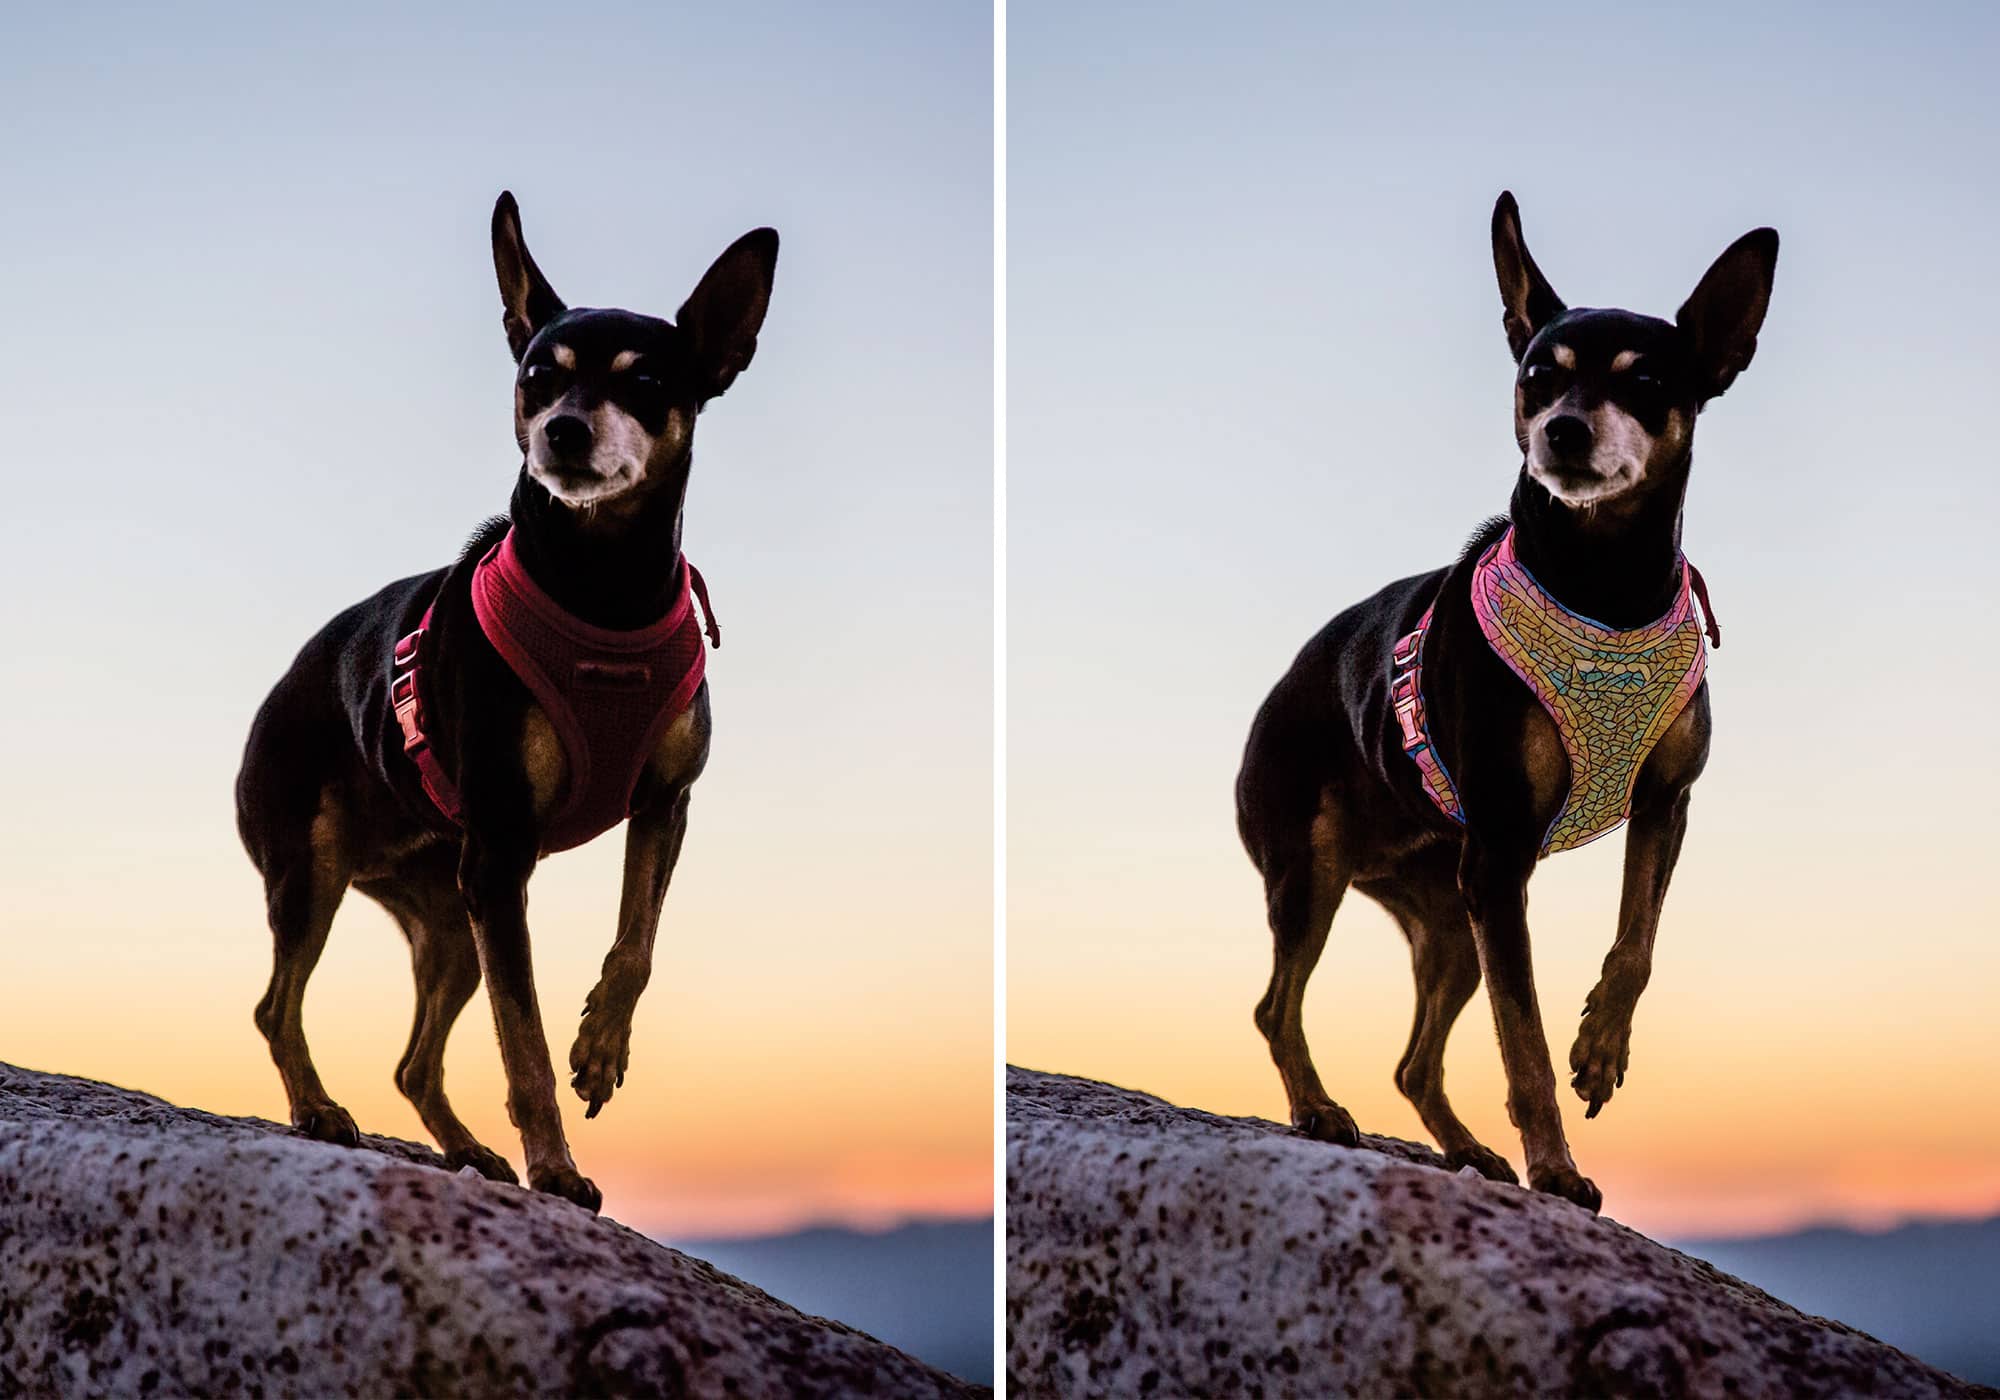
Corel PHOTO-PAINT’s effects filters make it easy to apply a wide range of transformations to images, from bokeh to sepia tone.
"A very intuitive and robust photo editing program"
Dewil Emilio Campos Ribeiro, Corel PHOTO-PAINT artist
What’s new in Corel PHOTO-PAINT?

SUBSCRIBER-EXCLUSIVE! Faster photo editing
Achieve stunning images with more control than ever, thanks to our continued focus on building a non-destructive, contextual, real-time editing experience.
New adjustment presets
Get creative with new, non-destructive stackable adjustment presets. Organize presets into custom categories or choose from a new collection of carefully curated preset styles.
Reimagined adjustments workflow
Work more efficiently with Corel PHOTO-PAINT’s totally transformed Adjustments docker inspector that’s up to 10 times faster than before, and find new tools, shortcuts, and commands in the redesigned Adjust menu.
User-inspired enhancements

Powerful artificial intelligence
Process images in high gear with machine-learned models that expand your photo editing capabilities and accelerate workflows.
Intelligent image improvements
Improve the size and quality of your images with impressive AI-powered upsampling and artifact removal features. Enlarge images without losing detail and eliminate noise from highly-compressed JPEG images.
Art Style effects
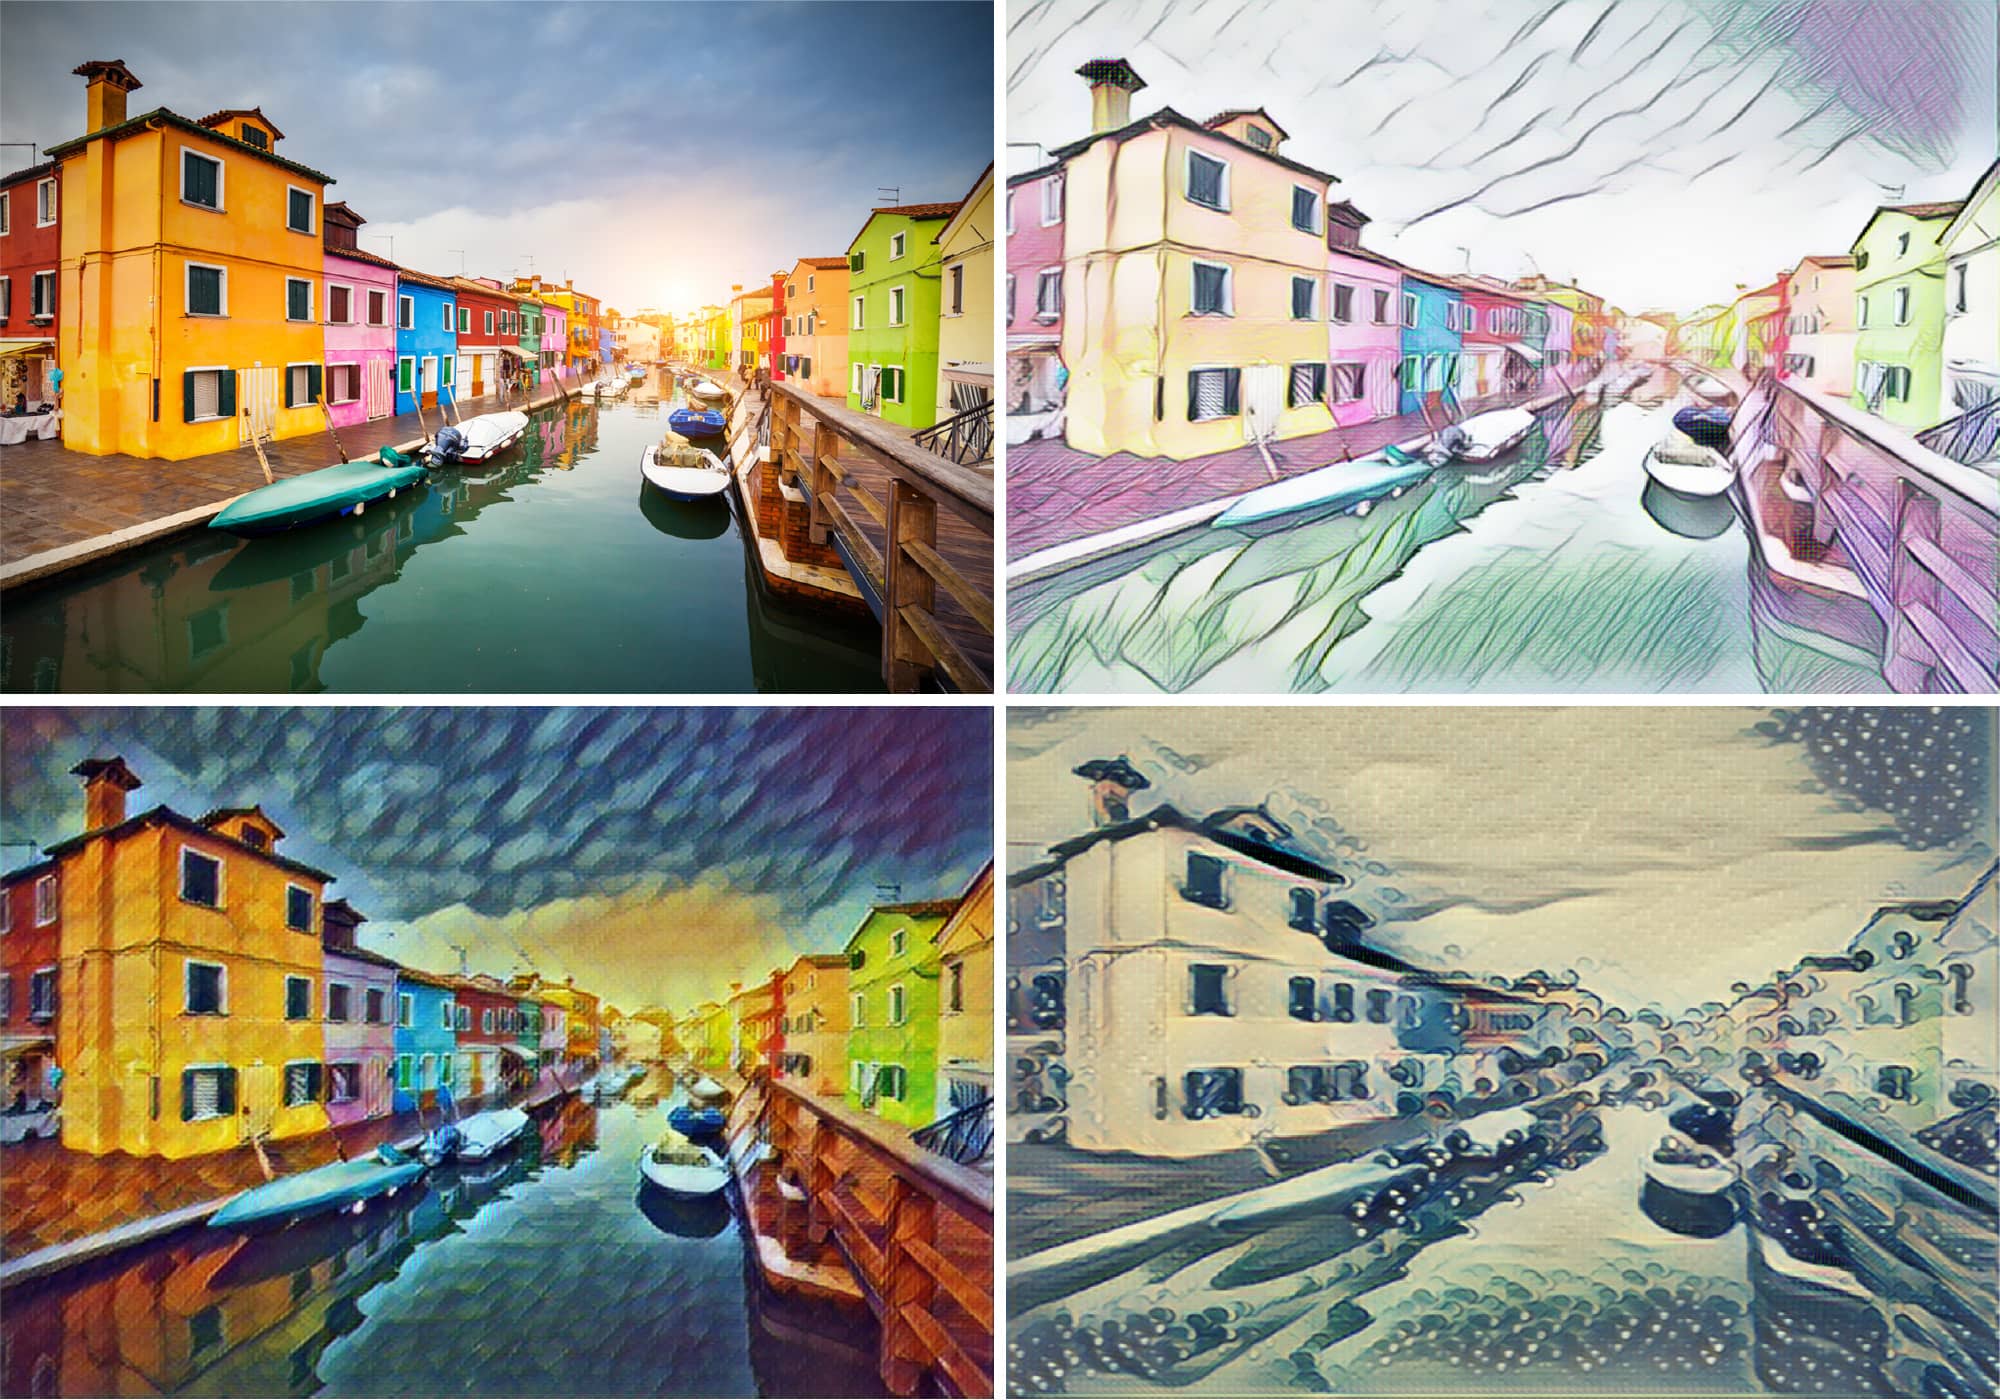
Experiment with effects that leverage artificial intelligence to replicate techniques from popular art movements. Apply these effects to bitmap objects, on their own or in tandem with others, for endless design possibilities.
Bitmap effect lens
Using a bitmap effect lens, apply any AI bitmap effect to change the appearance of objects beneath it. Moving or manipulating the lens gives you the freedom to experiment or position the bitmap effect with precision in your design.
Smart selections
Create masks with more accuracy, thanks to machine learning. Corel PHOTO-PAINT's Smart Selection Mask tool selects image areas using an algorithm that intelligently expands the selection by finding edges.
Crop, straighten, stitch and scale
Improve composition by cropping images, or correct crooked photos interactively with the Straighten tool. Use Smart Carver to edit without distorting content, and stitch images together to create a single, large image.
Correct distortion
Use the interactive Perspective Correction tool to adjust the perspective of buildings, landmarks, or objects in photos. You can also easily remove pincushion and barrel distortions introduced by your camera lens.
Retouch
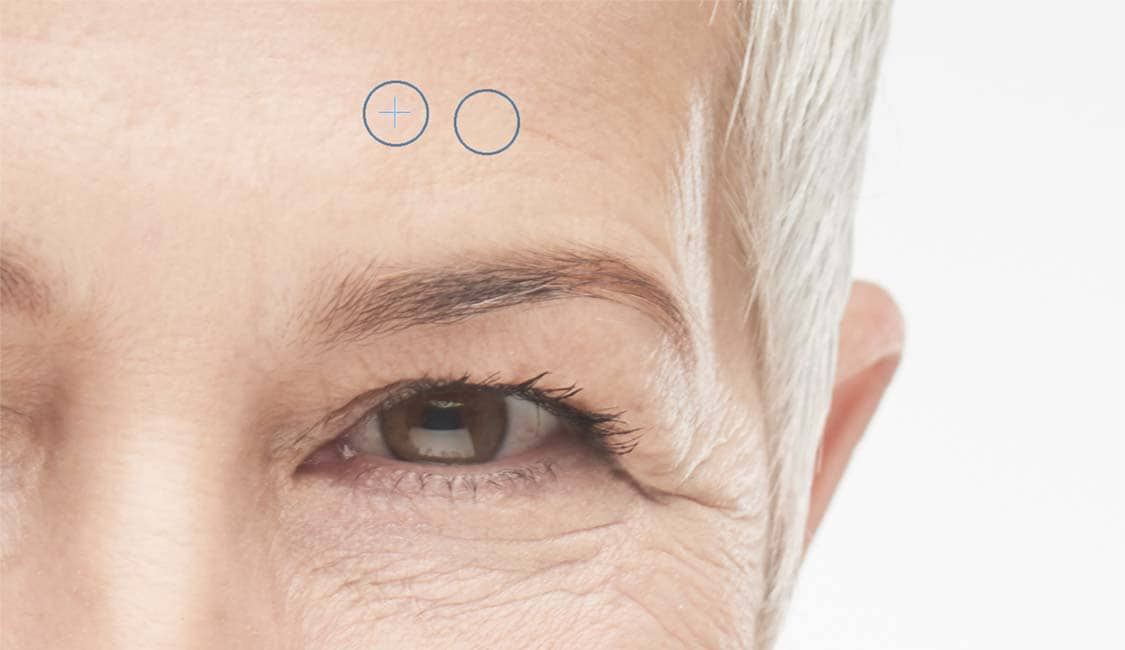
Remove unwanted areas and imperfections
Use the Smart Carver to paint over an area and eliminate unwanted photo elements. Try the Healing Clone tool to remove imperfections, or the Red-Eye Removal tool to eliminate red pixels from eyes.
Sharpen, blend and blur
Reveal image details with sharpening filters, effects and brushstrokes. Remove artifacts with the help of artificial intelligence, and soften transitions between colors or hard edges with blend, smear and smudge tools.
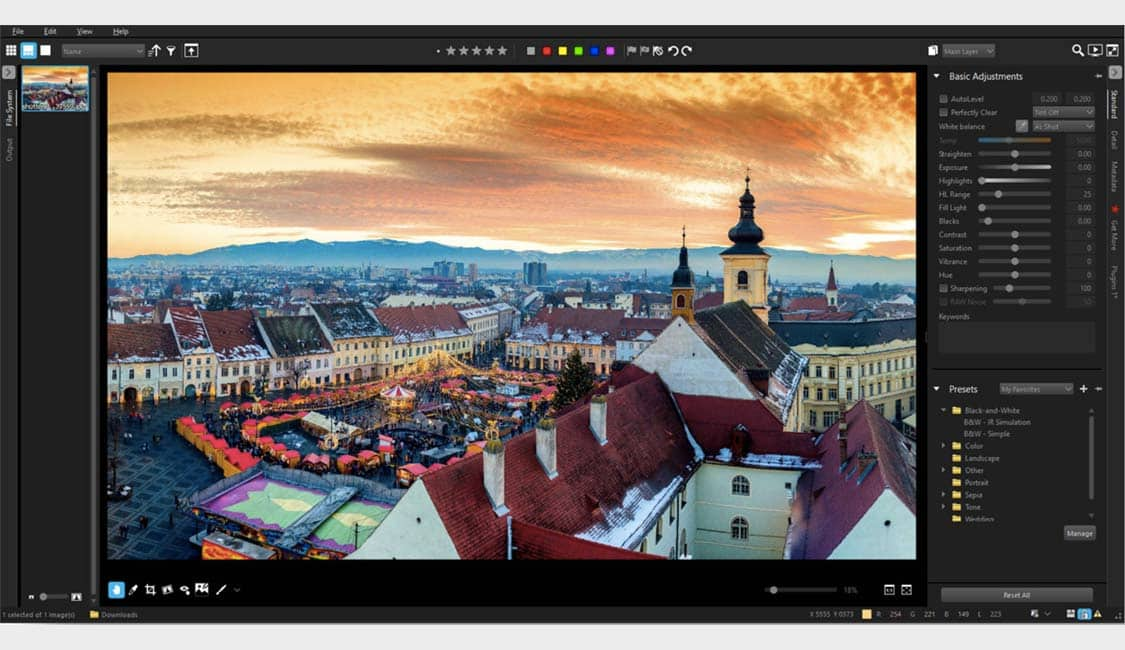
Adjust
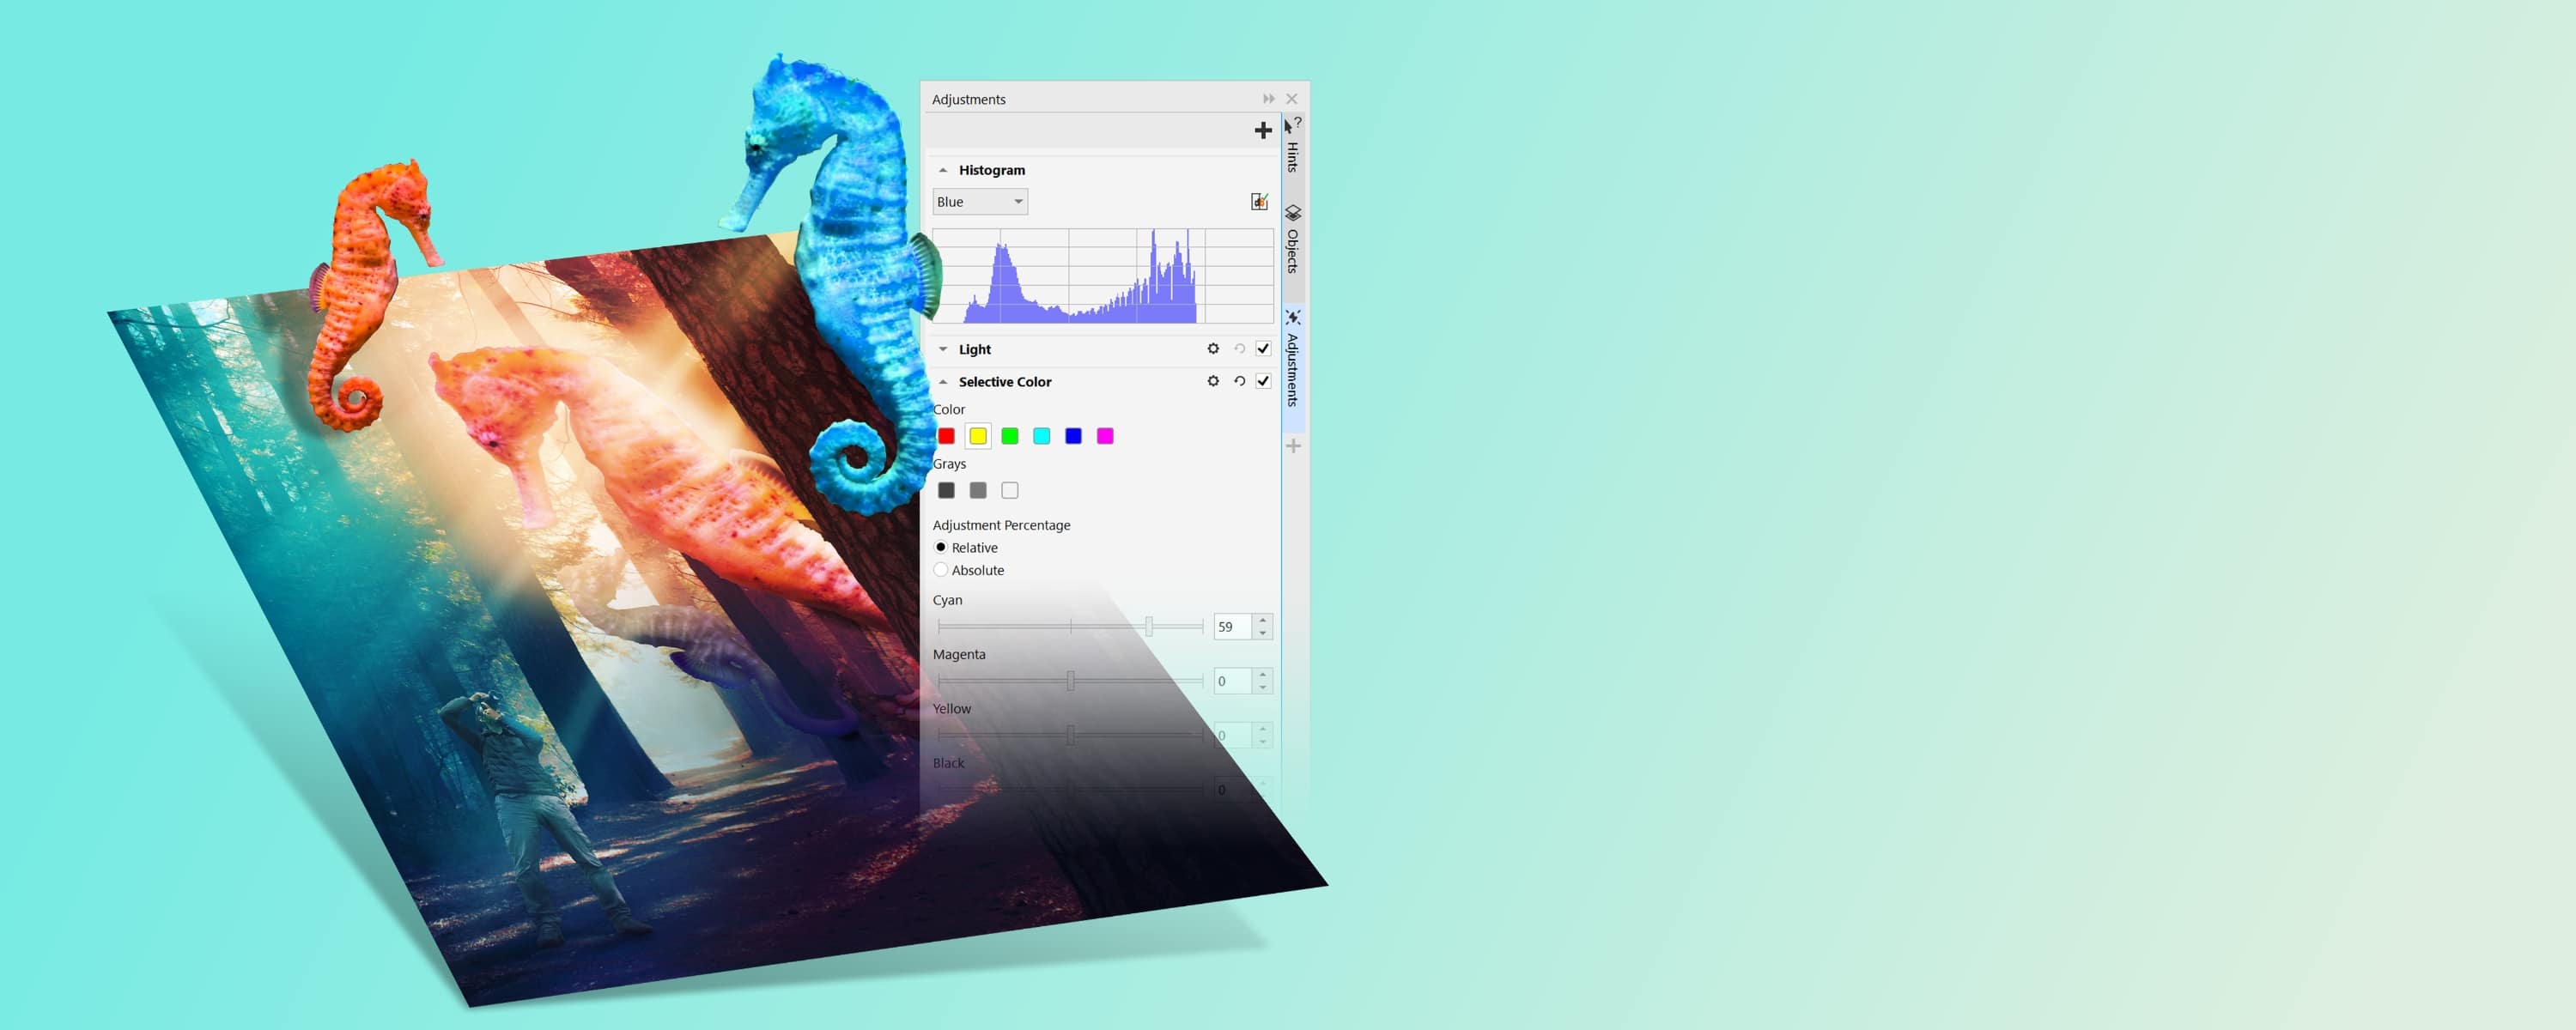
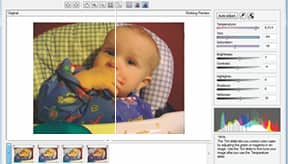
Correct color and tone
Open the Adjustments docker inspector to correct color balance and tone issues. Adjust temperature, tint, saturation, brightness, and contrast manually or automatically. You can also use a histogram to adjust tone interactively, or make changes to color channels directly.
Use adjustment filters for greater control
Filters offer greater control over the image correction process and allow adjustments to color and tone. Apply a filter to an entire image, an object layer, or an editable area of an image.
Composite
Work with Objects
Increase your image editing capabilities by using Objects, which are independent image elements layered on top of one another. Edit Objects without affecting other objects or the background of an image.
Use Clip masks
Adjust the properties of a group of objects without modifying the objects within the group by creating a clip mask. For example, you can adjust the transparency levels for the whole group without altering the pixels of the individual objects.
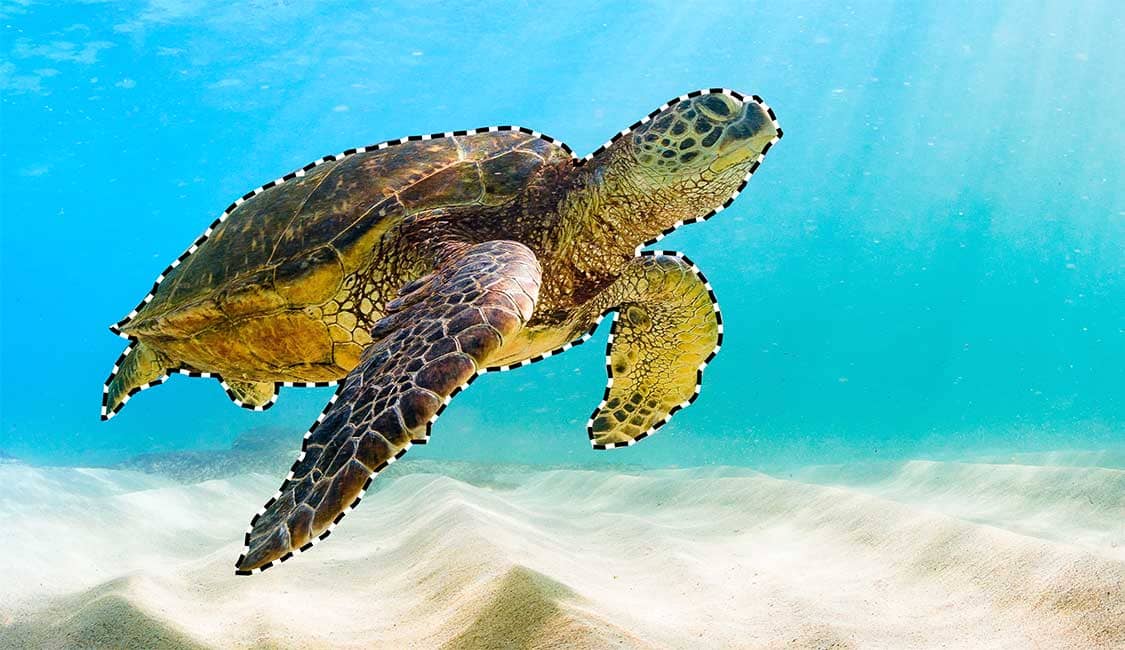
Isolate image areas
Edit and adjust specific areas of your image without affecting the rest of your photo. Try the Smart Selection tool to quickly and accurately select around parts of your image you want to modify.
Cut out images
Use mask tools to cut and paste regions of your image, as well as apply transformations, like rotate, mirror, scale and more. Or try the Cutout Lab to remove image areas from the background while preserving edge detail.
Effects

Apply special effects
Corel PHOTO-PAINT includes special effects filters and camera effects that let you apply an array of transformations to images. Try AI-powered Art Style effects to transform photos into paintings, abstract art, and more.
Work non-destructively
Apply, modify and experiment with effects on an object, all without altering it. The Effects docker inspector is your hub for non-destructive editing.

Add text to images
Add text to images and create interesting text effects. Fitting text to a path lets you place text along an uneven line for compelling compositions. Fill text with textures, patterns and more.
Fine-tune type responsively
Enjoy unprecedented font flexibility, thanks to variable font support. Interactively experiment with font properties, such as width, weight and slant, to precisely fine-tune the look of text in your designs.
Paint and draw
Paint
Apply brushstrokes to images that imitate watercolors, felt markers, and more. Or paint with bitmaps using the Image Sprayer tool. Use a pen or stylus to vary the brushstroke appearance with pressure, tilt, bearing, and rotation.
Draw, color and fill
Create or modify images with a variety of drawing, color and fill tools. Fill objects, editable areas, and images with colors, patterns, and textures. Use industry-standard color palettes, color mixers, and color models.
Advanced editing
Work with RAW files
Adjust color and tone in RAW camera files with Corel PHOTO-PAINT’s Camera RAW Lab. Or use AfterShot™ HDR, included in CorelDRAW graphic design software suite, to edit and process your RAW images non-destructively.
Create HDR images
Download AfterShot HDR at no extra cost from Corel PHOTO-PAINT’s Welcome Screen to access the High Dynamic Range (HDR) Merge module and create breathtaking images with a broader tonal range.
Output
Prepare photos for print
Whether you’re printing at home, preparing files for print service providers, or printing to canvas, Corel PHOTO-PAINT delivers an extensive array of options and tools to output your work with ease.
Get images web ready
Find all the right tools to create images for the web. Choose a web preset for common web image sizes, then optimize and export.
Get started
Whether you’re a first-time user or an experienced designer, Corel PHOTO-PAINT is easy to learn photo editing software, thanks to in-product learning, valuable content, handy plug-ins and more.
Download CorelDRAW Graphics Suite to see just how user-friendly Corel PHOTO-PAINT is.
Original sample artwork is provided by third parties and is used, and/or modified, by permission, unless otherwise agreed with such parties.
"I use Corel PHOTO-PAINT and CorelDRAW every day for all my digital work, including illustrations, graphic design and layout for book covers, brochures, vector logos, T-shirt prints and, of course, image editing."
–Stefan Lindblad, CorelDRAW Master
Experience the synergy of image editing and design
As an artist, you know the importance of having crisp and vibrant photos for your designs. CorelDRAW® Graphics Suite is an impressive photo-editing software that delivers everything you need to perform detailed retouching, add versatile enhancements and make selective edits.
One of the powerful tools within the suite is Corel PHOTO-PAINT®, an advanced photo-editing application that provides realistic special effects, photo painting and retouching. In addition, PHOTO-PAINT offers bitmap creation, digital painting, RAW image editing and streamlined web exporting capabilities.
Enjoy more image-editing capabilities
With new and enhanced features within the PHOTO-PAINT application, you can satisfy your photo-editing needs with ease and creativity. See what’s new in PHOTO-PAINT:
Windows 10, multi-monitor, 4K and Real-Time Stylus support
Take advantage of the expanded support and work quickly and efficiently.
Startup tours
Get comfortable quickly with three tours illustrating different photo-editing workflows.
Workspace customization options
Be productive immediately with a workspace that matches your workflow needs.
Healing Clone tool
Improve your favorite photos with powerful new tools to correct and edit in a variety of ways.
Explore the many ways to manipulate images with powerful photo-editing tools
In addition to a robust selection of graphic design features, CorelDRAW also includes specific photo-editing tools to achieve exacting results. Take a look:
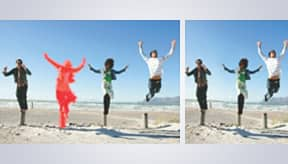
Smart Carver tool
A much-needed photo-editing tool to quickly and easily slice or eliminate unwanted areas from a photo. Plus, it will automatically adjust the photo's aspect ratio.
Create clip mask
Adjust the properties of a group of objects by applying a clip mask on the group without modifying the individual objects within it. Image editing made simple!
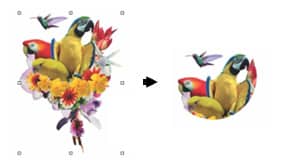
Photo effect and adjustment lab
Quickly correct common color balance and tone problems from a single dialog box. Incorporate one of many popular photo effects, including Vibrance, Grayscale or Photo Filter, to enhance your photos in a variety of ways.
Tone Curve adjustments
Adjust your images with more precision with an integrated histogram that provides real-time feedback as you make adjustments. The Eyedropper lets you pinpoint specific color locations on the tone curve of your image. You can also select, add, or delete nodes along the tone curve.
Pass Through Merge Mode
A perfect way to gain more control of a lens or effect, as changes can now be applied to all objects, including those layered below a group.
Take your photo-editing techniques to the next level with CorelDRAW Graphics Suite.
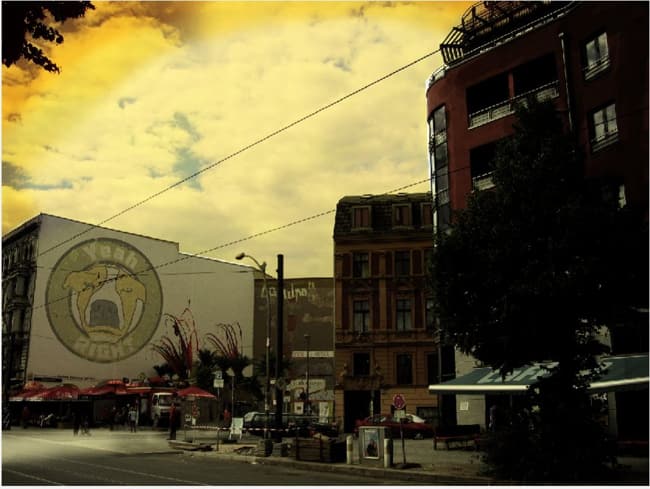
Most of the photographs we take with our cameras, can be turned into something far more exciting and imaginative. I remember walking on the millennium bridge in London, when a local Londoner walking with his lunch date, made a loud comment as if he wanted me to overhear him: "I don't understand why tourists take all these photos all the time". Well this Londoner did miss a point – I may have been a tourist but I always take reference photos as well. This is kind of in my DNA as I never know what my next design & illustration work will be about.
Take this photograph for example, which I took on a trip to the former East Berlin Mitte district in Germany a few years ago. Quite ordinary, right? I walked the streets and came to a bohemian neighbourhood. I took several photos, and this one is the one I will be using for this tutorial, so it came in use.
Analysing the photo
Looking back at this neighbourhood in Berlin Mitte, I thought it would provide an excellent example of making something ordinary a bit more exiting and imaginative. I always begin by looking at the strong and weaker areas in a photo. They can turn out to be great assets as work progresses during a project.
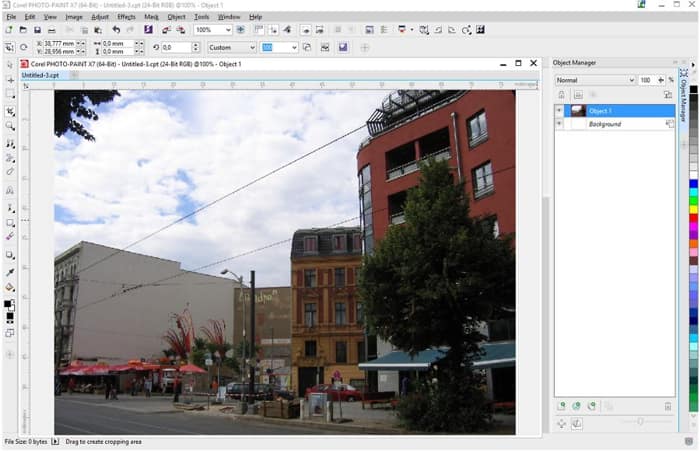
Corel PHOTO-PAINT the magical tool
Open the photograph in Corel PHOTO-PAINT X7 and look at where the present lighting is coming from. The lighting is very bland, almost dull. But what is good, is that it's possible to work with the light and shadows and contrasts. I noticed the shadows under the outdoor seating and the tree at the bottom right corner of the picture and will have that in mind later on.
I start by creating a New Object in the Object Manager Docker (Object > Create > New Object), and using the Paint Tool (Toolbox > Paint tool), and a soft edge brush nib to add sun rays. I chose the Art brush > Large Soft from the drop-down list in the Property Bar. I increased the width of the nib slightly using the Nib Size settings in the Property Bar. I now painted 7 sun rays from the sky down onto the street towards the square, using white color. I then adjusted the opacity of the brush stroke object by tweaking the Opacity slider at the top of the Object Manager Docker.
Next, I used the Mask Tool to mask the sky and copy and pasted this (CTRL+C, CTRL+V), to create a Group object with it. This way I only make adjustments to the sky, and not the entire image, when I use the Lens Object Adjustment features.
I make 2-3 duplicates of the mask, so that I can apply different changes to the sky, and quickly turn the specific objects on or off. When I am done, I simply delete any mask objects I don't want to keep. So I will end up with one mask object of the sky. While selected, I applied a Tone Curve Lens (Object > Create > New Lens > Tone Curve) to increase contrast, making dark areas darker and with a rather soft S-Curve (Values in the dialog window: Black approximately 51,54 and White approx. 172, 162).
Also adding a Contrast Enhancement Lens Object effect, placed hierarchically under the Tone Curve object and with a Input Value Clipping of 12 – 255. I now clean up parts of the mask I don't want to keep using the Eraser Tool (Toolbox > Eraser Tool).
I also applied Dodge & Burn effects, increasing shadow effects with the Effects Tool > Dodge & Burn > Burn Highlights, on the windows and facade of the buildings. However, before I use the Dodge & Burn tool I first use the Mask tool to copy and paste those parts of the image, and save them as separate objects in the Object Manager Docker.

On some mask objects I repeated the Dodge & Burn effect like a paint brush. This gives me the freedom to paint the shadows and contrasts on to the image with the Effect tool, like painting with Gouache water colour paint, traditionally used by illustrators and designers before the age of computer graphics. Each coat of the exact same paint, or in this case, each coat of Dodge & Burn, makes it darker. In my photo it makes the plaster and cement look more real and adds depth.
On the red building to the right, I repeated Dodge & Burn quite extensively, adding more contrast, depth and darker shadow. This brings the windows more to life.
Looking at the Parasol just behind the sun rays, I can see that this needs more contrast. I apply contrast using the Effect Tool > Dodge & Burn > and Dodge Highlights instead of Burn Highlights as we used earlier. This lightens up the top of the parasols.
The outdoor awning, over the outdoor tables by the red house to the right, is empty and without any logo or text, which gives me an excellent opportunity to add text or a logo on top of it. I went for "Coffee". With the Text Tool (Toolbox > Text tool), and the color white, I chose a fairly modern bold San Serif font. With the Pick tool selected, I use the distortion handles to shape the text to fit the outdoor awning (click on the Distort icon in the Property Bar). To make it look more real, I applied opacity while I used the Eraser tool to erase anything that would overlap the tree, and make it fit in better. When done, I simply removed opacity from the text. I finished it off by adjusting the opacity of the text object to around 30 using the Opacity slider in the Object Manager Docker.

Using the Photo Filter Lens
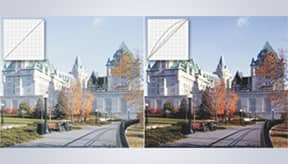
I wanted to add a sort of old, yellow feel to the image, so in the Object Manager Docker I choose Lens Object > Photo Filter Lens (or click on Object > Create > New Lens > Photo Filter). I then continued by adding another Lens Object > Contrast Enhancement, and also a Tone Curve Lens object.
After adding a final, Photo Filter lens, I moved on. All together, these lenses have added a bolder, old yellow, warmer feel to the whole image. And if we now compare our current image with the original, rather dull lighting, we suddenly have a far more interesting feel.
Adding a Halftone effect
To add a Halftone effect I created another temporary New Image (File > New…). After painting random brush strokes, I added a Halftone effect (Effects menu > Color Transform > Halftone). Meaning I now have a white background object and another with halftone dots. Selecting the Color Transparency Tool in the Toolbar, I dragged it over the white background colour, making the background transparent. From there I simply copy pasted the object over to my Berlin image as a new object. This way I can control where and how the Halftone dots are distributed over my image.

Adding imported art & images to the photo
But I wasn't quite done yet as I had the idea of adding something to the empty house facade facing the square. And I came up with a vector image of a dogs face, like a logo or brand. Or Street Art.
I therefore imported (Ctrl+I), my vector dog image. Although it's a CorelDRAW .cdr file in vector format, it's no problem for Corel PHOTO-PAINT to open or import.
Click (don't drag to place the file), and in the Import dialog window make sure that you choose the "Transparent background" option before clicking OK. I imported it as a single bitmap object. I reduced the size by dragging it to size using the sizing handles and with the Pick tool selected, I shaped it into place on the house façade using the Transformation icons in the Property Bar and then adjusting the appropriate handles. It's important to get the perspective correct so it follows the perspective of the wall facade. And then added some textures to it as well. In this case I used Textures in the Effects menu bar. To this, I applied some opacity to make it fit better with the wall.
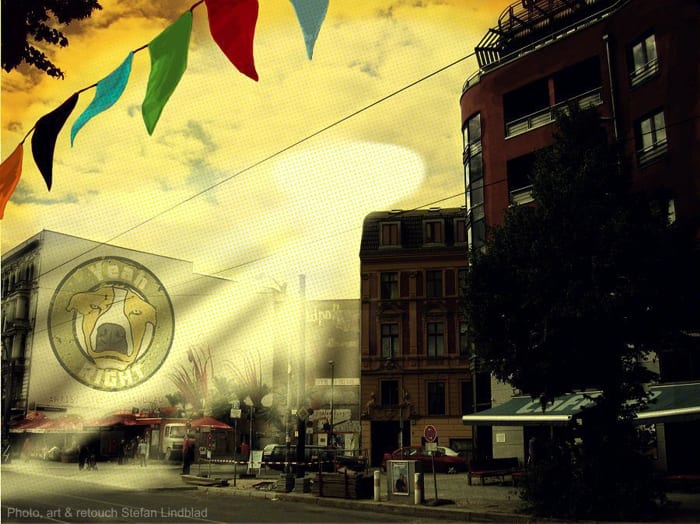
I finished off the image by drawing and painting pennants in various colours using the Paint tool. And once those were finished, the resulting photo was suddenly far more captivating than the first one I took. From something quite unexciting to something far more interesting.
Линейка графических редакторов от канадской компании "Корел" с самого своего появления прочно зарекомендовала себя на рынке соответствующего ПО. В одном комплекте от "Корел" содержится не одна, а сразу четыре программы для работы с изображениями – Corel Draw, Corel R.A.V.E., Corel Trace и Corel Photo Paint. Если первые три редактора главным образом нужны для более или менее опытных художников, то последний незаменим для любителей необременительной и несложной обработки фотографий и рисунков.
Преимущества Corel Photo Paint перед Adobe Photoshop
Программа Adobe Photoshop для обработки растровой графики приобрела бешеную популярность у пользователей по всему миру. В русском языке существительное «фотошоп» и глагол «фотошопить» стали синонимами редактирования фотоснимков и рисунков. Тем не менее, несмотря на такой успех «на словах», Photoshop часто оказывается не по зубам новичкам – в сложном интерфейсе редактора порой очень непросто отыскать нужную функцию.
Продукт компании "Корел" гораздо понятнее интуитивно – разобраться с ним без труда получается даже у детей и подростков. Также очень важным плюсом в деле удобства использования Corel Photo Paint является возможность регулировки размера кисти при зажатии клавиши Shift, а также некоторые другие подобные сочетания, упрощающие работу в редакторе. Adobe Photoshop, при всех своих достоинствах, не предлагает пользователю ничего подобного.
Уникальные фильтры фоторедактора "Корел"
В Corel Photo Paint имеется набор фильтров и инструментов, которых нет ни в одном фоторедакторе, схожем по популярности. Среди них особенно можно выделить:
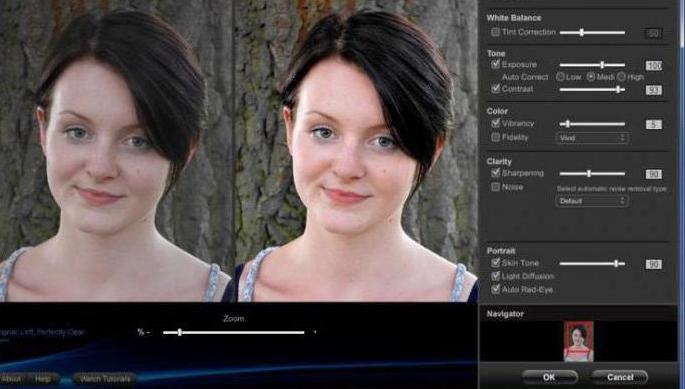
- Red eye removal. Инструмент для удаления эффекта «красных глаз». Для удобства использования рекомендуется использовать опцию «Кисть» – таким образом другие части лица не подвергнутся неожиданным переменам в цвете.
- Frame. Простой инструмент для создания рамок. В Adobe Photoshop сделать рамку совсем нелегко – для этого существуют даже специальные туториалы. В Corel Photo Paint никаких сложностей с созданием рамок не возникает.
- Weather. Плагин для добавления к изображению погодных условий, таких как снег, дождь и туман. Для создания реалистичной картинки имеются все необходимые настройки. Фильтр подойдёт не только для шуточной обработки фотоснимков, но и для быстрого создания эффектных открыток и постеров.
Также в фоторедакторе от "Корел" всегда есть большой выбор текстурных фильтров – изображение в два клика переносится на поверхность, к примеру, кирпичной стены, булыжников или слоновьей кожи.
Продукт Paint Shop Pro от "Корел"
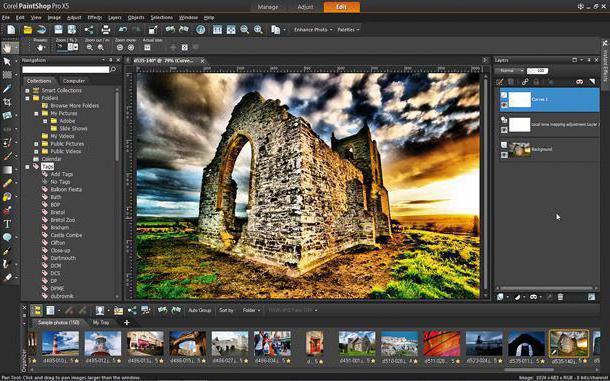
Фоторедактор Corel Photo Paint невозможно приобрести отдельно – программа является частью комплекта Corel Graphics Suite. Однако не так давно по просьбам пользователей, которым кроме Photo Paint не нужна была ни одна программа из набора, создатели линейки вывели в свет новый продукт – Corel Paint Shop Photo. Отдельная программа Paint Shop несколько шире по своему функционалу – помимо обработки изображений пользователь может делиться ими, не закрывая окно редактора, что позволяет встроенная функция синхронизации с соцсетями. Интерфейс по-прежнему интуитивно понятен, поэтому подойдёт как опытному пользователю, так и новичку.
Недостатки редактора Photo Paint от "Корел"
Самое слабое место представителей линейки Corel Photo Paint – работа со слоями. Как в начальных версиях, так и в новейших релизах, таких как Corel Photo Paint X6, схожая функция имеет название Objects, однако разнообразие взаимодействий с «объектами» довольно-таки бедно. Тем не менее, основная масса пользователей фоторедакторов от "Корел" не испытывает потребности в сложном фотомонтаже. Большинство профессионалов всё же пользуется для фотомонтажа программой Photoshop от Adobe, оставляя новичкам и любителям возможность легко и просто обрабатывать изображения с помощью интуитивно понятного редактора.
Corel PHOTO-PAINT – растровый графический редактор, поставляемый в пакете Graphics Suite. Сейчас актуальна версия 2017 года. Работает на Windows и macOS.


Лицензия: Условно-бесплатно
Операционная система: Cross-platform
Дата обновления: 28 апреля 2017 г.
Компания Corel считается второй по популярности после всем известной Adobe, создающей Photoshop и Illustrator. Популярность соизмерима с качеством, поэтому заочно PHOTO-PAINT можно считать хорошей программой. Меньшая распространенность этого продукта вызвана нежеланием разработчика продавать его отдельно, а только лишь в составе графического пакета. Тем не менее для активных пользователей CorelDRAW – это отличный вариант, ведь программы между собой взаимодействуют, а приобрести их вместе куда выгоднее.
Возможности программы
По техническим возможностям Corel PHOTO-PAINT максимально соответствует Adobe Photoshop.
- Программа работает с RAW-файлами большинства современных камер.
- Гибкая работа на графических планшетах. Так, именно в последней, 2017-ой версии появилась поддержка определения наклона и силы нажатия пера.
- Пусть редактор и считается программой для профессионалов, любое освоение начинается с какого-либо этапа. Corel подготовила несколько гайдов, демонстрирующих возможности программы и особенности редактирования разного типа фотографий.
- Разработчики все равно осознают лидерство компании Adobe в этой сфере,поэтому их продукты полноценно поддерживают формат файлов PSD.
- Присутствует функциональность для каталогизации снимков: перемещение, переименование, присвоение меток и так далее.
- По части инструментов в Corel PHOTO-PAINT присутствует все необходимое и знакомое по другим растровым редакторам: эффекты, фильтры, маски, кисти, работа со шрифтами, слои и многое другое.
Преимущества Photo-Paint перед конкурентами
Сложно говорить о сильных сторонах редактора от Corel, потому что при сравнении пользователи все равно интуитивно пытаются понять, чем он лучше, чем тот же Photoshop. На самом же деле, это просто качественная альтернатива, а не компромисс. Часто говорят о простоте интерфейса. Но это абсолютно субъективное мнение.
Самостоятельно свое отношение можно определить, только попользовавшись всеми аналогами. Так, например, в программе есть тенденция размещать различные инструменты на разных панелях. То же самое есть и в Photoshop, но там они более сгруппированы. И хоть такая организация пространства и позволяет быстрее находить то что нужно, при сложной работе интерфейс будет перезагружен разными панелями.
Главное преимущество продукта от Corel – его взаимодействие и распространение в составе пакета. Таким образом, CorelDRAW, который является куда более популярным и серьезным конкурентом Adobe Illustrator, получает хорошее (бесплатное) дополнение в виде полноценного растрового редактора.
Больший акцент в PHOTO-PAINT сделан на эффектах – то есть пресетах с заготовленными параметрами. Профессиональные дизайнеры стараются избегать такого рода автоматизации, но именно она может сократить время рутинной однообразной работы.
Главной проблемой программы от Corel часто считают процесс работы со слоями, но разработчик постоянно улучшает и обновляет этот компонент. Хоть для работы PHOTO-PAINT и нужно достаточно много ресурсов компьютера, Photoshop требует еще больше, поэтому при наличии слабого железа, выбирать будет сложно, но, вероятнее всего, в результате вы склонитесь именно к разработке Corel.
Выводы
Corel PHOTO-PAINT в каком-то плане можно считать даже не отдельным продуктом. Его создавали для графического пакета, в котором основную роль играет CorelDRAW – векторный редактор, который часто считается лучше, чем Illustrator. Раньше PHOTO-PAINT был действительно слабее, но с каждой новой версией он получает вдвое больше функций, и, если компания решит выпускать его отдельно, вполне вероятно, что у Photoshop появится сильный и грозный конкурент, у которого теперь будет равные шансы, чтобы вытеснить его с пьедестала.
Читайте также: