
Clip studio paint как рисовать мангу


Drawing Comics with Clip Studio Paint
The following is an introduction to functions used for drawing a simple color comic with Clip Studio Paint.

· To create a new canvas (file) → " New "
· To draw with pencil touch > " Pencil Tool "
· To erase a drawn line → " Eraser Tool "
· To create balloons and input text → " Explanation: Balloons and Text "
· Pages can be added to or deleted from a manga file. To adjust the number of pages, see " Add Page " / " Delete Page " . [EX]
· Changing [Unit of length] to "mm" for [Ruler/Unit] > [Unit] in the Preferences dialog box will enable you to configure the canvas as if you were configuring an original piece of paper for print. For details, see " Preferences [Windows] " > " Ruler/Unit " .
· Be sure to save your work when taking a break from it. If you quit without saving, the manga drawn on the canvas will be lost. To save the file, select [File] menu > [Save].
· You can change the canvas view to make drawing easier. For details on how to change the canvas' scale, see " Zoom Tool " . For details on zooming in/out of the canvas or changing its display position, see " Move Tool " .
· The manga file allows for 2-page spreads. For how to create two-page spreads, see " Combine Pages " . [EX]
· To create a new layer → " New Raster Layer "
Create a new layer for pencilling.
· To draw with pencil touch → " Pencil Tool "
· To adjust the line thickness → " Tool property Palette "
Even if you draw on a layer whose expression color is monochrome or gray, you can replace black with any color by using the [Layer color] function. This is useful to reduce the load on your computer. Layer color is configured in the [Layer Property] palette. For details, see " Functions of Layer Property Palette " .
Hide the draft layer to make coloring easier.
· To create a new layer → " New Raster Layer "
· To draw with pen touch → " Pen Tool "
· To rotate the canvas and draw a line → " Move Tool "
· To change the shape and size of a balloon → " Explanation: Balloons and Text "
· Changing [Unit of length] to "mm" for [Ruler/Unit] > [Unit] in the Preferences dialog box will enable you to configure the canvas as if you were configuring an original piece of paper for print. For details, see " Preferences [Windows] " > " Ruler/Unit " .
· Be sure to save your work when taking a break from it. If you quit without saving, the manga drawn on the canvas will be lost. To save the file, select [File] menu > [Save].
· You can change the canvas view to make drawing easier. For details on how to change the canvas' scale, see " Zoom Tool " . For details on zooming in/out of the canvas or changing its display position, see " Move Tool " .
· To create a new layer → " New Raster Layer "
· To create a fill in monochrome layer → " Fill [PRO/EX] "
Create fill in monochrome layers in areas where you want to stack mesh tone or fill in one color.

Hello! Kyorin here~
This tutorial is dedicated for you who wants to make or currently making webtoons. Note that every steps I'm using here are what I usually do, so you can always improvise them yourself! Since this tutorial is about creating webtoon, I'm not going to explain my drawing steps in details (hopefully I can make another tutorial about it next time :D). You check out the video version above or read this article below xD
So here you go!
Part 1: Making Grids
I was told about this grid system by my editor back then (thank you!). Although some people don't really use this (which is fine!), I think this might worth sharing :D
1) What is grid?
Grid is like a guide. Every section of the grid equals to general phone screen ratio, so it lets you estimate how many panels you want to put in one screen.
It also lets you see how crowded your panels are. Giving blank gaps on webtoon paneling is important since webtoon is using vertical format. The gaps give readers' eyes some break when reading, also give readers feel about the pacing (longer gaps usually give slower pace).
2) How to make grids?
Since we can't make a shape with exact size, let's do some tricks!
First, create a canvas with 800x1280 size (common screen size, also webtoon accepted size).
Then fill the whole canvas with any color. Then press Ctrl + A [Select all], Ctrl + C [Copy].
When you have copied it, create a new canvas for your strip. Strip is a long vertical canvas you can use to draw webtoon. Why a long vertical canvas? Because webtoon format is vertical and long canvas can let you see your flow better.
Before deciding how big your canvas should be, you should mind what you need and what you don't:
1. I need to print my webtoon one day!
If you do, make your canvas big! Do it in at least your planned paper size width (length can be adjusted later). For example, if you want to print it in A5 size (148 × 210 mm), then you can use 148mm width and adjust your canvas height based on your grid.
2. I'm not planning to print my webtoon.
If you don't plan to print it, then use a small canvas! 800px width should be enough since it is also webtoon's standard size. You can make it a slight bigger, but having too big canvas will only torture your PC. In the end, your strips will be compressed and you can't really see too much details.
Deciding your format before starting will help you a lot. In this case, I use 2480 x 27777 px (because 27777 px height doesn't cut my grid) since I plan to print it in the future.
Next, paste your grid and scale it by pressing Ctrl + T [Transform] and drag the square while pressing shift or check [Keep aspect ratio] then drag the square.
Copy and paste the other grids until it fills all your canvas.
Don't forget to merge the grid layers! Click on [Combine to layer below] to merge it with the grid layer below your active layer.
Note: merge your unnecessary layers to keep your file size low
Your grid is ready to use!
Part 2: Paneling
To start sketching your storyboard, just simply create a new layer above your grid and draw on it.
Gaps in webtoon format is important to maintain the flow. Each grid is better consist of 1-2 panels. You might want to avoid having 3 panels in one grid. 4 or more panels are way too crowded to read, it will make your readers confused.
Part 3: Lineart
Before you start doing lineart, you might need to change your sketch color. Click on [layer color] and choose the color that suitable for you to trace later. Light color will make it easier to draw over it.
Choose the brush you like the most. You can either use default brushes, set up those brushes, download the brushes from [Asset], or make your own brush. For me, I like G-pen the most so far. But I also set it according to my preference. Here's my G-pen setting if you want to try:
Before you start lining, there are things you need to know about Vector Layer and Raster Layer.
1. What are their differences?
Vector is made of mathematically formed paths and curves. It allows you to scale up your lines without making it compressed or pixelated. Raster is made of pixels which are combined into one and it will pixelate your line when you scale it up.
2. Then why don't we just draw using vector?
You can and you can't. Then again it depends on your art style. Even though vector is pretty convenient with scaling and editing, raster still forms smoother result than vector. You can do some experiments on this.
So now, to start lining create a new [Vector Layer] above your sketch. Choose the brush you like and start drawing your lineart over your sketch.
There are benefits of doing lineart using [Vector Layer]:
1. You can use [Vector Eraser]!
[Vector Eraser] is a tool that allows you to automatically erase some lines. There are 3 kinds of [Vector Eraser]: (1) Erase touched area, (2) Erase up to intersection, and (3) Whole line. See the differences below:
2. You can scale up and down without getting pixelated!
3. You can edit your line size!
Go to [Operation] and change the [Brush Size].
Or go to [Correct Line] then choose [Thicken] or [Narrow] depends on your need. Set the size and apply it to the line you want to edit.
4. You can always rasterize it!
Right click on your [Vector Layer] and choose [Rasterize].
Remember that once you rasterize it, you can't turn it back to vector.
Okay, enough with Vector and Raster. So after this, you can draw over your sketch.
Part 4: Base Color
After lineart is done, the next thing you need to do is giving base colors (flats). Create some layers under your lineart layer (put it inside a folder will make it organized). I usually make 4 kinds of base color layers: Hair, Skin and Eyes, Clothes, and Objects.
Once again I recommend you to use your layer efficiently to keep your file size low and less confusing workspace. Merge or delete those unnecessary layers. When 2 or more colors don't meet each other, you can use one layer instead of making it one by one. For example if you have an object on a character's head and feet, you can use one layer base color instead of 2.
Next is to fill each parts with colors. There are some alternative ways to do it:
1. Fill
Fill or bucket too is probably the most common way to do basing. All you need to do is choose the color and click the area you want to color. Note that there is some settings you need to set depending on your lineart style. In this case, we are using [Refer Other Layers] setting.
- Refer to only editing layer: Means your [Fill] tool won't detect any object outside your layer. For example, if you color in HAIR layer and you haven't drawn anything on it, it will fill your whole canvas with the chosen color (because it detects no object inside).
-Refer other layers: Means your [Fill] tool will detect objects in other ACTIVE layers. In this case, if you want to color hair in HAIR layer, your [Fill] tool will detect your lineart. If you click inside the hair, the color will remain inside the closed lines of hair (except if you have line gaps).
-Close gap: the sensitivity of your [Fill] tool to detect line gaps. The higher option you choose, the bigger gap it can detect and vice versa.
-Color margin: the sensitivity of your [Fill] tool to detect some similar colors.
-Area scaling: You can scale up or down the color area using this setting.
-Refer multiple: the sources of object that your [Fill] tool will detect.
Sometimes there come a case when we put a wrong color. Do we need to redo it?
Nope! Don't. You can just change it by clicking on [Lock Transparent Pixels] then draw over it with the color you want. Your color won't go out of the previous color since it is locked.
2. Close and Fill
This tool is quite fun to use! You just need to create and area outside the part that you want to color, and the color will detect your lineart on its own!
The setting is still the same as [Fill] setting, so you might want to set them when using this tool.
3. Lasso Fill
Although this one is a manual way to color, it will have some use in some cases. [Lasso Fill] will let you color the area you make. Unlike [Close and Fill], this won't detect your lineart so you need to do it manually.
4. Transparent Color
This might not be a brush for coloring, but this can make any brush or tool into an eraser! Some might not notice it, so this is how you choose transparent color.
you can either click on the grey and white squares under the color squares or right click on the area outside your canvas. That will make any brush you are using becomes an eraser.
Part 5: Background
There are plenty of ways to do backgrounds. Using 3D object is probably the most efficient way. Clip Studio Paint provides you with some 3D models (you can also download it from [Asset]) or you can use other softwares like Sketchup or Blender. But, using 3D object inside your drawing might need a little adjustment, depending on your style. In this case, you can play with [Tonal Correction], there are a lot of adjustment you can make for your backgrounds.
Part 6: Shading and Lighting
There isn't any specific way to do shading and lighting. Everyone has their own way. But [Layer Blending Mode] might be important for you (and it's fun to play with!). This blending mode gives some different effects on colors you are using for each layer (you might need to do experiments on this to find which one suits you the most).
For me, I just use one [Multiply] layer on each base colors, one [Glow Dodge] or [Add Glow] and one [Normal] layer above all layer.
For shading, I use [Watery] with my own setting and [Blend] tool. Sometimes I use [Airbrush] with soft [Hardness] and low [Opacity].
Part 7: Typeset
Typesetting in Clip Studio Paint pretty easy! You just need to type it using [Text] tool and drag or draw your speech bubbles. There are speech bubbles ready in [materials] or you can also download them from [assets].
Combine 2 text layer into one to merge the speech bubbles. You still can edit it one by one, so don't worry about it.
You can also use [Border Effect] feature in some scene of your comic.
Last one after typeset is to SAVE YOUR FILE! (Never. forget. to. save!)
Remember to save it as both [Clip Studio Format] and JPEG!
Part 8: Slicing
You only need to upload your strips (in Croppy available formats only) and you will receive your slices files in RAR.
After that, you can upload and launch your webtoon!
Here's the complete step by step of me doing my strip :D
If you still have anything to ask, feel free to reach me @kyorin24 (Instagram or Twitter)!
I hope this will help!

This user has contributed greatly to the management of the community, by posting many great responses to the questions asked. Once every three months, MVPs are determined based on the points earned during that period and will be recognized accordingly.
These are the next-best contributors to the community after MVPs. This is awarded to users who have not yet won an MVP award, based on the number of points they have earned.
Chosen out of all MVP awardees, who are already proof of excellence, this is a testimony of outstanding correspondence in the community. After careful screening, they are appointed by CELSYS and assume their position.
Moderators are official CELSYS staff members who are fluent in Japanese as well as various other languages. As moderators are not experts on software or creative work, they will not be able to directly answer your questions. However, moderators will provide communication and language support to ensure that everyone can smoothly communicate with each other.
When creating manga manuscripts or submitting data to a print shop, there are several rules that should be followed.
Else, parts of the manuscript may be cut off, tones may be misprinted, or there may be too many or too few pages, resulting in the worst case scenario: missing your deadline.
The following is a guide that explains how to create a manuscript without any problems.
* This article is written based on the premise that you are producing a manga manuscript in Japan. If you are making manga manuscripts outside of Japan, it may differ from the contents of this article.
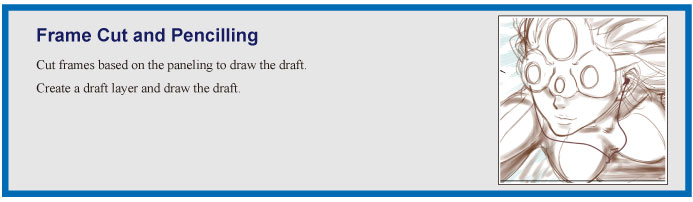
[1] Page layout of a manga
First, let’s start with the layout of a manga manuscript.
The pages of a manga manuscript will usually have pre-drawn lines. There are rules for each of these lines.
■ (1) Default border
This is the large square frame in the center of the page. This is also called the “inner frame” or “inner line”.
If dialog or pictures are drawn near the edge of the page, these may be cut off or may not be visible after the finishing process. The default border is there to prevent this.
Therefore, frame borders (panels) should be drawn based on the default border’s lines.
Also, by placing important dialog and pictures inside the default border, you can ensure that they will be printed and displayed in an easy-to-read area.
Of course, you may want to place some dialog and pictures over the default border for effect.
In this case, make sure that they are not too close to the later described “Cropped border”.
[POINT] Be careful of the bound side of the book when placing dialog overlapping the default border!
There might be dialog that is placed over the default border, as shown below.
In paper books such as fanzines, the readability of this dialog depends on whether this is done on the outer side or inner side (bound side) of the page.
While doing this on the outer side does not cause issues with readability, the dialog becomes somewhat difficult to read if this is done on the inner side (bound side).
This is the general term for the lines at the corners of the page. This serves as a guide when setting the finished size of the book.
[POINT] Do not ink over the crop marks
If these areas are covered with color, the crop marks may become invisible.
Some printing shops will not accept fanzine data or commercial manga data without visible crop marks.
■ (3) Cropped border
The border made from lines extending from the inside of the crop marks is called the “cropped border”.
As a principle, anything inside this border will be printed/displayed when finished (This will be the size of the finished book).
For example, if a manga is created on A4 paper, the finished size is usually B5.
When creating works such as fanzines or commercial manga, do not place important pictures or dialog close to the cropped border.
They may be cut off or disappear during finishing.
■ (4) Bleed width (bleed)
This area is important during finishing. There are various terms relating to this area.
The outside of the crop marks is called the “bleed border”.
The width of the area from the “cropped border” to the “bleed border” is called the “bleed width” (pictures inside this area are called “bleed information”).
Drawing as far as the “bleed border” instead of creating frames along the “default border” is called “full bleed”.
The upper side is called the top (天 or “ten” in Japanese) and the lower side is called the bottom (地 or “chi”).
When finishing, pages are trimmed along the cropped border.
However, in the case of paper works such as fanzines, the page’s actual trimmed position may differ by a few millimeters. Therefore, full bleed should be applied to avoid white space from occurring.
As a principle, full bleed is recommended even for e-books, where only the area up to the cropped border is displayed for all pages.
In the case of printed fanzines, bleed widths will differ based on the print shop of choice (generally 3mm-5mm). Check this information in advance on the website of the print shop you plan to use.
The center crop marks are the “+” shaped lines at the top, bottom, left and right of the page.
With fanzine and commercial manga manuscripts, these lines are required to indicate the center of the page for the printing shop staff. They can also be helpful during production of the manga, when you want to center a picture.
[2] Data Production
Next, let's learn the rules for producing the data of each manga volume or book.
■ (1) Number of pages in a work or book
There are basic rules concerning the number of pages in a manga work. Pages are generally drawn in multiples of 8 or 4.
Similar rules also apply to the page composition of book data.
The reason for these restrictions is because multiple pages of a book are printed on both sides of a large sheet of paper.
The sheet is then cut to form the individual pages and then bound.
Pages therefore need to be created in multiples of 8 (if printed with 4 pages on each side of a sheet) or 4 (if printed with 2 pages on each side of a sheet).
As such, while it is easy to add two more sheets to an e-book that was initially supposed to have 20 pages, problems would arise with a paper book.
If your fanzine is too short, you can bring it up to the minimum number of pages by adding features such as a postscript, bonus pages or a contents page.
■ (2) Cover page and back cover page
The cover page, back cover page and the reverse of these two pages are referred to as Cover Pages 1-4.
・Cover page 1: Front cover
・Cover page 2: Back of front cover
・Cover page 3: Back of back cover
・Cover page 4: Back cover
For fanzines, it is custom to submit all of these as a single file, with cover pages 1 and 4 joined together.
Cover pages 2 and 3 are not usually printed, but some printing shops will provide this service for an additional fee, or as part of a plan fee.
If you want to print cover pages 2 and 3, check the website of the printing shop you want to use in advance.
The data for the cover pages is referred to collectively as the “cover page data”. Take care in cases such as when submitting the cover page data ahead of the rest of the data.
Also, be aware that in most cases, cover page 1 is counted as the first page and cover page 4 is counted as the last page.
This count includes cover pages 2 and 3 even if they are blank.
■ (3) Manuscript size
The following sizes are usually used.
Commercial manga: B4 pages (finished in A4)
Fanzines: A4 pages (finished in B5)
The size depends on the purpose or the publishing method, but care needs to be taken when publishing the same file with multiple methods.
For example, commercial manga data produced in B4 size can easily be converted to A4 size for a fanzine, as this is simply a matter of reducing the size.
However, enlarging data can cause issues such as pixelated lines.
If, for example, you are publishing a work as a “commercial manga & e-book”, the data should be produced in B4 size, but A4 size is adequate if you are publishing a “fanzine & e-book”.
Carefully consider how you will publish the work before deciding on the size.
The following resolutions are usually used.
Color manuscripts: 300/350 dpi
Monochrome manuscripts: 600 dpi
Using resolutions larger than the above is not recommended unless the finished print is large (such as posters), as the file will become very large.
■ (5) Color depth (Color mode)
The following color depths (color modes) are usually used.
Color manuscripts: CMYK color
Monochrome manuscripts (when printing books): Duotone
Color manuscripts: RGB color
Monochrome manuscripts: Duotone/grayscale
If you have not yet decided on a publishing format, it is recommended to use the settings for paper books, for the same reason mentioned in the section about manuscript sizes.
When creating a manga manuscript in CLIP STUDIO PAINT, make sure that the layer expression colors are correct for the manuscript settings.
[POINT] Differences between duotone and grayscale
Put simply, they are different in the following ways.
Monochrome duotone: pictures are expressed in either black or white. Gray areas are expressed by tones such as dot tones.
Grayscale: in addition to black and white, gray is used to express shades.
Black and white manga manuscripts are generally produced in duotone.
However, there is no definite rule when choosing a color mode. For example, the gradients of grayscale are more suited to e-books than tones as readers zoom in and out when reading, or your printing shop may have a printer that can cleanly print grayscale.
Please read the following section on moiré in addition to this section, and decide on the best setting for your manuscript.
Moiré appears when dot tones and other patterns are output in an unexpected manner.
Here are various causes of moiré and ways to avoid it.
Most published manga are printed in two colors: black and white.
When the artist wishes to use shades of gray, tones such as dot tones are used in place of actual gray colors to create the illusion of grey.
When publishing an e-book or printing with a printer that can express gray well, there is no reason to use dots.
Understand that processes such as using dot tones with grayscale or using anti-aliasing for dot tones (an effect in which the dots themselves contain gray) are not the intended purpose of tones.
If the tones are not overlaid correctly, this can create moiré that resembles stripes or patterns. Make sure to not overlay dot tones with different numbers of lines, angles or densities.
Changing the size or resolution of manuscripts containing rasterized dot tones can result in a lack of uniformity in the dot size (irregularity of the shapes), causing moiré.
When using PAINT, moiré will not occur when non-rasterized tone layers are output. Due to this, we recommend that you do not rasterize tone layers.
Anti-aliasing is the process of using grey to smooth out the edges of black sections.
This means that if anti-aliasing is applied, gray is applied to the dots themselves.
This distorts the dots’ shape during printing and output, resulting in moiré.
Please note that the same outcome also occurs when applying opacity settings to the tones (changing the alpha value or fill value).
However, it is extremely difficult to avoid moiré in e-books, which will be scaled up and down by readers.
Therefore, when creating works that will only be published as e-books, there may be cases where filling with gray will yield better result than tones.
■ (7) Required pages, etc. when creating book data
In addition to the parts of a book you are likely familiar with, such as the preface, postscript or contents page, the following pages and settings are also required when producing book data. The required items vary depending on the publishing method.
The title page is the first page of the main text seen after opening the cover. It contains the title and other information.
There is not much use for a title page in e-books, and whether one is used in a fanzine also depends on the author's preference, but including one may make page composition easier.
The page numbers printed on the page.
The page number is generally counted from the cover page and displayed at the bottom of each page.
Whether folios are needed depends on the publishing method, but they are required by many printing shops when printing fanzines.
For e-books, meanwhile, there are cases in which folios must not be used.
This includes information on the work and its publication, usually at the end of the work.
Various information is included depending on the situation, including the title of the work, author name, publication date, printing and production company, contact details and website URL.
Whether a colophon is needed depends on the publishing method, but they are required by many printing shops when printing fanzines.
Для рисования комиксов можно использовать практически любой графический редактор. Однако существуют специальные решения, заточенные именно под иллюстрации и японские рисунки – мангу. Одна из таких программ – Clip Studio Paint от разработчика CELSYS.
Описание программы
Ранее графический редактор назывался Manga Studio и использовался исключительно для отрисовки комиксов в японском стиле. Но начиная с 2016 года разработчик доработал все ключевые инструменты и добавил много новых. При этом поменялось и название программы на Clip Studio Paint.

Здесь всё также можно рисовать мангу, а вместе с тем проводить полноценную обработку изображений. Сегодня возможности Clip Studio Paint находятся на уровне Procreate и Photoshop (по части работы с 2Д-графикой).
Ключевые возможности
Редактор одинаково хорошо работает как с растровой, так и векторной графикой. Здесь есть инструменты для создания анимации, смешивания цветов, а также есть возможность синхронизации мобильной модификации с десктопной. Последнее могут предложить далеко не все популярные графические редакторы.
Возможности Клип студио пейнт:
- отдельные группы панелей для каждого направления: анимация, комиксы, иллюстрация;
- работа со слоями;
- полный набор инструментов для рисования: карандаши, кисти, аэрограф, градиент и прочее;
- большой выбор шаблонов для быстрого старта;
- поддержка покадровой мультипликации;
- работа с текстом и сопутствующие эффекты наложения;
- трансформация изображений без потери качества;
- экспорт и импорт во все востребованные форматы, в том числе PSD.
В арсенале самого популярного графического редактора Photoshop отсутствуют специфические инструменты для рисования манги. Последние заметно облегчают, равно как и ускоряют процесс создания японских комиксов.
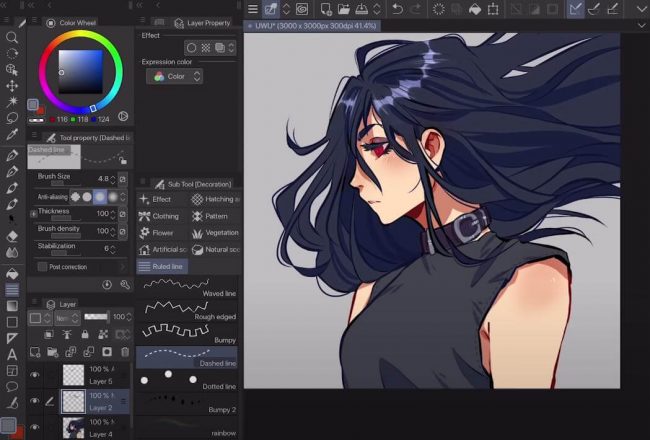
Интерфейс программы
Внешний вид редактора практически полностью идентичен Photoshop. Тем, кто ранее работал с решениями от Adobe будут чувствовать себя как дома. Слева расположены основные инструменты: кисти, стёрка, карандаши, заливка и прочее. Справа находятся панели со слоями, градиентами, стилями и другими вспомогательными элементами.
Верхняя часть интерфейса вариативна и так же как в Photoshop меняется в зависимости от выбранного инструмента. Основное меню построено по классической схеме: работа с файлами, окнами, эффектами и т.п. Ничего оригинального здесь нет.
Установка
Программа не имеет русскоязычной локализации, поэтому у некоторых пользователей могут возникнуть проблемы как с установкой, так и освоением графического редактора. На тематических форумах можно найти русификаторы, но они слетают при каждом новом обновлении Clip Studio Paint.
Системные требования
Здесь многое зависит от поставленных задач. Если требуется исключительно 2Д-рисовка, то достаточно простого ПК с посредственной начинкой. Тогда как для создания анимации нужна более серьёзная техника с большим количеством ОЗУ, многопоточным процессором и хорошей видеокартой.
Графический редактор Clip Studio Paint кроссплатформенный. Программа работает в среде Windows, Мас, а также на мобильных устройствах под управлением Android и iOS.
Рекомендуемые системные требования для Windows:
- ОС версий 8.1, 10 и 11;
- 4-ядерный процессор с поддержкой инструкций SSE2;
- 4 Гб RAM;
- 3 Гб HDD/SSD;
- монитор с развёрсткой в 1280 точек;
- видеокарта с 2Гб DDR3.
Что касается планшетов, то разработчик настоятельно рекомендует специфические решения от Wacom с полноценной поддержкой пера. На рядовых мобильных устройствах программа также работает, но управляться с интерфейсом посредством пальцев достаточно проблематично.
Где скачать
Дистрибутив программы можно найти на официальном сайте разработчика. Существует три модификации графического редактора:
- Trial. Это ознакомительная бесплатная версия. Пользователю даётся 3 месяца (для Galaxy – 6) на изучение ключевых возможностей программы. Модификация ограничена по части экспорта/импорта и сохранений.
- Clip Studio Paint Pro. Версию нужно покупать, 4000 руб. Расширенная версия для профессионалов. Оптимальный набор инструментов для создания концепт-артов, иллюстраций и комиксов.
- Clip Studio Paint EX ≈ 18 000 руб. Полный доступ ко всем имеющимся инструментам, в том числе анимации плюс возможность командной работы над проектами.
Процесс инсталляции
Инсталляция графического редактора проходит в штатном для ОС режиме. Запускаем исполняемый файл дистрибутива и следуем указаниям мастера-помощника. В процессе инсталляции можно изменить путь установки и отключить часть компонентов при необходимости.
Инсталляция мобильных версий происходит посредством фирменных сервисов: Google Play и App Store. Здесь также не должно возникнуть проблем. Переходим на нужный сервис и запускаем установку:
У некоторых пользователей возникают проблемы со скачиванием дистрибутива для ПК. Чаще всего виноваты блокировщики рекламы, запрещающие открытие дополнительных окон. На время установки разработчик рекомендуют отключить подобные плагины.
Как пользоваться программой
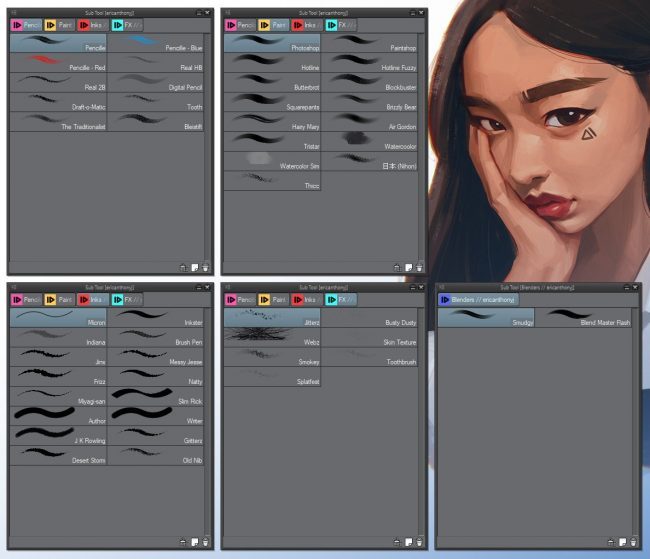
Учитывая, что Clip Studio Paint задумывался как инструмент создания комиксов, в первую очередь имеет смысл познакомиться с кистями. В этой части программа особенно хороша. Редактор предлагает массу пресетов, настроек и возможностей для управления brushes.
Все элементы разбросаны по группам, плюс дополнительно разделены на типы: холодные цвета, сухие краски, масло и т.п. Также имеется более продвинутый аналог Mixer Photoshop. В Clip Studio Paint нет необходимости выбирать отдельные цвета на референсе, можно сразу работать с имеющимися материалами.
Работа в программе:
- Выбираем кисть, при необходимости настраиваем её. Полезный инструмент для новичков – стабилизация.
- Рисуем эскиз.
- Выполняем заливку с помощью инструмента Fill.
- Добавляем при желании векторную графику. Отредактировать любую геометрию можно с помощью инструмента Vector Eraser.
- Сохраняем/экспортируем проект через главное меню File.
Наглядный обзор инструментов в видео:
Для большего удобства можно разместить все ключевые объекты на отдельных слоях. Такой подход заметно облегчает подгонку элементов без вмешательства в основное полотно.
Программы-аналоги
Artweaver
Разработчик предлагает две модификации Artweaver – бесплатную (Free) и расширенную (Plus). Первая имеет некритичные для любителя ограничения, в то время как за вторую придётся отдать больше 2500 рублей.
Программа привлекает в первую очередь своим интерфейсом. Он максимально упрощён и не перегружен лишними элементами. Все нужные панели легко выводятся на рабочую зону и также просто скрываются. Редактор работает со всеми популярными форматами, в том числе профессиональными – RAW, PDF и PSD.
Имеется приличная библиотека фильтров, эффектов, пресетов кистей и градиентов. Artweaver в отличие от Clip Studio Paint полностью переведена на русский язык, что критично для некоторых пользователей. Из минусов можно отметить только отсутствие восстанавливающей кисти и обозначение направляющих посредством клавиатуры, а не Drag&Drop.
Adobe Illustrator
Программа платная и так же как и остальной софт от Adobe имеет высокий порог вхождения. Чтобы разобраться что к чему новичку придётся потратить немало времени. Интерфейс пестрит самыми разными инструментами, среди которых есть специфические для отрисовки комиксов и манги в частности.
Основной упор в Illustrator сделан на работу с единичными элементами. Каждый объект можно как угодно трансформировать, причём без потери качества. Имеется большой выбор кистей, карандашей и геометрии. Работа со слоями облегчит вёрстку серьёзных проектов. Стоимость подписки на программу колеблется в районе 1600 рублей в месяц. Каких-то бесплатных модификаций, увы, нет.
WeDraw
Это простое приложение для обучения рисованию аниме. Местный помощник поэтапно расскажет как оформить рисунок, начиная с азов и заканчивая реализацией сложных приёмов. Для продвинутых пользователей предусмотрен профессиональный режим, где подсказки полностью отключены.
С помощью WeDraw можно создавать вполне презентабельные эскизы. Но наполнять их цветом придётся в другой программе. Приложение распространяется совершенно бесплатно, но время от времени всплывают блоки с рекламой.
Любителям манги Clip Studio Paint обязательна к ознакомлению. Также программа будет полезна иллюстраторам. Разработчик регулярно выпускает обновления, совершенствуя инструменты с оглядкой на отзывы пользователей. Учитывая стоимость продуктов в данном сегменте, Clip Studio Paint со своими возможностями выглядит очень даже привлекательно.
Discover how to draw manga with these expert tips for sketching, shadows and lighting.
Learning how to draw manga isn't an easy thing to do, especially when you're staring at a blank canvas and the possibilities seem endless. Artists always feel excited about creating a new illustration, but with this joy comes many fears and a lot of self-doubt. Apart from being unsure where to start, you can ask yourself questions. Does your illustration look good? What else can you add? Did you add too much? What if you change this? (Our roundup of how to draw tutorials is also sure to help.)
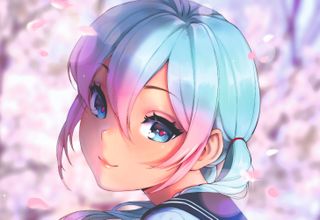
To help you out, artist Asia Ladowska has shared her artistic process along with tips for how to draw manga. For this workshop, Ladowska created a character: Mai. This simple name comes from the name of the month she painted her in. Ladowska started this illustration in May 2020 and didn’t open the file until May 2021, once she'd finally finished it. Follow Ladowska's process below and discover how to draw manga.
Want even more? See our tips on how to draw manga characters. And for new tools (including Clip Studio Paint), here's our pick of the best digital art software around.
How to draw manga
01. Choose an interesting angle
The most difficult angle to work with when drawing a portrait is the frontal view. It needs careful symmetry, balance and well-measured proportions, and when you put all of this together it looks a little… boring. I always struggle to make frontal poses look interesting, and end up trying to second-guess myself. Even if I push through the process, the result doesn't look very attractive. However, if you choose a slightly more dynamic angle then you'll be off to a good start!
02. Sketch quickly
I always try to draft a sketch in under 15 minutes. Let's face it – it's just a sketch. I need to visualise my idea before I forget it! My favourite tool to use in Clip Studio Paint is the Darker Pencil. It's good for sketches, line-art and even shading. I mainly use the software's default brushes, but adjust their settings slightly. For the Darker Pencil I always untick the Adjust by Speed option and change Stabilization to around 15.
03. Colour your sketches
I usually add a splash of colour to my sketches at this stage to bring out the character. Some mistakes can't be spotted when there are just lines in place (and on top of that, many messy lines!). It helps to see the illustration as a shape, and colours help to shape sketches. When you squint you can already see the character. For the lines of this sketch I used a dark navy colour rather than black, and when I changed the layer mode to Color Burn it resulted in beautiful hues that I can use later for shading my character.
04. Don't rush the line-art
I can break down my process into sketch, line-art, colours and post-processing. Yet each of these steps can become complicated. By saying "don't rush the line-art" I don't mean draw slowly, but rather refine the sketch as many times as it takes for the line-art to become easier to draw.
05. Save time using Clip Studio Paint's Smart Bucket tool
Before I knew Clip Studio Paint, I used to waste countless hours drawing flat layers manually. Luckily, you don’t have to make that mistake! The software's Smart Bucket tool is very good at recognising line-art and with one click I can fill in most of the areas. If you play with its settings it can identify lines that have gaps in them, or even textured lines. To make sure all the pixels in my character are selected, I colour the background first on a separate layer. Then I switch off the line-art and colour the reverse on another layer.
06. Use a hard brush rather than a soft airbrush
Good drawings have both soft and hard shadows in place, but if you're not sure what and where they should go, choose the hard edge. Drawings look much better with flat cell shading (just look at all the anime ever made!) rather than mellow soft airbrush shading for everything. I always use a hard brush first and then blend selected edges into soft ones if necessary.
In this step I've added some shading to all of the colour layers. Much like artists who use ambient occlusion, this shading doesn’t define any light source. Rather, it adds some depth to the character and makes her look more interesting. Let me show you how I do it in the next step.
07. Use the Transparent Watercolor brush as a blender
For me, a much more powerful tool than the Blending brush or any other paint brush is the Transparent Watercolor default brush in Clip Studio Paint. You can see the settings I use in the screenshot, but I change them as I paint. If you set Amount of Paint to a low value, it blends the colours together, depending on the direction of your strokes and the pressure you put on your pen, and it doesn't matter what colour you've chosen for your brush. If you set that value to a high number, it'll blend the colour of your brush with the existing colours. This tool has so much versatility, and surprisingly the results doesn't even look like watercolours…
08. Adjust your line widths
Clip Studio Paint is made for painters, illustrators, animators and manga artists, and is packed with functions to help us work faster and more effectively. One of those functions that I can't live without is being able to adjust line width. You can access it under Filters>Correct line>Adjust line width, and it enables you to thicken or narrow the line-art. On the left you can see the lines I drew originally, and on the right are my corrected lines. Thanks to this function my illustration became even more delicate. However, if your art now looks rough and pixellated, I'd recommend duplicating the layer of edited line-art, blurring it a little with Filter>Blur>Gaussian Blur and setting the layer mode to Multiply.
09. Experiment with colours
I can never decide what colours to use! I love playing with colours and changing them to see 'what if…'. There are multiple ways you can do it yourself. You can either select the coloured area in question (or apply it to a whole layer) and use Edit>Tonal Correction>Hue/Saturation/Brightness filter and adjust the sliders, or clip a layer to the one you're editing and set it to Color mode, then add colour with the Bucket tool. You can also add new colours using functions such as Multiply, Color Dodge, Divide… you name it! You can also mix colours and use gradients, too.
10. Put a whole world into the eyes
I do believe that eyes are the window to the soul and I paint them with this in mind. I love painting eyes! It might actually be the eyes that made me fall in love with the manga style art. I endlessly experiment with how I paint them, using a variety of styles, shapes and colours. I often take inspiration from other artists as well, and mix their styles with mine. I wonder if you can see my inspirations in my drawings.
11. Define your light source and add shadows
When creating a base for my shadows I start by adding basic and delicate shading to my character, without defining any light source. This stage adds depth to flat colours and creates a strong base for the actual shadow.
To paint flat shadows I imagine my light source, then add a layer set to Multiply above the Color layers. Next, I paint a shadow with just one colour on this new layer. It's usually greyish purple, but depending on what effect you want to achieve, you can use any colour.
I make my shadows glow by adding another layer above my earlier Multiply one and set it to Color Dodge. Now with a soft brush I paint the areas that I want to glow, using a colour that's low on value and high on saturation.
12. Ignore the rules and just paint
Everything you've just read? Sometimes I don't want to do any of it! To be honest, it's a lot to remember and think about when painting. When I just want to relax while creating art I get my illustrations as far as I can with a coloured sketch, and then add a layer on top of it (or sometimes not even that) and just paint. My favourite tools here are the Darker Pencil and the multifunctional Transparent Watercolor Brush.
13. Use coloured reflections in your art
Here's a cool technique to bring your illustrations to life: add reflected colours in the shadow areas or on the edges where different colours meet. Colours often reflect each other in nature. If the character is placed in an environment with strong red elements for example, red is likely to reflect in some darker colours . The same goes for the blue of the sky or green from the grass. In illustration it can be exaggerated; manga artists often use skin hue around the face on clothes and hair to make the character's skin look soft, almost appearing to glow.
14. Don't feel you have to be amazing at everything
I'm really bad at drawing backgrounds. I know that I'll get good at this when I start practising, but I haven't found the drive to do so just yet. That doesn't mean I can’t create illustrations with backgrounds. I just need to be a little more creative about the fact that I can't paint them! For this illustration I'm using photos I took myself and adjusting them using my photo-editing skills. I crop them, blur, brighten, overpaint and add effects to the point where it's not easy to tell that these are photos in the background.
15. Know when to walk away
Often I'll blast through the entire illustration process, then sit in front of the canvas adding and deleting layers for hours, only to end up exactly where I started. Am I finished? Should I add more? Does it look good? Can it look better?
This article originally appeared in ImagineFX, the world's best-selling magazine for digital artists. Subscribe here.
Читайте также: