Установка mikrotik на kvm
License Update

Creating KVM Guest
Before creating KVM guest we need image file. RouterOS has built in commands to make and modify RouterOS image easily without external tools.
We can proceed with Guest configuration when disk image is created.
As you noticed initrd and kernel properties are empty, which means that hosts kernel and initrd is used.
For example, to add guest without SMP support we can explicitly set initrd and kernel:
Note: Leaving initrd and kernel properties empty is dangerous if Host and Guest will be running different RouterOS versions . Guests other than RouterOS also can break if you leave these values empty.
KVM Guest when created is not automatically started. We must start it manually
System Requirements
Minimal requirements:
- Package version: RouterOS v6.34 or newer
- Host CPU: 64-bit with virtualization support
- RAM: 128MB or more
- Disk: 128MB disk space for the CHR virtual hard drive (Max: 16GB)
Note: The minimum required RAM depends on interface count and CPU count. You can get an approximate number by using the following formula: RAM = 128 + [ 8 × (CPU_COUNT) × (INTERFACE_COUNT - 1) ]
CHR has been tested on the following platforms:
- VirtualBox 5 on Linux and OS X
- VMWare Fusion 7 and 8 on OS X
- VMWare ESXi 6.5
- Qemu 2.4.0.1 on Linux and OS X
- Hyper-V on Windows Server 2008r2, 2012 and Windows 10 (Only Generation 1 Hyper-V virtual machine is supported at the moment)
- Xen Project 4.6.5
- Xen Server 7.1
Warning: Hypervisors that provide paravirtualization are not supported.
Usable Network and Disk interfaces on various hypervisors:
- ESX:
- Network: vmxnet3, E1000
- Disk: IDE, VMware paravirtual SCSI, LSI Logic SAS, LSI Logic Parallel
- Hyper-V:
- Network: Network adapter, Legacy Network adapter
- Disk: IDE, SCSI
- Qemu/KVM:
- Network: Virtio, E1000, vmxnet3 (optional)
- Disk: IDE, Sata, Virtio
- Xen Project:
- Network: E1000, rtl8193, netfront
- Disk: IDE, Sata
- VirtualBox
- Network: E1000, rtl8193
- Disk: IDE, Sata, SCSI, SAS
Note: SCSI controller Hyper-V and ESX is usable just for secondary disks, system image must be used with IDE controller!
Warning: We do not recommend using E1000 network interface if better synthetic interface options are available on specific Hypervisor!
Установка MikroTik RouterOS на VDS VPS Cloud Hosted Router
![]()
RouterOS — операционная система маршрутизаторов (роутеров) MikroTik. Данную операционную систему можно установить на сервер либо виртуальный сервер ( VDS / VPS ) .
Paid licenses
p1 (perpetual-1) license level allows CHR to run indefinitely. It is limited to 1Gbps upload per interface. All the rest of the features provided by CHR are available without restrictions. It is possible to upgrade p1 to p10 or p-unlimited After the upgrade is purchased the former license will become available for later use on your account.
p10 (perpetual-10) license level allows CHR to run indefinitely. It is limited to 10Gbps upload per interface. All the rest of the features provided by CHR are available without restrictions. It is possible to upgrade p10 to p-unlimited After the upgrade is purchased the former license will become available for later use on your account.
p-unlimited
The p-unlimited (perpetual-unlimited) license level allows CHR to run indefinitely. It is the highest tier license and it has no enforced limitations.
Using vlans on CHR in various Hypervisors
In some of hypervisors before Vlans can be used on VMs they need to first be configured on hypervisor it self.
Enable Promiscuous mode in port group or virtual switch that you will use for specific VM.
ESX documentation:
Hyper-V
Hyper-V documentation:
bhyve hypervisor
It wont be possible to run CHR on this hypervisor. CHR cannot be run as paravirtualized platform.
Linode
When creating multiple Linodes with the same disk size, new Linodes will have the same systemID. This will cause issues to get a Trial/Paid license. To avoid this, run the command /system license generate-new-id after the first boot and before you request a trial or paid license. This will make sure the ID is unique.
Some useful articles:
Specific vlan is untagged by nic interface:
Allow passing other vlans:
Adding Interfaces
Lets add to our previously created Virtual Router one interface.
In this case dynamic type is used which creates dynamic virtual interface on the host:
Note: Add and remove interfaces only when KVM guest is shut-down, stopped or disabled. Making changes to running guest may lead to host system crash.
If mac addresses are not specified when creating virtual interfaces, addresses are generated automatically. Generate MAC addresses will be in form of 02:XX:XX:XX:XX:XX. For static interfaces this address will not change during use of guest, for dynamic interface will change every time dynamic interface is created.
More information about virtual interfaces are in virtual-ethernet manual
Packets not passing from guests
The problem: after configuring a software interface (VLAN, EoIP, bridge, etc.) on the guest CHR it stops passing data to the outside world beyond the router.
The solution: check your VMS (Virtualization Management System) security settings, if other MAC addresses allowed to pass if packets with VLAN tags allowed to pass through. Adjust the security settings according to your needs like allowing MAC spoofing or certain MAC address range. For VLAN interfaces, it is usually possible to define allowed VLAN tags or VLAN tag range.
Additional information
Information useful for running KVM guests
Host shutdown
When host is shutting down each guest receives shut-down notification and are give 10 seconds to shut down. After time-out value is reached, guests are killed.
Host and guest update
When new version of RouterOS is updated to host system and you have RouterOS guest with initrd and kernel fields empty, it is good practice to update guest first (even it it does not boot up at current host versions. Then update host and see if guests are running. After guest update incompatibilities between host kernel and guest drivers might prevent guest from booting up properly.
Guest tools
VMWare
Time synchronization
Must be enabled from GUI ('Synchronize guest time with host'). Backwards synchronization is disabled by default - if guest is ahead of host by more than ~5 seconds, synchronization is not performed
Power operations
- poweron and resume scripts are executed (if present and enabled) after poweron and resume operations respectively.
- poweroff and suspend scripts are executed before poweroff and suspend operations respectively.
- If scripts take longer than 30 seconds or contain errors, the operation fails
- In case of failure, retrying the same operation will ignore any errors and complete successfully
- Failed script output is saved to file (e. g. 'poweroff-script.log', 'resume-script.log' etc)
- Scripts can be enabled/disabled from hypervisor GUI ('run VMware Tools Scripts') or by enbaling/disabling scripts from console
Quiescing/backup
Guest filesystem quiescing is performed only if requested.
- freeze script is executed before freezing the filesystem
- freeze-fail script is executed if hypervisor failed to prepare for snapshot or if freeze script failed
- thaw script is executed after snapshot has been taken
- Script run time is limited to 60 seconds
- freeze script timeouts and errors result in backup operation being aborted
- FAT32 disks are not quiesced
- Failed script output is saved to file (e. g. 'freeze-script.log', 'freeze-fail-script.log', 'thaw-script.log')
Guest info
Networking, disk, and OS info is reported to hypervisor every 30 seconds (GuestStats (memory) are disabled by default, can be enabled by setting 'guestinfo.disable-perfmon = "FALSE"' in VM config).
- The order, in which network interfaces are reported, can be controlled by setting 'guestinfo.exclude-nics', 'guestinfo.primary-nics' and 'guestinfo.low-priority-nics' options. Standard wildcard patterns can be used.
Provisioning
Can use the ProcessManager from vim API to execute scripts. Python bindings are available
After using GuestProgramSpec together with an instance of GuestAuthentication as arguments to StartProgramInGuest unique JobID is obtained.
Script progress can be tracked by using the ListProcessesInGuest command. ListProcessesInGuest accepts an array of job id's; passing an empty array will report on all jobs started from API
- ListProcessesInGuest returns an array of GuestProcessInfo instances:
- pid field is set to JobID
- endTime is only set after completion
- exitCode is set to 0 on success and -1 on error
- name is set to 'inline' or 'import' (same as programPath in GuestProgramSpec)
Information about completed jobs is kept around for ~1 minute, or untill ListProcessesInGuest (with the corresponding JobID) is called. If the script fails, a file named 'vix_job_$JobID$ .txt' containing the script output is created. Script run time is limited to 120 seconds and script output is not saved on timeout,
- The vmrun command runScriptInGuest can also be used
- The PowerCLI cmdlet Invoke-VMScript is not supported
- Host/guest file transfer is not supported
Python example
Network, disk, memory and OS info is reported to hypervisor every 30 seconds
- On older hosts (pre 21.06.2017) only the first ipv4 address assigned to interface is visible
Provisioning
Base-64 encoded strings written to (domain local) xenstore path ('vm-data/provision/script') are decoded and interpreted a script-text. Status ('ready', 'running', 'error') is reported in 'vm-data/provision/script/status'. Scripts are accepted only if 'status' != 'running'. Base 64 encoded script output (if any) is written to 'vm-data/provision/script/otuput'.
- When creating a VM scripts can be provided by using xenapi (VM.add_to_xenstore_data)
QEMU guest agent is available. Supported agent commands can be retrieved by using guest-info command. Host-guest file transfer can be performed by using guest-file-* commands. Guest networking information can be retrieved by using the guest-network-get-interfaces command.
Proxmox
Some agent commands can be issued by using Proxmox REST api. Guest filesystem quiescing is automatically performed when taking a snapshot
Where it can be used?
Virtual Router is useful to allow clients or lower-privilege users access their own 'router' and adjust configure as they like without the need for a second hardware.
For example; a WISP can create a virtual router for the clients ethernet port allowing them to define their own firewall settings, while leaving the WISP's wireless settings untouched.
Another useful method is to run guest OS that supports functionality which is not available in RouterOS, for example, Intrusion detection (SNORT), Asterisk or Squid web proxy.
It can also be used as test environment. it is possible to create virtual network within one x86 machine very similar to real network and test how RouterOS behaves before implementing the setup in your production network.
Using bridge on Linux
If Linux bridge supports IGMP snooping, and there are problems with IPv6 traffic it is required to disable that feature as it interacts with MLD packets (multicast) and is not passing them through.
Troubleshooting
General
Sub-menu: /kvm
KVM Guest Properties
To add new KVM guest you will have to issue command add under /kvm menu with attributes as follows:
or it can be comma seperated list:
Warning: vnc-server attribute has been changed since RouterOS 5.0. in older versions instead of vnc-server-address and vnc-server-display was used combine attribute named vnc-server :
Note: If start of guest failed for the first time, then next 20 seconds KVM will attempt to start guest. After 20 seconds it will fail and guest will stay in stopped state.
States of KVM guest
This field is read-only and is set by RouterOS. These are possible values that can be set:
Cloud Hosted Router (CHR) is a RouterOS version intended for running as a virtual machine. It supports the x86 64-bit architecture and can be used on most of the popular hypervisors such as VMWare, Hyper-V, VirtualBox, KVM and others. CHR has full RouterOS features enabled by default but has a different licensing model than other RouterOS versions.
Running on VMware ESXi
Changing MTU
VMware ESXi supports MTU of up to 9000 bytes. To get the benefit of that, you have to adjust your ESXi installation to allow a higher MTU. Virtual Ethernet interface added after the MTU change will be properly allowed by the ESXi server to pass jumbo frames. Interfaces added prior to MTU change on the ESXi server will be barred by the ESXi server (it will still report old MTU as maximum possible size). If you have this, you have to re-add interfaces to the virtual guests.
Example. There are 2 interfaces added to the ESXi guest, auto-detected MTU on the interfaces show MTU size as it was at the time when the interface was added:
Связанные статьи
Для установки SSH-соединения из-под Windows скачайте и запустите программу-клиент PuTTYЗапустите.
VPS (англ. Virtual Private Server) или VDS (англ. Virtual Dedicated Server) — услуга, в рамках.
КомандаОписание Системная информация arch отобразить архитектуру компьютера uname.
ВАЖНО: для успешного создания NS в ISP Manager Вам нужно не менее 2 ip. Убедитесь, что вы.
Связка двух веб-серверов, один из которых выполняет функцию фонтенда (Nginx), другой - бэкенда.
Configuring a virtual network
Right now you saw that the virtual interface is visible in the Host Interfaces menu as tap1 and also in the guest interfaces menu as ether1. You can add an IP address on both interfaces, and set up networking. Creating a bridge between the virtual interface and a physical interface allows traffic to pass.
As an example lets make three virtual routers connected to each other on the same broadcast domain. File:Kvm-test-bcast.jpgCreate images and guests:
Create a bridge interface which will simulate broadcast domain and add virtual interfaces:
Now we can start virtual machines and verify if dynamic interfaces are created:
Now we can connect with console to each of guests and set up ip addresses from the same network and verify reachability. R1
Console
To connect using console:
To disconnect from the metarouter virtual machine console, hit CTRL + A and then Q to Quit back to your Host console (if you are using minicom, hit CTRL + A twice):
Before connecting with VNC client guest needs some configuration changes.
VNC servers address in this case is the address on the host reachable from remote locations. Address is followed by screen number.
Now we can try to connect from remote location:
Removing KVM guest
KVM guest has two parts in RouterOS - configuration (kvm, virtual-ethernet, /kvm interface) and image file (/file). If image file is removed, but KVM guest is still running, then file will be removed from file menu but still exist until guest is shut-down or disabled, at that moment file will be removed and storage space returned to available storage on the router.
Настройка RouterOS
Настраиваем IP сервера
После этого вы уже можете перейти к настройке в веб-интерфейсе, для этого в браузере введите IP который вы настраивали выше.
После первого подключения обязательно установите пароль для пользователя admin
- mikrotik, routeros, chr, vds, vps, Cloud Hosted Router
- 8 Пользователи нашли это полезным
Requirements
KVM requires Intel VT-x or AMD-V CPU virtualization support. Here you can find a list of supported CPUs, for more detailed information look on vendor's web site.
Each guest requires at least 16 MB of RAM and sufficient storage space on image file. Once image file have been created, its size cannot be increased.
KVM support in RouterOS is enabled if kvm package is installed.
Free licenses
There are several options to use and try CHR free of charge.
The free license level allows CHR to run indefinitely. It is limited to 1Mbps upload per interface. All the rest of the features provided by CHR are available without restrictions. To use this, all you have to do is download disk image file from our download page and create a virtual guest.
60-day trial
In addition to the limited Free installation, you can also test the increased speed of P1/P10/PU licenses with a 60 trial.
You will have to have an account registered on MikroTik.com. Then you can request the desired license level for trial from your router that will assign your router ID to your account and enable a purchase of the license from your account. All the paid license equivalents are available for trial. A trial period is 60 days from the day of acquisition, after this time passes, your license menu will start to show "Limited upgrades", which means that RouterOS can no longer be upgraded.
If you plan to purchase the selected license, you must do it within 60 days of the trial end date. If your trial ends, and there are no purchases within 2 months after it ended, the device will no longer appear in your MikroTik account. You will have to make a new CHR installation to make a purchase within the required time frame.
Warning: If you plan to use multiple virtual systems of the same kind, it may be possible that the next machine has the same systemID as the original one. This can happen on certain cloud providers, such as Linode. To avoid this, after your first boot, run the command "/system license generate-new-id" before you request a trial license. Note that this feature must be used only while CHR is running on free type of RouterOS license. If you have already obtained paid or trial license, do not use regenerate feature since you will not be able to update your current key any more
CHR Licensing
The CHR has 4 license levels:
Perpetual is a lifetime license (buy once, use forever). It is possible to transfer a perpetual license to another CHR instance. A running CHR instance will indicate the time when it has to access the account server to renew it's license. If the CHR instance will not be able to renew the license it will behave as if the trial period has ran out and will not allow an upgrade of RouterOS to a newer version.
After licensing a running trial system, you must manually run the /system license renew function from the CHR to make it active. Otherwise the system will not know you have licensed it in your account. If you do not do this before the system deadline time, the trial will end and you will have to do a complete fresh CHR installation, request a new trial and then license it with the license you had obtained.
License Speed limit Price Free 1Mbit FREE P1 1Gbit $45 P10 10Gbit $95 P-Unlimited Unlimited $250 Установка Mikrotik CHR на виртуальную машину Proxmox
Не так давно мы рассказывали о виртуальном роутере Mikrotik CHR (Cloud Hosted Router), который представляет собой специальную версию RouterOS для виртуальных сред. Это дает возможность использовать все возможности Mikrotik без оглядки на производительность и физические ограничения роутеров официальной линейки. Сегодня мы поговорим о том, как установить CHR на виртуальную машину Proxmox, ничего сложного в этом процессе нет и даже есть соответствующая статья в официальной Wiki, но гладко было на бумаге.
Научиться настраивать MikroTik с нуля или систематизировать уже имеющиеся знания можно на углубленном курсе по администрированию MikroTik. Автор курса, сертифицированный тренер MikroTik Дмитрий Скоромнов, лично проверяет лабораторные работы и контролирует прогресс каждого своего студента. В три раза больше информации, чем в вендорской программе MTCNA, более 20 часов практики и доступ навсегда.
Изначально мы не собирались писать эту статью. Какой смысл переписывать то, что есть в официальной документации, тем более что там представлен готовый скрипт. Как говориться: нажми на кнопку и получи результат. Хотя сами мы его никогда не использовали, предпочитая все делать вручную. На самом деле процесс несложный: скачать и сконвертировать образ диска, затем создать виртуальную машину с ним. Но недавно с таким вопросом к нам обратился коллега и мы дали ему ссылку на официальную документацию.
А вот дальше все пошло не так. Скрипт оказался фактически нерабочим, кроме того, содержащим достаточно грубые ошибки. Начнем по порядку.
Но скрипт игнорирует ошибку получения образа и продолжает свою работу, создавая виртуальную машину без жесткого диска.
Следующая ошибка - перед предложением указать свободный VM ID выводится список только виртуальных машин, существующие контейнеры игнорируются. И хотя Proxmox не даст создать еще одну виртуалку с существующим VM ID, но мусор в виде образа диска в системе останется.
После указания VM ID проверка на существование виртуальной машины производится некорректно, проверяется наличие каталога с образом диска, в то время как современные виртуалки могут использовать Thin LVM. Правильно будет проверять наличие конфигурационного файла виртуалки. При этом логика самой проверки неверна, установив наличие существующего образа скрипт предложит ввести новое значение VM ID, но новое значение проверяться никак не будет. Т.е. можно два раза указать неверное значение и скрипт продолжит свою работу.
С учетом всего вышесказанного мы серьёзно переработали скрипт и добавили в него новые функции. Наш скрипт выполняет следующие действия:
- Скачивает образ Mikrotik CHR указанной версии и проверяет успешность этого действия
- Выводит список всех виртуальных машин и контейнеров
- Проверяет введенный VM ID на существование виртуальной машины или контейнера с таким идентификатором
- Конвертирует образ и изменяет размер виртуального жесткого диска на указанный пользователем (новая функция)
- Создает виртуальную машину с нужным образом диска
При возникновении ошибок на любом из этапов скрипт сообщает об ошибке и завершает свою работу.
Разберем его работу подробнее.
Затем производится проверка успешности скачивания и распаковки образа:
Если файл образа не существует - скрипт завершит свою работу.
![CHR_ProxMox_installation-001.jpg]()
В случае успеха он выведет пользователю список не только виртуальных машин, но и контейнеров:
После ввода желаемого VM ID происходит проверка наличия конфигурационных файлов, как для виртуалок, так и для контейнеров:
Если для указанного VM ID будет найден конфигурационный файл, скрипт сообщит что такая машина или контейнер существуют и завершит свою работу.
![CHR_ProxMox_installation-002.jpg]()
После прохождения всех проверок, казалось бы, можно создавать виртуальную машину, но не будем спешить. По умолчанию образ диска имеет объем всего 64 МБ, что во многих случаях будет явно недостаточно.
![CHR_ProxMox_installation-003.jpg]()
Поэтому мы добавили в скрипт новую функцию - установку нужного размера виртуального диска. Требуется указать нужное значение в ГБ или ноль, если вы не хотите увеличивать диск.
После чего будет выполнена конвертация образа, установка указанного размера и создание виртуальной машины.
Все последующие действия требуется выполнять с правами суперпользователя root.
Сначала создадим сам файл скрипта в корневой директории суперпользователя:
И внесем в него приведенный выше текст, также можно скачать готовый скрипт с нашего сайта:
Например, это можно сделать командой:
Затем, вне зависимости от того, каким образом вы создали скрипт, сделаем его исполняемым:
Теперь его можно запускать, для этого, если вы находитесь в /root выполните:
Из иных расположений:
В ходе работы скрипта вам потребуется ответить на три вопроса: указать версию RouterOS так как она указана на сайте (6.48.1 или 6.49beta27), номер идентификатора виртуальной машины (VM ID) и желаемый размер виртуального диска в ГБ:
![CHR_ProxMox_installation-004.jpg]()
Результатом работы скрипта будет созданная виртуальная машина, перед запуском вы можете проверить и изменить ее параметры:
![CHR_ProxMox_installation-005.jpg]()
Обратите внимание, что скрипт создает единственный сетевой интерфейс, который подключает к vmbr0. Сама же RouterOS настроена таким образом, что на интерфейсе ether1 включен DHCP-клиент и при наличии в сети DHCP-сервера автоматически получит от него адрес. Однако вы можете настроить любую иную сетевую конфигурацию. Более подробно читайте в нашей статье о настройке сети в Proxmox VE.
![CHR_ProxMox_installation-006.jpg]()
Также не забудьте проверить и включить автоматический запуск виртуальной машины, по умолчанию он выключен:
![CHR_ProxMox_installation-007.jpg]()
Если же вам нужно расширить виртуальный диск уже существующей машины, то ее следует выключить и выполнить следующую команду:
В данном случае мы увеличили диск виртуальной машины с идентификатором 105 на 4 ГБ.
Научиться настраивать MikroTik с нуля или систематизировать уже имеющиеся знания можно на углубленном курсе по администрированию MikroTik. Автор курса, сертифицированный тренер MikroTik Дмитрий Скоромнов, лично проверяет лабораторные работы и контролирует прогресс каждого своего студента. В три раза больше информации, чем в вендорской программе MTCNA, более 20 часов практики и доступ навсегда.
Сразу скажу, что в сфере IT я не очень давно и многие моменты "батям" системного администрирования могут показаться смешными и/или очевидными (как, к примеру, синтаксис в NIXовых ОС). Прошу сильно не кидаться в меня ссаными тряпками. Скорее всего, вам эта инструкция будет не интересна. Но если дадите какие-то советы, то всегда за них благодарен.
Данная статья сделана на основе инструкции пользователя Iliasla на форуме Mikrotik. Спасибо ему большое за нее. И да, если у кого хорошо с английским, то можно просто воспользоваться оригиналом. По сути, это перевод и чуть более удобное представление.
Информации про выбор хостера, думаю, достаточно и эту тему оставим за рамками данной статьи. Скажу лишь, что задачей было найти азиатского хостера (ну или минимально завязанного на западные страны, по понятным причинам) с азиатскими же локациями расположения серверов. Страна должна иметь максимально лояльное отношение к другим странам. Эти условия были выполнены частично, т.к. одним из владельцев хостинга является американская компания.
![]()
Стоит также отметить, что у данного хостера нет возможности залить образ ОС. на виртуальный сервер.
Кроме того, на Хабре уже была статья про установку Mikrotik CHR на VPS, но как следует из предыдущего тезиса, она не совсем подойдет в данном случае.
Инструкция по установке Mikrotik CHR на виртуальный сервер хостера vpsserver.
Регистрируемся на хостинге и создаем новый сервер.
На втором шаге выбираем тип операционной системы. Нам понадобится CentOS.
![]()
На этапе 3 выбираем минимальную конфигурацию. Много ресурсов для него нам не потребуется.
Никаких дополнительных опций в обязательном порядке подключать не требуется. В общем то, даже периодический бэкап не имеет смысла, т.к. есть возможность сделать бэкап в ручном режиме, частая смена конфигураций сервера нам не грозит, а сам микротик имеет великолепную функцию песочницы - включается безопасный режим и даже если что-то накосорезил, то он сам вернет всё как было если что-то пойдет не по плану.
И вот у нас запущен VPS со стандартной минимальной ОС.
![]()
Запускаем PuTTY, подключаемся к нашему серверу используя логин и пароль, заданные нами в веб-интерфейсе.
![]()
Дальше собственно начинается сама инструкция, что делать с сервером.
Устанавливаем всё необходимое. Так как CentOS это один из самых легких и как следствие пустых дистрибутивов Linux, то и необходимые пакеты необходимо доустанавливать вручную. Везде добавлял ключ -y т.к. ленивая жопа и мне лень каждый раз соглашаться - он позволяет отвечать на все вопросы при установке "да".
Скорее всего, потребуется добавить репозиторий пакетов.
Устанавливаем текстовый редактор nano.
yum install nano -y
Устанавливаем аналог Norton Commander (да, да, вот тут от линуксоидов сейчас в меня полетят ссаные тряпки, о которых говорил раньше, но через него реально удобно проверять, всё ли прошло успешно).
yum install mc -y
yum install unzip -y
Обновляем всё, что только можно
Через веб-интерфейс перезагружаем сервер в режиме восстановления. Это обязательно. Если не сделать этого, то наш сервер превратится в тыкву и в конце концов нам его заблокируют т.к. CPU будет работать на 146%. Придется писать в техподдержку что бы разблокировали и запускать ребилд после чего начинать всё заново, т.к. ОС будет повреждена.
Узнаем и записываем изначальные сетевые настройки своего сервера (нас интересует сетевой интерфейс (скорее всего он будет eth0), маска сети (скорее всего 255.255.255.0), адрес шлюза (скорее всего тот же, что и адрес сервера только с нулем на конце).
Снова через PuTTY подключаемся к серверу и монтируем раздел tmp
mount -t tmpfs tmpfs /tmp/
На сайте Микротика выбираем необходимый дистрибутив в формате RAW и копируем ссылку на него для последующей загрузки. На момент написания статьи стабильной версией является 7.1.3.
В командной строке переходим в смонтированную директорию и загружаем туда архив:
Необходимо определить имя диска.
В нашем случае это диск /dev/vda
Разворачиваем образ на диск.
dd if=chr-7.1.3.img of=/dev/vda bs=4M oflag=sync
Проверяем, что теперь у нас два диска (vda1 и vda2)
fdisk -l | grep da
Запускаем Midnight Commander (олдфаги вытирают слезы ностальгии о Norton Commander).
Монтируем развернутый образ
mount /dev/vda1 /media/vda1
Переходим в папку /media/vda1 и создаем папку boot и внутри папку grub2. В результате должна получиться следующая структура папок:
Внутри получившейся папки запускаем текстовый редактор nano (в нижней строке Midnight Commander есть командная строка):
В открывшийся текстовый файл копируем следующие три строчки:
setparams 'Grub 2'
![]()
Нажимаем Ctrl+X, соглашаемся, что файл будет записан (Y + Enter) и даем название файлу grub2.cfg
![]()
В папке должен появиться файл с конфигурацией загрузчика grub2.cfg
Выходим из всех папок в Midnight Commander в корневой каталог и затем выходим из Midnight Commander.
Записываем все данные из памяти и размонтируем образ
(не обязательно) Проверяем, что диск размонтирован. Запускаем Midnight Commander, переходим в папку /media/vda1. Она должна быть пустой.
Закрываем Midnight Commander и через командную строку перезагружаем сервер:
echo 1 > /proc/sys/kernel/sysrq
echo b > /proc/sysrq-trigger
После выполнения второй команды связь оборвется.
В веб-интерфейсе хостера перезагружаем сервер уже в нормальном режиме (т.к. после перезапуска он снова будет запущен в режиме восстановления):
Ждем, когда сервер закончит перезагружаться (вместо статуса Pending должен появиться статус Running).
Там же в веб-интерфейсе открываем консоль и назначаем пароль.
Осталось прописать сетевые настройки для последующего подключения через winbox. В командной строке после авторизации пишем (да, она показалась какой-то кривой и копипастить у меня не получилось - вероятно, придется писать ручками):
/ip address add address=YOUR.IP.ADD.RESS/MASK
Эти данные мы получили в пункте 3.
/ip route add gateway=YOUR.GATE.WAY.IP
Стоит обратить внимание, что скорее всего, так как микротик переписывает полностью раздел, соответственно и адрес шлюза скорее всего поменяется на стандартный микротика. То есть, вместо ноля на конце адреса шлюза будет единица.
Можно проверить в той же командной строке, прописался ли проброс маршрута командой ip route
Если настроено всё правильно, то отправив, к примеру, ping 8.8.8.8 мы увидим, что пакеты отправляются. Если они теряются, то что-то настроено неправильно.
Всё, можно подключаться через winbox (ссылка на скачивание).
(не обязательно, но очень рекомендуется) Так как практически вся настройка Микротика выполняется через winbox, то в целях безопасности лучше всё лишнее отключить.
Остальную настройку описывать не вижу смысла, т.к. возможностей и соответственно задач, для чего нужно настраивать Mikrotik CHR, огромное количество. К тому же, мне самому в ближайшее время предстоит разбираться в функционале.
Данная же статья написана лишь потому, что сам потратил много времени (по большей части в силу своей неопытности) и что бы другие могли пройти мимо всех граблей, по которым я в течении недели устраивал забеги.
Эту статью писал "по свежим следам", но для ее написания повторно проходить все шаги не готов. Поэтому, где-то могут быть неточности (но по идее не должно быть). Если что - пишите в комментарии вопросы, где случились "затыки". Постараюсь вспомнить и подсказать.
Kernel-based Virtual Machine (KVM) is the method to run multiple guest operating systems on one RouterOS host. KVM can be used only on x86 machines that have CPU with virtualization support .
Connecting to the virtual machine
There are two ways how to connect to KVM Guest:
Reference
Установка RouterOS на VDS
Для установки нам потребуется любой VDS сервер, подойдет сервер с минимальными характеристиками. У нас вы можете заказать сервер уже с предустановленной RouterOS . Устанавливаем на сервер любую linux систему. В данной инструкции, в качестве операционной системы сервера, будет использоваться Ubuntu Server 20.04
Создаем временный раздел для хранения образа диска
Переходим на сайт MikroTik и переходим в раздел Software
![]()
Скачиваем RAW образ из раздела Cloud Hosted Router. Копируем ссылку на загрузку ( правой кнопкой мышки на дискету и выбираем копировать ссылку)
На сервере выполняем команду
Устанавливаем unzip для распаковки zip архива
Определяем имя диск на вашем сервере
В нашем случае - sda
Записываем распакованный образ на диск
где chr-7.1beta2.img - файл образа из архива
/dev/sda - диск виртуального сервераПроизводим перезагрузку сервера командами
После загрузки сервера, вы не сможете подключиться к нему удаленно, так как на сервере не указан Ваш IP. Для дальнейшей настройке сервера используйте KVM/VNC подключение к серверу.
![]()
Стандартный логин admin без пароля.
How to Install CHR
We provide 4 different virtual disk images to choose from. Note that they are only disk images, and you can't simply run them.
- RAW disk image (.img file)
- VMWare disk image (.vmdk file)
- Hyper-V disk image (.vhdx file)
- VirtualBox disk image (.vdi file)
Steps to install CHR
-
virtual disk image for your hypervisor
- Create a guest virtual machine
- Use previously downloaded image file as a virtual disk drive
- Start the guest CHR virtual machine
- Log in to your new CHR. Default user is 'admin', without password
- p1 upgrade to p10
- p1 upgrade to p-unlimited
- p10 upgrade to p-unlimited
Please note that running CHR systems can be cloned and copied, but the copy will be aware of the previous trial period, so you cannot extend your trial time by making a copy of your CHR. However, you are allowed to license both systems individually. To make a new trial system, you need to make a fresh installation and reconfigure RouterOS.
Installing CHR
Getting the License
After the initial setup a CHR instance will have a free license assigned. From there, it is possible to upgrade the license to a higher tier. Once you have a trial license all the work with the license is done on the account server where it is possible to upgrade license to a higher tier unless it is p-unlimited already.
Upgrade from free to p1 or higher
Using WinBox (Sytem -> License menu):
![CHR Licence Renew]()
![CHR Licence Renew]()
Using command line interface:
To acquire a higher level trial, set up a new CHR instance, renew the license and select the desired level.
![Account server]()
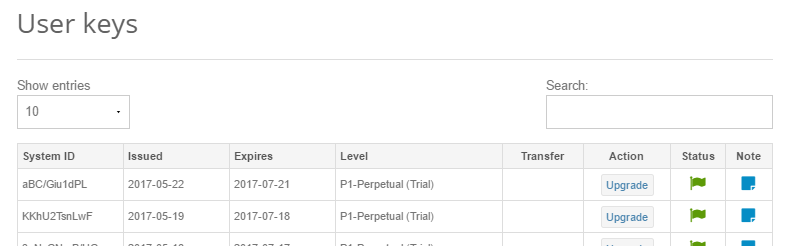
You will be presented with a list of your CHR machines and licenses:
![Account server]()
To upgrade from a Trial to a Paid license click 'Upgrade', choose the desired license level (it can be different than the level of the trial license) and click 'Upgrade key':
![Account server]()
Choose the payment method:
![Account server]()
It is possible to pay using account balance (deposit), credit card (CC), PayPal or using Balance (prepaid) key (if you have any).
Upgrade from higher tier up
Читайте также: