
Установка и настройка oracle bi
In this tutorial, you learn how to install Oracle Business Intelligence (Oracle BI) Suite Enterprise Edition (EE) on Windows.
Time to Complete
Approximately 1 hour
1- Download


Чтобы скачать, требуется чтобы вы вошли в систему используя аккаунт Oracle, Вы можете бесплатно зарегистрировать аккаунт.


Installing Oracle BI EE
This topic describes the process of downloading and running the installation wizard for the Oracle BI EE platform components.
For this installation, a single instance of Oracle Database 10g is deployed locally.
For this installation you need to download the software from OTN. Navigate to the directory where the files were unzipped, and double-click the setup.exe file located in the Windows\Server\Oracle_Business_Intelligence subdirectory.
The InstallShield Wizard appears and prepares your Java Virtual Machine, enabling you to easily perform your Oracle BI EE installation using the wizard.
If you are running Windows 2003 or Windows XP, follow the instructions to disable DEP (Data Execution Protection) if DEP is presently running on your machine; otherwise, click Next.
In this step you choose both a product directory and a data directory. The Basic installation type deploys components in stand-alone Oracle ApplicationContainers for J2EE (OC4J) or in Microsoft IIS. If you are using Oracle Server 10.1.3.1.0 or later, select Advanced.
This installation assumes that OC4J is used. Accept the default names for both directories and accept the Basic installation type. Click Next.
Note: If you are running Oracle Application Server 10.1.3.1.0 or later and you have selected the Advanced option, you will be asked to choose: the Installation Type (Compete, Client Tools, and so forth), the application server running Presentation Services (Oracle Application Sever or Microsoft IIS), and the location for the server.
If you want to perform a custom installation, select the Advanced option and click Next. Select the Custom option button and click Next. Choose the components that you want to install and click Next.
Click the Complete option button to perform a full installation for this setup. This installs the following components: Oracle BI Server, Oracle BI Presentation Services, Oracle BI Client Tools, Oracle BI Disconnected Client, and Oracle BI Publisher. Note: ODBC and JDBC drivers will be installed as well.
Click Next.
Next you choose the application server that runs Presentation Services and Presentation Services Plug-Ins. Click the option button for Oracle Containers for J2EE (OC4J) and click Next.
Now browse to locate your JDK location (JAVA_HOME environment variable). Note: As mentioned in the Prerequisite section, you must be running Java SDK version 1.5.0 or later.
Specify a password for the oc4jadmin password text box. This password is used for future oc4j maintenance. Click Next.
Note: If you selected the Advanced option in step 4, you need to identify the location of the Oracle Application Server.
Whether your server participates in a cluster or not, you need to choose how to start the services. If you choose Automatic, machine boot time will increase. Click Next.
Accept the default error message language and click Next.
10.
A summary of your installation appears. Click Next.
The InstallShield proceeds with the installation.
A confirmation window appears after the installation has completed successfully. Click Next.
A second summary window appears, providing you with useful information about OC4J. Click Next
Click Finish to restart your machine.
Configuring Your Data Sources
After the InstallShield Wizard completes the Oracle BI platform installation, there are a number of additional tasks you must perform in order to properly configure the server components.
The installation creates a sample repository file (paint.rpd) in \OracleBI\server\Repository. You use the Administration Tool to create, edit, and configure, or import a repository file.
For this installation, an existing repository named sh.rpd is used. Copy sh.rpd from here.
The repository name, sh.rpd, must match the repository name within the NQSConfig.ini (or NQClusterConfig.ini, if you performed a cluster installation) file, which is also created during installation. The NQSConfig.ini file is located in \OracleBI\server\Config.
Navigate to \OracleBI\server\Config and open the NQSConfig.ini file in Notepad and ensure that the entry matches your repository name. Close the configuration file.
You will need to restart the Oracle BI Server service to load the new repository into memory. Select Start > All Programs > Administrative Tools > Services.
Select Oracle BI Server, right-click, and select Restart from the shortcut menu.
Use the Windows Administrative Tools program to define the data source connection.
Select Start > All Programs > Administrative Tools > Data Sources (ODBC).
The ODBC Data Source Administrator window appears. Click the System DSN tab.
Click Add. When the Create New Data Source window appears, scroll down to locate the driver for the data source. Select your driver as indicated in the screenshot below and click Finish.
The Oracle ODBC Driver Configuration window appears. The Data Source Name must be the same as the instance name, in this case, orcl SH.
The TNS Service Name can be the service name name or the tnsnames entry name recorded in the tnsnames.ora file. For this installation, it is orcl.
Note: If you run your setup on a different instance, your tnsnames.ora file may contain a different TNS Service Name. If this is the case, you must use this TNS Service Name.
The User ID (sh) must match that within the connection pool. The connection pool is an object in the Physical layer of the repository that describes access to the data source. It contains information about the connection between the Oracle BI Server and that data source. It should be noted that the Data Source Name field for the connection pool within the Administration Tool must match the entry in your tnsnames.ora file.
Note: When you create the Physical layer by importing a schema for a data source, the connection pool is created automatically.
For additional information about creating the Physical layer and setting up connection pools and data sources, refer to the Oracle Business Intelligence Server Administration Guide.
Click Test Connection. Enter the Service Name, User Name, and Password that correspond to the appropriate items in step 4, and click OK.
The ODBC Driver Configuration tests successfully. Click OK twice to close the Oracle ODBC Driver Configuration window.
Запуск и остановка Oracle BI 11g
Запуск сервера должен осуществляться только из под пользователя, который выполнял установку сервера. В противном случае возможно возникновения ошибок доступа к файлам сервера!
% MIDDLEWARE_HOME% \instances\instance1\bifoundation\OracleBIApplication\coreapplication\StartStopServices.cmd start_all
% MIDDLEWARE_HOME% \instances\instance1\bifoundation\OracleBIApplication\coreapplication\StartStopServices.cmd stop _all

2014-01-30 в 16:21, admin , рубрики: linux, oracle linux, администрирование серверов, Серверное администрирование, метки: linux, oracle linux, администрирование серверов
В данной статье описывается процесс установки сервера приложений Weblogic 12 компании Oracle и развёртывание (deployment) модуля аналитической платформы BI Publisher. Статья выполнена в виде небольшого руководства.
Будьте осторожны, количество картинок зашкаливает.
Предисловие
Статья выполнена в виде мануала (хаутушки) по установке сервера приложений Weblogic и модуля отчётов BI Publisher в операционной системе GNU/Linux. Постарался изложение сделать как можно более подробным, поэтому число картинок приличное.
Краткое описание что есть что
WebLogic Server — это мощный, масштабируемый сервер приложений Java энтерпрайз уровня с упрощённой и расширенной системой управления, высокой производительностью. Он полностью поддерживает спецификацию Java EE 5.0. Для создания приложений есть множество фреймворков и технологий, среди которых такие как веб-сервисы, JMS, EJB, RMI, JDBC, XML. Как пишет оракль это Сервер №1 для приложений традиционных и облачных сред. Включает в себя инструменты быстрой разработки, обеспечения безопасности и администрирования.
Oracle BI Publisher — один из модулей аналитической платформы Oracle Business Intelligence Enterprise Edition. Это компонент для создания печатных отчётов и документов. Например таких, где форма отчёта даже важней как чем само содержание — какие-нибудь справки, договоры и прочия, в которых нужно чётко прописывать шапки, буковки да циферки, а строчка 27 должна быть отпечатана именно вот таким шрифтом и с таким-то отступом (ох уж эта бюрократия). В общем всё что может понадобиться предприятию вывести в виде документа, предварительно вставив туда какие-то данные. Помимо этого есть возможности делать отчёты с расчётной графикой.
Установка Weblogic
В распоряжении имеется:
сервер на базе ОС GNU/Linux
и файл wls1211_generic.jar.
В целях безопасности, дабы не запускать Weblogic от суперпользователя, а так же исходя из требований самого установщика, который отказывается стартовать в сеансе суперпользователя, создаю системного непривилегированного пользователя oracle. Для установочного файла задаю права доступа на полный доступ и исполнение:
Установка будет происходить в графическом режиме, хотя установщик позволяет работать в консольном режиме (ключ -mode=console) или производить установку с помощью файла сценария в тихом режиме. Захожу в консоль под учётной записью пользователя oracle и запускаю процесс установки:

Процесс пошёл.

Здесь предлагается выбрать место, где будет находится домашняя директория для файлов Weblogic.

Поступает заманчивое предложение о регистрации (Next).

Ноль внимания на все страдания (No).

Не смотря на заманчивость предложения, выбираю продолжение (Next).

Предупреждение, что не указан почтовый адрес. Всё равно (No).

Всё так же отказ (No).

Продолжить, не смотря на предупреждения (Continue).

Окно выбора варианта установки: стандартная, выборочная. Для своих нужд подходит выборочная.

На этом шаге предлагается сделать выбор устанавливаемых компонентов.

Смотрим, что у нас есть из Java.

Что бы не заморачиваться потом с изменением пути до актуальной версии Java после обновления, сказал системе, что Java лежит в /usr/java/latest. И только там.

Удостоверяемся, что всё устанавливается куда надо.

И устанавливается то что надо.

Процесс пошёл.

После окончания действа установки будет открыто окно с предложением перекурить запуска оснастки быстрых настроек.

Вот собственной персоной сама оснастка. Она предлагает запустить развёртывание нового сервера приложений, обновить старый, либо предаться увлекательному чтиву.

Непосредственно интересует установка нового за этим мы сюда и собрались, поэтому ей и займёмся.

Как домен вы назовёте так он себя и поведёт: предлагается на выбор обозвать домен и разобраться с его будущим месторасположением.

Настройка аутентификации администратора. Здесь задаётся логин и пароль для доступа в консоль администрирования.
На данном этапе система установки предлагает выбрать какую Java-машину следует испльзовать. Как и ранее сказал системе, что Java лежит в /usr/java/latest.

Здесь следует выбрать опции конфигурации, которые собираемся настраивать. Пока настройка каснётся административных частей, остальные можно настроить после установки непосредственно в окне конфигурации WedLogic.

Можно указать свой порт, на котором будет работать WedLogic, прослушиваемые интерфейсы, при желании и возможности подключить доступ по SSL.

Контрольное окно — проверка правильности выбранных параметров перед процессом установки.

Процесс пошёл.
После окончания установки заходим в окно управления WebLogic. Для этого с адресной строке браузера следует указать путь:

После ввода логина и пароля открывается окно административной консоли.
Установка Publisher
Теперь можно приступить к разворачиванию (deployments) модуля печатных форм аналитической платформы BI Publisher (xmlpserver). Установка будет выполняться ручками без привлечения runInstaller.
Необходимо создать директорию, которой будет разворачиваться Publisher:
Теперь распаковываем архив с модулем:
В распакованном архиве находим директорию manual, в ней директорию generic, в которой будет лежать интересующий нас файл xmlpserver.war. Вот его и скопируем в заранее созданную директорию:
Распоковываем архив и удаляем лишнее:
Теперь надо вернуться в директорию ранее распакованного zip-архива в каталог manual и скопировать от туда директорию XMLP со всем её содержимым в каталог xmlpserver:
Ещё немного терпения и цель достигнута.
В директории /home/oracle/Oracle/xmlpserver/WEB-INF должен лежать файл xmlp-server-config.xml со следующим содержимым:
Его надо изменить под свой вариант установки:

Теперь уже можно вернуться в консоль администрирования Weblogic и выбрать Deployments, что в окошке Domain Structure.

Выбираем нашу директорию — xmlpserver.

На этом шаге следует указать, точнее уточнить, системе, что именно будет разворачиваться приложение или библиотека. В данном случае это приложение.
Здесь можно указать как оно (приложение) будет именоваться в списке Deployments, модель безопасности и место расположения.

Контрольное окно для проверки правильности выбранных параметров установки.
После установки.

Запуск модуля BI Publisher.
Теперь в адресной строке браузера указываем путь.

Вот он родимый BI Publisher.

Умолчальные логин: пароль Administrator:Administrator.

Вид изнутри.

Вкладка администрирования модуля BI Publisher.
Настройка запуска и остановки Weblogic
Для запуска и остановки сервера приложений Weblogic во время старта и остановки операционной системы или, например, обновления Java необходимо выполнить соответствующий скрипт. Для остановки надо запустить следующий скрипт:
где — в нашем случае путь /home/oracle/Oracle/; — имя домена — base_domain.
Не такой уж страшный вариант запуска, но всё равно это не наш путь. Лучше, если запуск и останов будут совершаться через подсистему init. Для этого создаю файл:
Теперь остановка Weblogic будет выглядеть:
Заключение
Статья не претендует на догматическое следование, тому кто будет устанавливать лучше смотреть по своим требованиям и обстоятельствам. Что-то пригодится, а что отнюдь.
Ещё обратил внимание, что качество картинок получилось не очень, местами паршивое. Поэтому оставляю ссылку на ресурс, где они в сносном качестве.
3- Настройка Oracle BI


Выберите коренную папку где Oracle BI будет установлен. Другие папки будут генрированы автоматически в соответствии с этой папкой.


- Database Type: Oracle Database
- Connect String: localhost:1521:db11g
- BIPLATFORM Schema Username: DEV_BIPLATFORM
- Password: .

- Database Type: Oracle Database
- Connect String: localhost:1521:db11g
- MDS Schema Username: DEV_MDS
- Password: .


Теперь установка Oracle BI завершена. Автоматически откроется административный вебсайт, или вы можете войти по ссылке:
В процессе установки следует выбирать следующие опции:
Choose the setup type that best suits your needs: «Complete»;
Browse or Enter the JDK Location (JAVA_HOME): Следуюет выбрать путь к JDK версии 1.5 и выше ;
P.S. Важно в окне установки Oracle BI Services не менять Account: LocalSystem и не задавать для него пароль . Так же рекомендую установить запуск всех предложенных служб на ручной режим Manual .
После завершения инсталляции и перед началом работы необходимо настроить источник данных ODBC для соединения с вашим сервером Siebel .
Для настройки источника ODBC выполняем следующие шаги:
1. Заходим «Пуск/Настройка/Панель управления/Администрирование/Источники данных ODBC »;

- В появившемся окне переходим на вкладку « СистемныйDSN »;
- Нажимаем кнопку «Добавить…»;
- Из списка драйверов выбираем « OracleBI Server »;
- В первом окне в поле « Name » вводим имя соединения (любое), в поле « Server » вводим адрес сервера, где находится Siebel , в нашем случае localhost , нажимаем «Далее»;
- В следующем окне вводим логин и пароль для доступа на сервер Siebel , логин скорее всего будет « Administrator »;
- Если на предыдущем шаге введен верный логин/пароль, то появляется следующее окно, где нужно нажать «Готово» - источник данных создан.
Далее если еще не запущен, запустим веб-сервер «Пуск/Программы/ Oracle Business Intelligence /OC4J Start ».
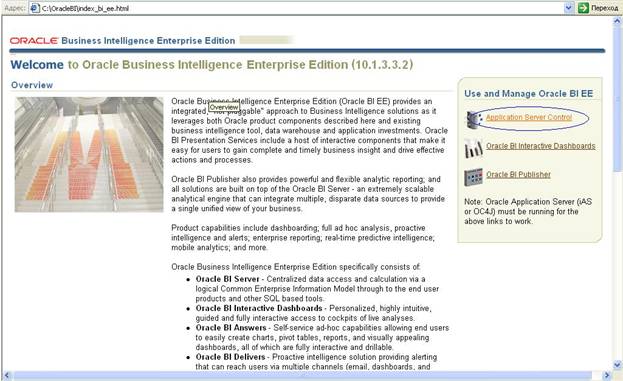
Теперь мы должны узнать имя своего хоста «Пуск/Программы Oracle Business Intelligence / Welcome to Oracle BI EE ».
На появившейся страничке жмем на « Application Server Control ».
Введем там требуемый пароль, который задали во время установки.
Вот мы в Oracle Enterprise Manager и видим свой хост.

Этот адрес мы используем для обращения к страницам нашего Siebel Analytics . Далее в настройках браузера напишем исключения для прокси , например, * myserver *.
Теперь определимся, с каким rpd файлом мы будем работать в Oracle BI Administration Tool и какой репозитарий загрузится на наши dashbord ’ s . Если с тем, что лежит на удаленном сервере, то перепишем его к себе, например, это будет файл OracleBIAnalyticsApps.rpd . На сервере и у нас он должен находится в каталоге OracleBI_HOME\server\Repository\.
Далее пропишем этот файл в настройках Oracle BI Administration Tool , для того, что бы он его подхватывал во время загрузки Oracle BI сервера. Файл настройки NQSConfig.INI лежит в OracleBI_HOME\server\Config \.

Следующим шагом необходимо запустить службы сервера Oracle BI Server , Oracle BI Presentation Server и Oracle BI Java Host , если таковые не запущены :
1. Заходим «Пуск/Настройка/Панель управления/Администрирование/Службы»;
2. Запускаем в следующей очередности : Oracle BI Server -> Oracle BI Presentation Server -> Oracle BI Java Host.
Р. S . Если служба Oracle BI Server долго не запускается, «висит», то можно выключить сетевое подключение и подождать пока запустится.
После успешного запуска всех служб зайдем в BI Administration Tool , « File / Open / Online » выбрав свое локальное ODBC соединение, в данном случае okotow . Должен появиться репозитарий из файла OracleBIAnalyticsApps.rpd .
По необходимости можно задастся другими источниками подключения к базе данных.
Например, в меню « Manage / Variables », список глобальных переменных используемых репозитарием . Кликнув два раза по OLAP _ DSN можно изменить параметр соединения с базой данных ((DESCRIPTION = (ADDRESS_LIST = (ADDRESS = (PROTOCOL = TCP)(HOST = sap.borlas.local)(PORT = 1561)))(CONNECT_DATA =(SERVER = DEDICATED)(SERVICE_NAME = SIEBELDB10G)))) . А если кликнуть два раза по OLAP _ USER , изменить имя пользователя/схемы базы данных. Соответственно в Connection Pool нужно будет изменить пароль доступа к базе данных.
После этого нужно проверить соединение, выполнив запросы к объектам.
Далее если мы выбрали работу с файлами с удаленного сервера, то перепишем весь веб-каталог ( dashbord ’ s , answer ’ s ) к себе. На сервере и у нас этот веб-каталог должен находится в OracleBI _ DATA _ HOME\web\catalog \ . Если есть необходимость, то переписываем его к себе полностью или же интересующий нас каталог, например, EnterpriseBusinessAnalytics .
Теперь пропишем веб-каталог в конфигурационном файле instanceconfig.xml, для того, что бы то, что мы переписали с удаленного сервера, отобразилось с нашей машины. Этот файл лежит в OracleBI _ DATA _ HOME \ web \ config \. Зайдя в него, пропишем в раздел < CatalogPath > наш каталог EnterpriseBusinessAnalytics .

Машина с установленной серверной версией Windows (32 или 64 bit) имеющая минимум 4Gb оперативной памяти, 20 Gb свободного дискового пространства, 950Мб дискового пространства для временных файлов, 3 Gb пространства под swap, dual core Pentium class процессор 1.5 GHz или лучше.
2- Установка Oracle BI Repository Creation Utility
Для установки Oracle BI сначала вам нужно установить Oracle BI RCU (Oracle BI Repository Creation Utility). OBI RCU похож на промежуточную система, помогающую вам соединить OBI (Oracle BI) с вашей базой данных.

Oracle BI был создан как умный инструмент, чтобы обрабатывать данные из разных источников, по факту он может подключаться к разным базам данных для получения данных. Oracle BI Repository Creation Utility на самом деле является утилитарным инструментом для создания репозиторий (Repository) данных из определенного источника.
Oracle BI будет использовать эти репозитории (Repository) во время его операций.


Вы можете подключить к любой базе данных (Oracle, SQLServer или MySQL). Здесь я подключаю к Database Oracle.


Prerequisites
Before starting this tutorial, you should:
Identify which components to install
Ensure that MS Word is installed if you are installing BI Publisher
Ensure that you have the proper permissions for installing and configuring on your company's system:
Network: Network Administrator
Windows: Administrator for individual machines
Database: DBMS Administrator
Ensure that Java SDK 1.5.0 or later is installed on the same machine where Oracle Business Intelligence will be installed.
Ensure that database connectivity software that Oracle BI Server uses to connect to the database is installed. For example, if the Oracle BI Server needs to access an Oracle database, install the Oracle 10g client. If the Oracle BI Server needs to access an MS SQL Server database, install Microsoft Data Access Components (MDAC version 2.7 or later).
If you are planning to use Microsoft Internet Information Server (IIS):
Ensure that Microsoft Data Access Components (MDAC) version 2.7 or later is installed. Note: If you are installing the Cluster Server feature, MDAC is not required on machines that host only Cluster Controllers.
Ensure that Microsoft IIS is installed and that the IUSR_machinename matches the true name of the machine being used.
If you are planning to use Oracle Application Server 10g and choose the Advanced option, ensure that you specify the location of your Oracle_Home.
Ensure your screen resolution is a minimum of 1024x768
Have access to or have installed Oracle Database 10g
Have access to or have installed the sample SH schema
This example uses the SH schema included in the Oracle Database 10g.
Create a directory named SetupFiles under . Download and extract the sh.zip file from here to this directory.
Hardware and Software Requirements
The following is a list of hardware and software requirements:
Oracle BI Server components:
- CPU and RAM: 1 GHz, 2 GB RAM, with two or more processors recommended
- Disk Space: 800 MB of hard disk space, plus appropriate disk space for cache storage and Scheduler results (temporary disk space of 2 GB)
Oracle BI Presentation Services components:
- CPU and RAM: 1 GHz, 2 GB RAM, with two or more processors recommended
- Disk Space: 500 MB of hard disk space, plus appropriate disk space for cache storage and log files (temporary disk space of 2 GB)
Cluster Server requirements:
Machine hosting a clustered Oracle BI Server or a machine hosting both Oracle BI Server and Cluster Controller:
- Processor and RAM: 1 GHz, 2 GB RAM, with two or more processors recommended
- Disk Space: 1 GB of hard disk space or better
Topics
This tutorial covers the following topics:
Viewing Screenshots
Place the cursor over this icon to load and view all the screenshots for this tutorial. (Caution: This action loads all screenshots simultaneously, so response time may be slow depending on your Internet connection.)
Note: Alternatively, you can place the cursor over an individual icon in the following steps to load and view only the screenshot associated with that step. You can hide an individual screenshot by clicking it.
Overview
This OBE provides installation instructions for a stand-alone installation of the following Oracle BI EE components:
Oracle Business Intelligence Server (BI Server), including the Administration Tool
Oracle Business Intelligence Interactive Dashboards (Interactive Dashboards)
Oracle Business Intelligence Answers (Answers)
Scenario
In this OBE, you install all components of Oracle Business Intelligence Enterprise Edition. You then test the component installation by creating a query, adding it to your dashboard, and so forth.
Инсталляция OBIEE 11g
Enterprise — обычная установка, с заданием большинства параметров во время процесса установки. Этот тип и выбираем.
Далее, установщик проверяет систему на совместимость. В случае возникновения каких-либо проблем, устраняем их и повторяем проверку.

Далее, указываем путь к домашнему каталогу Oracle Middlewar е . Путь не должен содержать пробелов, каталог должен быть пустым. Всю информацию о путях на данном экране записываем!

Указываем подключение к базе данных в виде hostname:port:servicename. Указываем пользователя созданного RCU и его пароль.
Следующий шаг – Configure Ports. Выбираем Auto Port Configuration. Если есть надобность в ручной конфигурации портов, нужно создать файл специального вида. Пример файла можно найти в bishiphome/Disk1/stage/Response/ staticports.ini

Testing Your Basic Installation
Now that you have successfully completed the installation and have created the data source connection, you need to verify that you can actually connect to your data source. You verify your data source connections by using the Administration Tool.
You begin by ensuring that your services have been started correctly. Select Start > All Programs > Administrative Tools > Services.
Oracle BI Server, Oracle BI Presentation Server, and Oracle BI Java Host should be running.
When verified, you open the Administration Tool. Select Start > All Programs > Oracle Business Intelligence > Administration.
The Oracle BI Administration Tool appears. You can open a repository for editing in either online or offline mode. You use online mode to view and modify a repository while it is loaded into the Oracle BI Server. Online mode allows you to perform tasks such as managing scheduled jobs, user sessions, and so on.
You want to verify that the connection pool parameters for your data source, sh.rpd, are correct.
Select File > Open > Online.
Enter the default Password, automatically set to "Administrator" during installation, and click Open.
The repository layers appear.
Expand the database object, orcl SH. Right-click the Connection Pool object and select Properties.
Click Yes to enable update capabilities for the repository.
The Connection Pool dialog box appears. Ensure that the following data items are accurate:
Call interface: The call interface is the application program interface (API) that you use to access the data source. You use OCI for Oracle Database 10g. Other access methods include native APIs and a special call interface for XML.
Data source name: The data source name is the name that you configured to connect to the database. This corresponds to the TNS Service Name.
Shared logon and User name: Select the Shared logon check box if you want all users whose queries employ the connection pool to access the underlying database using the same user name and password. If this option is selected, then all connections to the database that employ the connection pool will use the user name and password specified in the connection pool.
You can modify the name of the connection pool that is automatically assigned by the system.
Click OK when you are satisfied with each attribute for the connection pool. When prompted to verify the password, enter sh.
Note: Sh is both the username and password.
Next, you should verify that you can actually access the data. Click the plus sign (+) to promote SH.
Move the cursor over the tables to view the row count for each. Notice that the row count has not yet been updated. When you request row counts, the Administration Tool retrieves the number of rows from the physical database for all or selected tables and columns (distinct values are retrieved for columns) and stores those values in the repository. If you successfully retrieve a count, you may surmise that you can access your data.
Right-click PRODUCTS and select Update Row Count.
The "Check out objects" dialog box appears. Click Yes.
The Physical layer table is updated. Move the cursor over Products to view the row count.
You can also verify that your connection pool is properly set up by checking the actual data. Once again, right-click PRODUCTS. This time, select View Data.
The View Data from Table window appears and reiterates that you have successfully connected to your data source.
Next, you need to perform a consistency check on your repository. The consistency check analyzes the repository for certain kinds of errors and inconsistencies.
Repositories in online mode and the business models within them must pass the consistency check before you can make them available for queries. When a repository or business model is inconsistent, a detailed message alerts you to the nature of the inconsistency.
To check the consistency of a repository in the Administration Tool, select File > Check Global Consistency. The Consistency Check Manager window appears.
Click Check All Objects. An informational message alerts you if the repository is consistent.
If the repository is not consistent, a more detailed message will appear that contains information about the nature of the inconsistency. For example, if you created a business model that does not have a corresponding Presentation Catalog, a message will alert you and you will be prompted to create one.
Click Close.
For further information about the Oracle BI Server Administration Tool and the repository, refer to Creating a Repository Using the Oracle Business Intelligence Administration Tool (Oracle By Example).
Finally, you need to ensure that you are able to create a request and publish the request to a dashboard.
Note: After installation, the default catalog for Presentation Services is Paint. If you specify a name of your choice instead of Paint as the CatalogPath, you will eliminate this dashboard. You can change this entry in the CatalogPath by performing the following steps:
A. In Notepad, open the instanceconfig.xml file located in the \OracleBIData\web\config directory.
B. Locate the CatalogPath statement and change it to anything you choose. This is a sample catalog entry for My Dashboard:
C:/OracleBIData/web/catalog/default In this example, default is the catalog name.
C. Save the new instanceconfig.xml file.
D. The first time you launch Presentation Services, default will be created automatically for you and an empty My Dashboard will appear.
If Oracle Business Intelligence is not currently open, select Start > All Programs > Oracle Business Intelligence > Presentation Services, enter Administrator in both the User ID and Password fields, and click Log In.
The My Dashboard page of Oracle Interactive Dashboards appears.
Click the Answers link.
Select the SH subject area.
You create a new request by selecting (clicking) each column from the Selection (left-hand) panel. They will be added to the Workspace area in the right-hand panel. Click these columns to add them to the Workspace area: Channel Class, Channel Description, Channel Total, Product Category, and Product Name.
The sample request Workspace area is provided below. Click Display Results.
The request completes.
Click Save Request , name the request My Request, and save it in My Folders.
Click OK.
Now you verify that you can add a request to a dashboard.
Click the Dashboards link.
A blank My Dashboard page appears.
Click the Page Options drop-down list and select Edit Dashboard.
The Dashboard Editor window appears. Drag My Request from the pane on the left to the gray workspace area on the right. This gray area is actually a "Section" placeholder.
The Dashboard Editor window should look like this:
Click Save. My Dashboard appears with My Request.
Click the Log Out link and close your browser.
Summary
In this OBE, you've learned how to:
Install Oracle BI EE
Set up an ODBC driver for your data provider
Check your data source to ensure that your installation succeeded
Related Information
To learn more about Oracle BI EE, refer to additional OBEs on the Oracle Learning Library Web site.

Следуйте за нами на нашей фан-странице, чтобы получать уведомления каждый раз, когда появляются новые статьи. Facebook
Создание репозитория
Доходим до шага Database Connecton Detail, вводим параметры соединения с базой данных репозитория ( нужен пользователь с привилегией DBA или SYSDBA )


Далее, вводим пароли для пользователей вновь создаваемых схем БД. Можно поставить один для всех, выбрав опцию « Use Same Password for all schema's ». Пароль и имена пользователей записываем, в дальнейшем они нам понадобятся!

Topics
This tutorial covers the following topics:
Viewing Screenshots
Place the cursor over this icon to load and view all the screenshots for this tutorial. (Caution: This action loads all screenshots simultaneously, so response time may be slow depending on your Internet connection.)
Note: Alternatively, you can place the cursor over an individual icon in the following steps to load and view only the screenshot associated with that step. You can hide an individual screenshot by clicking it.
Читайте также: