
Установка fedora 34 uefi
Fedora is a Linux based distribution which offers desktop and server flavors. It is a free and open-source Linux distribution sponsored by Red Hat and developed and contributed by the community. It works as an upstream distribution for Red Hat Enterprise Linux. Hence, with Fedora you get the latest Linux Kernel, packages with cutting edge features and applications.
Fedora desktop edition offers almost all popular desktop environments. A quick list of desktop environment is below which has official Fedora flavor.
- KDE Plasma
- GNOME
- Xfce
- LXDE
- LXQt
- i3 WM
- MATE
- Cinnamon (via repo)
This is why it is very popular, and many users choose Fedora to Ubuntu because you get a perfect system with many packages pre-installed. Mostly experienced users prefer Fedora, but it is absolutely useful for beginner’s as well. If you are an Ubuntu user and want to jump the ship to Fedora, well, you may want to check out our Ubuntu to Fedora migration guide.
The Fedora 34 which we are going to install in this post brings some interesting changes. Fedora 34 brings Linux Kernel 5.11, Zstd compression when btrfs is used, default sound daemon Pipewire, GNOME 40 desktop, KDE Plasma 5.21 and many Wayland related updates. For a detailed coverage, visit our Fedora 34 topics to learn more.
Поддерживается ли технология Secure Boot?
Да, полностью. В качестве предварительного загрузчика используется shim, подписанный цифровой подписью Microsoft.
Как установить Fedora в dual-boot вместе с другой ОС?
Существует два способа: автоматический и ручной.
Автоматический способ:
Загрузим систему с Fedora LiveUSB , выберем автоматической способ разбиения. Все действия будут выполнены автоматически с настройками по умолчанию.
Ручной способ:
Выполним следующие шаги в строго указанном порядке:
загрузим систему с Live образа ;
установим менеджер разделов GParted sudo dnf install gparted (потребуется доступ к Интернету; в XFCE и LXDE Live он уже присутствует внутри базового образа);
запустим GParted, затем уменьшим раздел другой ОС так, чтобы на диске появилось свободное место достаточного объёма;
создадим новые разделы для Fedora;
запустим установку в режиме ручного разбиения диска, затем укажем точки монтирования для созданных разделов;
завершим установку и перезагрузимся в установленную ОС;
в случае если другой ОС является Microsoft Windows, применим следующие оптимизации .
Загрузчик Grub 2 автоматически обнаружит другие операционные системы на устройстве и добавит их в список загрузки.
Как определить точную дату установки ОС?
Т.к. операционная система постоянно обновляется, точную дату установки ОС напрямую получить не представляется возможным. Можно лишь вывести дату последнего форматирования раздела диска, на котором установлена система:
Здесь /dev/sda1 – раздел диска с Fedora.
Fedora Media Writer
Fedora Media Writer has been significantly improved and is now the official, tested and supported way to make bootable media. Fedora Media Writer supports Linux, macOS, and Windows. It is an easy way to make bootable USB media to install Fedora (or other operating systems). Using Fedora Media Writer is strongly encouraged, although other USB media creation software can work as well.
Some of the new additions to Fedora Media Writer are that Fedora Workstation and Server are easily and quickly accessible from the selection on the main screen. Further choices are available if you select the button below Custom image. This offers a selection of various Fedora Spins, such as Xfce or Mate.
Historically, universal USB creation tools, such as Unetbootin, are a popular way to create USB installers from ISOs intended for optical media. They typically create a filesystem on the USB drive by extracting files from the image, and writing syslinux bootloader to the device.
These methods circumvent the boot-loader configuration built into Fedora images, which are pre-partitioned and designed to boot on UEFI systems with SecureBoot enabled as well as BIOS systems, and thus they do not produce consistent results with Fedora images, especially on UEFI systems.
The best results are produced by utilities that use a direct write method and do not modify the Fedora image.
Always think twice before writing an image to the device. The media creation methods described in this article are destructive. All data on the USB stick are deleted during the process, so make sure you have a back up of the data on the USB stick. Double check that you have selected correct device to write the image to!
Как улучшить отображение шрифтов в Fedora?
В актуальных релизах Fedora пакет freetype уже собран с поддержкой субпиксельного сглаживания, поэтому, чтобы получить качественный рендеринг шрифтов, необходимо лишь разрешить использование LCD фильтров, создав символическую ссылку на файл 11-lcdfilter-default.conf в каталоге /etc/fonts/conf.d :
Для вступления изменений в силу необходимо повторно войти в систему либо перезагрузить компьютер.
Creating a Boot CD or DVD
In addition to creating a bootable USB flash drive, you can also use the provided ISO images to create bootable optical media (a CD or DVD). This approach may be necessary when installing Fedora on an older system which cannot boot from USB.
The exact steps you need to take to burn a bootable CD or DVD from an ISO image will vary depending on what disc burning software you use. This procedure only offers a general overview.
Insert a blank CD or DVD into your system’s CD or DVD burner.
Open your system’s burning software - for example, Brasero on Fedora systems with GNOME desktop environment, or Nero on Windows systems. In the software’s main menu, find an option which lets you burn an ISO image to a disc. For example, in Brasero, this option is Burn image in the main menu on the left side of the window.
When prompted, select the ISO image of Fedora to be burned, and the CD or DVD burner with a blank disc inside (if you have more than one drive).
Confirm your selection, and wait for the disc to be burned.
All Fedora Documentation content available under CC BY-SA 4.0 or, when specifically noted, under another accepted free and open content license.
The massive Fedora 34 release is here with cutting-edge technology across modules and packages. And I’m sure you have downloaded/upgraded to Fedora 34 already. Keeping that in mind, we present a list of 10 things to do after installing Fedora 34.
It doesn’t matter whether you are a beginner or an advanced user of Fedora. Certain tweaks are definitely required after you do a fresh install/upgrade. A list always trivial varies based on users. And these are not the final list as something you may do as well which is not listed here.
This is just a guideline for you to get started with Fedora 34 after install.
Можно ли использовать Grub на BTRFS?
Конфигурация, при которой раздел /boot использует файловую систему BTRFS (раздел или подтом) является неподдерживаемой и будет приводить к возникновению ошибки .
После установки Windows был затёрт UEFI загрузчик Fedora. Как его восстановить?
Во время своей установки ОС Microsoft Windows всегда осуществляет форматирование служебного ESP раздела диска, поэтому придётся вручную восстановить загрузчик.
Выполним переустановку загрузчиков Grub2 и shim:
Завершим работу chroot окружения:
Что быстрее: раздел подкачки или файл подкачки?
Раздел подкачки, т.к. отсутствуют ограничения, накладываемые используемой файловой системой.
Что будет если при отсутствующем разделе подкачки закончится память?
При критическом недостатке оперативной памяти (исчерпании доступных страниц) и при отсутствии подкачки существует риск зависания всей системы.
Таким образом, для данной конфигурации настоятельно рекомендуется использовать любой OOM killer пользовательского режима: earlyoom , systemd-oomd и т.п., чтобы не подвергать систему опасности и не доводить до использования механизма OOM Killer ядра Linux.
Есть возможность самому выбрать пакеты для установки?
Да, при помощи netinstall образа, но лишь группами .
Сколько нужно подкачки для работы гибернации?
Для нормальной работы режима suspend to disk размер подкачки должен быть больше, либо равен объёму установленной в ПК или ноутбуке оперативной памяти.
Почему таймер TRIM отключён по умолчанию?
Изначально таймер TRIM активировался автоматически, если установка Fedora производилась на SSD накопитель, но через некоторое время обнаружилась серьёзная проблема с noname-накопителями. Их контроллеры декларировали поддержку процедуры TRIM, однако при её выполнении теряли все данные на носителе.
Из-за достаточно большого количества жалоб на потерю данных с таких дешёвых контрафактных noname накопителей, созданных на базе простейших контроллеров от флешек и микросхем памяти из отбраковки, было решено таймер отключить.
Как установить Fedora в UEFI режиме?
Загрузка Fedora LiveUSB образа должна производиться исключительно в UEFI режиме. На большинстве материнских плат в меню вариантов загрузки требуется выбрать режим UEFI External Drive или UEFI USB HDD.
Схемой разбиения диска, на который будет установлен дистрибутив, должна быть GPT. Проверить можно посредством выполнения fdisk:
Если используется классический MBR (msdos), необходимо запустить утилиту GParted, выбрать диск из списка, затем в меню Устройство пункт Создать таблицу разделов – GPT и запустить процесс кнопкой Применить изменения. Все данные на диске будут уничтожены.
Теперь можно приступать к установке. Автоматическое разбиение в Anaconda произведёт все действия самостоятельно.
Installing and running Fedora Media Writer
On Fedora
On Fedora 25 or later, Fedora Media Writer is available in the default repository. You can use dnf to install the package.
To install the Fedora Media Writer using:
Run the Fedora Media Writer:
or in Gnome 3 select Activities and then click on Fedora Media Writer.
On other Linux distributions
To setup Flatpak on your Linux system, follow the guidelines on the Flatpak documentation page.
Run the application:
On Windows
Run the installation by double clicking the installer, and then continue through the set-up wizard. The Wizard lets you customize the software’s installation if you choose to.
Run the application by clicking on a launcher.
In Windows 8 and 10, the Fedora Media Writer launcher will be placed in the All apps menu under F. In Windows 10, you can just type Fedora Media Writer in the search box on the task bar.
On macOS
Open the .dmg file, and press and hold the Ctrl key while clicking on the Fedora Media Writer application.
Press “Open” in the pop-up menu.
Click the “Open” button in the confirmation dialog, if it appears.
Как ускорить запуск системы?
Приобрести в компьютер или ноутбук SSD накопитель и установить операционную систему на него. Это даст колоссальный прирост к скорости запуска.
Какой способ разбиения диска лучше выбрать?
Существует 2 способа:
LVM (используется по умолчанию) – динамические разделы, позволяющие изменять разделы на лету в любую сторону, а также поддерживающие функцию моментальных снимков (снапшотов);
классическая схема с физическими разделами.
Если возможности LVM использовать не планируется на ПК или ноутбуке, то рекомендуется применять классическое разбиение , т.к. такая схема работает быстрее и надёжнее.
Необходим ли доступ в Интернет при установке?
Только для netinstall образа. Все остальные устанавливаются «как есть», т.е. со стандартным набором пакетов.
Как отключить скрытие меню Grub?
Отмена скрытия меню загрузки и отображение его при каждой загрузке системы:
Как произвести минимальную установку системы?
Если требуется выполнить минимальную установку системы без дополнительного программного обеспечения, но с графической средой Gnome или KDE, выполним следующие шаги в строго указанном порядке:
This chapter will explain how to boot the installer from local media or a network server as well as how to navigate the boot menu and use custom options.
Other methods to create a live USB
Using the Fedora Media Writer is highly recommended for everybody, because it offers a reliable way to create a live USB stick for Fedora installation.
However, some experienced users may prefer to go through the creation process manually. If you decide to do so, you have to download the installation images and use an application to write them onto the USB stick.
If you have downloaded and verified the installation images manually, you still can write them onto the USB stick using Fedora Media Writer.
Downloading Boot and Installation Images
The Fedora Project offers different Editions tailored for some specific use cases. Choose the Fedora Edition best for you. You can also build your own by customizing Fedora after it’s installed or by using a kickstart file as described in Creating a Kickstart File. Kickstart installation requires the netinstall media type, or a direct installation booting method such as PXE; kickstarts are not supported with live images.
Read more about Fedora Workstation, Fedora Cloud, Fedora Server and the available media types in Downloading Fedora.
Verifying the Downloaded Image
Because transmission errors or other problems may corrupt the Fedora image you have downloaded, it is important to verify the file’s integrity. After the images are created, an operation is performed on the file that produces a value called a checksum using a complex mathematical algorithm. The operation is sufficiently complex that any change to the original file will produce a different checksum.
Verifying checksums on Windows systems
Open a powershell session.
Change to the directory containing the downloaded files.
Load the resources required to calculate the checksum.
Calculate the downloaded image’s checksum. This will take a while!
Compare the calculated checksum to the expected checksum.
Verifying checksums on Linux and macOS systems
Open a terminal window, and navigate to the directory with the downloaded files.
Use the appropriate utility to verify the image checksum.
Как полностью скрыть меню Grub?
Скрытие меню загрузки:
Если в дуалбуте установлена ОС Microsoft Windows, но всё равно требуется скрыть меню Grub 2, то вместо menu_auto_hide=1 следует применять menu_auto_hide=2 .
Получить доступ к элементам скрытого меню можно посредством зажатия клавиши Shift или F8 во время начальной загрузки системы.
Bonus Tip
Могу я переместить Fedora на другой диск?
Да. Алгоритм такой:
загрузка с Fedora LiveUSB ;
создание разделов для новой установки Fedora посредством GParted или любой другой утилиты разбиения дисков;
монтирование старых и новых разделов;
копирование всех файлов и каталогов со старого накопителя на новый с сохранением прав доступа;
редактирование файла /etc/fstab нового накопителя так, чтобы в нём были указаны UUID новых разделов;
создание в корневом каталоге нового накопителя файла /.autorelabel для автоматической установки контекста безопасности SELinux;
установка загрузчика (если необходимо).
В консолях фреймбуфера отображаются кракозябры. Как это починить?
Способ 1:
Способ 2:
Установим пакет шрифтов Terminus:
Теперь откроем файл /etc/vconsole.conf в текстовом редакторе:
Укажем правильное имя шрифта внутри директивы FONT :
Сохраним изменения в файле и пересоберём initrd.
Configure DNF for faster download
The dnf package manager provides various config options which help you to download faster or update your system faster. The configuration options are described here.
One of the options I would suggest is the max_parallel_downloads option. This takes a number from 3 to 20 – which means that many numbers package download can be done using dnf.
To do that, open the config file via below command and add the switch as below.
So, these are 10 things that you may consider doing after a fresh install of the Fedora 34 workstation edition. I know these are a complete or ideal list or only things that you do typically. But I believe these can be a starting point for your journey with the brand new Fedora 34 desktop.
Do let me know if there are other things that you do but no on this list to make yourself productive.
We bring the latest tech, software news and stuff that matters. Stay in touch via Telegram, Twitter, YouTube, and Facebook and never miss an update!
Что вы скажете об установке системы на BTRFS?
поддержка копирования при записи (COW);
поддержка проверки целостности данных посредством контрольных сумм;
поддержка моментальных снимков системы (snapshot);
отсутствие ограничения на максимальное количество файлов;
поддержка прозрачного сжатия данных с использованием нескольких алгоритмов;
поддержка подтомов (subvolume);
встроенная поддержка клонирования, что полезно при создании резервных копий;
оффлайновая дедупликация записываемых данных.
ранее была слишком нестабильной и при определённых условиях приводила к потере всех данных на накопителе;
не имеет встроенного полнодискового шифрования;
известны случаи несовместимости с системой внешнего полнодискового шифрования LUKS;
из-за COW очень сильно фрагментируется, поэтому не рекомендуется к использованию на жёстких магнитных дисках (HDD);
без использования флага nodatacow проседает производительность баз данных (СУБД), а также виртуальных машин.
При установке не предлагается установить пароль для суперпользователя. Это нормально?
Да. Если при установке системы был создан пользователь-администратор , то пароль для учётной записи суперпользователя (root) не устанавливается.
Для выполнения команд с привилегиями суперпользователя в настоящее время рекомендуется использовать sudo .
Однако если по какой-то причине работающая учётная запись root необходима, можно её активировать, установив пароль .
Preparing to Boot
After you have made a bootable USB flash drive or a CD or DVD using the steps described in Preparing Boot Media, you are ready to boot the installation. Note that the steps described below are generic and the exact steps will vary somewhat depending on your system - particularly on your motherboard manufacturer.
There are no separate media provided for BIOS and UEFI systems; all of them can boot from the same ISO image. However, once you install Fedora, you cannot switch between UEFI and BIOS. The system must run on the same firmware it was installed on; if you, for example, perform the installation on an UEFI system in UEFI mode, and then switch it to BIOS compatibility mode, Fedora will no longer boot and will require a reinstallation.
Fedora does not support UEFI booting for 32-bit x86 systems. Only BIOS boot is supported on these systems.
To boot the Fedora installer, follow these steps:
Plug in the boot USB drive, or insert the boot CD or DVD into your computer’s optical disc drive. Alternatively, if you plan on booting from a network boot (PXE) server, make sure that the network cable is plugged in.
Restart the system. Once it starts rebooting, it should display a prompt similar to the following (usually at the bottom of the screen):
Follow the on-screen instructions to access the boot menu. If no instructions are displayed (some systems only display a graphical logo during early stages of boot), try pressing F12 , F11 , F10 or Del several times; these are most commonly used keys. Note that there is usually a very short time window provided to access the menu; once it passes, you need to restart the system and try again.
Some older systems may not support choosing a boot device at startup. In that case, enter the system’s SETUP (BIOS), and change the default boot order so that your boot media (CD, DVD, USB or network) has higher priority than internal hard drives.
On Mac hardware, hold down the Option key to enter the boot media selection menu.
When your system’s boot menu opens, select an entry such as Boot from USB if you created a bootable USB drive, Boot from CD/DVD if you are using an optical disc to install Fedora, or Boot from PXE if you want to boot from a network location.
Wait until the boot menu is displayed. The boot menu is described further in this chapter.
Writing the ISO image to the USB Media.
Select the Fedora Edition you wish to make a bootable USB drive for.

The main selection lets you choose one of the default Fedora editions, Fedora Workstation or Server. Fedora Media Writer displays more details about the edition before you can proceed with downloading the image and the USB creation. You can choose a different architecture, if you select Other variants.
Select “Create Live USB” to proceed.

Fedora Media Writer will automatically download the ISO for you. If you have downloaded the ISO before and placed it in the Downloads directory, it will be immediately available to use.

Plug in a USB drive on which you want to create the bootable media.
To write the image onto the media, click the red Write to disk button.

Какую файловую систему рекомендуется использовать на Fedora?
Начиная с Fedora 33, в редакции Workstation, для установки по умолчанию предлагается BTRFS .
Несмотря на это, мы рекомендуем применять ext4. На наш взгляд, это самая стабильная и популярная файловая система в настоящее время.
Для хранения больших объёмов данных можно использовать XFS. Это также стабильная и быстрая ФС, но следует помнить, что при сбоях электропитания вместо файлов, в которые в этот момент шла запись, могут оказаться нули. Таким образом, XFS лучше применять только если есть источник бесперебойного питания (UPS) либо на ноутбуках.
Writing the images to USB media
Creating USB media with GNOME Disks
On a system with GNOME, or with the gnome-disk-utility package installed, open Disks using the system menu.
Click your USB device in the left column.
Click the menu icon in the upper right corner of the window, and choose the Restore Disk Image option.
Navigate to your image file and click Start Restoring . After a few minutes, it will report the process is complete and your installation media will be ready to use.
Creating USB Media on the Linux command line
Open a terminal window and insert the usb drive.
Find the device node assigned to the drive. In the example below, the drive is given sdd .
Use the dd utility to write the image.
Pay extreme attention to the source ( if= ) and target ( of= ) device. The dd command destroys all data on the target device. If you made a mistake, you could lose important data.
Preparing Boot Media
Fedora images are Hybrid ISOs and can be used to create installation media with both optical and USB disks, for booting on both BIOS and UEFI systems.
Можно ли без потерь данных преобразовать одну файловую систему в другую?
Нет, конвертирование ФС без потери данных не представляется возможным, поэтому для выполнения данной процедуры необходим другой раздел диска подходящего размера с поддержкой прав доступа Unix. Алгоритм следующий:
копирование всех данных на другой раздел с сохранением прав доступа ;
форматирование старого раздела с необходимой файловой системой;
возвращение данных на прежнее место;
сброс контекста SELinux.
Download and prepare LIVE USB
Download the Workstation edition from the below link. It contains the torrent of the .ISO file and also includes all other Fedora 34 Spins as well.
After the download is complete, create a LIVE USB using any utility such as Etcher. Plug in the USB in your system, change BIOS settings to boot from it.
Fedora 34 workstation – System requirement
This is the minimum system requirement for installing Fedora in general.
- 2 GHz dual-core processor
- 4 GiB RAM (system memory)
- 20 GB of hard-drive space
- VGA capable of 1024×768 screen resolution
- Either a CD/DVD drive or a USB port for the installer media
- Internet access is not mandatory for installation
Install Fedora 34 – Steps
1. The LIVE Fedora installation system boot up to a LIVE desktop, that gives you options to install to a Physical medium.

Install to Hard Driver Option in LIVE Media
2. In the next screen, select language and continue. Then click on the Installation destination to select which partition you would like to install.

Select Language

Installation Destination Select
3. In the installation destination screen, select the disk and choose Storage Configuration: Custom. And click Done at the top.

Select Disk
4. In the partitioning screen, choose your partition sizes for root, and boot partitions. For example, keep /boot at around 1GB and rest you can assign to /root partition.
5. For Fedora 34, it is better to use btrfs for root partition for better performance. Do not forget to set the mount point as / in root partition.

root partition

boot partition
6. When you are satisfied with your new file system, click on Done. In the next screen, make sure to verify carefully the summary of changes that is going to happen to your disk. Because this will make changes to your system and can not be reverted. Click Accept changes once you are ready.

Summary of Changes
7. Wait for the installation to complete. Once it is finished, click on Finish Installation and reboot the LIVE system.

Installation complete
So, that’s about it. If all goes well, after reboot, you should be greeted with Fedora 34 workstation edition desktop with GNOME 40.
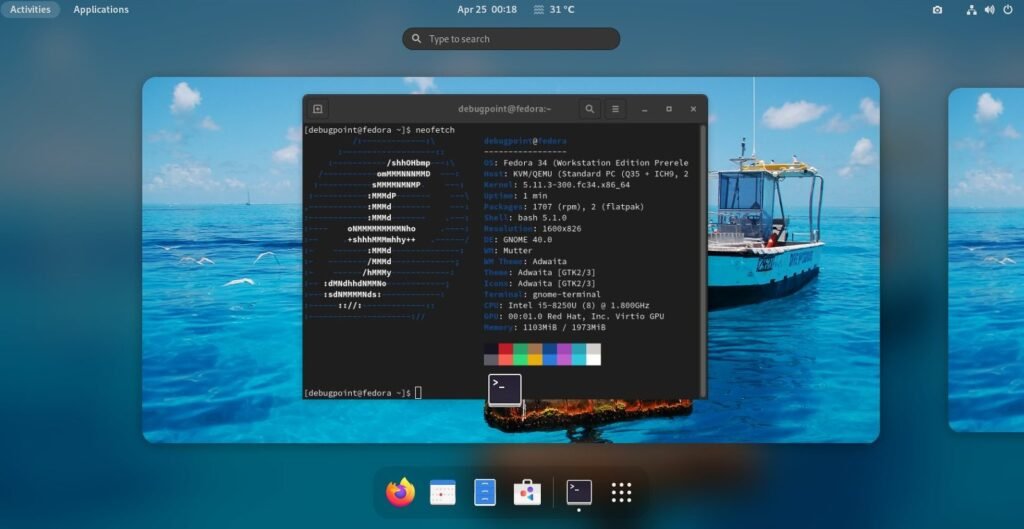
Fedora 34 Desktop
I hope this basic guide to install Fedora 34 helps beginner’s or advanced users for their work. If you run into a problem, such as with dual boot, or any other installation error, let me know in the comment box below.
We bring the latest tech, software news and stuff that matters. Stay in touch via Telegram, Twitter, YouTube, and Facebook and never miss an update!
Для загрузки Live образа целиком в память, необходимо стрелками выбрать пункт Start Fedora Live, нажать Tab, затем в строке редактирования параметров добавить rd.live.ram через пробел сразу после quiet и после этого нажать Enter.
The Boot Menu
In most cases, when you boot the Fedora installer from your prepared boot media or server, the boot menu will be the first thing that appears. From this menu, you can either start the actual installation, or you can use the boot media to rescue an existing system.
The way the boot menu will look and function will vary somewhat depending on your system’s firmware - BIOS systems use the SYSLINUX boot loader, and UEFI systems use GRUB2. However, both of the menus described below function very similarly from a user’s point of view.
Use the arrow keys to select an entry in the menu and Enter to confirm your selection. The first two entries in the list will both proceed with the installation; the first one will start the installer directly, and the second one will verify the integrity of the boot media before starting the installation.
The final entry in the list is Troubleshooting ; this is a submenu. Selecting this entry and pressing Enter will display a new set of selections, where you can choose to install in basic graphics mode (useful if you want to do a manual graphical installation but your system has issues with the default graphical installer), rescue an existing system, or test your system’s memory modules for errors (on BIOS systems only). The troubleshooting menu also allows you to exit the boot menu and boot normally from your system’s hard drive via the Boot from local drive option.
Every menu entry in the list is a predefined set of boot options, and these options can be customized to change some aspects of the installer’s behavior. To edit the default set of boot options, press Tab on BIOS systems, or e on UEFI systems. The key to use is also displayed at the bottom of the screen.
Editing boot options in GRUB2 (on UEFI systems) will display the entire configuration for the selected entry. Actual boot options are configured on the line which starts with the linux (or linux16 or linuxefi ) keyword. Do not modify any other lines in the configuration.
On systems with BIOS firmware, only the actual boot options are displayed when you press Tab .
When editing the default set of options, you can change the existing ones as well as append additional ones. Once you finish, press Enter on BIOS or Ctrl + X on UEFI to boot the installer using your customized options.


All available Anaconda boot options are described in Available Boot Options.
All Fedora Documentation content available under CC BY-SA 4.0 or, when specifically noted, under another accepted free and open content license.
This chapter describes the steps you need take before you begin the installation. Not every step must be strictly followed - for example, if you plan to use the default installation settings, you do not need to gather system information such as disk device labels/UUIDs or network information such as the system’s IP address. However, you should still go through this chapter, as it also describes the available types of installation media and how to prepare boot media and installation sources.
Upgrade or Install?
If you already have Fedora installed and want to upgrade your installation to the current version, there are two basic ways to do so:
The preferred way to upgrade your system is an automatic upgrade using the dnf system upgrade utility. For information on performing an automatic upgrade, see Fedora Wiki dnf system upgrade.
You can upgrade to the latest version of Fedora manually instead of relying on dnf system upgrade. This involves booting the installer as if you were performing a clean installation, letting it detect your existing Fedora system, and overwriting the root partition while preserving data on other partitions and volumes. The same process can also be used to reinstall the system, if you need to. For detailed information, see Manual System Upgrade or Reinstallation.
Always back up your data before performing an upgrade or reinstalling your system, no matter which method you choose.
Возможно ли в Fedora включить TRIM в реальном времени?
Да, это возможно. При использовании классической схемы с обычными разделами необходимо добавить опцию монтирования discard для каждого раздела на SSD в /etc/fstab .
При использовании LVM, следует открыть файл /etc/lvm/lvm.conf в текстовом редакторе и прописать:
При использовании зашифрованных LUKS томов следует в файле /etc/crypttab добавить опцию discard для каждого тома.
Однако следует помнить, что на некоторых накопителях реалтаймовый TRIM может вызвать сбой в работе контроллера и привести к потере всех данных. Именно поэтому он по умолчанию и не применяется.
Все изменения вступят в силу при следующей загрузке системы.
Можно ли установить Fedora на устройство с ARM?
Да. Загрузки доступны для armhfp, а также aarch64.
Могу ли я создать свой собственный ISO образ?
Да. Собственный образ можно создать на базе Kickstart файлов. Более подобную информацию можно найти здесь.
Готовые Kickstart проекты для изучения:
У меня много оперативной памяти. Нужен ли мне раздел подкачки?
За счёт использования сжатия памяти zram , в современных выпусках Fedora для большинства сценариев использования на рабочих станциях 10+ ГБ оперативной памяти будет вполне достаточно, поэтому раздел подкачки можно не создавать.
Внимание! При отсутствии раздела подкачки перестанет работать функция suspend to disk (гибернация).
Как определить в каком режиме была произведена установка системы?
Определим режим установки системы ( UEFI или Legacy) посредством проверки наличия либо отсутствия каталога /sys/firmware/efi :
Pre-Step Before Installation
Before you start the installation, make sure of the followings.
- If you are installing in a physical system, make sure to decide which partition you want to install.
- If you are planning to dual boot with Windows or any other Linux Systems, then make sure you decide which partition to install.
- Take a backup of your personal data.
- Keep a LIVE USB with Boot Repair handy, in case something goes wrong.
Как лучше разбить диск самостоятельно?
Если по какой-то причине не хочется доверять автоматическому разбиению, мы рекомендуем следующую конфигурацию (порядок важен):
Служебный ESP (UEFI) раздел.
Раздел для хранения ядер и initrd.
Корневой раздел для системы и приложений.
Раздел для хранения пользовательских файлов.
Здесь RAM – объём установленной оперативной памяти.
Можно ли сделать так, чтобы подкачка использовалась лишь при исчерпании ОП?
Да, это возможно. Откроем терминал и выполним следующие команды:
Изменения вступят в силу немедленно и сохранятся до перезагрузки системы.
Для того, чтобы сделать эти изменения постоянными, создадим файл конфигурации sysctl .
Можно ли не переносить на SSD домашние каталоги пользователей?
Можно, но настоятельно не рекомендуется так делать ибо в таком случае прирост скорости работы системы будет далеко не таким большим, каким мог бы быть, т.к. колонна всегда двигается со скоростью самой медленной машины, а это всегда жёсткий диск.
Большая часть приложений хранят в домашних каталогах пользователей свои файлы конфигурации, а также различные кэши. В итоге, они загрузятся быстро, а затем перейдут в состояние iowait для ожидания этих данных с медленного накопителя.
Таким образом, на быстром SSD накопителе следует размещать как корневой, так и домашние каталоги пользователей.
Могу ли я автоматизировать установку?
Нужно ли как-то настраивать Fedora для работы с SSD?
Особой настройки не требуется. Необходимо лишь убедиться, что таймер процедуры TRIM активен:
Если это не так, активируем его:
Процедура TRIM для всех установленных твердотельных накопителей будет выполняться автоматически по расписанию один раз в неделю во время простоя системы.
10 Things to Do After Installing Fedora 34
1. Update Your System

dnf update
The first thing that you should do after installing Fedora 34 Workstation edition is to make sure that you update the system. You can open a terminal window and run the below command.
The first time you do this, it would take some time to get the updated repo information. So be patient while the command executes.
2. Change Touchpad settings (Laptop)
This is probably the most annoying thing on the GNOME desktop. Until this very day, I still do not know why this ‘tap to click’ option is not enabled by default. So problematic for laptop users.
To enable ‘Tap to click’, open Settings and go to the ‘Mouse and Touchpad’ tab. Then enable Tap to Click under Touchpad settings.
3. Enable RPM Fusion Repository
The RPM Fusion software repo is a community-maintained software repo that provides additional packages for Fedora Linux which are not distributed by the official Fedora team such as DVD playback, media playback, software from GNOME and KDE, etc. This is because of licensing and other legal reasons and country-specific software norms as well.
4. Install GNOME Tweaks
This extension is super useful because of a lot of settings that require changes after a fresh installation of Fedora – GNOME edition. For example, changing themes, enabling maximize buttons in window dialogs, and many more.
To install Open Software and search for Gnome Tweak, Or, run the below command from the terminal.
After installation, finds the GNOME Tweak tool in the application menu. Now you can use this to change different settings of your GNOME desktop.
5. Enable Minimize, Maximize buttons
Open the GNOME Tweak tool and go to Window Titlebars. Enable the Maximize and Minimize buttons. I know that GNOME has a different workflow where, in an ideal world, you should not minimize anything, ever. But still, I think the maximize and minimize buttons are required and should be enabled by default.
6. Install Additional Extensions for GNOME 40 Desktop
The GNOME extensions give you many ways to customize your desktop. There are hundreds of extensions out there which you can use for your own need. There are extensions for almost all possible scenarios.
Right now, the existing GNOME 3.38 based extensions are being ported by their respective developers for the new GNOME 40 desktop. And many popular ones’ already ported. So try some cool extensions from the GNOME Extension website for your GNOME 40 desktop.
To get you started, we featured a complete article on GNOME 40 Extensions with a top 10 list of cool extensions you can use right away.
7. Install Additional Software
The GNOME edition comes with basic utilities to get you started, unlike other desktops. For example, Cinnamon, KDE Plasma, etc – they come with preloaded applications for various needs.
But not GNOME. Hence, you can consider installing some additional applications as per your need. I have added some important ones below for your reference.
You can install these either via command line or search in Software.
8. Install additional multimedia codecs
You can enable RPM Fusion to play multimedia files that use gstreamer, and additional multimedia playback packages via the below command.
9. TLP for Battery health management

tlp status in Fedora
TLP is a great utility to help optimize your Laptop’s battery. This utility comes with various command-line options to tweak and view reports about power consumption.
TLP is so good that you just need to install it and forget it. This doesn’t require any settings or set up to make it work. It just works out of the box after you install it with its default settings.
If you have a Thinkpad laptop, you may consider running the below commands for Thinkpad specific packages for TLP which gives you more info and control on your battery.
After installation, run below to view the Battery information and status.
10. Install Additional Desktop Environments
It is very easy to install other desktop environments in Fedora when you are running the GNOME version. The core is already installed for you, hence you can easily install the basic framework for other desktops.
For example, if you like to install KDE Plasma or XFCE desktop with Fedora 34 – you do not need to download and install the entire respective Fedora Spin .iso file. You can easily follow this method to install an additional desktop environment. Open a terminal and run the below commands.
First, run below to check the available environment package names.
You can see the list of environments available below.

Switching desktop environments – available packages
Now you can install your favorite desktop using the name below.
Remember this will install the entire desktop environment minus the common packages which you might have already as you are running native Fedora with default desktop environment.
After download and install, reboot the system. Then choose the installed desktop on the login page.
Читайте также: