
Usb ninja что это
Многие из нас используют различные usb накопители для хранения и обмена информацией. Давайте разберемся для чего это и нужно ли вообще безопасно извлекать. При подключении usb накопителя к компьютеру, у нас обнаруживается съёмный носитель, т.е. Флешка или жёсткий диск, далее мы выполняем необходимые операции и затем решили отключить флешку без использования безопасного извлечения. Но возможно в этот момент нашу флешку в фоновом режиме начал проверять антивирус или вы забыли, что копируете данные на флешку. Такое отключение может привести к потере данных или вовсе выходу из строя usb накопителя. Возможно вы скажете я всегда просто так отключаю флешку и ни каких проблем нет, но проблема может возникнуть в самый неподходящий момент. Поверьте моему опыту, на моей памяти очень много случаев, когда пользователи просили восстановить данные с usb накопителей. А если вы используете переносной жёсткий диск, то в момент подключения к usb у нас начинает вращаться диск и обычное отключение считается аварийным завершением работы диска, он также может выйти из строя . Поэтому советую использовать безопасное извлечение устройств. Особенно пользователям которые используют операционную систему ниже 10й версии.
В Windows 10 с версии 1809, корпорация mircosoft утверждает, что предусмотрели автоматическое безопасное извлечение usb устройств, но на сколько хорошо оно работает покажет время. Я советую все же не поленитесь извлекать usb накопители через безопасное извлечение, это займет у Вас ну от силы одну минуту, зато вы будете уверены в сохранности своих данных. Я также рекомендую делать резервные копии или хранить важный файлы, как на компьютере, так и на флешке. Все мы знаем, что техника может выйти из строя в любой момент. А восстановление файлов занимает длительное время и не всегда можно восстановить все файлы. Если у вас уже случилась беда, то могу посоветовать попробовать восстановить файлы с помощью программы Recuva, она бесплатная с понятным интерфейсом . Спасибо за внимание, если информация была для вас полезной не забудьте поставить этому посту лайк и подписаться на наш канал, впереди ещё много новой и интересной информации.
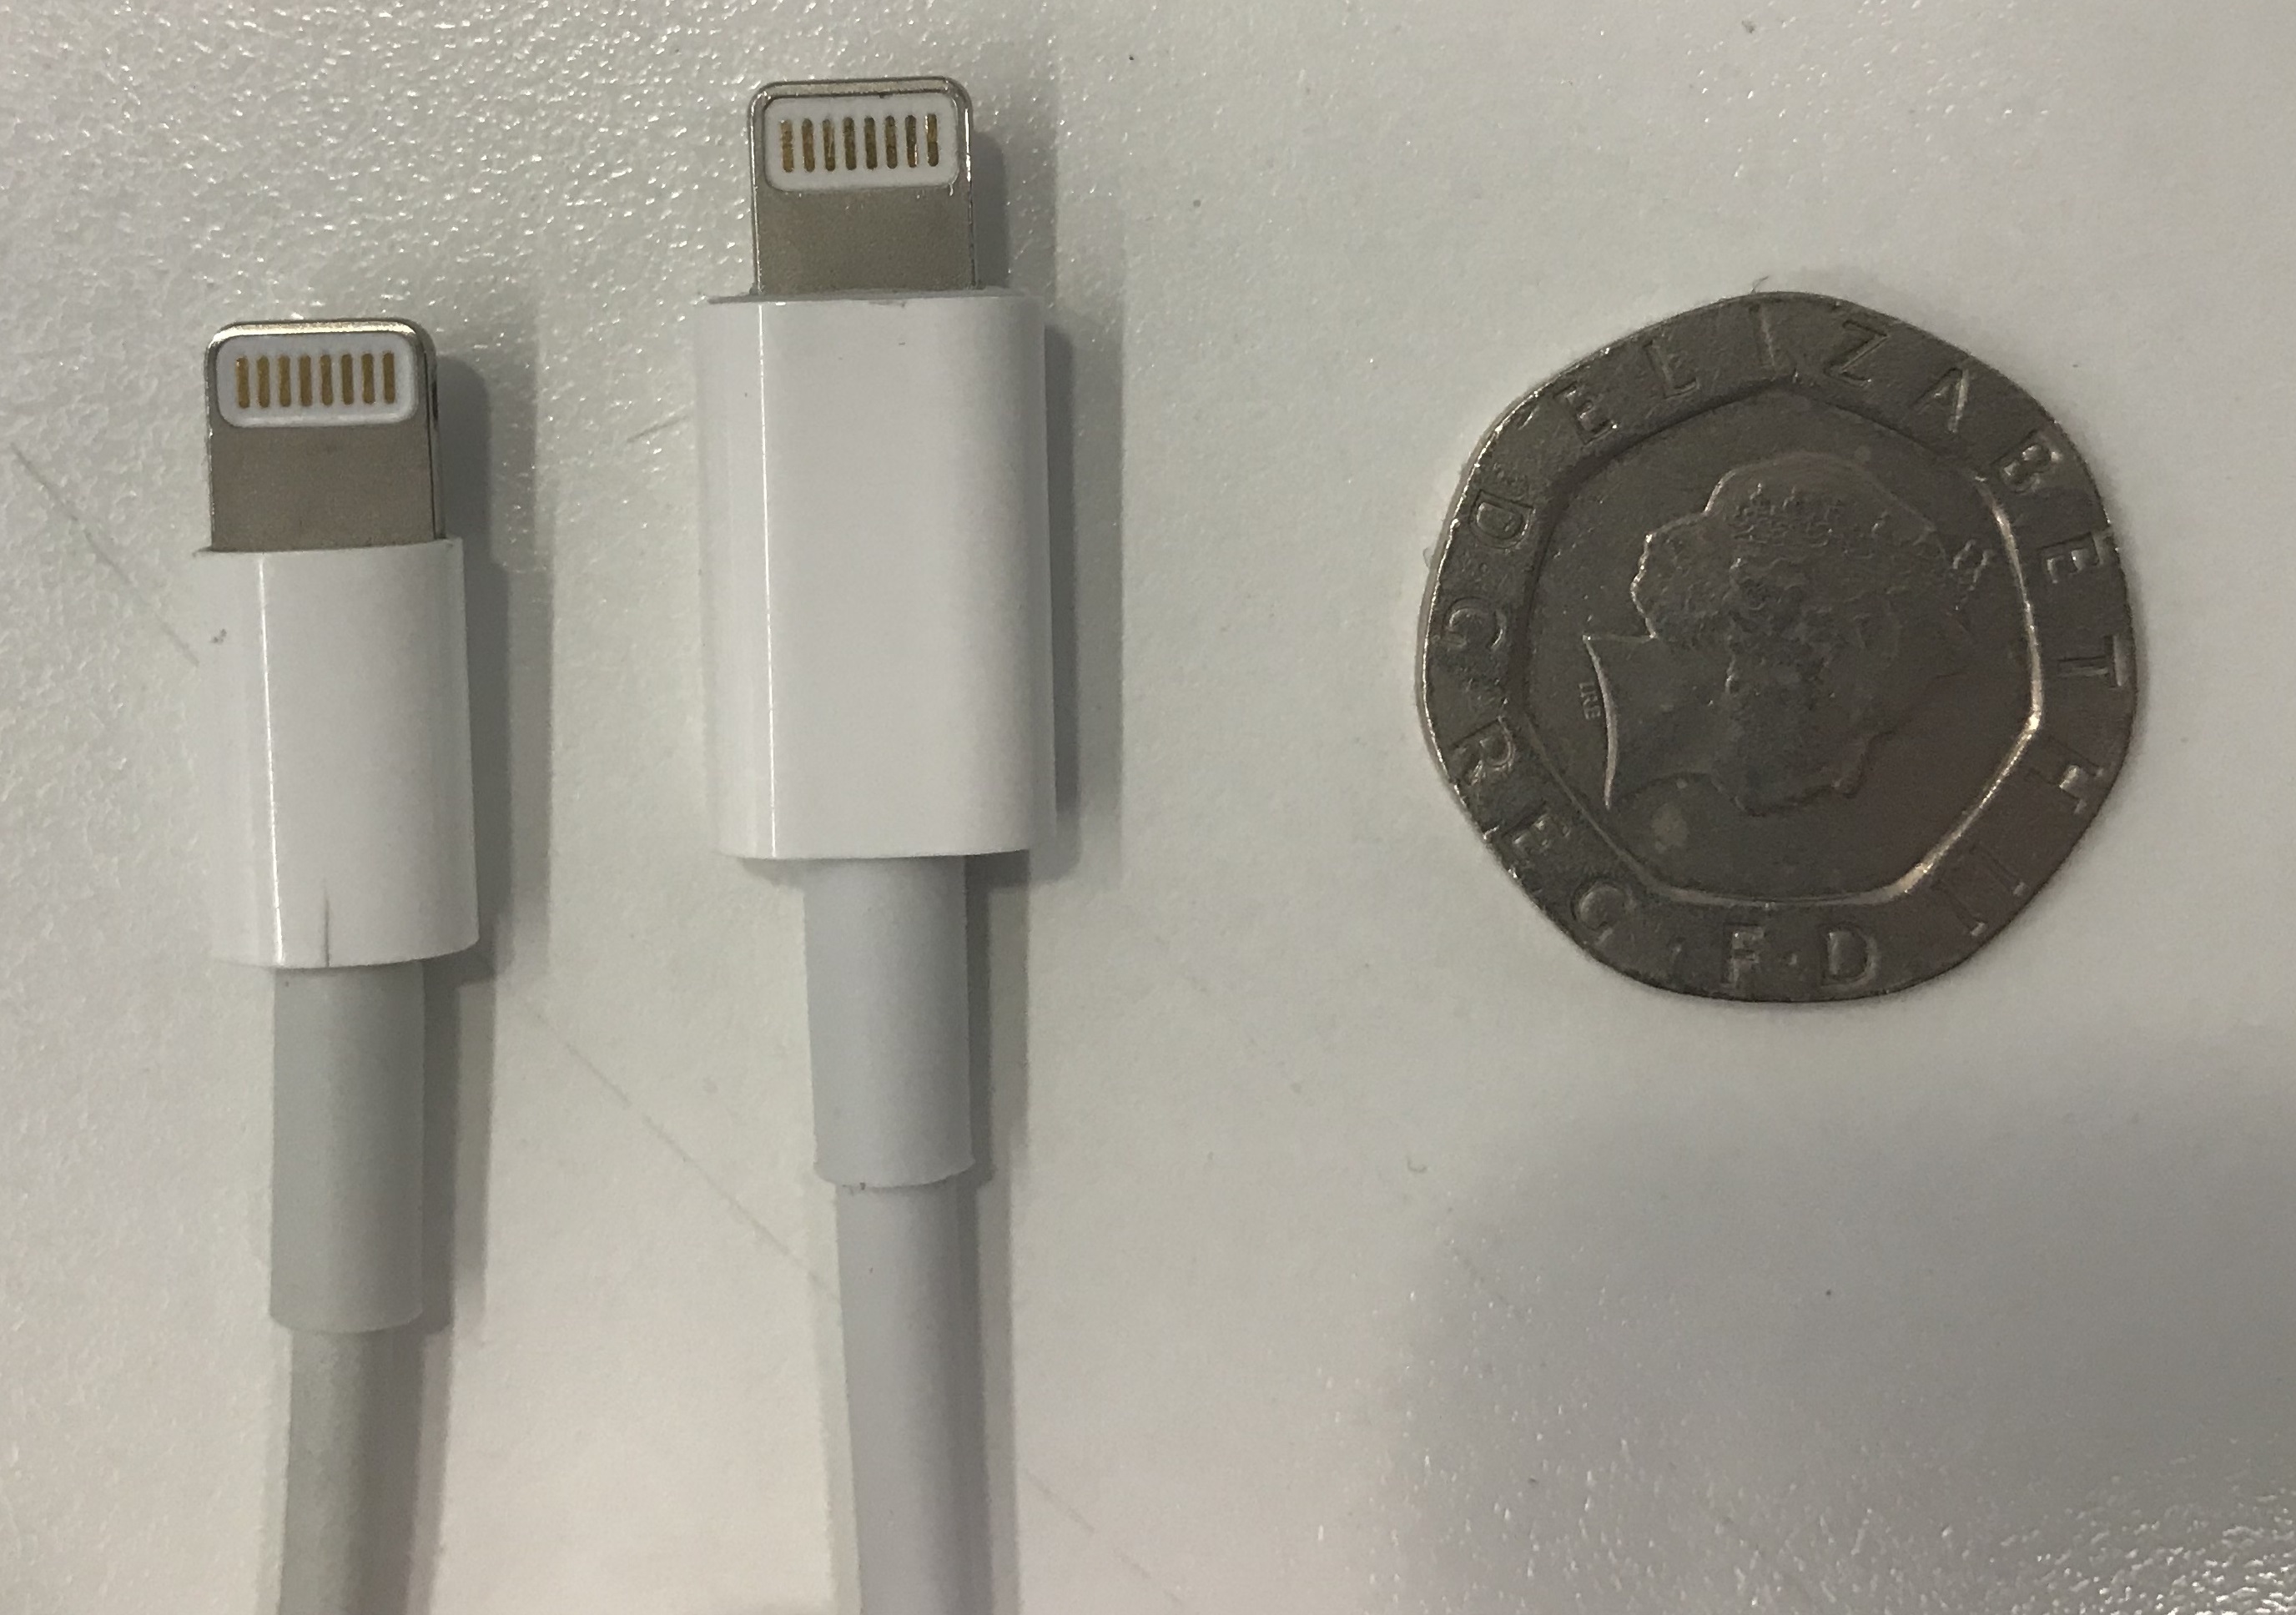
Answer:Yes. Can be cut, then you will get a small badusb stick, which is smaller than the average U disk, and is still IP67 waterproof, while Bluetooth and magnetic induction trigger function is not affected.
- What if I always fail when uploading firmware?
Answer:If it fails repeatedly multiple times, try not using the HUB or not using the front USB operation.
- What should I do if the computer does not respond after remote triggering with the remote control?
Answer:There is a few possibilites:
a. The inserted computer system is different, and the recognition time is different. When the W7 system is inserted for the first time, it takes more than 5 seconds to install, and the characters output during this time will be ignored. Please increase the delay as appropriate.
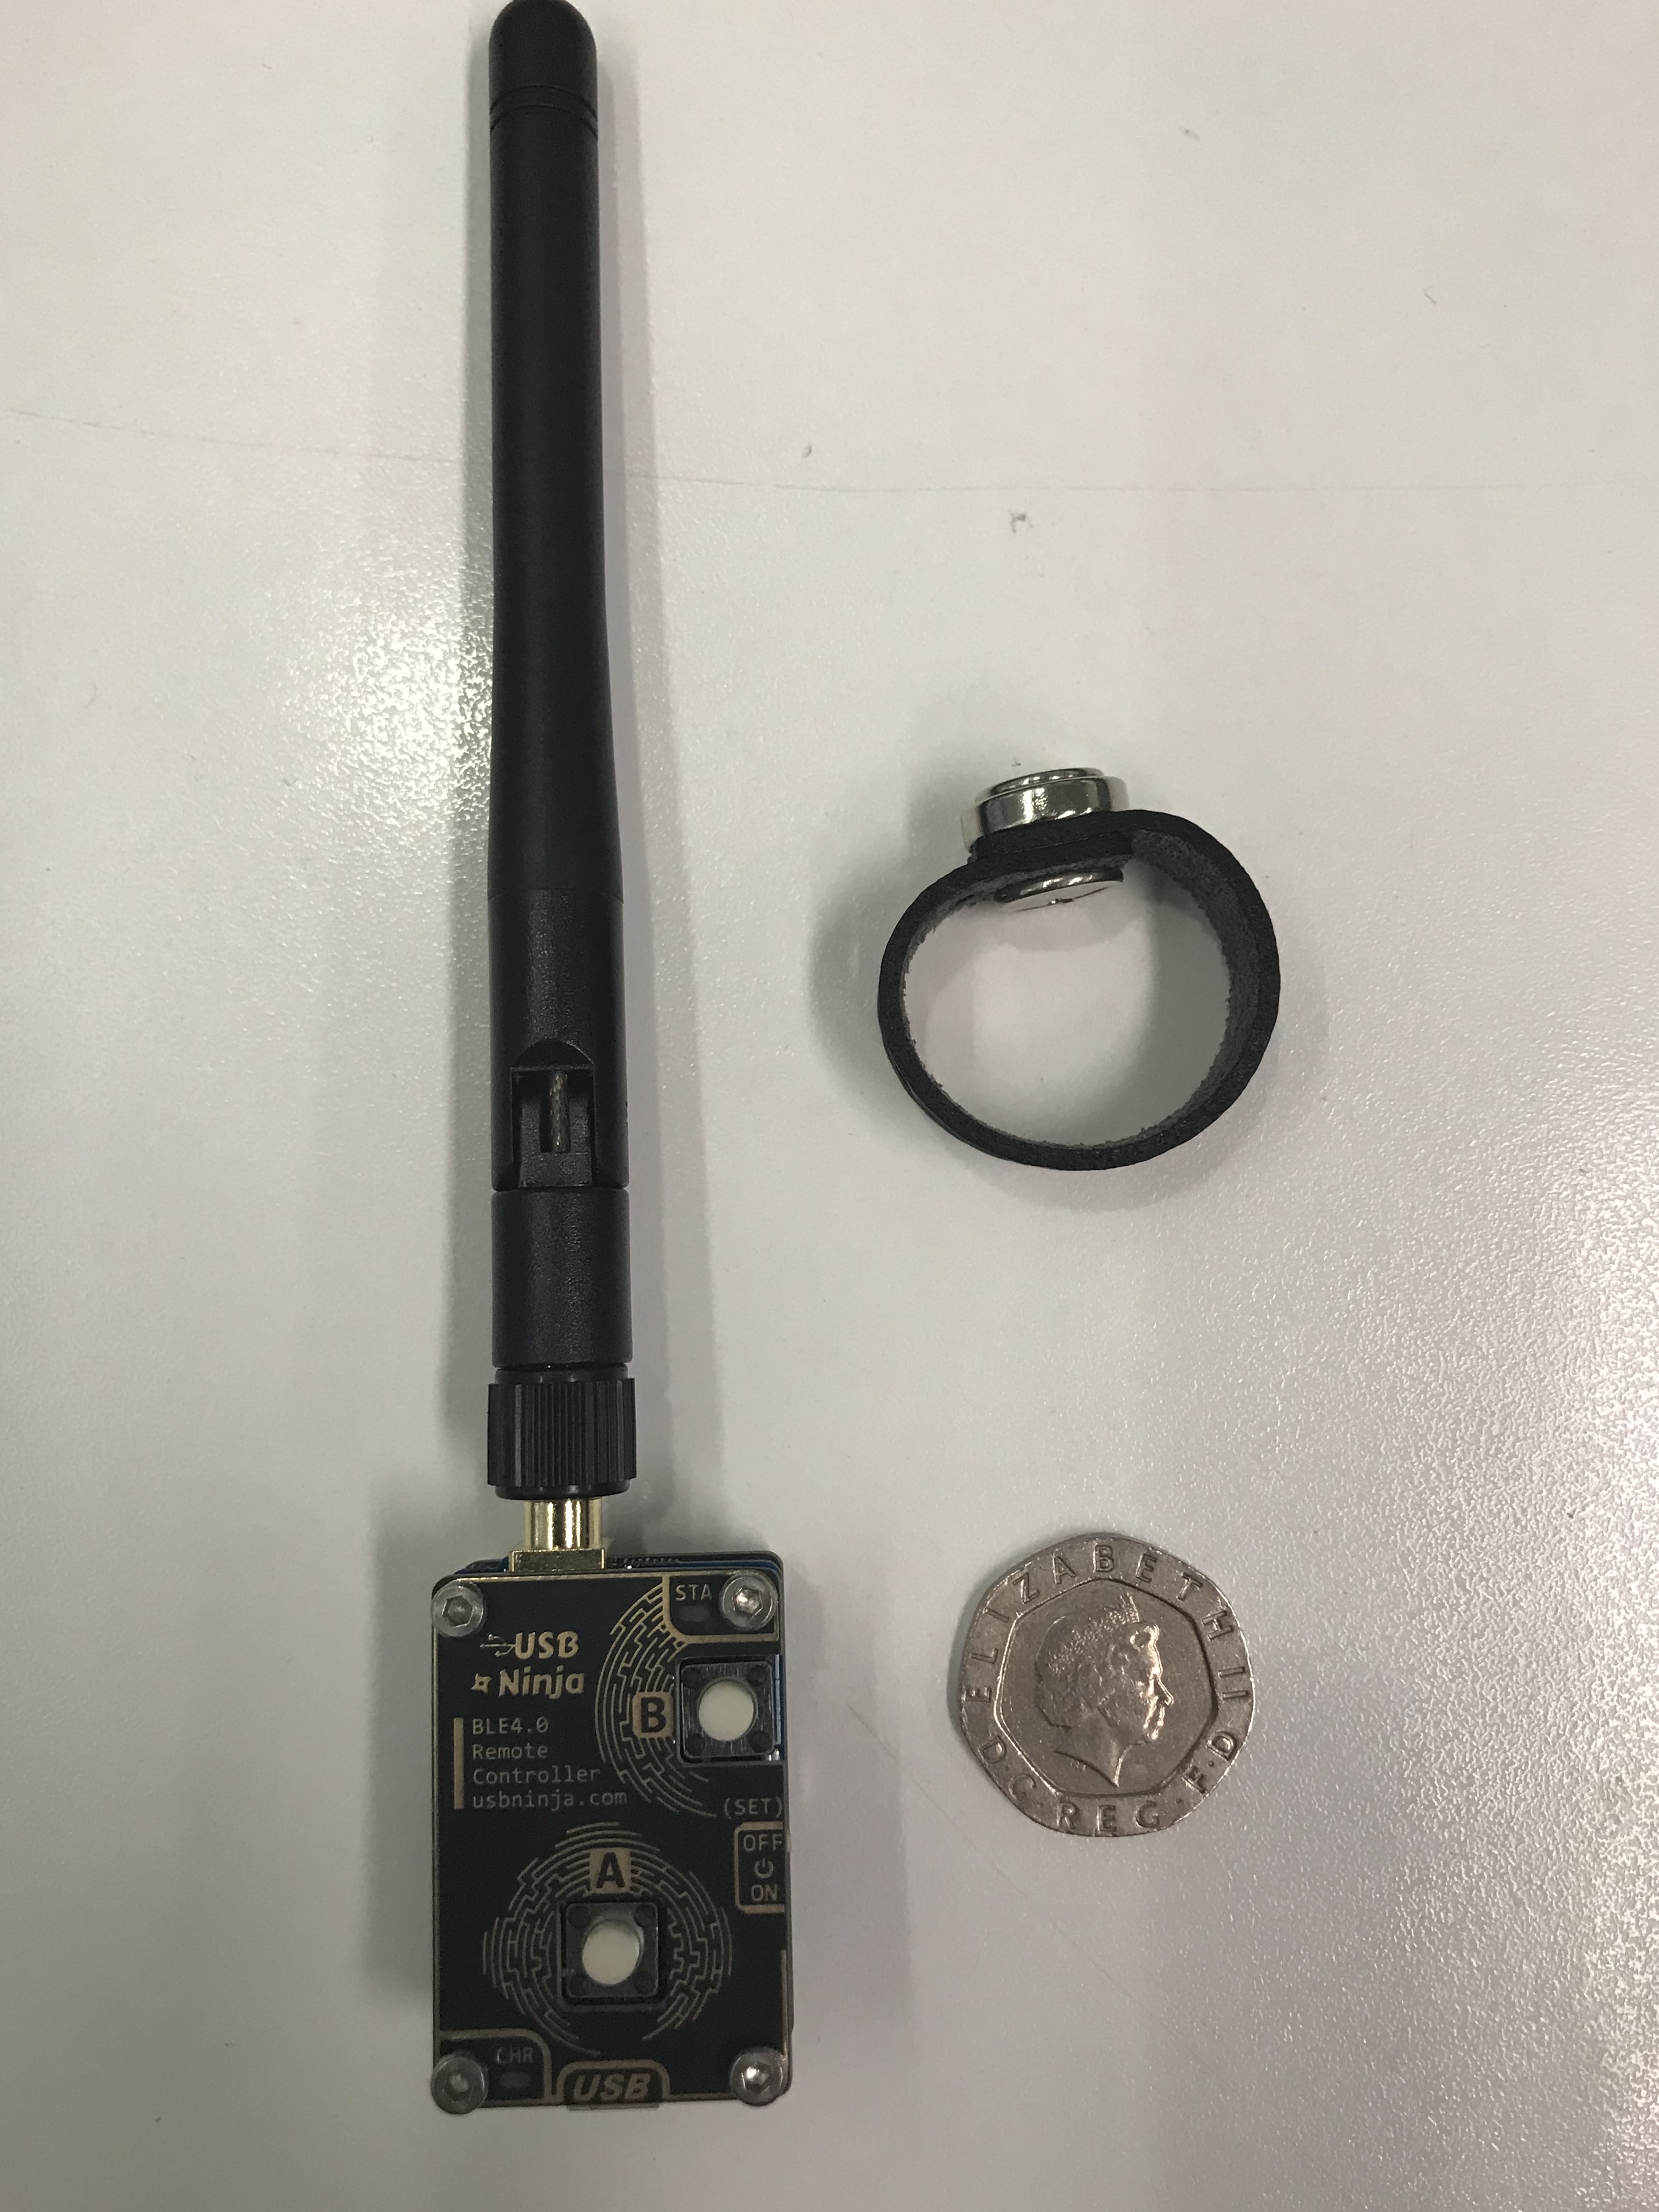
b. Remote control failure. How to troubleshoot the remote control: Turn on the power, plug in the ninja cable, press the remote control to see if the button will flash, and link the ninja cable. If it is damaged, please contact the supplier for replacement.
c. USBninjaCable failure. How to troubleshoot the ninja cable receiver: Use the Android phone to download the remote APP, test the distance and the connection. If it is damaged, please contact the supplier for replacement.
d. Whether the data cable is plugged in at the same time to charge. Some computer USB ports are unstable when the current and voltage are charged, and will cause some interference, which will affect the use of USBninja. Please remove the phone and test again.
e. Whether there are high-power RF interference sources nearby, such as walkie-talkies, high-power radios, fluorescent lights, and turned-on microwave ovens, can seriously interfere with Bluetooth communication. You can change a place to test.
Answer: After experiment, USBninja Cable is plugged into the USB port of some computers, and when the other end is connected to the mobile phone for charging, it may cause some interference. The buttons should not be pressed frequently and quickly when using the remote control.If so, It is easy to cause the Bluetooth on the receiving end to crash. Replug USBninja Cable to recover.
- Can the USBninja Cable plug white shell film be peeled off?
Answer:The film on the white casing can be peeled off. The white film is designed to protect the appearance and prevent scratches in the production process.
USBNinja is an information security and penetration testing device that looks and functions just like a regular USB cable (both power and data) until a wireless remote control triggers execution of a pre-configured payload. Official website.

For typing 100 characters it takes 1.631 seconds. This test prints 100 - len(date +"%T.%N") characters and counts the time:
Installing Arduino IDE
Download and install Arduino software. Version used in this readme - 1.8.9 (Windows Store 1.8.21.0).
Installing USBNinja driver
Download and install USBNinja driver. Version used in this readme can be found here.
Setting up Arduino IDE for USBNinja
Start Arduino IDE and select File -> Preferences menu.
Add USBNinja Boards Manager URL (copy of the version used in this readme can be found here):

Select Tools -> Board -> Board Manager. In Board Manager menu select Contributed from dropdown. Select USB Ninja by RRG package and click Install.

Close Board Manager. From Tools -> Board menu select USB Ninja cable.

Changing Bluetooth name and password of USBNinja
By default USBNinja cable has "Ninja" as its Bluetooth device name (this name is visible to anyone in range of the cable) and 8888 as its PIN for Bluetooth pairing. To change these values we need to reconfigure both the cable and the remote control.
Changing name and password of USBNinja cable
In Arduino IDE go to File -> Examples -> NinjaBLESetup -> NinjaBLESetup. In setup() function set name and password you want to use (file example can be found here):
Disconnect the cable from your computer, press Verify button (top left). For unknown reasons it may fail on the first run. Try verifying the code again and if the code is correct you should get something like this:
Press Upload button (top left) and connect USBNinja cable to your machine while holding magnetic ring next to the USB plastic shell. After two seconds you can remove the ring. You will see terminal output about starting erasing/writing your settings to the cable.
Changing name and password of USBNinja remote control
To change the name and the password of USBNinja remote control you need to download USBNinjaTransmiterToolsV1.0.zip. The version used in this readme can be found here. Unzip the archive, start the tool and connect remote control to your machine with the micro USB cable.
Select the serial port of the remote control and click OPEN. Set the name and password that you're using for USBNinja cable and press SET BLE NAME and SET BLE PASSWORD. After name and password were set press CLOSE button. If the tool is not detecting the remote control, try installing drivers from the zip archive.
![]()
Changing USBNinja keyboard device name
By default USBNinja has "USB Ninja Keyboard" as a name.

To change this name you need to change USB driver configurations located in C:\Users\User\Documents\ArduinoData\packages\USBNinja\hardware\avr\1.0.2\libraries\NinjaKeyboard\include\usbconfig.h
Change this value to something generic :
After changing these values you need to re-upload your payload to USBNinja cable for changes to take effect.

Uploading code to USBNinja cable
To upload any code to USBNinja you need to press Upload button (top left) and connect USBNinja cable to your machine while holding magnetic ring next to the USB plastic shell (USB connector). After two seconds you can remove the ring. You will see terminal output about starting erasing/writing your settings to the cable.
Cobalt Strike payload (remote control)
Due to memory limitations of USBNinja board we can't use Cobalt Strike PowerShell command payload. From testing it seems that we can put approximately 2000 characters in the payload and Cobalt Strike PowerShell payload command is approximately 6000 characters. Due to that we will run download and execute command as our payload.
Remote control's range is approximately ten meters (tested though the wall).
First part of the payload is defining the correct keyboard layout. All available keyboard layouts:
We need to include NinjaKeyboard header file:
Function setup and loop can be left empty (these functions are used for "run on connect" payloads):
As an example we will use DownloadFile PowerShell command:
Full payloadA() function:
Same functionality but with different download location will be used for DNS payload:
Full code file can be found here (to save memory we can rewrite both functions to call a generic function with download URL as an argument).
Cobalt Strike payload (Android app)
Payload from Cobalt Strike payload (remote control) can be re-used. Range of the Android App is the same as of the remote control (tested on Samsung S5).
Download APK file from here. Version used in this readme can be found here.
Install APK file on Android phone. If you changed default password for USBNinja cable change it in password menu (top right). After scanning pick the device.

In here you will be able to execute commands the same way as with the remote control.

Cobalt Strike payload (run on connection)
USBNinja can also be used in RubberDucky mode and execute payload as soon as it's connected. To do this we can use the same payload but place it in loop() function.
As by default Arduino is executing everything in loop() function in a infinite loop, but we can add a flag that would check if we already executed the payload. To do this we need to create a flag outside of loop() function:
Now we need to add a check in loop() function:
Please note, that during testing USBNinja started executing payload as soon as it finished uploading, so try not to spawn any beacons on your machine.
Full code file can be found here.
Cobalt Strike payload (ring activation)
USBNinja can also be activated using magnetic ring. To do this we will check the pin state in loop() function. First we need to configure the pin mode in setup() function:
Now we need to check for the pin state in loop() function:
Don't forget to remove the ring after two seconds when uploading code or it can trigger payload on your machine.
The USB Ninja is an advanced USB attack development platform designed to be as simple as possible whilst leaving as many options open for development. Written in Golang, it was developed on a Raspberry Pi Zero W, but should work on any device that supports USB OTG - see the list of Supported Devices. It makes heavy use of configfs to configure and present the drivers to the host system. See the FAQ for more information.
Please check out ADDED.md for details about all the new features being added!
Looking for some examples? Check out my blog at xcellerator.github.io!
Getting setup with the USBNinja is pretty simple, as long as you're happy with the Linux command-line.
You can follow the instructions below, or head over to my blog here for a more detailed guide on the first time setup!
- First of all, head over to Releases to download the latest release files. You need both root.tar.gz and boot.tar.gz .
- Create a new folder (doesn't matter where) to act as our working directory. You'll only need this during the first setup.
- Create two folders within this called boot and root and then copy boot.tar.gz and root.tar.gz to the working folder.
- i.e. You should have boot , boot.tar.gz , root , and root.tar.gz sitting in your working folder.
- Insert your MicroSD card into your computer and check whats its called under /dev/ using a quick lsblk . I use an SD adapter, so its called mmcblk0 for me.
- Now fire up fdisk with sudo fdisk /dev/mmcblk0 .
- Type o . This will wipe any existing partitions on the card.
- Type n , then p for a primary partition.
- Type 1 for the first partition, then ENTER for the default starting sector, then +100M for a 100MB boot partition.
- Type t , then c to set the first partition as "W95 FAT32 (LBA)".
- Type n , then p for another primary partition.
- Type 2 for the second partition, then ENTER twice to fill the rest of the card.
- Now you can write the new partition table with w .
- Next, we create the filesystems on the two partitions:
- sudo mkfs.vfat /dev/mmcblk0p1
- sudo mkfs.ext4 /dev/mmcblk0p2
- Now, mount the two partitions to our root and boot folders:
- sudo mount /dev/mmcblk0p1 boot
- sudo mount /dev/mmcblk0p2 root
- Extract the release to the mounted partitions
- sudo bsdtar -xpf boot.tar.gz
- sudo bsdtar -xpf root.tar.gz
- Finally, you can sync (this will take a little while - don't worry!) and then sudo umount boot root to unmount the MicroSD card.
- Pop the MicroSD card back into the Raspbery Pi and boot it up! Make sure you use the "USB OTG" port on the board (the one next to the mini-HDMI port).
- After a few seconds, you should see a new serial device show up in dmesg . You can use either screen or minicom to access it. E.g. sudo minicom -b 115200 -D /dev/ttyACM0 or sudo screen /dev/ttyACM0 115200 .
Note: The default login is alarm:alarm and the root account is root:root. By default the alarm user is already in the wheel group.
Build from source
The other option is to just download and setup Arch Linux ARM by yourself and follow the instructions in INSTALL.md to compile the binaries from source and setup all the other services. The process is exactly the same as what was done to prepare the image.
Using other gadgets
If you want to use gadgets other than plain old serial (and if you're here - you probably do), then all you need to do is edit usbninja/options.txt on the first partition of the MicroSD card. This corresponds to the /boot directory when the OS boots up.
See OPTIONS.md and GADGETS.md for more information.
I am not responsible for your actions using this software. Never engage in any activities on any machine that you do not have the express permission to do so. The USBNinja is meant to be used by professionals only.
Современные смартфоны обладают достаточно мощной начинкой и уже в некоторых задачах заменяют нам компьютер. И тут я подумал, а почему бы не попробовать подключить к телефону различную периферию и проверить, как она будет работать . Наверное многие из нас задумывались попробовать подключить к телефону USB флешку, клавиатуру или мышь. Возможно для кого-то это будет новостью, но сделать это можно без всяких проблем. Для этого понадобится один кабель под названием OTG. Стоит он не дорого, но с помощью него мы сможем значительно расширить функциональные возможности смартфона.
Хочу начать с того, что уже все современные смартфоны поддерживают OTG (On-The-Go) технология позволяет без каких либо усилий подключить к телефону различные USB устройства. Некоторые из них я проверил на своем телефоне Xiaomi и решил поделиться с Вами своими впечатлениями, а также рассказать зачем это нужно.
Что еще можно подключить через OTG
Также через кабель OTG можно подключить USB колонки, веб-камеру, картридер, USB вентелятор или фонарик . Еще я пробовал подключить интернет через Ethernet адаптер, но у меня не заработало, скорее всего из-за прошивки MIUI. В интернете читал, что на некоторых телефонах работает. Допустим сломался у Вас роутер, мы взяли, подключили интернет к телефону и начали раздавать по WiFi пока не купили другой роутер.
И еще многих интересует можно ли подключить телефон к телевизору таким способом через HDMI. Я отвечу, что можно, но телефон должен поддерживать MHL(Mobile High-Definition Link)
Я ля таких целей купил хаб в котором есть 3 USB порта, Ethernet разъем, SD и microSD разъем, HDMI и VGA, он мне также необходим для подключения USB накопителей и внешнего монитора к MacBook Air. Возможно кто-то скажет, что эта технология уже устарела и есть беспроводные технологии позволяющие сделать то же самое. С одной стороны это так, но с другой бывают различные ситуации, когда в каком-то оборудовании нет WIFI или Bluetooth и проще подключить через кабель, который стоит копейки и будет более надежным.
На этом наша очередная статья подошла к концу, надеюсь каждый нашел в этой статье для себя что-то новое и полезное. Не забывайте подписаться на наш канал, поставить статье лайк. Если у Вас остались какие-то вопросы, то задавайте в комментариях, мы обязательно ответим Вам.
Подключение USB накопителей к телефону
Внутренняя память у нашего телефона не бесконечная и иногда ее не хватает, а расширить ее с помощью microSD карты это уже редкость. Поэтому нам приходится удалять какие-то данные или переносить их на свой ПК. Но почему бы не подключить к телефону USB накопитель (флешку или внешний жесткий диск) и перенести редко используемую информацию на нее. Или поступить наоборот скопировать необходимую информацию прямо с жесткого диска или флешки к себе на телефон. Делается это все очень просто и без каких либо дополнительных приложений. Для этого покупаем OTG кабель и подключаем его к телефону, а к USB выходу на кабеле подключаем флешку или жесткий диск. Телефон должен будет определить флешку, как внешний накопитель. И потом уже через любой файловый менеджер мы можем копировать данные, как с флешки так и на флешку. Достаточно удобно и быстро. Хочу обратить ваше внимание, что для чтения и записи на жесткий диск или флешку с файловой системой ntfs могут понадобится дополнительные приложение или root права.
Подключаем клавиатуру и мышь к телефону
Если вы собираетесь подключать несколько USB устройств к телефону, то советую присмотреться Вам к USB хабу, который будет подключаться к Вашему телефону через USB-C или microUSB. У меня есть такой хаб и через него я подключил клавиатуру и мышь .
Они автоматически определились и на телефоне появился курсор, с помощью которого можно полноценно управлять телефоном, двойной щелчок левой кнопкой мыши производит запуск приложения, а одинарный клик правой кнопкой мыши переход назад. Клавиатура также работает во всех приложениях без каких либо проблем. Вся эта периферия может понадобиться нам, когда нужно много печатать, а компьютер сломался или на вашем телефоне вышел из строя тачскрин. Я уже не один раз с помощью такого способа вытаскивал информацию с телефона, где не работал тачскрин.
Подключение USB геймпада к смартфону
Играя в игры на сенсорном экране особенно в шутеры, многие знают как это неудобно. Но и здесь нам ни кто не запрещает подключить проводной геймпад через OTG кабель. Да, можно купить беспроводной геймпад, но он стоит дороже и при игре могут наблюдаться задержки, через кабель таких проблем не будет. Я сам лично попробовал проиграть в ретро игры и LIMBO на геймпаде и мне кажется с геймпадом намного удобнее. Подключение геймпада производится к USB разъему OTG кабеля, возможно понадобится дополнительное программное обеспечение и root права.
Подключаем принтер к телефону
Как оказалось принтер тоже можно подключить через OTG кабель к телефону. Это очень будет актуально владельцем старых принтеров без wifi. Если принтер не определился автоматически, то скорее всего понадобится дополнительное программное обеспечение, которое можно скачать с PlayMarket например приложение PrintHand .
Читайте также: