Sketchup убрать лишние грани
Softening and smoothing edges at once
In SketchUp, softening and smoothing edges typically go hand-in-hand. That’s why both the Eraser tool and the Soften Edges dialog box apply these properties together.
Tip: Use the Eraser tool to quickly smooth and soften your edges. Open the Soften Edges dialog box when you need more fine-tuned control.
To soften and smooth edges with the Eraser, follow these steps:

- Select the Eraser tool () or press the E key.
- Tap the Ctrl key (Microsoft Windows) or the Option key (macOS) to toggle Smooth Edges and then "erase" these lines the same way you would to delete them.
If you make a mistake or change your mind, tap the Alt (Microsoft Windows) or Command (macOS) and click the edges to undo the softening and smoothing.
To soften and smooth with the Soften Edges dialog box, follow these steps:
- Select the edges you want to soften and smooth. (See Selecting geometry for tips and selection techniques.)
- MacOS: Select Window > Soften Edges. | Windows: Select Window > Default Tray > Soften Edges. Or context-click your selection and choose Soften/Smooth Edges. Either way, the Soften Edges dialog box appears, as shown in the figure.
Click and drag the Angle between normals slider to set the maximum size of all angles that will be smoothed or softened. The higher the setting, the more angles you are likely to smooth or soften. In the example, the slider is set to 20 degrees, which smooths and softens most of the rock’s surface.
To check or change the properties applied to an edge, context-click it and choose Entity Info. In the Entity Info box, shown here, the type of entity appears in the upper left, and you can select or clear the Soft and Smooth check boxes. Select a face, and you can see whether it’s a surface entity or another type of geometry.

Tip: Softened and smoothed edges make basic geometry look polished. In a complex model, relying on soft and smooth edges can noticeably lighten the load on your computer’s memory. For example, you can create the corbel shown in the figure by creating a 2D drawing in the shape of the selected edges. Then extrude the face into the 3D shape shown here. The shape is quite basic, but the softened and smoothed edges enhance the model’s dimensions and shape. Also, if you draw and extrude arcs, circles, or curves, these entities apply soft and smooth edges by default.

Что произойдет, если вы трижды щелкните грань в SketchUp?
Когда вы дважды щелкаете грань, вы выбираете эту грань и все ребра, которые ее определяют. Двойной щелчок по ребру дает вам это ребро и все грани, которые с ним соединены. Если вы трижды щелкните ребро или грань, вы выбираете весь конгломерат, частью которого он является.
Как уменьшить края в SketchUp?
Как удалить неприглядные края из вашей модели SketchUp
- Используйте ластик. Чтобы сгладить края с помощью инструмента «Ластик», удерживайте нажатой клавишу Ctrl (Option на Mac), щелкая или перетаскивая края, которые нужно сгладить.
- Используйте диалоговое окно «Смягчение краев».
Каковы системные требования для SketchUp?
Минимальное оборудование
- 1 ГГц процессор.
- 4GB RAM.
- 500 МБ свободного места на жестком диске.
- Видеокарта 3D-класса с 512 МБ памяти и выше и поддержкой аппаратного ускорения. Убедитесь, что драйвер видеокарты поддерживает OpenGL 3.1 или выше и обновлен.
Hiding geometry
As you draw a model, you don’t necessarily want a line marking every edge in your model. The Soften Edges feature hides the line, but also creates a surface entity, which means you can apply only one material to any face in the surface entity. If you want to hide an unsightly line without creating a surface entity, seek out the Hide feature. You can hide lines, faces, and any SketchUp entity.
Follow these steps to hide a line or any geometry:
- Select the geometry you want to hide.
- Context-click the selection and choose Hide from the context menu that appears, as shown in the figure. Or choose Edit > Hide. The selected geometry disappears from view, although it is still there, like a ghost in the machine.
After you hide geometry, by default, you can’t select it. To make hidden geometry selectable, you must display hidden geometry or unhide the geometry. (There is a difference.) See Viewing hidden edges for details.
Tip: In SketchUp, styles change the look of your whole model. All you have to do is click a style preset. If you’re hiding edges or geometry to see through your model or change the appearance of your model as a whole, consider whether styles offer an easier way to get the job done.
Drawing a polygon
You can create polygon entities with the Polygon tool. (No surprise there.) However, here are a few facts that you may not know about polygons, but that are handy to know as you draw them:
- In SketchUp, a polygon has a radius and 3 or more sides. So the size of your polygon is measured from a center point, and the number of sides determines the type of polygon you draw. A pentagon as 5 sides; an octagon has 8 sides.
- Polygon entities act as a single line in that they can define the edge of a face and also divide a face. Selecting one side of the polygon selects the entire polygon.
- The SketchUp inference engine interprets each side of a polygon as a segment. As you hover your cursor over a polygon, you see endpoint, midpoint, and from point inferences.
- You can draw polygons on faces or separate from existing geometry.
Follow these steps to draw a polygon:
- Select the Polygon tool () on the toolbar. The cursor changes to a pencil with a polygon. The Measurements box indicates the current number of sides. To change the number of sides in your polygon, you can type a number value now or wait until after you’re done drawing.
- Click to place the center point of the polygon. The Measurements box changes to display the radius. You can type a radius value now or immediately after you draw the polygon.
- Click to place the center point of the polygon. To align the plane of your polygon with a specific drawing axis or other geometry, press the arrow key that corresponds your desired alignment. For example, the up arrow align's the polygon's plane with the blue axis. See the earlier table in Drawing a rectangle or square for details.The Measurements box changes to display the radius. You can type a radius value now or immediately after you draw the polygon.
- Move the cursor out from the center point to define the radius of your polygon. As you move the cursor, the radius value is displayed dynamically in the Measurements box. To specify the radius, type a value and press Enter. You can also press Esc to start over.
- Click a second time to finish the polygon. Here, you see a 5-sided polygon.
- (Optional) Until you select a new tool or draw a new polygon, you can use the Measurements box to change the radius or the number of sides as follows:
- To change the number of sides: Type a number and the letter S (for example, type 5s for 5 sides or 42s for 42 sides). Then press Enter.
- To change the number of sides: Type a number and the letter S (for example, type 5s for 5 sides or 42s for 42 sides). Then press Enter. Alternately, you can hold down the Ctrl key (Microsoft Windows) or the Option key (macOS) while pressing the + or - to increase or decrease the number of sides, respectively. If you're using a French Canadian keyboard, hold down the Ctrl key (Microsoft Windows) and the +/= key to increase the segments. For macOS, press Command and = to increase segments or - to decrease segments.
- To change the radius: Type a number and a unit (if desired), such as 6”, 8’, 34cm, or 7m. Then press Enter or Return.
Tip: Although the Polygon tool works similarly to the Circle tool, the difference between the tools becomes apparent when you push/pull a circle or polygon into a 3D shape. The circle’s edges look smooth, but a polygon’s edges show distinct sides, as shown here.
In this live-action video, you can see the Circle and Polygon tools demonstrate all their stunts.
Editing shapes
The Entity Info dialog box enables you to change a circle or polygon’s radius or sides anytime after you create the shape. Here’s how:

- Context-click an edge (not the face) of a circle or polygon that you want to edit.
- Select Entity Info from the context menu that appears, as shown here.
- In the Entity Info panel, click in the Radius or Segments box, change the value, and press Enter (Microsoft Windows) or Return (Mac). After you press Enter or Return, your shape immediately reflects your changes.


SketchUp doesn’t enable you to modify the width or length of a rectangle at anytime. If you’ve already selected another tool or drawn additional rectangles, you need to erase the rectangle you want to change and redraw it. See Drawing a rectangle for details. Or resize the rectangle with the Scale tool if you don't need to enter precise dimensions.
Tip: The basic shape tools use a thin solid line. To create dashed lines, see Applying Dashed Lines to Layers.
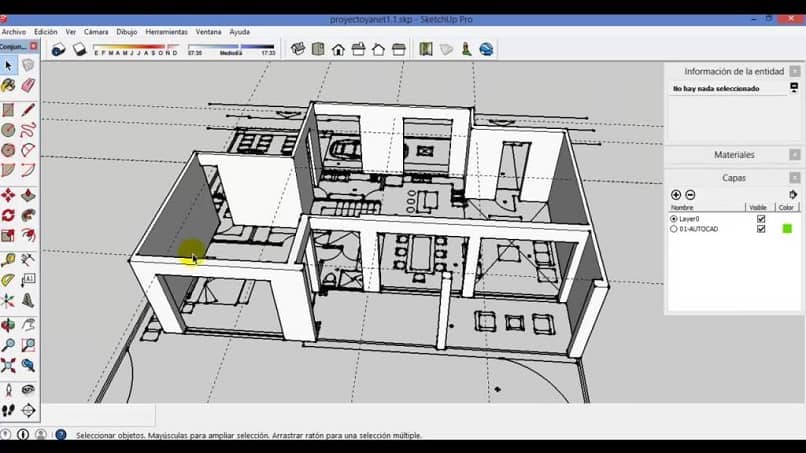
Для профессионалов в области дизайна существует довольно обширный список, в котором есть большое количество программ на выбор, отвечающих их требованиям. Среди прочего появляется Sketchup, который для начинающих пользователей предлагает быстрые советы благодаря «направляющим точкам» или «пунктирным линиям». Кукуруза Как удалить направляющие точки или отмеченные линии в SketchUp, когда они не нужны?
Как и ожидалось, там есть некоторые инструменты, доступные в SketchUp для правильной ориентации плоскости, чтобы не было глюков. Несмотря на это, иногда они только мешают работе дизайнера. Поэтому в определенном смысле полезно отказаться от услуг этих опций, чтобы продолжить проект.
Масштабирование компонентов
Вы можете использовать эти методы масштабирования как для компонентов, так и для повседневной геометрии. (Для ознакомления с компонентами см. Добавление готовых компонентов и динамических компонентов). Однако при масштабировании компонента вы можете изменить размер одного экземпляра компонента или всех экземпляров компонента в вашей модели:
- При масштабировании компонента изменяется только отдельный экземпляр. Эта функция позволяет вам иметь в вашей модели версии одного и того же компонента с разным масштабом. Чтобы масштабировать отдельный экземпляр, щелкните экземпляр компонента с помощью инструмента «Масштаб» и используйте ручки, чтобы установить новый масштаб с помощью любого метода инструмента «Масштаб», описанного ранее в этой статье. На следующем рисунке показано масштабирование компонента двери, загруженного из 3D Warehouse.
- Масштабирование объекта внутри компонента масштабирует каждый экземпляр компонента. Чтобы масштабировать объект в компоненте, вам нужно открыть компонент, дважды щелкнув его. Вокруг компонента появятся пунктирные линии, а линии и грани внутри компонента становятся доступными для редактирования, как показано на следующем рисунке. При открытом компоненте вы можете, например, масштабировать линейный объект. Это действие влияет на определение компонента, и, следовательно, все экземпляры компонента масштабируются соответствующим образом. При открытом компоненте вы можете выбрать линию и, следовательно, масштабировать с помощью инструмента «Масштаб» или «Рулетка», как объяснялось ранее в этой статье. Однако обратите внимание, что единый масштаб с помощью инструмента «Рулетка» часто является самым простым способом масштабирования всех компонентов в модели.
Many models start with basic shapes. In SketchUp, the shape tools help you draw rectangles, circles, and polygons. You find these tools on the Getting Started toolbar, the Drawing toolbar, and the Large Tool Set toolbar.
Table of Contents
Пропорциональное масштабирование выборки
Если вы хотите изменить размер геометрии в модели и сохранить ее пропорции, вы можете использовать инструмент «Рулетка» или инструмент «Масштаб». Выбор зависит от того, как вы хотите установить масштаб:
- Чтобы масштабировать размер определенной линии, используйте рулетку. Например, вы обнаружите, что одна комната на плане этажа может иметь ширину не более 10 футов, но остальная часть плана этажа может оставаться такой же. Или вы знаете, что статуя должна быть 3 метра в высоту.
- Чтобы изменить размер выделенной области в процентах от исходного размера, используйте инструмент «Масштаб». Например, выберите этот метод, если вы хотите увеличить размер выборки на 200% или уменьшить его до 50%.
Чтобы масштабировать часть вашей модели с помощью рулетки, выполните следующие действия:
Примечание. Этот процесс также работает с компонентами. См. Добавление готовых компонентов и динамических компонентов для ознакомления с компонентами. В разделе Масштабирование компонентов далее в этой статье объясняется, как масштабирование влияет только на один компонент или все экземпляры компонентов в модели.
Если вы хотите пропорционально масштабировать модель в процентах, инструмент «Масштаб» легко справится с этой задачей. Представьте, что вы не знаете, как поговорить со своим клиентом об уменьшении комнаты на его плане этажа до 10 футов шириной, поэтому вы моделируете слона в комнате, пока обдумываете это. Вот как масштабировать слона или любую другую выборку в вашей модели в процентах:
- С помощью инструмента Выбрать () выберите геометрию, которую нужно масштабировать. Этот шаг важен, если вы хотите масштабировать сложную 3D-выборку. Если у вас простая выборка, например 2D-фигура или объект поверхности, вы можете пропустить этот шаг.
- Выберите инструмент Масштаб () или нажмите клавишу S. Вокруг вашего выбора появится желтая рамка с зелеными ручками, как показано на рисунке. Если вы пропустили шаг 1, щелкните геометрию курсором инструмента «Масштаб».
- Для равномерного масштабирования или сохранения пропорций выборки щелкните угловую ручку масштабирования. Выбранная ручка и противоположная ручка масштабирования становятся красными, как показано на следующем рисунке, а в поле «Измерения» вы видите масштаб 1.00, что означает, что ваша геометрия имеет исходный размер или масштабируется до 100%.
- Переместите курсор, чтобы масштабировать объект. В поле «Измерения» масштаб отображается динамически. Чтобы начать все заново, в любой момент нажмите клавишу Esc. Чтобы установить масштаб из центра, а не из противоположного угла, удерживайте клавишу Ctrl (Windows) или клавишу Option (macOS), перемещая красную ручку угла.
- Щелкните, чтобы установить новый масштаб вашей выборки. Или введите желаемые размеры шкалы и нажмите Enter.
Примечание. Технически на шаге 5 вы можете ввести размер, например 2 м или 3", вместо размера в масштабе. Однако масштабирование на основе измерения с помощью рулетки, как правило, более интуитивно понятно.
Как расчленить компонент в SketchUp?
Чтобы разбить объект, щелкните, чтобы выделить его, и выберите Правка > Группа > Разнести или Правка > Компонент > Разнести.
Drawing a circle or ellipse
Before you draw a circle, it’s helpful to understand how SketchUp creates circle entities:
- Circle entities have a radius and connect multiple line segments.
- These segments act as a single line in that they can define the edge of a face and divide a face. Additionally, selecting one segment selects the entire circle entity.
- SketchUp’s inference engine still sees the segments in the circle. So, if you hover your mouse around the circumference of the circle entity, you’ll see endpoint and midpoint inferences.
To draw a circle, follow these steps:
- On the toolbar, select the Circle tool () from the drop-down menu next to the Rectangle tool. Or press the C key. The cursor changes to a pencil with a circle, and the Measurements box indicates the default number of sides: 24, as shown in the figure. To change the number of sides, you can type a value now or wait until after you’re done drawing the circle.
- Click to place the center point of the circle. The Measurements box changes to display the circle’s radius. You can type a radius value now or immediately after you draw the circle.
- Click to place the center point of the circle. To align the plane of your circle with a specific drawing axis or other geometry, press the arrow key that corresponds your desired alignment. For example, the up arrow aligns the circle's plane with the blue axis. See the table in Drawing a rectangle or square for details.The Measurements box changes to display the circle’s radius. You can type a radius value now or immediately after you draw the circle.
- Move the cursor out from the center point to define the circle’s radius. As you move the cursor, the radius value is displayed dynamically in the Measurements box. Press Esc at any point to start over.
- Click to finish the circle. SketchUp creates a circle-shaped face, as shown in the figure.
- (Optional) Until you select a new tool or draw a new circle, you can use the Measurements box to change the circle’s radius or the number of sides as follows:
- To change the number of sides: Type a number and the letter S (for example, type 5s for 5 sides or 42s for 42 sides). Then press Enter.
- To change the number of sides: Type a number and the letter S (for example, type 5s for 5 sides or 42s for 42 sides). Then press Enter. Alternately, you can hold down the Ctrl key (Microsoft Windows) or the Option key (macOS) while pressing the + or - to increase or decrease the number of sides, respectively. If you're using a French Canadian keyboard, hold down the Ctrl key (Microsoft Windows) and the +/= key to increase the segments. For macOS, press Command and = to increase segments or - to decrease segments.
- To change the radius: Type a number and a unit (if desired), such as 6”, 8’, 34cm, or 7m. Then press Enter or Return.
Tip: The Entity Info dialog box offers a handy way to edit the sides and radius values anytime. See Editing shapes later in this article for details.
To draw an ellipse or oval, follow these steps:

- Draw a circle with the Circle tool.
- Select the Scale tool ().
- Click the circle. A bounding box with eight green grips is displayed around the circle.
- Click one of the middle grips (not one of the corner grips) and move the mouse to pull the circle into an ellipse, as shown here.
- Click again when you’re done scaling the circle.

Understanding the edge properties
In SketchUp, the following properties, in various combinations, enable you to control edges’ appearance:
-
Soft: When you soften an edge, the edge is hidden, and the faces that the edge bounds become a surface entity.
Note: A surface entity joins two or more faces so that they look round. Although you still see inferences for all the geometry that a surface entity contains, the surface entity acts like a single entity when you select or paint it. In the figure, you see that clicking the face on either side of the soft edge (1) selects both faces.
You can also hide an edge (or any geometry, the hidden property isn’t exclusive to edges). When you hide an edge, the edge is not visible, but any faces adjoining the edge are not transformed into a surface entity. (Edge 3 in the figure is a hidden edge.)

Масштабирование всей модели
Если вы хотите масштабировать всю модель, используйте инструмент «Рулетка».
Совет. Инструмент «Рулетка» позволяет выполнять точное масштабирование, указав желаемый размер между двумя точками. Эта линия называется контрольной линией.
Чтобы масштабировать всю модель, например план этажа в этом примере, выполните следующие действия:

- Выберите инструмент Рулетка () или нажмите клавишу T. Курсор примет вид рулетки.
- Измерьте расстояние между двумя точками на вашей модели. В этом примере предположим, что вы знаете, что ширина лестницы должна быть 48 дюймов. Вот как измерить это расстояние:
- Щелкните один конец отрезка линии, чтобы установить начальную точку измерения. Используйте механизм вывода SketchUp, чтобы выбрать точную точку.
- Переместите мышь в конечную точку того же отрезка линии. Когда вы перемещаете мышь, временная линия рулетки со стрелками на каждом конце тянется от вашей начальной точки.
- Щелкните другой конец отрезка линии, как показано на рисунке. Окончательное расстояние появится в поле «Измерения».
Совет. Вы можете использовать британские или метрические единицы. SketchUp распознает оба типа. Просто не забудьте указать желаемые единицы измерения, если они не являются единицами измерения по умолчанию в вашем шаблоне.
Как удалить ключевые точки или сшитые линии в SketchUp
Направляющие точки позволяют пользователю идеально рисовать геометрические фигуры, шаг за шагом следуя порядку точек. Тем не менее, иногда более полезно обойтись без них, потому что, если они "злоупотребляют", то есть если доступно большое количество из них, SketchUp имеет тенденцию терпеть неудачу.
![]()
Чтобы удалять ориентиры или отмеченные линии в SketchUp, сначала необходимо навести курсор мыши на удаляемую точку. Щелкните по нему, затем нажмите «Изменить», затем «Скрыть», чтобы он немедленно исчез.
Если вы хотите удалить их полностью, проделайте ту же процедуру, что и раньше. Но вместо того, чтобы выбрать вариант скрыть в панели редактирования , наконец, нажмите «Удалить», чтобы эти точки целиком были удалены из проекта.
В том же духе, помимо удалите направляющие точки или линии, отмеченные в SketchUp, вы можете удалить так называемые строки TOPO. Нажмите «Сетка» в правом верхнем углу, чтобы отображались только строки. На клавиатуре нажмите и удерживайте клавиши «Ctrl + A», чтобы выбрать все строки, затем, щелкнув правой кнопкой мыши, вы можете выбрать между «Скрыть» или «Удалить», чтобы завершить процедуру.
Drawing a rectangle or square
- On the ground plane
- On a vertical plane
- On existing faces
- Separate from existing geometry (aligned to an axes plane)
- Inferenced from existing geometry
To draw a rectangle with the Rectangle tool, follow these steps:
![]()
-
Select the Rectangle tool () from the toolbar or press the R key. The cursor changes to a pencil with a rectangle.
As you draw a rectangle, the Measurements box helps you model precisely as follows:
- Set the length and width. Type a length value, a comma, a width value, and then press Enter. For example, type 8‘,20’ and press Enter. If you type only a number or numbers, SketchUp uses the current document units setting. You can also override the document units setting by specifying imperial (such as 1’6") or metric (such as 3.652m) units.
- Specify only a length or width. If you enter a value and a comma (3‘,), the new value is applied to the first dimension, and the second dimension doesn’t change. Similarly, if you type a comma and then a value (,3’), only the second dimension changes.
- Change the rectangle’s position with negative numbers. If you enter a negative value (–24, –24), SketchUp applies that value in a direction opposite to the one that you indicated while drawing.
Tip: You don’t need to click in the Measurements box before you type a value. As you draw, the Measurements box is waiting for you to type precise measurements if you choose to do so. Also, until you select another tool or draw another rectangle, you can use the Measurements box to change a rectangle’s dimensions as many times as you like.
Note: If you're using a non-English keyboard, use a comma to indicate the decimal place and a semi-colon to separate the dimensions. For example, you might enter two sides of a rectangle as: 7,6m;4,3m
As you move your cursor with the Rectangle tool selected, the SketchUp inference engine displays the following cues:
Need to align a rectangle’s plane with a drawing axis or other geometry? The arrow keys can help, as explained in the following table.
Modifier Key Locks a Rectangle’s Plane So It Aligns With … How It Looks On-Screen Left arrow Green axis ![]()
Up arrow Blue axis ![]()
Right arrow Red axis ![]()
Down arrow Inferenced geometry ![]()
In the video, you can see these features of the Rectangle tool in action.
Растягивание или сжатие геометрии в масштабе
Иногда вам нужно масштабировать только одно измерение модели (или, может быть, два). Для этого используйте ручки ребра или грани инструмента «Масштаб». Вот как этот процесс работает на примере шкафа:
- С помощью инструмента Выбрать () выберите геометрию, которую нужно масштабировать. Этот шаг важен для сложной 3D-выборки. Пропустите этот шаг, если выполняете простую выборку, например 2D-форму или объект поверхности.
- Выберите инструмент Масштаб ( ) или нажмите клавишу S. Вокруг вашей выборки появится желтая рамка с зелеными ручками. Если вы пропустили шаг 1, щелкните геометрию курсором инструмента «Масштаб».
- Щелкните ручку ребра или грани (не угловую ручку). Выбранная ручка и противоположная ручка масштабирования становятся красными, как показано на рисунке, а в поле «Измерения» вы видите масштаб 1.00, что означает, что ваша геометрия имеет исходный размер или масштабируется до 100%. В поле «Измерения» также отображается направление оси для вашей шкалы, например синяя шкала или красная шкала. Если вы выберете ручку ребра, вы увидите две оси: красная и зеленая шкала.
- Переместите курсор, чтобы масштабировать объект. В поле «Измерения» масштаб отображается динамически. Чтобы начать все заново, в любой момент нажмите клавишу Esc. Чтобы установить масштаб от центра, а не от противоположного ребра или грани, удерживайте клавишу Ctrl (Windows) или клавишу Option (macOS), перемещая ручку красного угла.
- Щелкните, чтобы установить новый масштаб вашей выборки. Или введите желаемые размеры масштаба и нажмите Enter. Чтобы установить масштаб по двум или даже трем осям, введите два или три числа, каждое из которых разделено запятой, например 3,2. В этом примере вы видите, что исходный шкаф был увеличен в два раза по ширине, но на половину высоты.
Совет. Если у вас возникли проблемы с контролем направления масштабирования, попробуйте изменить положение осей рисования в соответствии с вашей выборкой. Для этого выберите Инструменты > Оси в строке меню. С помощью курсора инструмента «Оси» щелкните угол, который хотите использовать для выравнивания осей рисования. Затем переместите курсор так, чтобы он зафиксировал ребро, по которому вы хотите выровнять выводимую ось, и щелкните, чтобы подтвердить изменение. (Вывод будет красным, зеленым или синим в зависимости от направления, в котором вы перемещаете курсор). Для получения подробной информации о работе с осями рисования см. раздел Регулировка осей рисования.
Можно ли стереть в наброске?
Вы можете использовать Инструмент стирания чтобы стереть любые наброски на холсте, сделанные с помощью инструмента «Эскиз». Нажмите на кнопку «Стереть», чтобы активировать ее. Нажмите и перетащите эскиз, чтобы стереть его.
The Soften Edges feature may remind you of a stick of butter or a chocolate bar that got too warm in the sun. In SketchUp, however, the Soften Edges feature does nothing to compromise your model’s structural integrity.
Tip: You can use the Soften Edges feature, along with the Smooth edge property, to change the visibility of your edges and make your model look more realistic with less geometry, which improves your computer’s performance.
Here, you find an introduction to soft, smooth, and hidden geometry and the types of entities they create. After you understand the basics, check out a few tips for improving your model’s appearance and modeling efficiently.
Table of Contents
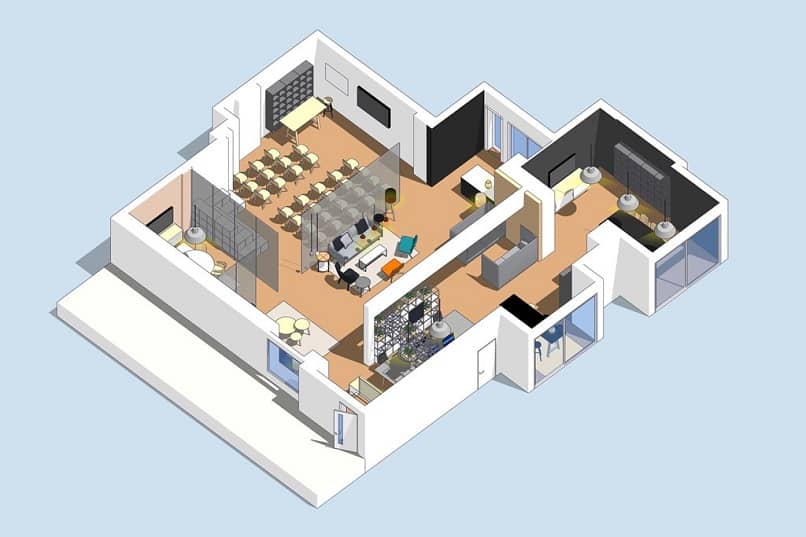
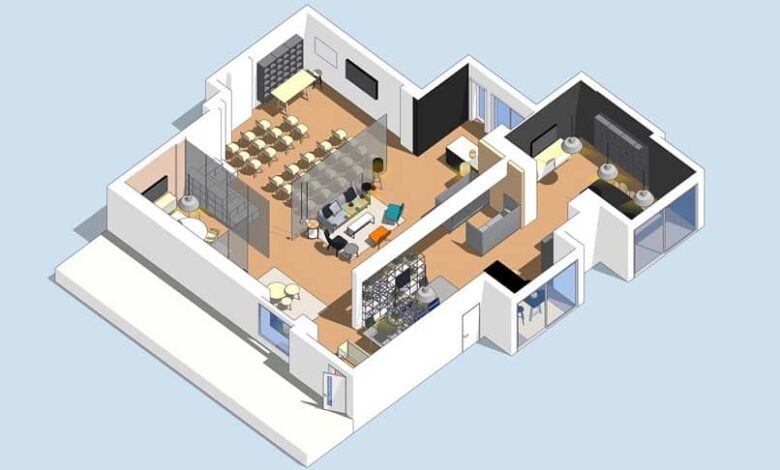
Что такое SketchUp и для чего он нужен?
Ранее он назывался Google SketchUp, потому что у гиганта технологической индустрии купил права в то время . Спустя годы он был переименован в свое первоначальное название, после того как все его акции были переданы компании Trimbe.
Sketchup - это программное обеспечение, программа или приложение, доступное для Windows и MacOS. чьей целью является графический дизайн и 3D-дизайн, в зависимости от обстоятельств. Помимо Autocad, он признан сообществом инженеров, архитекторов и дизайнеров легкодоступным элементом с интерфейсом, который вообще не представляет проблемы.
Дизайнер умеет удалить направляющие точки или отмеченные линии в SketchUp создать из Projets 3D , и даже для создавать и редактировать 3D-тексты с инструментом.
И все это с простотой, характерной для программного обеспечения, сочетающей заранее установленные геометрические аспекты и знания пользователя для получения идеальной отделки. Имейте в виду, что Google Sketchup также позволяет вставлять фон в вашу работу. , с практикой все просто.
![]()
Некоторые называют это "маленьким Autocad от Google" потому что он имеет практически ряд опций, аналогичных программе Autocad как таковой. SketchUp гарантирует идеальное создание 3D-моделей, от архитектурной инфраструктуры до простого объекта, такого как чашка кофе.
Точно так же это программное обеспечение оснащено наглядным пособием. И он шаг за шагом объясняет его меню и то, как следует применять параметры, отображаемые в нем при входе в программу. Помогите новым пользователям ознакомиться с приложением и поделиться своими дизайнерскими знаниями.
Drawing a rotated rectangle
The Rotated Rectangle Tool can come in handy when you need to draw a rectangle whose face is at an angle to SketchUp's default red, green, or blue axes or to other geometry.
Like the Rectangle tool, the Rotated Rectangle tool enables you to create precise rectangles and squares and displays inferences to help you as you draw. However, when you create a rectangle with the Rotated Rectangle tool, you position the rectangle at an angle as well. The following figure is an example of a rectangle created with the Rotated Rectangle tool.
![A rotated rectangle in SketchUp]()
To create a rotated rectangle, follow these steps:
![]()
- On the toolbar, from the Shape Tools menu, select the Rotated Rectangle tool (). Or select Draw > Shapes > Rotated Rectangle from the menu bar.
- (Optional) Press an arrow key to set the plane for your rotated rectangle, per the table that appears earlier in this article. For example, press the left arrow key to constrain the plane of your rotated rectangle to the green plane.
- Click once to set the first corner of your rectangle.
- Create the first edge of your rotated rectangle. You can do this in two ways:
- Type a precise measurement and press Enter.
- Or move the cursor where you want to place the second endpoint of this edge, using the SketchUp inference engine to position the endpoint in relation to the axes or other geometry, as shown in the following figure, and then click.
Tip: You can use a few modifier keys as you complete this step. Hold down the Shift key to constrain the first edge to its current direction. The Alt (Windows) or Command (macOS) key locks the protractor plane. Or the arrow keys can again help you align the first edge to an axis. Simply press the arrow key that corresponds your desired alignment, as explained earlier in this section. For example, press the right arrow key to constrain the first edge so it's aligned with the red axis.
- Type an angle and width into the Measurements box, following the prompt.
- Type a width and angle into the Measurements box, following the prompt.
- Move around the protractor to set the angle, and move your cursor away from the center of the protractor to set the width, as shown in the following figure. To constrain the angle, hold down the Shift key. Click to finish creating the rotated rectangle.
Tip: Press the Alt (Windows) or Command (macOS) key to set the protractor baseline at the cursor's current position and then move the cursor to measure the angle from the baseline you set. This method is helpful if you want to measure the angle from a point other than the baseline set in Step 3. A dashed line appears so you can see the new baseline.
![Inferences can help you align a rotated rectangle with nearby geometry]()
![Inferences can help you align a rotated rectangle with nearby geometry]()
Note: if you're using a non-English keyboard, you'll want to use a comma to indicate the decimal place and a semi-colon to separate the values in the Measurements box. For example, you might enter the angle and width of the second edge as 43,2;8,2m to get an angle that’s 43,2 degrees and 8,2 meters long.
Note: if you're using a non-English keyboard, you'll want to use a comma to indicate the decimal place and a semi-colon to separate the values in the Measurements box. For example, you might enter the width and angle of the second edge as 8,2m; 43,2 to get a width that’s 8,2 meters long and angle that's 43,2 degrees .
Как очистить SketchUp бесплатно?
В открытом приложении нажмите кнопку "составные части" на правой панели инструментов, чтобы открыть вкладку «Компоненты». В верхней части вкладки есть кнопка со значком переработки. Нажмите эту кнопку, чтобы очистить модель от всех неиспользуемых компонентов.
Какой инструмент позволяет удалить линию или ребро?
Если вы выберете инструмент Ластик на любой из панелей инструментов вы можете щелкнуть край, чтобы стереть его и любые грани, которые он ограничивает. Нажмите и перетащите несколько строк с помощью инструмента «Ластик». Линии, которые вы сотрете, когда отпустите кнопку мыши, будут выделены синим цветом.
В чем разница между группой и компонентом в SketchUp?
По определению группа — это отдельный экземпляр набора геометрии. Компонент — это именованная коллекция геометрии, которая может существовать в нескольких местах модели. Каждый экземпляр является повторением всех остальных. А изменение к одному экземпляру изменяет все остальные экземпляры.
Viewing hidden geometry and objects
In SketchUp, any geometry that’s hidden is still there. You just can’t see or select it.
To see the hidden geometry or objects but keep them hidden, choose View > Hidden Geometry or View > Hidden Objects. All hidden entities appear in a ghosted pattern (as shown in the figure), allowing you to select them. Choose View > Hidden Geometry or View > Hidden Objects again to clear the option and make the ghost pattern or object disappear.
To change geometry from hidden to visible, you need to unhide it. Select the hidden geometry, context-click the selection, and choose Unhide. (The Hide menu item changes to Unhide when selected geometry is hidden.)
В SketchUp вы можете изменять размер и форму модели в зависимости от относительных размеров ребер и граней. Вот краткий обзор доступных опций:
- Масштабируйте всю модель с помощью инструмента «Рулетка».
- Изменяйте размер объектов, сохраняя их пропорции, с помощью инструмента «Рулетка» или «Масштаб».
- Растягивайте или сжимайте объект для масштабирования с помощью инструмента «Масштаб». Например, растяните шкаф так, чтобы он был вдвое больше нынешней ширины, или сузьте автомобиль на 5 процентов.
- Масштабируйте один или все компоненты в вашей модели.
В следующем видео показано, как с помощью инструмента «Масштаб» можно пропорционально масштабировать геометрию или растягивать ее размеры.
Если вам нужны подробные сведения о масштабировании всей модели или подробные инструкции по использованию функций масштабирования SketchUp, ознакомьтесь с разделами далее в этой статье.
Содержание
Читайте также: