
Pfsense firewall rules настройка
Что всегда заметит каждый пользователь? Правильно, отсутствие интернета. Но как? «Вконтакте» не грузится — значит, интернета нет. Но ведь бывает, что директор или бравые богатыри из отдела ИБ хотят что-то запретить, что-то собрать, где-то проконтролировать. И тут администратор начинает танцевать вокруг шлюза в интернет. Если в компании много денег, то танцы могут быть длительными и с галантными кавалерами (мар Checkpoint, мистер PaloAlto, господин SonicWall). А вот что делать, если денег только на железо, функционала хотят много, а делать надо быстро? Бежать. На помощь приходит Mr Proper Pfsense, активно поддерживаемый сообществом бесплатный, гибкий и несложный в настройке межсетевой экран на базе FreeBSD.
В первой части рассмотрим классику жанра — межсетевой экран с прокси (аутентификация по учетным данным Active Directory) и фильтрацией контента, а также какой-никакой антивирусной проверкой трафика налету. Отдельно рассмотрим вопрос настройки удаленного доступа пользователей к сети предприятия.
Для уменьшения возможного холивара: «Да, это можно сделать на %yourdistrname%» и «Да, все можно настроить из командной строки». Так, все формальности соблюдены — можно начинать.
Установку сделаем с флешки. Для этого используем образ pfSense-memstick-2.2.2-RELEASE-i386.img.gz, скачанный с одного из зеркал, указанных на официальном сайте. Очень удобно, что сначала мы выбираем архитектуру, функционал, а потом уже нам предлагают список зеркал. Процесс установки детально расписывать не буду, там все элементарно, никаких дополнительных настроек не нужно. По окончанию установки вам предложат назначить VLAN и определить интерфейсы, а также их назначение. Выглядит это примерно так:

После настройки интерфейсов мы попадаем в меню с ограниченным числом пунктов, однако есть возможность выйти в шелл. На мой взгляд, самым полезным пуктом меню является возможность сброса пароля на веб-морду. Разработчики pfsense настоятельно рекомендуют проводить всю настройку только через графический интерфейс. А выглядит он достаточно симпатично, набор виджетов широк, можно кастомизировать их набор под себя.

Первым делом создаем свой внутренний CA на pfsense или используем уже имеющийся. Для этого в меню System выбираем Cert Manager и в разделе CA проводим необходимые настройки: нужно указать длину ключа, алгоритм хэширования, время жизни и полное имя CA. Настроенный CA будет нам нужен для создания OpenVPN-сервера и для работы по LDAPS.

Теперь интегрируем наш шлюз с Active Directory. В разделе Servers блока User Manager из меню System были проведены настройки на использование контроллера домена. Все до безобразия просто — указал адрес, транспорт, область поиска, контейнеры с учетками, креды для создания привязки и шаблон для заполнения Microsoft AD — можно выпускать кракена пользователей в интернет.

Перейдем к настройке правил фильтрации трафика. Во-первых, если требуется любая группировка адресов, портов, URL, тогда добро пожаловать на вкладку Aliases. Во-вторых, вы можете настроить временные промежутки, которые можно использовать для работы правил. По умолчанию создано правило «всем везде все можно», а также правило, которое не дает заблочить доступ к веб-морде. Создание правил выглядит довольно буднично:

Однако есть ряд дополнительных возможностей, например, разрешенные ОС, какие могут быть выставлены TCP-флаги, график работы правила, а также инспектор протоколов прикладного уровня.


Аутентификация в локальной базе была выбрана с целью сохранения возможности удаленного подключения в случае каких-либо неполадок с серверами каталогов.
Для экспорта настроек OpenVPN для устройств на разных платформах нужно установить пакет OpenVPN Client Export Utility, который есть в списке доступных для установки пакетов. Теперь возвращаемся к истокам – во вкладку Cert Manager, там создаем сертификат для сервера VPN и каждого клиента. Разница только в типе сертификата.

Переходим к настройке сервера OpenVPN. Выбираем режим работы сервера – в моем случае «Remote Access (SSL/TLS + User Auth)», сервер аутентификации, протокол, порт, нужный сертификат сервера VPN и выставляем нужные параметры шифрования. То, что предлагается по умолчанию — не лучший выбор.

Дальше настраиваем VPN-сеть и выставляем настройки для клиентов. Тут мы можем определить, стоит ли выдавать клиенту DNS-сервера, весь ли трафик клиента гнать в туннель и т.д. После этого сохраняемся и отправляемся на вкладку client export. Отсюда мы экспортируем нужные для подключения настройки и сертификат пользователя.

Кстати, при настройке сервера можно было воспользоваться Wizardом, который провел бы Вас через все “печали и невзгоды” настройки OpenVPN. Некий аналог кнопки “Сделать хорошо”.
Конечно, если у вас многим пользователям нужен удаленный доступ, то работа по выдаче и отзову сертификатов, экспорту настроек, заведению пользователей в локальную базу превратиться в очень скучное, но ответственное задание. Считаю, что при подобных требованиях к масштабированию необходимо наличие отдельного CA с CRL и единой базы аутентификации, типа Active Directory. Но если пользователей мало, то предложенный выше вариант вполне работоспособен.
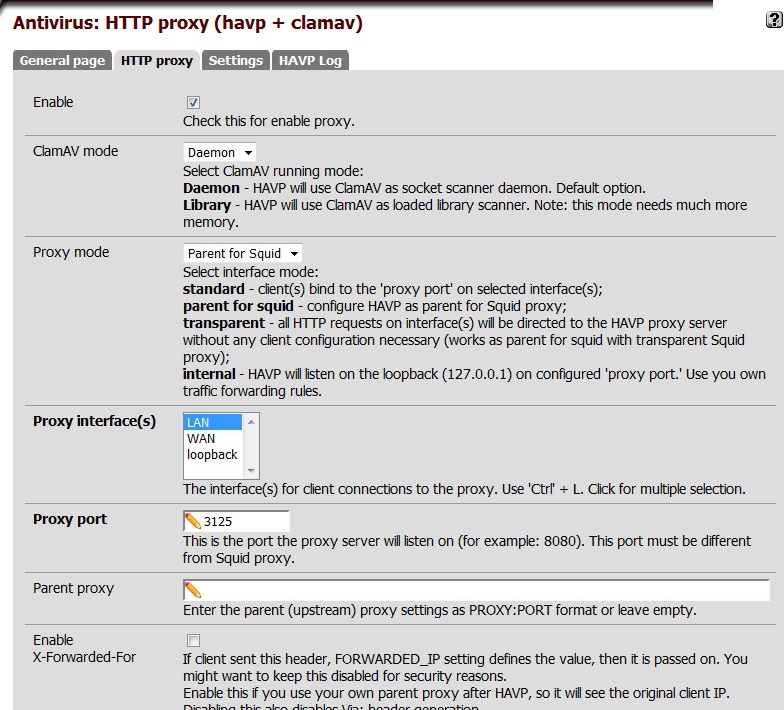
Нам осталось настроить прокси, фильтрацию контента и антивирусную проверку. Устанавливаем HAVP-пакет – это прокси с ClamAV сканером. Для настройки указываем режим работы ClamAV и прокси, порт, интерфейс, настройки проверки проходящего трафика. Поскольку планируется использование squid, то наш режим работы — «Parent for Squid». Отдельно настраиваем параметры обновления антивирусной базы и ее зеркала.
Переходим к настройке Squid. После установки пакета выбираем режим работы прокси и порт, затем на вкладке «Auth Settings» указываем используемый метод аутентификации. Поскольку у нас стоит задача использования Active Directory в качестве базы пользователей, то используем протокол LDAP. Настройки для интеграции с контроллером домена представлены ниже.

Теперь фильтрация – настраиваем squidGuardian. По подходам к фильтрации в принципе есть хорошая статья – «To-do: Фильтруем вся и всё». После установки squidGuardian через пункт «Proxy filter» меню «Services» переходим к его настройке. На вкладке «Blacklist» указываем откуда качать сами блэклисты в формате tar или tar.gz, а также на вкладке «General settings» ставим галочку для включения использования блэклистов. Я использовал бесплатные блэклисты отсюда. В случае необходимости работы контентного фильтра по времени, промежутки можно задать на вкладке Times. Дальше уже настраиваете общие или групповые ACL, главное не забыть поставить галочку напротив запрета использования IP-адресов в URL. Для настройки правил фильтрации нужно нажать «Target Rules List» и выбрать действия для нужных категорий, а также действие по умолчанию.

Если у вас есть необходимость в создании собственных категорий, то можно воспользоваться страничкой «Target Categories». После сохранения ваша категория появится в общем перечне правил. Я создавал свою категорию для разрешения доступа к ресурсам по IP-адресам, у которых нет DNS-имени.
А теперь ложка дегтя. Вполне допускаю, что проблемы вызваны собственной кривизной рук, но все же. Если кто-то из сообщества сможет подсказать какие-то решения, то я буду крайне признателен.
В заключении хотел бы отметить, что данный дистрибутив импонирует мне широким функционалом и гибкостью, очень легко клонировать настройки на несколько шлюзов, есть возможность сделать embedded решения. Конечно, полная настройка через веб ИМХО не есть хорошо, но может именно таким образом разработчики огораживают начинающих админов от болезненных ударов граблей разной высоты.
This section deals primarily with introductory firewall concepts and lays the ground work for understanding how to configure firewall rules using pfSense® software.
Stateful Filtering
Using this mechanism, traffic need only be permitted on the interface where it enters the firewall. When a connection matches a pass rule the firewall creates an entry in the state table. Reply traffic to connections is automatically allowed back through the firewall by matching it against the state table rather than having to check it against rules in both directions. This includes any related traffic using a different protocol, such as ICMP control messages that may be provided in response to a TCP, UDP, or other connection.
See Firewall Advanced and State Type for more information about state options and types.
TCP/IP Version
Instructs the rule to apply for IPv4, IPv6, or both IPv4+IPv6 traffic. The rules will only match and act upon packets matching the correct protocol. Aliases may be used which contain both types of IP addresses and the rule will match only the addresses from the correct protocol.
IP Options
Checking this box will allow packets with defined IP options to pass. By default, pf blocks all packets that have IP options set in order to deter OS fingerprinting, among other reasons. Check this box to pass IGMP or other multicast traffic containing IP options.
IPsec
When a site to site IPsec connection is enabled the firewall automatically adds rules which pass traffic necessary for the tunnel to connect and pass traffic. See IPsec and firewall rules for details.
Due to the nature of policy routing any traffic that matches a rule specifying a gateway will be forced out to the Internet and will bypass IPsec processing. Rules are added automatically to negate policy routing for traffic destined to remote VPN subnets, but they do not always have the intended effect. To disable the automatic negation rules, see Disable Negate rules and add a firewall rule at the top of the rules on the internal interface to pass traffic to the VPN without a gateway set.
Automatically added IPsec rules are discussed in further depth in IPsec and firewall rules .
Protocol
The protocol this rule will match. Most of these options are self-explanatory. TCP/UDP will match both TCP and UDP traffic. Specifying ICMP will show an additional drop down box to select the ICMP type. Several other common protocols are also available.
This field defaults to TCP for a new rule because it is a common default and it will display the expected fields for that protocol. To make the rule apply to any protocol, change this field to any. One of the most common mistakes in creating new rules is accidentally creating a TCP rule and then not being able to pass other non-TCP traffic such as ping, DNS, etc.
Tag and Tagged
The Tag and Tagged fields are useful in concert with floating rules, so the firewall can mark a packet with a specific string as it enters an interface, and then act differently on a matched packet on the way out with a floating rule. See Marking and Matching for more on this topic.
Maximum state entries per host
This setting works similar to the established count above, but it checks for state entries alone rather than tracking if a successful connection was made.
Source
This field specifies the source IP address, subnet, or alias that will match this rule.
The drop-down box for source allows several different pre-defined types of sources:
Matches any address.
Single host or Alias
Matches a single IP address or alias name. When this is active, an alias name may be typed in the Source Address field.
Uses both an IP address and subnet mask to match a range of addresses.
A macro that will match traffic from the client address range for the PPPoE server if the PPPoE server is enabled.
A macro that will match traffic from the client address range for the L2TP server if the L2TP server is enabled.
An entry in this list is present for each interface on the firewall. These macros specify the subnet for that interface exactly, including any IP alias VIP subnets that differ from the defined interface subnet.
An entry in this list is present for each interface on the firewall. These macros specify the IP address configured on that interface.
The WAN Net choice for source or destination means the subnet of the WAN interface only. It does not mean “The Internet” or any remote host.

For rules matching TCP and/or UDP, the source port may also be specified by clicking the Display Advanced. The source port is hidden behind the Display Advanced button because normally the source port must remain set to any, as TCP and UDP connections are sourced from a random port in the ephemeral port range (between 1024 through 65535, the exact range used varying depending on the OS and OS version that is initiating the connection). The source port is almost never the same as the destination port, and it should never be configured as such unless the application in use is known to employ this atypical behavior. It is also safe to define a source port as a range from 1024 to 65535 .
Selecting Invert Match will negate the match so that all traffic except this source value will trigger the rule.
Description
Enter a description here for reference. This is optional, and does not affect functionality of the rule. The best practice is to enter text describing the purpose of the rule. The maximum length is 52 characters.
Deciding Between Block and Reject
There has been much debate amongst security professionals over the years as to the value of block vs. reject. Some argue that using block makes more sense, claiming it “slows down” attackers scanning the Internet. When a rule is set to reject, a response is sent back immediately that the port is closed, while block silently drops the traffic, causing the attacker’s port scanner to wait for a response. That argument does not hold water because every good port scanner can scan hundreds or thousands of hosts simultaneously, and the scanner is not stalled waiting for a response from closed ports. There is a minimal difference in resource consumption and scanning speed, but so slight that it shouldn’t be a consideration.
If the firewall blocks all traffic from the Internet, there is a notable difference between block and reject: Nobody knows the firewall is online. If even a single port is open, the value of that ability is minimal because the attacker can easily determine that the host is online and will also know what ports are open whether or not the blocked connections have been rejected by the firewall. While there isn’t significant value in block over reject, we still recommend using block on WAN rules. There is some value in not actively handing information to potential attackers, and it is also a bad practice to automatically respond to an external request unnecessarily.
For rules on internal interfaces we recommend using reject in most situations. When a host tries to access a resource that is not permitted by firewall rules, the application accessing it may hang until the connection times out or the client program stops trying to access the service. With reject the connection is immediately refused and the client avoids these hangs. This is usually nothing more than an annoyance, but we still generally recommend using reject to avoid potential application problems induced by silently dropping traffic inside a network.
When configuring firewall rules in the pfSense® WebGUI under Firewall > Rules many options are available to control how traffic is matched and controlled. Each of these options are listed in this section.
State table size
The firewall state table has a maximum size to prevent memory exhaustion. Each state takes approximately 1 KB of RAM. The default state table size in pfSense is calculated by taking about 10% of the RAM available in the firewall by default. On a firewall with 1GB of RAM, the default state table size can hold approximately 100,000 entries.
See Large State Tables for more information on state table sizing and RAM usage.
Each user connection typically consists of two states: One created as it enters the firewall, and one as it leaves the firewall. Therefore, with a state table size of 1,000,000, the firewall can handle approximately 500,000 user sessions actively traversing the firewall before any additional connections will be dropped. This limit can be increased as needed so long as it does not exceed the available amount of RAM in the firewall.
To increase the state table size:
Navigate to System > Advanced on the Firewall & NAT tab
Enter the desired number for Firewall Maximum States, or leave the box blank for the default calculated value. See Figure Increased State Table Size to 2,000,000
Click Save

Increased State Table Size to 2,000,000 
Historical state table usage is tracked by the firewall. To view the graph:
Navigate to Status > Monitoring

Click to expand the graph options
Set Category for the Left Axis to System
Set the Graph for the Left Axis to States

Click Update Graphs
State timeout in seconds
Using this field, a state timeout for traffic matching this rule may be defined, overriding the default state timeout. Any inactive connections will be closed when the connection has been idle for this amount of time. The default state timeout depends on the firewall optimization algorithm in use. The optimization choices are covered in Firewall Optimization Options
This option only controls the traffic in the inbound direction, so it is not very useful on its own. Outbound traffic for a matching connection will still have the default state timeout. To use this setting properly, a matching floating rule is also required in the outbound path taken by the traffic with a similar state timeout setting.
Automatically Added Firewall Rules
pfSense automatically adds internal firewall rules for a variety of reasons. This section describes automatically added rules and their purpose.
VLAN Priority (Match and Set)
802.1p, also known as IEEE P802.1p or Priority Code Point, is a way to match and tag packets with a specific quality of service priority. Unlike DSCP, 802.1p operates at layer 2 with VLANs. However, like DSCP, the upstream router must also support 802.1p for it to be useful.
There are two options in this section. The first will match an 802.1p field so the firewall can act on it. The second will inject an 802.1p tag into a packet as it passes through this firewall. Some ISPs may require an 802.1p tag to be set in certain areas, such as France, in order to properly handle voice/video/data on segregated VLANs at the correct priority to ensure quality.
In pfSense® software, rules on interface tabs are applied on a per-interface basis, always in the inbound direction on that interface. This means traffic initiated from the LAN is filtered using the LAN interface rules. Traffic initiated from the Internet is filtered with the WAN interface rules. Because all rules in pfSense are stateful by default, a state table entry is created when traffic matches an allow rule. All reply traffic is automatically permitted by this state table entry.
The exception to this is Floating rules ( Floating Rules ), which can act on any interface using the inbound, outbound, or both directions. Outbound rules are never required, because filtering is applied on the inbound direction of every interface. In some limited circumstances, such as a firewall with numerous internal interfaces, having them available can significantly reduce the number of required firewall rules. In such a case, apply egress rules for Internet traffic as outbound rules on the WAN to avoid having to duplicate them for every internal interface. The use of inbound and outbound filtering makes a configuration more complex and more prone to user error, but it can be desirable in specific applications.
Rule Processing Order
So far we have talked about how the rules are processed on an interface tab, but there are three main classes of rules: Regular interface rules, Floating rules, and Interface Group rules (including VPN tab rules). The order of processing of these types is significant, and it works like so:
Interface Group Rules
The rules are ordered in that way in the actual ruleset, keep that in mind when crafting rules. For example, if an interface group contains a rule to block traffic, that rule cannot be overridden with an interface tab rule because the traffic has already been acted upon by the group rule, which was matched first in the ruleset.
The rules are processed until a match is found, however, so if a packet is not matched in the group rules, it can still be matched by an interface rule.
Another significant place this comes into play is with assigned OpenVPN interfaces. If an “allow all” rule is in place on the OpenVPN tab, it is matched with the group rules. This means the rules on the interface tab will not apply. This can be a problem if OpenVPN rules need to have reply-to in order to ensure certain traffic exits back via the VPN.
See Ordering of NAT and Firewall Processing for a more detailed analysis of rule processing and flow through the firewall, including how NAT rules come into play.
Block Bogon Networks
Bogon networks are those which should never be seen on the Internet, including reserved and unassigned IP address space. The presence of traffic from these networks can indicate either spoofed traffic or an unused subnet that has been hijacked for malicious use. Bogon lists are intended to filter invalid traffic from the Internet (e.g. on WANs) coming to the firewall for cases where the source cannot be otherwise filtered or validated, such as for public services. If rules on an interface only allow from specific remote sources, bogon blocking does not offer any benefit. pfSense software provides two bogons lists that are updated as needed, one for IPv4 bogon networks and one for IPv6 bogon networks.
Blocking bogon networks is not suited for use on local/private interfaces such as LAN. Blocking bogon networks on local interfaces can be harmful as they will block traffic which is necessary for proper local network operations, especially for IPv6. If local interfaces have proper rules which only allow from specific local sources, bogon blocking is unnecessary.
The firewall fetches an updated bogons list on the first day of each month from Netgate servers. The script runs at 3:00 a.m. local time, and sleeps a random amount of time up to 12 hours before performing the update. This list does not change frequently, and new IP address assignments are removed from the bogons list months before they are allocated, so a monthly update is adequate. To automatically update the list more frequently, change the Update Frequency for bogons under System > Advanced on the Firewall & NAT tab.
The bogons list for IPv6 is quite large, and may not load if there is not enough memory in the system, or if the maximum number of table entries is not large enough to contain it. See Firewall Maximum Table Entries for information on changing that value.
For information on troubleshooting bogon updates and forcing manual updates, see Troubleshooting Bogon Network List Updates .
Maximum state entries this rule can create
This option limits the maximum number of connections, total, that can be allowed by this rule. If more connections match this rule while it is at its connection limit, this rule will be skipped in the rule evaluation. If a later rule matches, the traffic has the action of that rule applied, otherwise it hits the default deny rule. Once the number of connections permitted by this rule drops below this connection limit, traffic can once again match this rule.
Advanced Options
Options which are less likely to be required or that have functionality confusing to new users have been tucked away in this section of the page. Click Display Advanced to show all of the advanced options. If an option in this section of the page has been set, then it will appear when the rule is loaded in the future .
TCP Flags
By default, new pass rules for TCP only check for the TCP SYN flag to be set, out of a possible set of SYN and ACK. To account for more complex scenarios, such as working around asymmetric routing or other non-traditional combinations of traffic flow, use this set of controls to change how the flags are matched by the firewall rule.
The first row controls which flags must be set to match the rule. The second row defines the list of flags that will be consulted on the packet to look for a match.
Synchronize sequence numbers. Indicates a new connection attempt.
Indicates ACKnowledgment of data. These are replies to let the sender know data was received OK.
Indicates there is no more data from the sender, closing a connection.
Connection reset. This flag is set when replying to a request to open a connection on a port which has no listening daemon. Can also be set by firewall software to turn away undesirable connections.
Indicates that data should be pushed or flushed, including data in this packet, by passing the data up to the application.
Indicates that the urgent field is significant, and this packet should be sent before data that is not urgent.
To allow TCP with any flags set, check Any Flags.
Maximum new connections / per second
This method of rate limiting helps ensure that a high TCP connection rate will not overload a server or the state table on the firewall. For example, limits can be placed on incoming connections to a mail server, reducing the burden of being overloaded by spambots. It can also be used on outbound traffic rules to set limits that would prevent any single machine from loading up the state table on the firewall or making too many rapid connections, behaviors which are common with viruses. A connection amount and a number of seconds for the time period may be configured for the rule. Any IP address exceeding the specified number of connections within the given time frame will be blocked by the firewall for one hour. Behind the scenes, this is handled by the virusprot table, named for its typical purpose of virus protection. This option is only available for use with TCP connections.
ICMP Type
When ICMP is selected as the protocol, this drop-down contains all possible ICMP types to match. When passing ICMP, the best practice is to only pass the required types when feasible. The most common use case is to pass only a type of Echo Request which will allow an ICMP ping to pass.
Historically, ICMP has a bad reputation but it is generally beneficial and does not deserve the reputation on modern networks. Allowing an ICMP type of any is typically acceptable when allowing ICMP.
No XML-RPC Sync
Checking this box prevents this rule from synchronizing to other High Availability cluster members via XMLRPC. This is covered in High Availability . This does not prevent a rule on a secondary node from being overwritten by the primary.
Block vs. Reject
There are two ways to disallow traffic using firewall rules on pfSense: Block and reject.
A rule set to block will silently drop traffic. A blocked client will not receive any response and thus will wait until its connection attempt times out. This is the behavior of the default deny rule in pfSense.
A rule set to reject will respond back to the client for denied TCP and UDP traffic, letting the sender know that the connection was refused. Rejected TCP traffic receives a TCP RST (reset) in response, and rejected UDP traffic receives an ICMP unreachable message in response. Though reject is a valid choice for any firewall rule, IP protocols other than TCP and UDP are not capable of being rejected; These rules will silently drop other IP protocols because there is no standard for rejecting other protocols.
Default Deny Rule
Rules that do not match any user-defined rules nor any of the other automatically added rules are silently blocked by the default deny rule (as discussed in Default Deny ).
LAN rules are defining rights to access internet services from your local network. So, if you block port 80 and 443 nobody from your LAN will be able to access internet.
WAN rules are defining access to the resources in your LAN (or DMZ) from the internet.
In this short LAB we`ll be defining LAN rules.
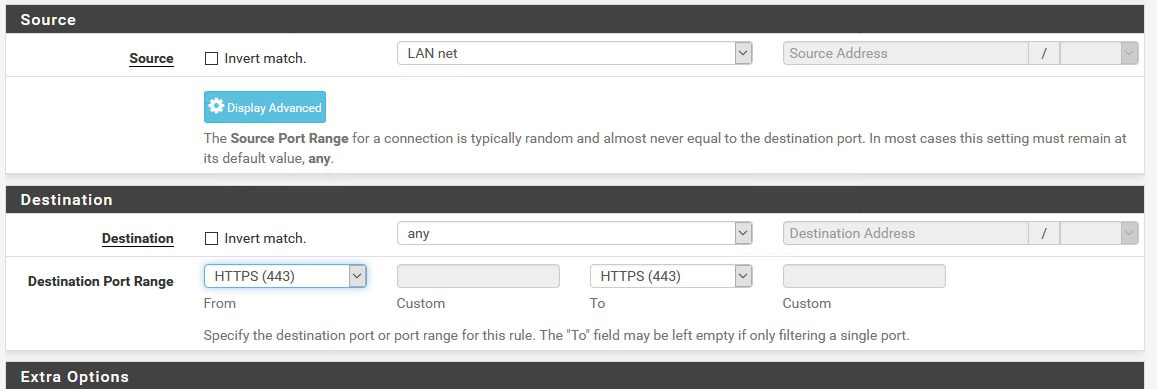
Let’s say we want to block access to the port 443 from our local network.
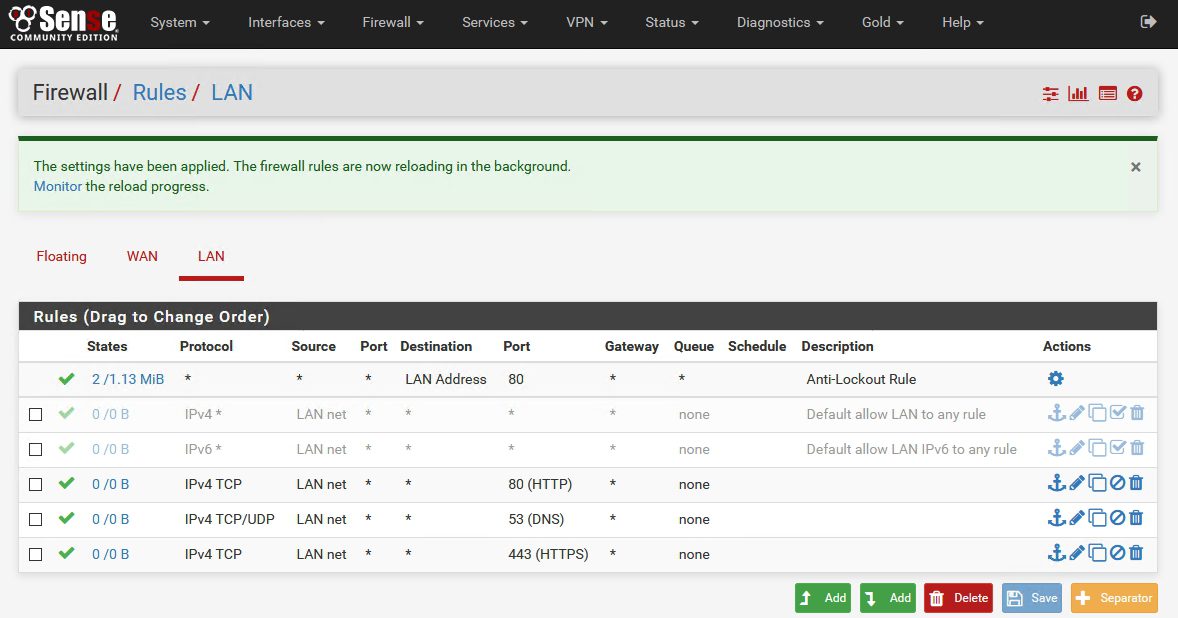
Select Firewall | Rules
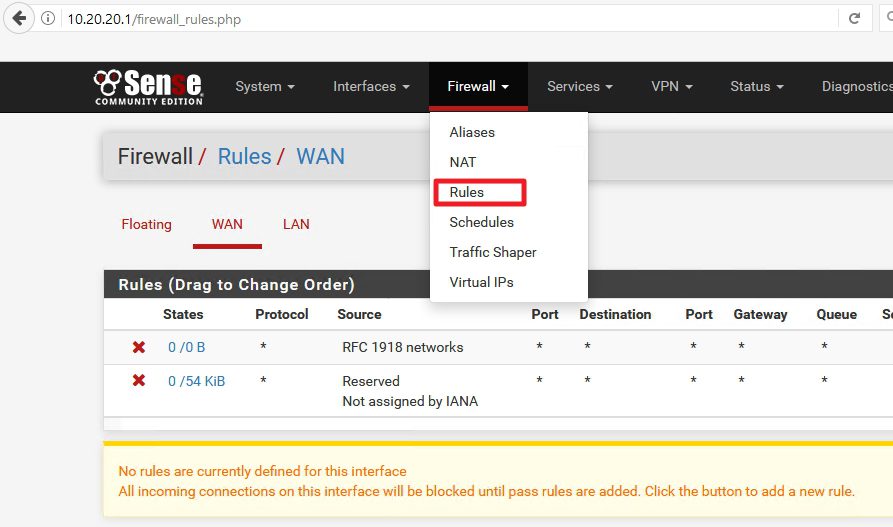
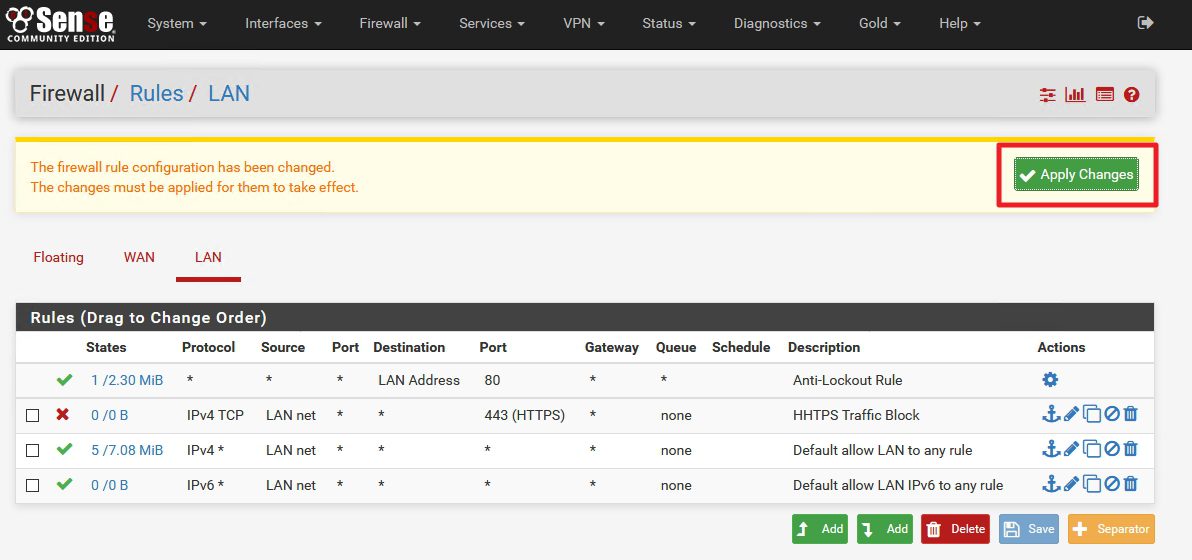
As you can see, by default all traffic from you LAN is allowed toward internet.
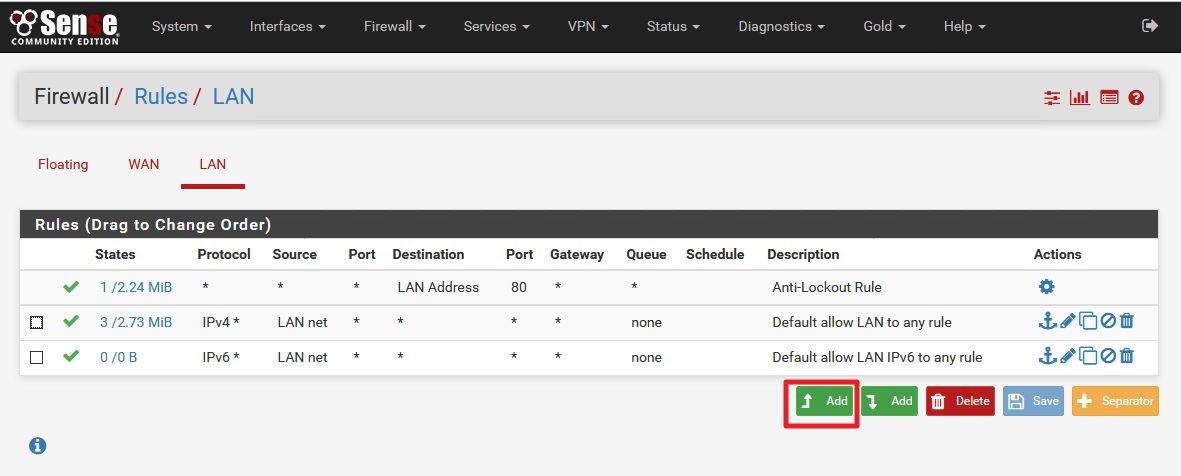
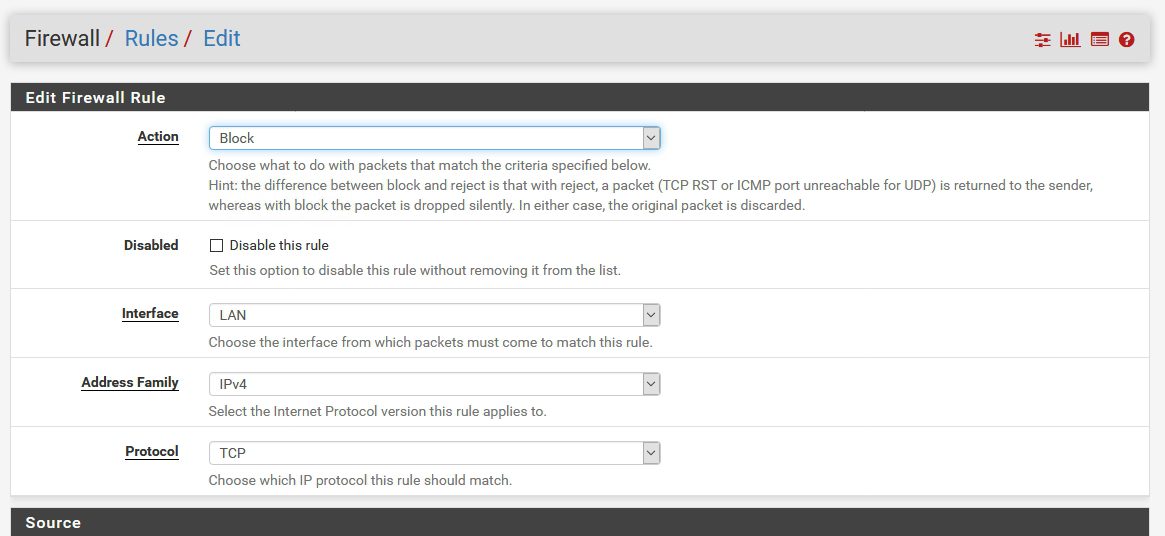
New window opens with settings:
Action: Block (since I want to block traffic to the outside) | Interface: LAN | Address Family IPv4 |Protocol TCP
Extra Options: You can enter Description and turn on Logging for the rule | Save
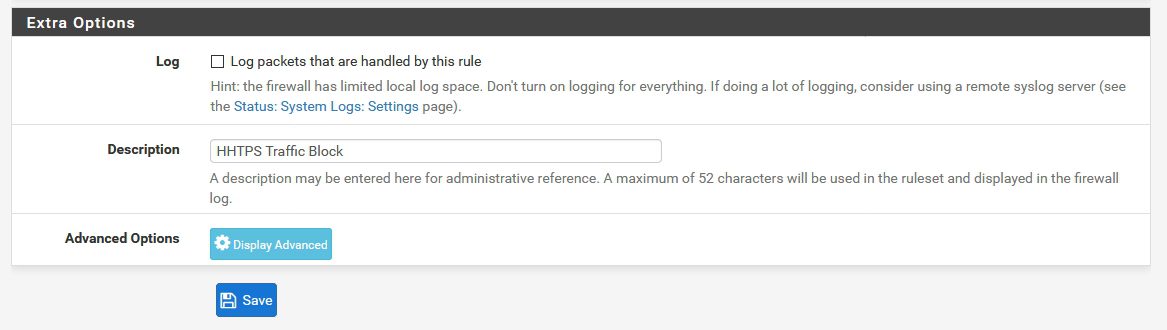
After you clicked on save you`ll be back on the main LAN Rule screen
Click Apply Changes
Now, onto rule testing…
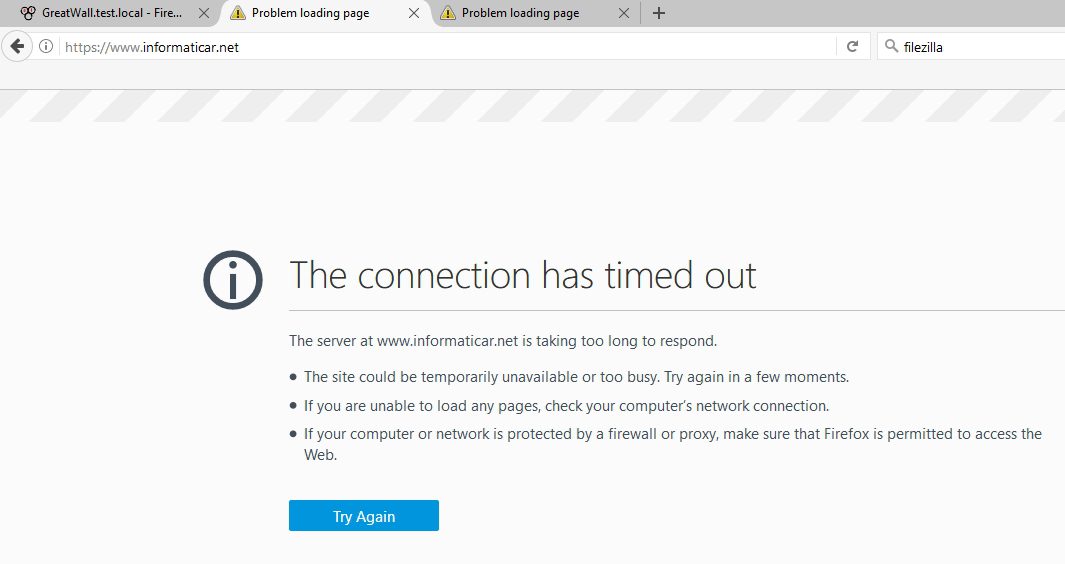
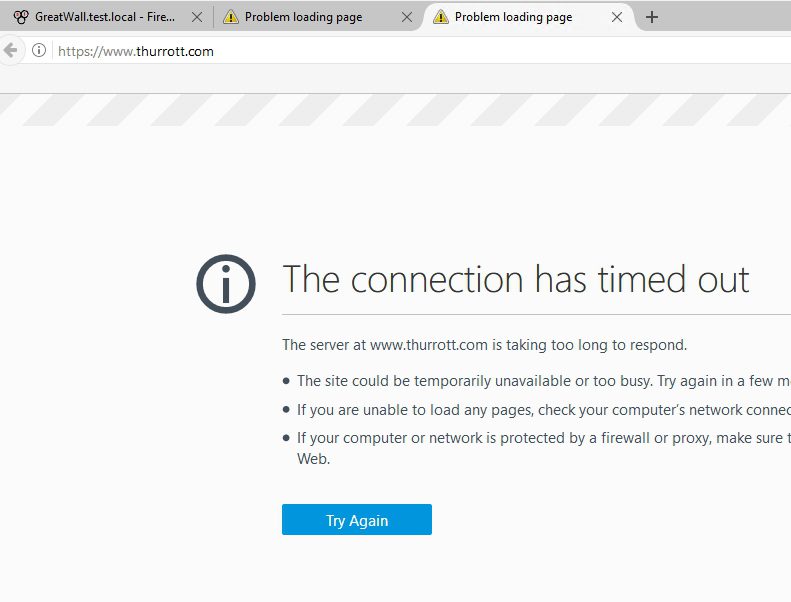
I also tested with FTP port – result is the same – so we can conclude that this works.
Smart idea would be to disable default ALLOW ALL traffic rules– you should remove default LAN firewall rules created by pFSense and define only ports you would like to use – only that way you can block unwanted traffic and better control your LAN-> WAN traffic.
Here is my default configuration for internet access
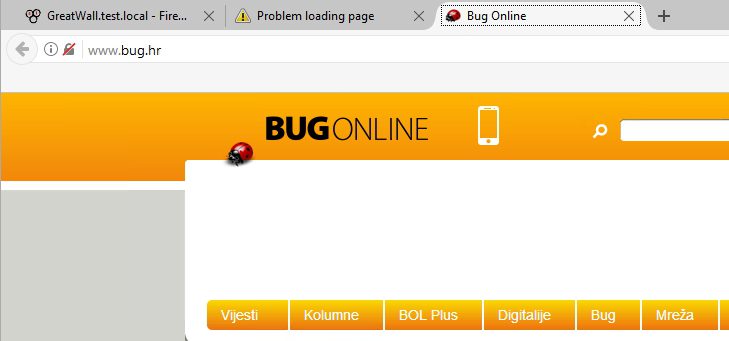
DNS rule HAS TO BE ALLOWED, and with both TCP/UDP protocol, otherwise your clients won`t be able to access internet.
By this short tutorial you can successfully define rules that will either allow of block some traffic from your network, in this example we covered blocking, but If you want to allow something, procedure is the same, except you’ll choose allow instead of block rule.
Anti-spoofing Rules
pfSense uses the antispoof feature in pf to block spoofed traffic. This provides Unicast Reverse Path Forwarding (uRPF) functionality as defined in RFC 3704. The firewall checks each packet against its routing table, and if a connection attempt comes from a source IP address on an interface where the firewall knows that network does not reside, it is dropped. For example, a packet coming in WAN with a source IP address of an internal network is dropped. Anything initiated on the internal network with a source IP address that does not reside on the internal network is dropped.
Interface Groups
Interface groups, discussed in Interface Groups , are a method to place rules on multiple interfaces at the same time. This can simplify some rule configurations if similar rules are required on many interfaces in the same way. Interface group rules, like interface rules, are processed in the inbound direction only. The VPN tabs for OpenVPN, L2TP, and the PPPoE server are all special Interface groups that are automatically created behind the scenes.
For example, a group may be used for a collection of interfaces including all LAN or DMZ type interfaces, or for a group of VLANs.
Interface groups are not effective with Multi-WAN because group rules cannot properly handle reply-to . Due to that deficiency, traffic matching a group rule on a WAN that does not have the default gateway will go back out the WAN with the default gateway, and not through the interface which it entered.
Diffserv Code Point
Differentiated Services Code Point is a way for applications to indicate inside the packets how they would prefer routers to treat their traffic as it gets forwarded along its path. The most common use of this is for quality of service or traffic shaping purposes. The lengthy name is often shortened to Diffserv Code Point or abbreviated as DSCP and sometimes referred to as the TOS field.
The program or device generating the packets, for example Asterisk via its tos_sip and tos_audio configuration parameters, will set the DSCP field in the packets and then it is up to the firewall and other interim routers to match and queue or act on the packets.
To match these parameters in the firewall, use the Diffserv Code Point drop-down entry that matches the value set by the originating device. There are numerous options, each with special meaning specific to the type of traffic. Consult the documentation for the device originating the traffic for more detail on which values must be matched.
The downside of DSCP is that it assumes routers support or act on the field, which may or may not be the case. Different routers may treat the same DSCP value in unintended or mismatched ways. Worse yet, some routers will clear the DSCP field in packets entirely as it forwards them. Also, the way pf matches traffic, the DSCP value must be set on the first packet of a connection creating a state, as each packet is not inspected individually once a state has been created.
This option only reads and matches the DSCP value. It does not set a value in packets.
Interface
The Interface drop down specifies the interface receiving traffic to be controlled by this rule. Remember that on interface and group tab rules, traffic is only filtered on the interface where the traffic is initiated. Traffic initiated from the LAN destined to the Internet or any other interface on the firewall is filtered by the LAN ruleset.
Anti-lockout Rule
To prevent locking an administrator out of the web interface, pfSense enables an anti-lockout rule by default. This is configurable on the System > Advanced page under Anti-lockout. This automatically added rule allows traffic from any source inside the network containing the rule, to any firewall administration protocol listening on the LAN IP address. For example, it grants access to TCP port 443 for the WebGUI, TCP port 80 for the GUI redirect, and TCP port 22 if SSH is enabled. If the WebGUI port has been changed, the configured port is the one allowed by the anti-lockout rule.
In security-conscious environments, the best practice is to disable this rule and configure the LAN rules so only an alias of trusted hosts can access the administrative interfaces of the firewall. A better practice yet is to not allow access from the LAN but only from an isolated administrative management network.
Restricting access to the administrative interface from LAN

Alias for Management Ports 
Then create an alias for hosts and/or networks that will have access to the management interfaces (Figure Alias For Management Hosts ).

Alias For Management Hosts 
The resulting aliases are shown in Figure Alias List .

Then the LAN firewall rules must be configured to allow access by the previously defined hosts, and deny access to all else. There are numerous ways to accomplish this, depending on specifics of the environment and how egress filtering is handled. Figure Example Restricted Management LAN Rules show two examples. The first allows DNS queries to the LAN IP address, which is needed if the DNS Resolver or DNS Forwarder are enabled, and also allows LAN hosts to ping the LAN IP address. It then rejects all other traffic. The second example allows access from the management hosts to the management ports, then rejects all other traffic to the management ports. Choose the methodology that works best for the network environment in question. Remember that the source port is not the same as the destination port.

Example Restricted Management LAN Rules 

Restricted Management LAN Rules Alternate Example 
Once the firewall rules are configured, disable the webGUI anti-lockout rule on the System > Advanced page (Figure Anti-Lockout Rule Disabled ). Check the box and click Save.
If the management interface can no longer be accessed after disabling the anti-lockout rule, the firewall rules were not configured appropriately. Re-enable the anti-lockout rule by using the Set Interface(s) IP address option at the console menu, then choose to reset the LAN IP address. Set it to its current IP address, and the rule will automatically be re-enabled.

Anti-Lockout Rule Disabled 
Source OS
One of the more unique features of pf and thus pfSense is the ability to filter by the operating system initiating a connection. For TCP rules, pf enables passive operating system fingerprinting (“p0f”) that allows rules to match based on the operating system initiating the TCP connection. The p0f feature of pf determines the OS in use by comparing characteristics of the TCP SYN packet that initiates TCP connections with a fingerprints file. Note that it is possible to change the fingerprint of an operating system to look like another OS, especially with open source operating systems such as the BSDs and Linux. This isn’t easy, but if a network contains technically proficient users with administrator or root level access to systems, it is possible.
Basic Terminology
Rule and ruleset are two terms used throughout this chapter:
Refers to a single entry on the Firewall > Rules screen. A rule instructs the firewall how to match or handle network traffic.
Refers to a group of rules collectively. Either all firewall rules as a whole, or a set of rules in a specific context such as the rules on an interface tab. The complete firewall ruleset is the sum of all user configured and automatically added rules, which are covered further throughout this chapter.
Rulesets on the Interface tabs are evaluated on a first match basis by pfSense. This means that reading the ruleset for an interface from top to bottom, the first rule that matches will be the one used by the firewall. Evaluation stops after reaching this match and then the firewall takes the action specified by that rule. Always keep this in mind when creating new rules, especially when crafting rules to restrict traffic. The most permissive rules should be toward the bottom of the list, so that restrictions or exceptions can be made above them.
The Floating tab is the lone exception to this rule processing logic. It is covered in a later section of this chapter.
Disable Reply-To
The firewall adds the reply-to keyword to rules on WAN type interfaces by default to ensure that traffic that enters a WAN will also leave via that same WAN. In certain cases this behavior is undesirable, such as when some traffic is routed via a separate firewall/router on the WAN interface. In these cases, check this option to disable reply-to only for traffic matching this rule, rather than disabling reply-to globally.
Maximum number of established connections per host
To limit access based on connections per host, use this setting. This value can limit a rule to a specific number of connections per source host (e.g. 10 ), instead of a specific global connection total. This option controls how many fully established (completed handshake) connections are allowed per host that match the rule. This option is only available for use with TCP connections.
Disabled
To disable a rule without removing it from the rule list, check this box. It will still show in the firewall rules screen, but the rule will appear grayed out to indicate its disabled state.
Maximum number of unique source hosts
This option specifies how many total source IP addresses may simultaneously connect for this rule. Each source IP address is allowed an unlimited number of connections, but the total number of distinct source IP addresses allowed is restricted to this value.
Action
This option specifies whether the rule will pass, block, or reject traffic.
A packet matching this rule will be allowed to pass through the firewall. If state tracking is enabled for the rule, a state table entry is created which allows related return traffic to pass back through. See Stateful Filtering for more information.
A packet matching this rule will be discarded.
A packet matching this rule will be discarded and for supported protocols, a message will be sent back to the originator indicating that the connection was refused.
See Block vs. Reject for a deeper description of the options and for help deciding between Block and Reject.
Block Private Networks
The Block private networks option on the WAN interface automatically puts in a block rule for RFC 1918 subnets. Unless private IP space is in use on the WAN, enable this option. This only applies to traffic initiated on the WAN side. Local clients may still reach hosts on private networks from the inside of the firewall. This option is available for any interface, but is generally only used on WAN type interfaces. A similar rule can be created manually to block private networks on interfaces by creating an alias containing the RFC 1918 subnets and adding a firewall rule to the top of the interface rules to block traffic with a source matching that alias. (See Private IP Addresses for more information about private IP addresses.)
Destination
This field specifies the destination IP address, subnet, or alias that will match this rule. See the description of the Source option in Source for more details. There is only one additional macro:
This firewall (self)
Matches all IP addresses on all firewall interfaces.
For rules specifying TCP and/or UDP, the destination port, port range, or alias is also specified here. Unlike source, configuring a destination port is required in many cases, as it is more secure than using any and usually the destination port will be known in advance based on the protocol. Many common port values are available in the drop-down lists, or select (other) to enter a value manually or to use a port alias.
To specify a continuous range of ports, enter the lower port in the From section and the higher port value in the To section.
This box determines whether packets that match this rule will be logged to the firewall log. Logging is discussed in more detail in Logging Practices .
State Type
There are three options for state tracking in pfSense that can be specified on a per-rule basis:
When chosen, the firewall will create and maintain a state table entry for permitted traffic. This is the default, and the best choice in most situations.
Sloppy is a less strict means of keeping state that is intended for scenarios with asymmetric routing. When the firewall can only see half the traffic of a connection, the validity checks of the default state keeping will fail and traffic will be blocked. Mechanisms in pf that prevent certain kinds of attacks will not kick in during a sloppy state check.
This option causes pfSense to proxy incoming TCP connections. TCP connections start with a three way handshake. The first packet of a TCP connection is a SYN from source, which elicits a SYN ACK response from the destination, then an ACK in return from the source to complete the handshake. Normally the host behind the firewall will handle this on its own, but synproxy state has the firewall complete this handshake instead. This helps protect against one type of Denial of Service attack, SYN floods. This is typically only used with rules on WAN interfaces. This type of attack is best handled at the target OS level today, as every modern operating system includes capabilities of handling this on its own. Because the firewall can’t know what TCP extensions the back-end host supports, when using synproxy state, it announces no supported TCP extensions. This means connections created using synproxy state will not use window scaling, SACK, nor timestamps which will lead to significantly reduced performance in most all cases. It can be useful when opening TCP ports to hosts that do not handle network abuse well, where top performance isn’t a concern.
This option will not keep state on this rule. This is only necessary in some highly specialized advanced scenarios, none of which are covered in this documentation because they are exceedingly rare.
Setting None here only affects traffic in the inbound direction, so it is not very useful on its own since a state will still be created in the outbound direction. It must be paired with a floating rule in the outbound direction which also has the same option chosen.
Читайте также: