Octoprint настройка usb камеры
Aside from an easy to use interface and the potential for remote control over your 3D Printer, having a camera to watch over your 3D Prints is one of the major benefits to OctoPrint and often a driving factor for setting the system up.
No products found.
Most people that I talk to in the various 3D Printing communities I am a part of simply plug in a Raspberry Pi Camera or USB Webcam and run with it. People do this without even considering that settings could be tweaked to make the video captured by these cameras better.
When I started looking into just what could be done to optimize cameras in OctoPrint I found that much of the information available was either outdated or a raw data dump that was not easy to read (or act upon) for most users. With updates to OctoPrint, a lot of information has changed and most of the information on this subject has not evolved. Because of this, I thought I would try my best to summarize what I had found and updated to the latest version of OctoPrint in an effort to perhaps save some of you some time.
5: Prepare webcamd service files:
First we’ll duplicate the existing webcamd file.
If you DON’T see a symbolic link for your camera:
Troubleshooting Tip 2:
Switch the camera to another USB port.
Boot your PI, confirm that the service didn’t load properly.
Move the USB camera to another port while the PI is still on.
Check the service status.
1: Get information about your USB webcam
Log into your Raspberry PI via ssh. If you followed the standard Octopi setup, ssh’ing into your PI should be as simple as this:
Make sure your USB webcam is unplugged from Raspberry PI. Type the following command in the terminal:
Now plug the USB camera back in, and look at the new text that appeared in the logs you’re tailing. You should see bunch of lines that include the text “New USB device found”, or similar. Here’s an example of my log:
You'll need the values for idVendor, idProduct, and SerialNumber in the next step.
We’ll make almost the same edits to webcamd2.
Toward the top of the file, make sure the line that starts with cfg_files+= points to octopi2.txt (our second octopi configuration file). It should read: cfg_files+=/boot/octopi2.txt
Now let’s edit webcamd.
Toward the top of the file, make sure the line that starts with cfg_files+= points to octopi.txt . It should read: cfg_files+=/boot/octopi.txt
That line only works when you have a single camera connected, otherwise it causes problems.
6: Set up service for webcamd2:
Now that we have our webcamd2 file ready, we need to create a service start file. We’ll copy an existing service file and edit it.
Change the ExecStart line to read ExecStart=/root/bin/webcamd2
Save and close the file.
If you see a symbolic link for your camera:
Congratulations! You are the golden child! Move on to step 4.
2: Create (or edit if existing) USB rules file
Use the nano text editor to edit (or create) a usb rules file:
Add the following line to the file:
These are the values I found in my log for my camera (a Logitech C510 HD webcam) — you’ll need to use your values for idVendor, idProduct and serial. For SYMLINK, use whatever name you want to give your camera. You’ll use the name in upcoming steps.
Choosing a Camera
When it comes to cameras to use with OctoPrint there is no shortage of options. These options range from one of the Official Raspberry Pi Cameras which will connect via a ribbon cable directy to the Raspberry Pi board to any of the myriad of USB webcams. Luckily there really is no wrong answer and it just comes down to personal preferences and aesthetics.
Last update on 2022-04-25 / Affiliate links / Images from Amazon Product Advertising API
If you want a bit of guidance however you can always consult the list of cameras known to work with OctoPrint here.
I had originally started off with a Raspberry Pi Camera and then eventually moved on to a Logitech C920. Had I known then what I know now about just what we can tweak with cameras in OctoPrint I most likely would have stuck with the Raspberry Pi Camera as it would have done everything I needed it to do and had so many more mounting options on my Monoprice Maker Select Plus.
Camera selection aside as I said it really is all just personal preference, what will make the real difference is coming when we dive into settings and start aligning out OctoPrint settings to our camera properties.
3: Confirm USB camera is properly set up:
Before moving on to step 4, it’s a good idea to confirm that the camera you configured in the previous udev USB rules step is working properly. If it isn’t, then none of the steps that follow will work.
Once your PI is back up, ssh into it again and type the following command to list all the devices under the /dev directory:
The -> character next to PrusaWebCam indicates that linux set up a symbolic link to the video0 device called PrusaWebCam.
Setting Resolution and Framerate
By default, the camera connected to your Raspberry Pi (or other device running OctoPrint) is configured to a resolution of 640×480 at 10 frames per second. This setting is regardless of what kind of camera you are using but since I am using a USB webcam I am going to focus on that from here on out. If you are using a Raspberry Pi Camera you will want to focus on the camera_raspi_options which will be similar but you should also review the full list of options with descriptions here.
Both the resolution and framerate options can be a bit hit or miss and require some trial and error but it is important to know that you are not going to break anything here so you are free to try options. The worst that will happen is your camera feed will stop working and you will have to rollback a setting.
A good starting point is the camera compatibility chart found here as it provides some configurations that have worked for others.
Before we start changing anything I just want to point out again that you are not going to break anything here so do not be afraid. These changes can be undone.
What I find as the best practice when setting the framerate and resolution for a new camera is to gradually increase one at a time until the camera stops working then back down the setting to the previous.
For me and my Logitech C920 things work best when set to:
That should be everything that needs to be changed in this file but you do have additional options like:
USB Webcam Options
- -d : The video device to use, e.g. -d /dev/video0
- -r : The resolution, e.g. -r 640x480 for 640x480px
- -f : The framerate in frames per second, e.g. -f 10 for 10 fps
- -q : The quality of the JPG compression to use, e.g. -q 85 for compression down to 85%
- -y : Use this if your camera doesn’t support MJPG, pictures will be captured in YUVY
Raspberry Pi Camera Options
- -fps or --framerate : set video framerate, default 1 frame/sec
- -x or --width : width of frame capture, default 640
- -y or --height : height of frame capture, default 480
- -quality : set JPEG quality (0 to 100), default 85
- -usestills : uses stills mode instead of video mode
- -sh : Set image sharpness (-100 to 100)
- -co : Set image contrast (-100 to 100)
- -br : Set image brightness (0 to 100)
- -sa : Set image saturation (-100 to 100)
- -ISO : Set capture ISO
- -vs : Turn on video stabilization
- -ev : Set EV compensation
- -ex: Set exposure mode, valid values
- -awb: Set AWB mode, valid values
- -ifx: Set image effect
- -cfx: Set color effect (U:V), the supplied U and V parameters (range 0 to 255) are applied to the U and Y channels of the image. For example, –colfx 128:128 should result in a monochrome image
- -mm: Set the metering mode
- -rot : Set image rotation (only 0, 90, 180 and 270 are supported)
- -hf : Set horizontal flip
- -vf : Set vertical flip
After making any changes to this file you will want to reboot your Raspberry Pi in order for the settings to take affect.
UPDATE February 11, 2021:
Added a new troubleshooting section with information about confirming the camera set up and configuring cameras without serial numbers.
8: Troubleshooting Services
The most common issue after not seeing your camera listed under /dev is problems with the service that launches mjpg streamer for the USB camera.
If you don’t see your USB webcam show up at port 8081, do you see it under /dev, then the service that starts up mjpg streamer is having a problem. To confirm this, run the following systemctl command:
If the service started up correctly, you’ll see something like this:
However, if the service failed to start up correctly, you’ll see something like this:
Notice the last line. It reads init_VideoIn failed . AND THIS IS WITH THE SAME CAMERA WITH THE SAME SETTINGS.
Возможно Вас так же заинтересует:
Troubleshooting Tip 3:
Change the service’s restart delay.
By editing webcamd2.service you can change the delay before the service controller tries to restart a failing service.
Change the RestartSec setting to 3, instead of 1, which is the default.
Troubleshooting 3:
Prerequisites
In this post I don’t explain how to install Octopi 0.17/0.18, nor how to attach and get working a PI Cam. You’ll need to get that done first before moving on.
You’ll also need to know a little about getting around a Linux command line and using the nano text editor.
Once you have the PI and PI Cam up and running, follow the instructions below to get a second (USB) camera working with your Raspberry PI.
Now let’s edit octopi.txt (the config file for your Raspicam):
To avoid the original octopi.txt from starting up the wrong camera, let’s edit it as well and make sure camera is set to raspi and not auto .
Find the camera line and make sure it reads camera="raspi" instead of auto
NOTE: As mentioned above, your octopi.txt file might not have a “camera” entry. If that’s the case for you, add one and set it to camera="raspi"
Make the line read camera_http_options="-p 8080"
Save and close the file
Camera Configuration in the OctoPrint Frontend
The OctoPrint frontend has some very basic yet powerful controls over your webcam and thus should be the starting point for anything you do. To access these settings:
- From the OctoPrint frontend click on the Wrench Icon
- Select Webcam & Timelapse from the list on the left-hand side
- If not already done check the box next to Enable Webcam Support
- Select the proper aspect ratio for your webcam by checking the box next to either:
- 16:9
- 4:3
- Flip Horizontally
- Flip Vertical
- Rotate 90° Counter Clockwise
While these are all basic settings as I mentioned they can be pretty powerful giving you the ability to adjust aspect ratio and rotation. While this is a good place to start with camera options it is good that we have more advanced options coming up.
The full story (for those who are curious):
A couple of weeks ago this post started getting a flurry of comments and questions, seemingly related to the instructions below not working when users updated to Octopi 0.18. The most common complaint was that only one camera (typically the PI cam) would work, while the USB camera didn’t connect.
To investigate why Octopi 0.18 didn’t work as expected, I took a spare Raspberry PI and installed a fresh copy of Octopi 0.18. Octoprint 1.5.2 worked correctly, as did a spare Raspberry PI camera module I have.
I followed my own instructions to connect a spare USB camera — I apparently have a lot of spare parts — and it didn’t work. The webcamd2 service I had created tried over and over to connect to the USB camera but failed. For a couple of hours I went down various rabbit holes, reading through comments, trying various approaches and learning more about the vagaries of Linux configuration. At one point, I even compared configuration files from Octopi 0.17 and 0.18, looking for a bug.
I checked my working Octopi 0.17 build and sure enough, I saw a symlinked entry under the /dev directory. When I compared the two 99-usb.rules files from my Octopi 0.17 and 0.18 installations, I saw what was going on. The Octopi 0.18 rules files had curly quotes (“) instead of standard straight quotes ("). Curly quotes — also known as “smart” quotes — are fancy quotes used in word processors and webpages, but they don’t belong in text-only Linux configuration files. Putting curly quotes in configuration files is like putting diesel in a gasoline engine. It don’t work.
Disabling Autofocus
The last thing I want to touch on is autofocus. If you have a camera that has autofocus you will most likely want to disable it as the constant moving of your 3D Printer will have the focus constantly changing and chances are it will never really focus on the proper thing anyways.
For my Logitech C920, I found that it would constantly try to focus on something in the background making my 3D Print in the foreground look fuzzy and out of focus.
Disabling autofocus is actually pretty straight forward and can easily be done through terminal commands in an SSH session. All you need to do is issue to following commands:
You will have to play around with your absolute value as this number will change based on where your camera is in relation to your printer but I can say for me, values in the 20-45 range work best.
After some experimentation you will have the value that works for you and you will want to make the change permanent. To do this we need to edit yet another file. This time it is the start script for mjpg-streamer which is located at:
In this file, we simply need to add the commands that we just used (with the proper absolute value) just below the commented section at the top.
At this point, we will have no more autofocus issues which will be evident when watching a video stream as the camera will not be focusing in and out for hours while your proter does its thing.
UPDATE February 27, 2021:
Added new services troubleshooting section, and updated the camera configuration section with comments about limiting resolution and frame rates.
Установка Octoprint на Orange Pi PC : 5 комментариев
Исправьте команду «virtualenv venv» на «virtualenv —python=python3 venv», а то по умолчанию ставится Python 2.7 и вылезает ошибка при запуске октопринта zipp.py invalid syntax.
Підбір якраз те що треба, хочу реалізувати таке на orange pi zerp ltsc, обновіть будь ласка інструкції
для 3 версії пітона./venv/bin/python setup.py install
выдает ошибку про депрекайтед и необходимость PEP 517 инсталлятор
И все -тупик …Запустил, но немного все по другому.
Питон 3 так как … а 2-й нет уже.![blog_background.jpg]()
I use Octoprint to manage my Prusa MK3 3D printer. To keep an eye on my prints, I have two cameras hooked up to the Raspberry PI on which I have Octoprint installed. The main camera is a Raspberry PI camera that hooks up directly the PI via a ribbon cable, and the second camera is a Logitech C510 webcam that I plug into one of the PI’s USB ports.
When I upgraded Octopi — a Raspberry PI Linux distribution that comes with Octoprint pre-installed — the USB camera stopped working and I couldn’t figure out how to get it working again. Octopi 0.17 is significantly different from previous versions, so I couldn’t rely on the tutorials I had used before.
I searched on YouTube, my favorite DIY resource, and found Chris Riley’s Chris’ Basement channel. He has a series of videos on how to set up an Octoprint multi-instance on one PI on Octopi 0.17. His instructions are great and I wouldn’t have found a solution without his videos, but they are geared toward hooking up USB cameras — not both a Raspberry PI camera and a USB camera.
Word of Caution:
You might be tempted to connect 2, 3 or 4 USB webcams to your Raspberry PI. Don’t do it. That path leads to madness. The cameras won’t mount as expected — I suspect because of limitations of Raspberry PIs in general, but I don’t know for sure. You’ll drive yourself crazy. Be content with running the RPI Camera Module and one USB camera.
Taking the Camera Configuration One Set Further in the octopi.txt File
With the basics done via the frontend of OctoPrint we can go one step further and start making changes to the octopi.txt file which is located at:
In the octopi.txt file, you have the ability to change settings that will improve video quality, image compression and other settings that will have little effect other than to clean up some code. Changes to these settings modify the bundled MJPG Streamer and can be used for both USB Webcams and Raspberry Pi Cameras. For a full look at what can be changed in the octopi.txt file have a look here. Let’s take a look at what I did and why.
Setting the Default Camera
By default, Octoprint will automatically detect a camera that is connected via either Ribbon Cable (Raspberry Pi Camera) or USB (webcam) but if you want to you can specify in the octoprint.txt file how your camera is connected. I have not seen (nor did I expect) any change in video playback by changing this option but since I am using a USB webcam I changed from auto to USB as shown below.
One thought I did have about this setting however is that it could be useful if you had both a Raspberry Pi Camera and a USB Webcam connected although I have not tried this so do not know exactly how the system would work.
7: Set up camera proxy:
Under the frontend public heading add the following line:
use_backend webcam2 if < path_beg /webcam2/ >There will already be an entry for webcam . Copy the entire backend webcam section and paste it below the first entry. We’ll make a couple of changes to have it point to the second webcam. It should look like this:
Notice a few things:
regrep line changed to read webcam2
server line port changed to 8081, the port we assigned the second camera in an earlier step.
HOWEVER, the server name should remain webcam1 . That’s not a typo above. Tricksy Linux.
Here’s what the two backend entries look like in my haproxy.cfg file.
If you don’t see your USB camera at port 8081, move on to step 8 for troubleshooting tips.
Using Advanced Settings in the OctoPrint Frontend
Once we are back up and running there is one more option in the OctoPrint frontend that I want to take a look at. This option again is in the Webcam settings but this time located under Timelapse Recordings > Advanced Options.
The option here that we may want to adjust is the FFMPEG Threads as by default this is set to one but depending on the hardware we are using we can comfortably bump this up giving a little more horsepower to our time-lapse processing. For me changing this setting from one to two worked out great.
Now let’s inform Linux about the webcamd2 service so it will get started at boot time:
UPDATE February 7, 2021:
Because of issues with HTML and Unicode, the code fragments in the instructions below had curly quotes (“) instead of straight quotes ("). Anyone that copied text off this page was unknowingly pasting in curly quotes that caused the Linux configuration files to not work. I’ve gone through and updated all the code sections and confirmed that everything works in Octopi 0.18.
Edit octopi2.txt:
Change the text camera="raspi" (or it might be camera="auto" ) to camera="usb".
NOTE: Some people have reported not seeing a “camera” entry at all in their octopi.txt file. If that’s the case, you’ll need to add one yourself.
Change that line to point to your USB camera. You’ll do that by adding a -d flag with the name you gave your USB camera. Here’s what my camera usb options looks like:
camera_usb_options="-d /dev/PrusaWebCam -r 1280x720 -f 10"NOTE: Be conservative with your resolution and framerate settings. A Logitech C920 can support 1920x1080 at 30 frames per second. However, your Raspberry PI can’t keep up with the camera, especially if it’s running a PI Cam module and Octoprint. So, I recommend setting USB cameras as 1280x720 and 10 fps.
If your camera supports higher resolution you can experiment with changing the -r setting (resolution) from 640x480 to a different resolution, like I did in my example above. The -f flag is for framerate.
That sets the port for your webcam to 8081.
You’re done with this file and can save and close it.
Troubleshooting 1:
Before you start messing around with text editors, try the following: REBOOT AGAIN. This shouldn’t be a serious step, but it’s worked some than once for me.
4: Prepare octopi.txt file for new webcam:
Under /boot there is an octopi.txt file which is a configuration file for the webcamd service (more on that service later). If you have your Raspberry PI camera running, then octopi.txt is set up to configure your PI cam. We’ll copy that file and use it to configure our webcam.
Troubleshooting 2:
One of the main culprits of issues with udev rules is that some cameras don’t have valid serial numbers.
For example, I bought a cheap USB endoscope on Amazon to test and connected it to my spare Raspberry PI with Octopi 0.18 installed. I tailed the messages log while I plugged the endoscope in and here’s a partial list of the output:
SerialNumber=0 was suspicious to me, but I tried using it anyway in a second entry in my 99-usb.rules file, with SYMLINK+="EndoCam" . After a reboot, I didn’t find an EndoCam symbolic link under the /dev directory. I rebooted several more times, still no luck.
After rebooting, I now saw two video symbolic links under /dev .
Подпишитесь на автора
Подпишитесь на автора, если вам нравятся его публикации. Тогда вы будете получать уведомления о его новых статьях.
Установка Octoprint на Orange Pi PC. Настройка управления питанием принтера, установка камеры. Настройка Telegram Notifications (1.5.0) для Octoprint и VPN для Orange Pi PC с использованием OPENVPN. Это не инструкция, а скорее мой блокнот дабы ничего не забыть.
Подготовка флешки с системой и установка ARMBIAN
Я купил на Ali вот такую Orange Pi PC H3 ССЫЛКА НА АЛИ
![]()
Буду использовать версию Armbian Buster (Debian). Для записи на флешку нам понадобится Rufus или Win32. Пишем флешку по инструкции — их в интернете море. Подключаемся к нашему одноплатнику через Putty. Авторизуемся под root, пароль 1234. И вводим все по порядку:
Для начала создадим пользователя octoprint
useradd -m octoprint
создадим пользователю пароль
passwd octoprint
добавим пользователя в группу sudo
adduser octoprint sudo
Теперь выходим из рутовой сессии и заходим через Putty новым пользователем octoprint
После чего выполняем
cd ~
sudo apt-get update
sudo apt-get upgrade
sudo apt-get install python-pip python-dev python-setuptools python-virtualenv git libyaml-dev build-essential virtualenvУстановка Octoprint
Ставим виртуальную среду
virtualenv venv
Для Питона 3
virtualenv —python=python3 venv
./venv/bin/pip install pip —upgrade
./venv/bin/python setup.py install
Создаем папку для конфигов
mkdir ~/.octoprint
Для того чтоб пользователь octoprint имел доступ к серийным портам добавим его в группы tty и dialout
sudo usermod -a -G tty octoprint
sudo usermod -a -G dialout octoprint
После этого можно попробовать запустить octoprint
~/OctoPrint/venv/bin/octoprint
После проверки закрываем octoprint Ctrl+CДобаваляем Octoprint в автозагрузку
Обновление Octoprint в ручном режиме
Заходим на микрокомпьютер терминалом под пользователем octoprint
cd ~/OctoPrint/
git pull
./venv/bin/python setup.py clean
./venv/bin/python setup.py install
Можно перезагрузить только сервис OctoPrint
sudo service octoprint restart
Или перезагрузить весь микрокомпьютер
sudo restartПерезагрузка Octoprint/Orange pi из меню Octoprinta.
sudo nano /etc/sudoers.d/octoprint-shutdown
пишем в файл
octoprint ALL=NOPASSWD: /sbin/shutdown
Ctrl+X, нажимаем Y и Entersudo nano /etc/sudoers.d/octoprint-restart
octoprint ALL=NOPASSWD: /bin/systemctl restart octoprint
Ctrl+X, нажимаем Y и EnterИ добавляем команды в разделе Server:
sudo shutdown -r now
sudo shutdown -h now
![]()
Для управления питанием принтера и камерой потребуется установка System Command Editor или редактирование файла config.yaml в ручную
Управление питанием принтера
Для этого нам понадобится модуль реле с Алика ССЫЛКА на АЛИ
![]()
![]()
Для подключния реле нам нужны контакты GND, +3.3B и контакт GPIO.25.
![]()
Реле включаем в разрыв провода питания 220В блока питания 3D принтера.
Есть один нюанс, при подключенной Orange pi к принтеру, питание на принтер приходит от сети 220в (через наше реле которым мы будем управлять), а еще через порт USB от Orange Pi. Если отключить через команду принтер, то он обисточится не полностью, мозги принтера останутся запитанными от USB Orange pi. Для исправления этой проблемы используем «изоленту». Просто заклеим в разъеме usb пин питания. После этого принтер будет отключаться полностью!
![]()
Скрипт отключения питания. Использует 25 ногу. Если используете реле как у меня на фото в начале статьи (инверсный вход) , они включаются при подтяжке управляющей ноги к земле и отключаются при появлении напряжения на ноге. Нужно вставить в скрипты poweroff.sh gpio write 25 1 и в poweron.sh gpio write 25 0
Скрипт отключени питания:
nano poweroff.shCtrl+X, нажимаем Y и Enter
Ставим необходимые права:
chmod 755 poweroff.sh
chmod +x poweroff.shСкрипт включения питания:
nano poweron.shCtrl+X, нажимаем Y и Enter
Ставим необходимые права:
chmod 755 poweron.sh
chmod +x poweron.shЗапуск скрипта включения всего питания:
/home/octoprint/poweron.sh
Запуск скрипта отключения всего питания:
/home/octoprint/poweroff.shИли редактирование config.yaml:
cd .octoprint
nano config.yamlЕсли раздел system: actions: уже есть, то добавить только пункты меню.
Ctrl+X, нажимаем Y и Enter. Соблюдая все отступы и знаки в точности.
Настройка автоматического отключения 3d принтера после завершения печати
Для включения этой функции нам потребуется отредактировать файл config.yaml
cd .octoprint
nano config.yamlCtrl+X, нажимаем Y и Enter. Соблюдая все отступы и знаки в точности.
Перезапускаем octoprint sudo service octoprint restart
Теперь будут корректно работать команды M81 (отключить питание) и M80(включить питание). Эти команды можно добавить или в слайсере или в самом Octoprint как GCODE выполняющйся после завершения работы:![]()
Настройка WEB камеры в Octoprint
Выводим список доступных устройств
ls /dev/video*![]()
Если запущен mjpg-streamer, закрываем его (Ctrl+C).
Чтобы разрешить ‘обычному’ пользователю доступ к устройствам video, надо добавить его в соответствующую группу.
sudo usermod -a -G video octoprint
После этого закрываем сеанс (exit) и подключаемся к Orange Pi заново.Устанавливаем mjpg-streamer в систему. При этом исполняемый файл окажется в /usr/local/bin, плагины — в /usr/local/lib.
cd ~/
cd mjpg-streamer/mjpg-streamer-experimental
sudo make install
После установки можно его удалить из домашней папки (cd ~ && rm -rf mjpg-streamer).Создаем скрипт запуска
cd
nano webcam-streamerДелаем файл исполняемым :
chmod +x webcam-streamer
Перемещаем файл куда нужно :
sudo mv webcam-streamer /usr/local/bin/Для запуска /usr/local/bin/webcam-streamer start
для остановки /usr/local/bin/webcam-streamer stop
Или редактирование config.yaml:
cd .octoprint
nano config.yamlЕсли раздел system: actions: уже есть, то добавить только пункты меню.
Ctrl+X, нажимаем Y и Enter. Соблюдая все отступы и знаки в точности.
Telegram
При первой установке он мне выдавал ошибку Pillow. Поэтому перед установкой плагина выполним нехитрые действия:
sudo apt-get install libjpeg62-dev
sudo apt-get install zlib1g-dev
sudo apt-get install libfreetype6-dev
sudo apt-get install liblcms1-dev
pip install pillow
sudo apt-get update
sudo apt-get install python-pilА дальше просто ставим плагин и настраиваем по инструкции
*Далее для 2020 не актуально, тетеграм разблокировали в РФ*
Но после установки он отказался работать без VPN, спасибо Роскомнадзору.
![]()
создаем папку home\octoprint\VPN
туда кидаем ваши сертификаты и ключи, у меня такие:
ca.crt
client.crt
client.key (в нем не забываем прописать пути до остальных сертификатов и ключей)
client.ovpn
ta.keyУстанавливаем клиент openvpn:
sudo apt-get install openvpnПроверяем коннект к VPN:
sudo openvpn —config /home/octoprint/VPN/client.ovpn
Коннект появился, но Telegram не хочет работать:![]()
sudo apt-get install resolvconf
sudo apt install openvpn-systemd-resolved (это тоже поставил)
cd /etc
сделаем бэкап файла resolv
cp resolv.conf resolv.conf.orig
Выполним команду — создаем жесткую ссылку
ln -s /etc/resolvconf/run/resolv.conf /etc/resolv.conf (не сработало) sudo ln -nsf ../run/resolvconf/resolv.conf /etc/resolv.conf
(это сработало)
в конце client.ovpn добавим
script-security 2
up /etc/openvpn/update-systemd-resolved
down /etc/openvpn/update-systemd-resolved
down-pre
Подключаться так openvpn —script-security 2 —config /home/octoprint/VPN/client.ovpnПроверяем, если Telegram работает, закрываем в консоли соедениеие VPN Ctrl+C и настраиваем автозагрузку.
Создадим папку для скрипта:
cd ~
mkdir ./bin
cd ./bin
Создадим скрипт автозагрузки:
sudo nano script_auto_run
В файл впишемCtrl+X, нажимаем Y и Enter
Сделаем файл исполняемым:
sudo chmod 755 script_auto_run
Проверим как он запускается, выполнив
/home/octoprint/bin/script_auto_run
Если все хорошо, закрываем Ctrl+C
Теперь пропишем это в rc.local. Выполним команду
sudo nano /etc/rc.local![]()
Там может быть много всего, или не быть ничего (если файл создан только что). Это не важно. Если там пусто, то просто допишите в конце exit 0, а перед ним
/home/octoprint/bin/script_auto_run
Ctrl+X, нажимаем Y и Enter
Перезагружаемся:
sudo rebootВ материале частично использованы наработки Sergey Irbis
Conclusion
With all of these settings properly configured your camera feed should look remarkably better than when you first plugged it in.
Remember when tweaking any of these settings you really do not need to worry about breaking anything and if your camera feed stops working simply revert to your previously working settings.
Tweaking any of these settings should give you the best possible experience and make live and time-lapse videos infinitely better and more usable.
Подпишитесь на автора, если вам нравятся его публикации. Тогда вы будете получать уведомления о его новых статьях.
Отписаться от уведомлений вы всегда сможете в профиле автора.
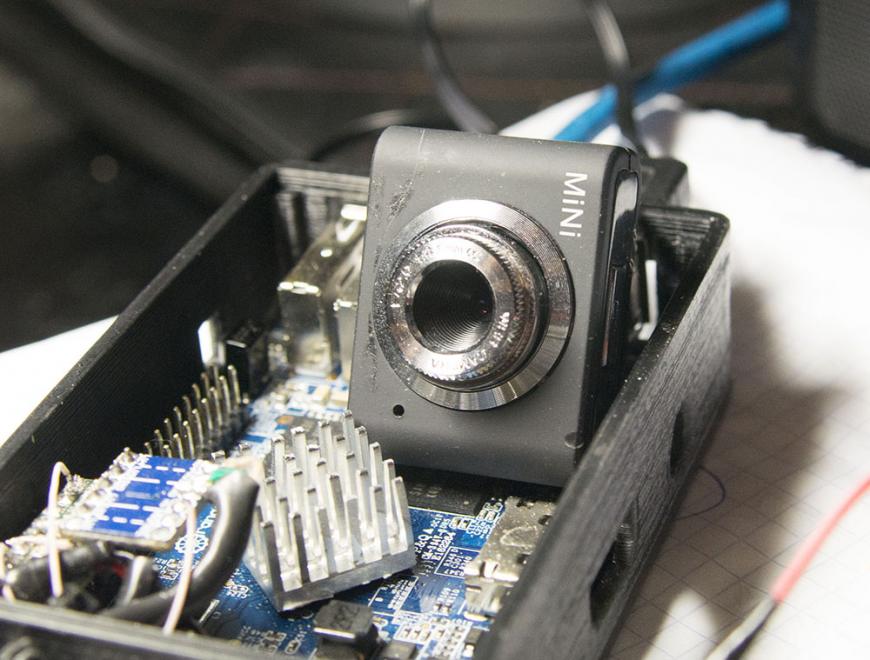
![Апельсиновый осьминог: обычная вебкамера]()
Хочу сказать, что штатная CSI-камера 'апельсинки' меня несколько разочаровала. Поэтому в дальнем ящике шкафа был откопан пакетик, в котором содержались кишочки старой китайской вебкамеры. Судя по их состоянию, камера подвергалась переделке в 'микроскоп' (переворот объектива и приклеивание его какой-то липкой мерзостью). Восстановив статус кво, я быстренько ее настроил, благо, все работает почти как в 'малинке'. Естественно, об этом сразу захотелось написать, но просто настройка камеры - это слишком скромно. А тут мне подсказали хорошую идею для реализации - надо, чтобы камера включалась и выключалась средствами OctoPrint - ну, чтобы не греть зря 'малинку-апельсинку'.
Поэтому сегодняшняя пошаговая инструкция будет из двух частей - как 'поднять' USB-вебкамеру в Debian и как сделать в OctoPrint два пункта меню для управления ею. Описывать процесс я буду на примере Orange Pi, но инструкция применима и к Raspberry практически без изменений (имя пользователя разве что будет другое).
Настройка USB вебкамеры
Исходная позиция - Orange Pi PC с установленным минимальным Debian (сборка от loboris) и развернутым принт-сервером OctoPrint. Далее производим установку необходимого ПО для работы с камерой, почти по инструкции (раздел Webcam), но с некоторыми изменениями.
sudo apt-get install subversion libjpeg62-turbo-dev cmake
Устанавливаем необходимые компоненты для сборки mjpg-streamer.
Скачиваем актуальный исходный код для mjpg-streamer.
nano Makefile
export LD_LIBRARY_PATH=.
Компилируем. Камеру пока не подключаем!
ls /dev/video*
Смотрим, что у нас с устройствами. По идее, вывод должен быть пустым. У меня уже было устройство /dev/video0, поскольку подключены модули ядра для штатной камеры. Но дальше я предполагаю, что их нет. Подключаем камеру, повторяем команду. Если появилось /dev/video0, то все должно быть хорошо, идем дальше. Если не появилось, тогда ой. Возможно, камера не поддерживается, или произошел еще какой-то забавный глюк, пишем об этом в комментариях вместе с моделью камеры и выводом lsusb.
Включаем-выключаем
Для начала, некоторые подготовительные действия. Если запущен mjpg-streamer, прибиваем его (Ctrl+C).
sudo usermod -a -G video orangepi
Чтобы разрешить 'обычному' пользователю доступ к устройствам video, надо добавить его в соответствующую группу. После этого закрываем сеанс (exit) и подключаемся к Orange Pi заново.
Переходим в каталог, где у нас собран mjpg-streamer.
sudo make install
Устанавливаем mjpg-streamer в систему. При этом исполняемый файл окажется в /usr/local/bin, плагины - в /usr/local/lib. После установки можно его грохнуть из домашней папки (cd ~ && rm -rf mjpg-streamer).
cd~ && nano webcam-streamer
Создаем скрипт запуска и остановки mjpg-streamer со следующим содержимым (почерпнул отсюда):
Подпишитесь на автора, если вам нравятся его публикации. Тогда вы будете получать уведомления о его новых статьях.
Отписаться от уведомлений вы всегда сможете в профиле автора.
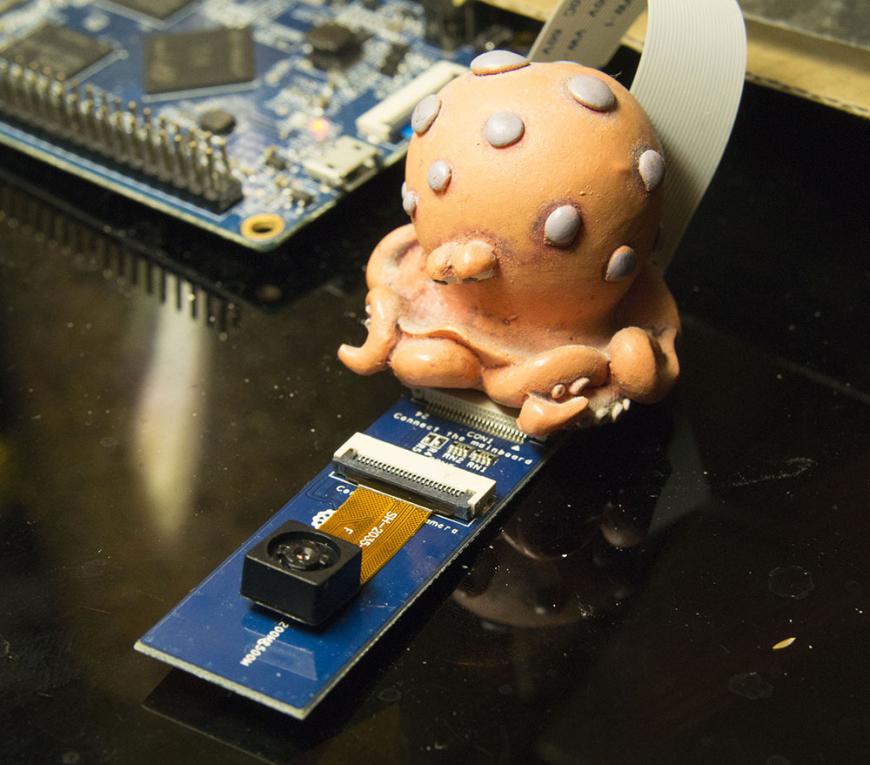
![Апельсиновый осьминог и штатная камера]()
Это - вторая часть эпопеи о водружении на китайское поделие (Orange Pi) нужного и полезного принт-сервера. Предыдущий материал представляет собой пошаговое руководство собственно по настройке Debian и установке OctoPrint, а теперь начинаем прикручивать к 'апельсинке' всякие дополнительные полезности.
Я зачем-то заказал 'апельсинку' вместе со штатной камерой. Так пока и не понял, хорошо это, или плохо. В любом случае, расскажу о том, как я с бубном прикрутил ее к OctoPrint и попробую сделать из этого какие-то выводы. К сожалению, у меня тупо нет USB-вебкамеры, чтобы устроить очное сравнение. Когда добуду, тогда все сомнения будут развеяны.
Итак, камера. Представляет собой миниатюрный модуль стандарта CSI с коротким хвостиком. Подключается к соответствующему разъему Orange Pi и не работает. Почему? Оказывается, на Orange Pi PC (самая простая модификация) что-то вокруг этого разъема не доделано, и поэтому камера будет работать только при подключении через прилагаемую плату (в несколько раз больше самого модуля камеры). Это первые грабли, по которым я поплясал. Хорошо, а как заставить камеру работать? В забугорных интернетах обнаруживается ровно 1 (одно) вменяемое руководство по 'подъему' штатной камеры. Проделав все нужные манипуляции, я понял, что камера 'как-то' показывает. Но для работы с ней там используют motion, а в документации к OctoPrint везде описывается mjpg-streamer.
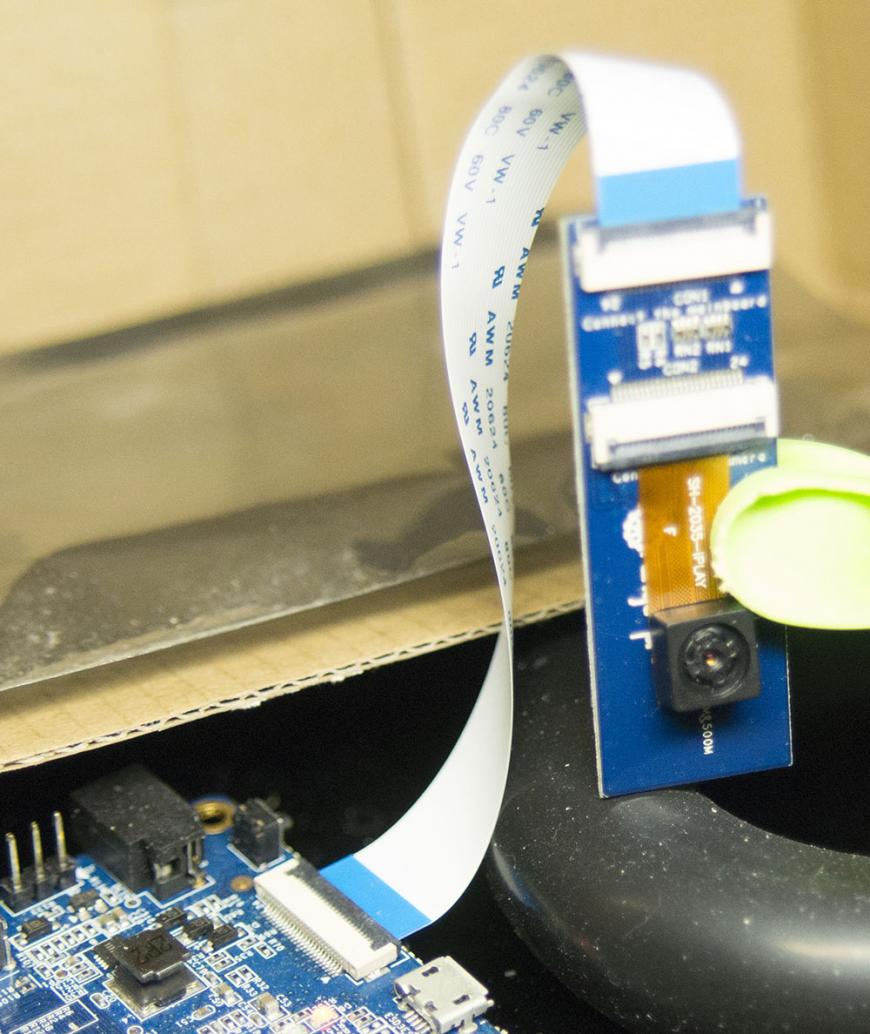
![Апельсиновый осьминог и штатная камера]()
Я потратил уйму времени, но так и не смог запустить mjpg-streamer с этой камерой. Более того, я не нашел ни одного упоминания о том, что кому-то это удалось. Тупик? Нет, мысли еще не закончились. Собственно, а какая OctoPrint'у разница, что генерирует видеопоток? Что мешает подсунуть ему результат деятельности motion? Забегая вперед, скажу: это работает. Поэтому можно описать процесс 'подъема' камеры под Debian на Orange Pi PC подробнее.
Предполагается, что на 'апельсинке' установлена прошивка от loboris, как это описано в первой части.
sudo nano /etc/modules
В редакторе дописываем две строчки в конце
Ctrl+O, Enter, Ctrl+X. Этим мы добавляем в автозагрузку нужные модули ядра.
sudo apt-get install motion
Установка пакета motion. Вообще-то, это средство скорее для организации эрзац-видеонаблюдения с помощью веб-камеры, но нам от него нужен только онлайн-видеопоток.
sudo nano /etc/motion/motion.conf
stream_localhost on на stream_localhost off, чтобы можно было подключаться к серверу motion не только с локальной машины.
output_pictures on на output_pictures off, чтобы motion не записывал картинки с камеры.
target_dir /home/orangepi/motion - на всякий случай мы все-таки создадим папку для записи - нет уверенности, что сервер будет без нее корректно работать.
Ctrl+O, Enter, Ctrl +X.
mkir ~/motion && chmod 777 ~/motion
Создание выходной папки для motion
sudo nano /etc/default/motion
Там правим строчку на 'start_motion_daemon=yes'.
sudo /etc/init.d/octoprint restart
Не уверен, что нужно, но на всякий случай перезапускаем OctoPrint. Теперь на вкладке Control должна появиться картинка.
![Апельсиновый осьминог и штатная камера]()
Немного поразмышляю. Во-первых, в motion.conf есть настройки разрешения и количества кадров в секунду. Но, насколько я понимаю, с этой камерой они ни на что не влияют. Поэтому мы имеем 800х600 и 2 fps. Во-вторых, камеру неудобно располагать, т.к. она соединяется с апельсинкой коротким (10 сантиметров) шлейфом. За стоимость этого модуля (почти $9, если с доставкой) можно купить USB вебкамеру, которая вряд ли будет хуже, но зато в корпусе, с длинным кабелем и прищепкой. Пока что мне приходит в голову только одно преимущество штатной камеры Orange Pi - это то, что она не задействует USB, а значит, не будет мешаться другим устройствам.
Troubleshooting Tip 1:
Reduce the resolution and frame rate of both your PI Camera and your USB webcam.
Your Raspberry PI is amazing, but it still must obey the laws of physics, and you just might be asking it to do too much. Remember, your PI is running Linux, Octoprint and two video streaming services.
Here are the settings for my PI Cam and Logitech C510 in octopi.txt and octopi2.txt, respectively:
Both cameras support resolutions of 1920x1080 and frame rates of 30fps, but setting the cameras to their max values caused the cameras not to start up. Sometimes I’d get one, or the other, but never both at the same time.
NOTE: Don’t set your frame rate to less than 5. While testing, I set my USB camera to -f 1 and discovered in the logs that the value was being pushed up (or “coerced” in video4linux speak) to 5. Seems like Linux doesn’t like frame rates that low.
Читайте также: