
Nintendo 3ds r4 инструкция
Core 3DS Card) is very easy to install and setup for all of your emulation and gaming needs. It actually has only one file and one folder that have to be copied over to them micro SD Card in order for the R4 menu to display and show up when you load it.
If you're seeing an error message on yoru 3DS or DSi system, and have the firmware files loaded, it is more than likely due to the firmware kernel being put in the wrong place on the card itself. This is a very common mistake, and people often unarchive or uncompress the firmware files, which most of the time creates a folder that has the same name as the firmware files themselves. If you copy over that folder, with the file and folder below over to your micro SD card, you WILL see an error message.
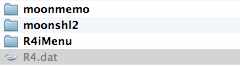
The only file and folder you should have in the ROOT of your micro SD Card can be seen below. There should be three folders, called moonmemo, moonshl2, and R4iMenu. There should only be one file named R4.dat - without exception. If you have this folder and file within or inside another folder, your will get an error message on your 3DS consoles screen, and the r4 menu system will not load up or enable you to load any of your apps, media or games.
So what do we mean when we say the ROOT of your micro SD card? Simply put, it means the main directory of your SD card. The included USB reader, when the micro SD is inserted and then plugged in to your free USB port on your computer, will enable you to have a removeable drive letter on your PC or MAC (or Linux). When you click on this drive letter, it opens up a new window, and there should be absolutely nothing there. This is the ROOT of your micro SD card. If you have a folder there, and click on that folder, you are no longer in the ROOT portion of your micro SD card, but instead, you are in the FOLDER NAME of your micro SD. You need to copy and paste the above file and folder directly to the root of your micro SD card. The firmware files should not be in any other folder at all, and when you see the micro SD card after clicking on its drive letter, the only thing you should see are the above file and folder showing.
Подготовка к работе
Вы можете выбрать нужную вам языковую версию ядра. Мы выбрали English.
Обратите внимание, что там «типа» на выбор 5 версий прошивок, но все файлы там одинаковые. Качайте любой.
Пойдет скачивание файла R4-V4.0b English .
Внутри этого архива 3 папки: moonmemo , moonshl2 и R4Menu .
Их нужно просто скопировать в корень карты памяти.
В: У меня не работает
О: Ищите решение здесь
Step 3: Follow our R4 3DS Firmware Setup Guides:
We suggest you take a look at our R4 3DS Firmware section first. Open it in a new browser tab, and make sure to download the correct firmware for your card. Our firmware page is very simple and plain, and we did this on purpose. We wanted to make choosing the right kernel for the card you bought as easy as possible. A picture of each card shows exactly which version or model of the card the firmware files are for. This way, you can select from any of the different language versions and download exactly the right firmware for your card. While we do have a few models of the same card, with newer versions, it should take no more than a quick look at your card and a comparison to the image we have on the page, to know exactly which firmware you should download.
Installation and setup of the R4 3DS is actually a whole lot easier than you may think. You need only a few things to get started, and the correct firmware files and you're ready to go, and you will be up and playing your favorite homebrew or indie games and applications in just minutes. We've separated each and every single type of R4 card we carry into their own specific setup and installation section. We've done this for both ease of navigating through the instructions and to ensure that our valued customers do not try to install the wrong firmware kernel, which will result in an error message that may appear to show the R4 not working, when in fact with the right firmware, the cards work just fine.
You can, of course, do the same comparison here with our setup guides. Take a look at the card you have ordered and received, and then take a look at the images below to make sure you are clicking on the correct guide for firmware installation. While many of the steps are identical from one card to another, there may be some differences that would otherwise cause you to see an error message due to an incorrect firmware installation
R4 3DS Card Setup - Full Instructions On How To Setup The Firmware Kernel And Start Using Your R4 3DS Card once you receive it, with information on the proper files and folders you need on your R4 3DS.
The R4 3DS Dual Core Card brings all of the same compatibility and features of the R4 3DS cards of the past, and adds to it a dual processor, enabling almost instant firmware updates and upgrades whenever a new version of the Nintendo 3DS or DSi system OS update is released. Setup and installation are just as easy.
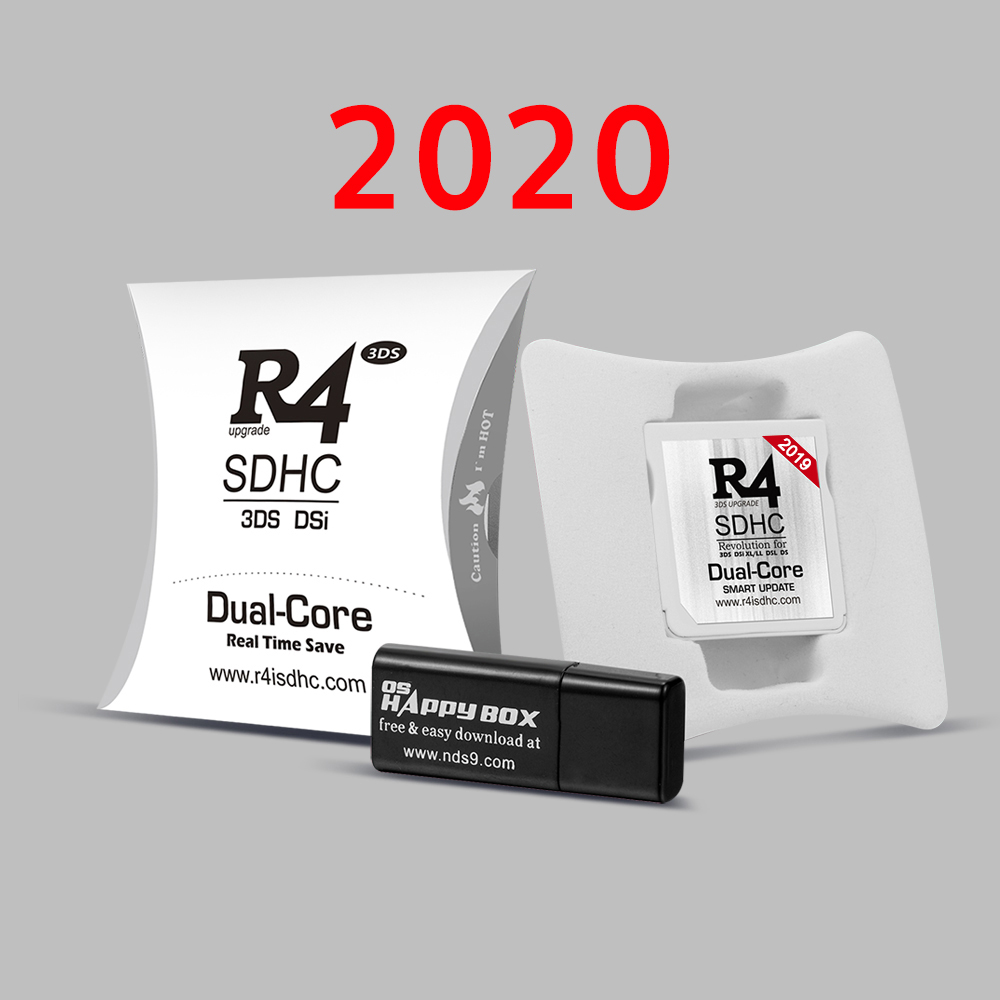
The card that gets the quickest updates for firmware. The real-time save features makes this card a customer favorite. Make sure you download the firmware for the card with the NEW sticker as shown in the image.
Full Instructions On How To Setup The Firmware Kernel And Start Using Your R4 3DS Card once you receive it, with information on the proper files and folders you need on your R4 3DS.
The R4 3DS Dual Core Card brings all of the same compatibility and features of the R4 3DS cards of the past, and adds to it a dual processor, enabling almost instant firmware updates and upgrades whenever a new version of the Nintendo 3DS or DSi system OS update is released. Setup and installation are just as easy.
В: У меня уже стоит arm9loaderhax, нужно ли мне обновляться до b9s?
О: Да. Все современные программы работают только на b9s
R4 3DS Card
В: Как разбаниться?
В: Как обновить Luma3DS?
О: Выполните инструкции по ссылке.
Как пользоваться картриджем R4?
После того как вы вставили картридж и открыли его (данный картридж в консоли выглядит как какая-либо игра, у меня, например, это Bomberman) появится меню с тремя кнопками:
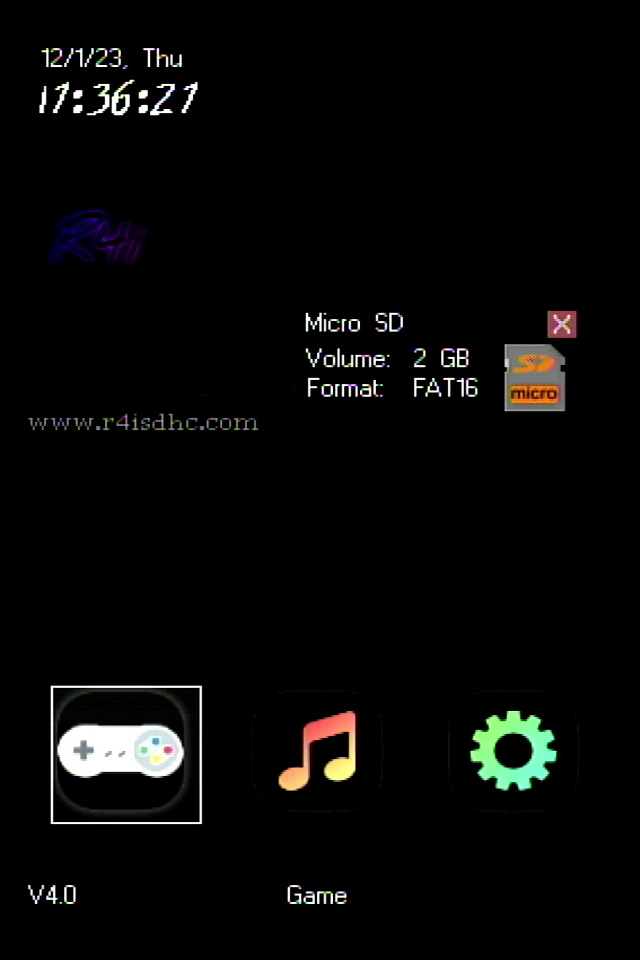
У вас внешний вид этого меню может выглядеть по-другому, но это из-за скинов. Они переключается в настройках.
Game (Игры) – меню для запуска игр и их настройки.
Multimedia (Медиа) – меню для запуска мультимедийных файлов (книги, фильмы, музыка)
Config (Конфиг) – настройки картриджа.
Начнем с меню Game .
В: Запустится ли R4 или его аналог на моей приставке?
О: Попробуйте сами. Если не запускается, выполните инструкции по ссылке
В: Как мне обновить boot9strap?
О: Обновление b9s
В: У меня rxtools/cakeCFW/etc, как мне перейти на b9s?
О: Все прошивки использующие menuhax морально устарели и не считаются полноценным взломом по сегодняшним меркам. В первую очередь из-за того, что используют уязвимости высокого уровня и просто перенаправляют вызовы чтения NAND на карту памяти в раздел с EmuNAND.
Современные прошивки делают по другому. Они перехватывают управление на самом низком уровне - на уровне загрузчика и дают возможность пользоваться настоящими кастомными прошивками.
Да и делается все это очень просто.
Если вы хотите перейти на Luma3DS и современные методы взлома, просто держите в голове тот простой факт, что ваша приставка фактически не взломана. Игнорируйте название своего кастома, игнорируйте наличие эмунанда. Просто загрузитесь в SysNAND и следуйте руководству.
В определенный момент вам будет предложено перенести существующий EmuNAND в SysNAND. В итоге, вы получите современную прошивку с современным неслетаемым взломом, располагающуюся в SysNAND. Еще и места на карте прибавится.
В: Как восстановить бекап?
О: Выполните инструкции по ссылке.
Настройки картриджа
Если в главном меню выбрать вкладку Config , то вы попадете в настройки картриджа.
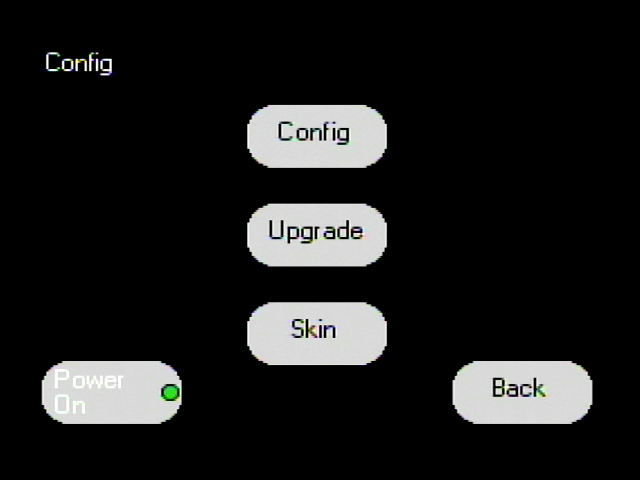
Кнопка Config – открывает настройки картриджа.
Upgrade – открывает меню с апгрейдом картриджа. Для этого нужно закачать файл апгрейда на флешку.
Если вам помогло или просто понравилось это руководство, то мы принимаем пожертвования. По вопросам, касающимся взлома и руководства, обращайтесь сюда.
Для использования magnet-ссылок в этом руководстве необходим torrent-клиент, например Deluge
Для работы с файлами формата .7z , .zip , .rar используйте архиватор, например 7-Zip. Соглашайтесь на замену файлов по запросу, если не указано иное. Если в гайде сказано что-то скопировать в папку, но на вашей SD-карте такой папки нет - создайте её!
Все манипуляции в руководстве производятся с картой память консоли, если не сказано иное!
Это FAQ для прошитых, дающий ответы на вопросы, которые наверняка у вас возникнут после взлома. Если вы ещё не начали взлом, ознакомьтесь с FAQ для не прошитых.
В: Не забанит ли меня Nintendo?
О: Рано или поздно - забанит. Чтобы избежать этого никогда не включайте wifi на консоли. Но если вы не станете его включать, то какая вам разница забанят вас или нет? :)
Step 2: Download the latest R4 3DS Firmware kernel for your card.
Each R4 3DS card has its very own distinct firmware kernel. The firmware kernel is the heart and guts of the R4 3DS. It is the menu, the loader and the way that you interact with it. You can download the firmware for each specific card from our R4 3DS Firmware section.
This is our special R4 3DS Setup section, where we will cover all of the different R4 DS and R4 3DS models and full step by step instructions on how to setup your firmware kernel and start using you R4 3DS card right away without any delay. We've also added some tutorials which will help you get setup and watching movies, reading ebooks and digital comics as well as listening to your MP3 music, and a whole lot more. All of these things made possible with the help of the R4 3DS.
And for further setup instructions, please check below for the model of your card and follow the individual setup instructions.
В: Можно ли запускать игры от DS?
О: Да, можно, с помощью специального флеш-картриджа, например R4 или его аналога. С внутренней памяти можно через TWiLightMenu++ и nds-bootstrap
A PC or Laptop with a USB port.
R4 3DS Tutorials And Guides:

All prices on our website will be processed in US Dollars. We do offer some currencies as a selection for reference purposes but the final price will be charged based on our US Dollar pricing. Please note that exchange rates can change every day - sometimes many times per day, and that your final amount will always be charged in US Dollars. By completing your order you agree to the US dollar charge and the equivalent amount based on the exchange rate at the time of processing.
Please note that our Buy 2 Get 1 Free Promotion Does Not Include Micro SD Cards. In orders where you purchase a combo package with a micro SD Card, only the R4 cards themselves are eligable for the Buy 2 Get 1 Free or Buy 1 Get 1 FREE Promotion. Please note that our buy 2 get 1 free promotion is NOT applicable with orders where bulk or quanrtity discounts are in place. A Maximum of 10 Free R4 Cards in total will be shipped with your order. Wholesale orders are not part of the buy 2 get 1 free promotion due to the discount / wholesale pricing
The R4 3DS Card, sometimes called the R4i 3DS SDHC Card is one of the very first cards that worked on the Nintendo 3DS. Check the package you received and make sure to download the firmware for your card. You can often take a look at the sticker on the card, and compare it to the R4 3DS firmware files we have on our firmware page. Once you have the firmware file, you may need to download the shareware version of WinRar or 7-zip. Both of which will uncompress the archive for you and put it in a folder on your PC or Mac.

Here's where you have to really be careful. Most of the time when you uncompress and archive, it wil create a folder that has the exact same name as the archive itself. For exmaple, if the file we have is called R4 3DS Firmware.rar then by default, most of the programs will create a folder called R4 3DS Firmware, and in that folder will be a different set of files and folders. Most people copy the folder over as it is, and keep all of the seperate files and folders in there and then put the micro SD in to their R4 and try to run it. Often this will bring up the LOADING screen, and simply won't work.
You need to take each of the files and folders WITHIN that actual folder, and copy them over to the root of your micro SD Card. By ROOT, we mean the main section of your micro SD. No other folder names or files should be present. You would just copy over the firmware files and be up and runing. Below you can see a screenshot of what your micro SD card should look like when you have copied all of the files and folders over to the micro SD. These are the only files and folders you should see when you first click on your micro SD Card from My Computer on your PC or Finder on your MAC.
You'll notice we have already included MoonShell for you, so that you can enjoy your media and music right from the start.

- 1. Insert your memory card to the card reader that you can get from the Pack R4i 3DS.
- 2. Insert the card reader to your computer.
- 3. Format the card by right-clicking on it and selecting “Format.”
- Note: Click on “Start” that you can find at the left corner on the bottom of your screen, click on “My Computer” and then right-click on the memory card icon.
- 4. Select “FAT 32” and get the check mark off the “Quick format” option then click “Start.”
- 5. Download only the latest version of R4i SDHC 3DS English or the regional language pack you would like to install.
- 6. Unzip the folder. Do a right-click on it and select “Extract.”
- Note: The extraction process needs winrar or winzip.
- (Expect to find files called moonmemo, R4iMenu, moonshl2, R4-‘date’_
- 7. Select all these items and copy them. Note: Click-drag all four elements, right-click on them and select “Copy.”
- 8. Copy all the files to your memory card.
Note: Right-click on its icon and select “Paste.” - 9. Eject the memory card and insert it into the R4 3DS.
All prices on our website will be processed in US Dollars. We do offer some currencies as a selection for reference purposes but the final price will be charged based on our US Dollar pricing. Please note that exchange rates can change every day - sometimes many times per day, and that your final amount will always be charged in US Dollars. By completing your order you agree to the US dollar charge and the equivalent amount based on the exchange rate at the time of processing.
Please note that our Buy 2 Get 1 Free Promotion Does Not Include Micro SD Cards. In orders where you purchase a combo package with a micro SD Card, only the R4 cards themselves are eligable for the Buy 2 Get 1 Free or Buy 1 Get 1 FREE Promotion. Please note that our buy 2 get 1 free promotion is NOT applicable with orders where bulk or quanrtity discounts are in place. A Maximum of 10 Free R4 Cards in total will be shipped with your order. Wholesale orders are not part of the buy 2 get 1 free promotion due to the discount / wholesale pricing
Step By Step R4 3DS Firmware Setup:
1. First, you'll need to take your micro SD card and put it in to the included Micro SD Card reader/writer.
2. Now, insert the USB Reader with the micro SD already installed in to any free USB port on your PC.
3. While most cards come formatted already, right from the factory, we always suggest you format the card again, just to be 100% sure that you have the right file format on the card. Simply Format the card by right-clicking on it and selecting “Format.”
Note: Click on “Start” that you can find at the left corner on the bottom of your screen, click on “My Computer” and then right-click on the memory card icon.
4. When asked what format you would like to have, Select “FAT 32” and get the check mark off the “Quick format” option then click “Start.”
5. Make sure to download the very newest version of our R4 3DS Dual Core firmeware from our R4 3DS Firmware section on our site.
6. Unzip the folder. Do a right-click on it and select “Extract.” Note: The extraction process needs winrar or winzip. If you don't have either WinZip or WinRar, the freeware version of 7-zip will work just as well, and it's absolutely free.
7. Select all these items and copy them. Note: Click-drag all four elements, right-click on them and select “Copy.”
8. Copy all the files to your memory card.
- Note: Right-click on its icon and select “Paste.”
9. Eject the memory card and insert it into the R4 3DS.
10. Plug your R4 3DS in to your DS, DSi or 3DS Console, and power up your console. You'll see the R4 there, sometimes called a new game name.
All prices on our website will be processed in US Dollars. We do offer some currencies as a selection for reference purposes but the final price will be charged based on our US Dollar pricing. Please note that exchange rates can change every day - sometimes many times per day, and that your final amount will always be charged in US Dollars. By completing your order you agree to the US dollar charge and the equivalent amount based on the exchange rate at the time of processing.
Please note that our Buy 2 Get 1 Free Promotion Does Not Include Micro SD Cards. In orders where you purchase a combo package with a micro SD Card, only the R4 cards themselves are eligable for the Buy 2 Get 1 Free or Buy 1 Get 1 FREE Promotion. Please note that our buy 2 get 1 free promotion is NOT applicable with orders where bulk or quanrtity discounts are in place. A Maximum of 10 Free R4 Cards in total will be shipped with your order. Wholesale orders are not part of the buy 2 get 1 free promotion due to the discount / wholesale pricing
Картридж R4 NDS это Flash картридж, то есть как жесткий диск для Nintendo DS и как жесткий диск на компьютере его можно использовать, как для пиратства, так и для обычной работы. Вы можете записать пиратские игры на Flash картридж (если скачать NDS ром образ игры из интернета), а можете использовать Flash картридж по другому назначению, например, скачав открытые NDS ром образы или просто закачав свою программу. То есть использовать Flash картридж как средство разработки.
При этом, в случае с Ninteno DSi и Nintendo DSi XL, картридж R4 позволяет не взламывать их.
Но помните, что вся ответственность за эти действия лежит на Вас!
В сети ходит невероятное количество версий этого картриджа, причем большинство из них фейки. Этот гайд написан именно для той версии, ссылка на которую есть в разделе «Где купить?».
При этом, там по ссылке есть три вида картриджей:
Но они полностью идентичные! И софт для них полностью идентичный!
В: Как вернуть приставку к заводскому состоянию?
О: Выполните инструкции по ссылке.
В: Как сделать бекап?
О: Выполните инструкции по ссылке.
Micro SD Card. The R4 3DS cards are compatible with micro SD Card from 2GB right up to 32GB in size.
Step 1: The Things You Will Need

В: Можно ли обновлять системное ПО на прошитой консоли?
О: Да
А как сохраняться в игре?
Как и любые другие картриджи, R4 картридж умеет сохраняться как обычный картридж и в режиме RTS.
1. Real Time Save сохранения.
Можно сохранится в любое время и в любом месте. Нажимаем L + R + X + Y + A + B и появляется меню, которое спрашивает нас сохранить игру?
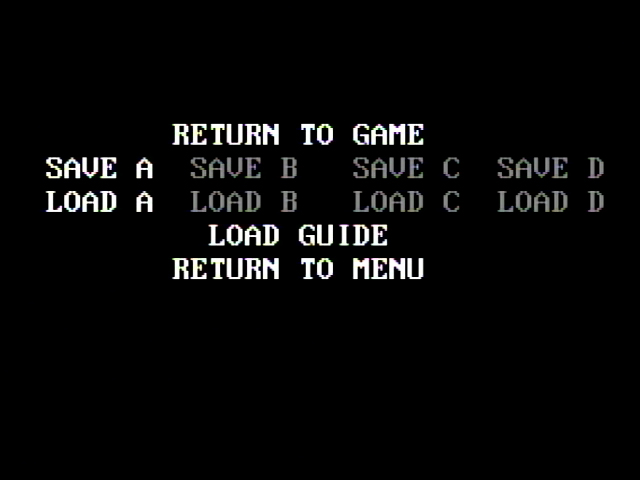
SAVE A – сохранить в слот A .
SAVE B – не активно, это как раз и есть такая настройка Hidden Off .
Для загрузки соответственно нужно выбрать LOAD A или другую ячейку.
2. Normal Save.
Нормальные сохранения — это такие сохранения, которые делаются таким-же способом, как если бы вы использовали обычный лицензионный картридж.
Сохранения в картридже R4 делаются автоматически. Чтобы сохраниться нужно дождаться, когда в игре вы пройдете чекпоинт (на котором игра автоматически сохраняется) или место сохранения или сами нажмете кнопку сохранить (если игра поддерживает сохранения) и подождать пять секунд.
В: С какой скоростью работает скачка по WiFi?
О: На Old3DS и 2DS в среднем - 600-800 kbps, на New - в среднем 1,5-2 mbps. Вне зависимости от карты памяти и ее класса. Все упирается в шину данных и модуль WiFi.
Updated on September 1st, 2019 as we added additional setup instructions for more R4 3DS Cards and R4i Gold 3DS cards. Check back often as we update our R4 3DS Setup guides and tutorials page regularly.
While the cards are all different, some of the steps are the same for every card.
В: Можно ли запускать игры другого региона?
О: Да, можно. Luma пропатчена на запуск игр любого региона. Нет, за это не забанят.
Micro SD Card USB Adapter (included with each and every one of our R4 3DS cards)
Your Nintendo 3DS, 3DS XL, NEW 3DS, 2DS, 2DS XL or DSi, DSi XL or Nintendo DS system.
В: Как запустить игру на русском на приставке без русского языка в настройках?
О: Выполните инструкции по ссылке.
Как записать игры и приложения на картридж?
Все крайне просто, нужно скопировать NDS файл игры или приложения с компьютера на карту памяти (или в папку на карте памяти).
Где купить R4 NDS
В: Как поставить в приставку карту большего объема?
О: Отформатируйте новую карту, затем просто скопируйте ВСЕ данные со старой карты в новую.
В: Можно ли качать игры с eShop?
О: Можно. Не забанят. На взломанный приставке можно делать всё, что можно делать на не взломанной, даже покупать игры.
Как выйти из игры?
Чтобы выйти из игры, нужно нажать кнопки L + R + X + Y + A + B . Если RTS не активировано, то при нажатии этой комбинации кнопок, игра сразу закроется. А если RTS активировано, то появится меню, где нужно будет выбрать RETURN TO MENU .
В: Где взять LocalFriendcodeSeed_B?
О: Ищите в гугле. Тут я вам не помошник
В: Можно ли убрать оповещение об обновлении при запуске?
О: Да, для этого нужно с включенным WiFi войти в рекавери ( + + + при загрузке приставки) и при запросе на обновление прошивки нажать “Отмена” (это удалит скачанный уже файл обновления), после чего приставка выключится. Затем, чтобы консоль не проверяла обновления в дальнейшем, прописать в настройках DNS активного подключения 159.203.242.044 и 208.67.220.220 . ВАЖНО: после изменения DNS могут возникнут трудности с доступом к eShop!
Как запустить игры?
После того как вы нажали кнопку Game перед вами откроется такое меню:
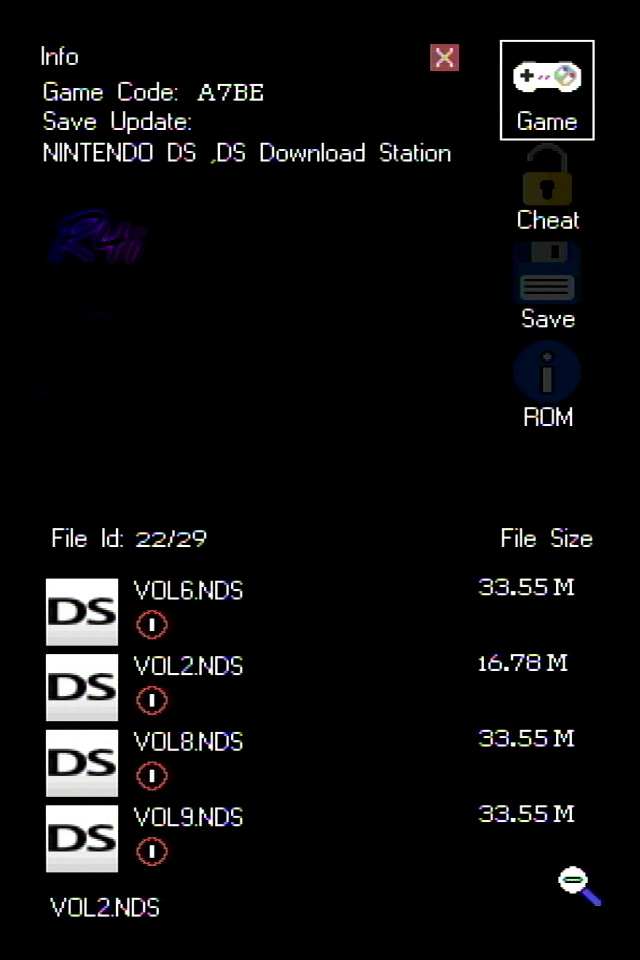
На верхнем экране находится меню настроек игры. Немного странно звучит, но мы сейчас с вами полностью разберемся.
На нижнем экране находится список игр. Здесь перечислены все ваши приложения и игры. Независимо от того в какой папке лежит ваша игра, они все будут в этом списке.
Нижний экран.
С этого экрана непосредственно запускаются игры.
Вариантов действий на этом экране не очень много:
Если выбрать игру и нажать A , то она запустится.
Если нажать Start , то откроется меню с подсказками:
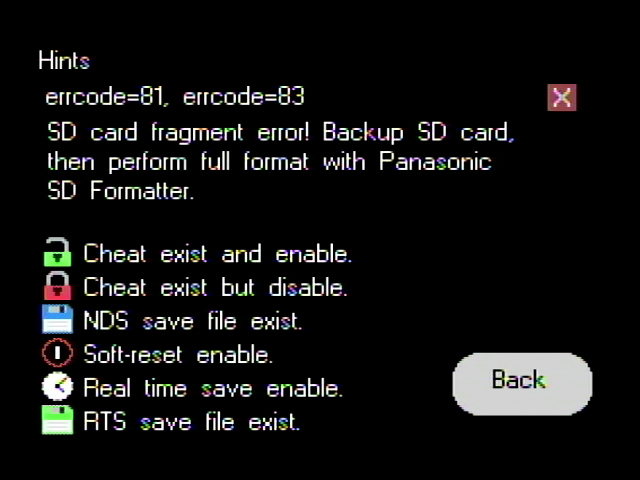
Здесь говорится о том, что если у вас будет ошибка 81 или 83, то нужно скачать программу Panasonic SD Formatter и отформатировать карту.
Снизу расшифровка иконок, которые находятся под названием игры в прошлом меню.
Если нажать Select , то откроется меню сортировкой игр:
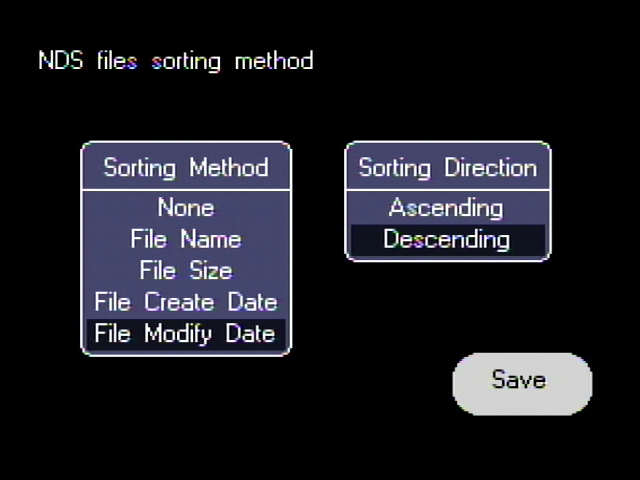
Слева выбираете сортировку по имени, размеру дате создания и дате изменения файла.
Справа порядок по восходящей и наоборот, после чего нажимаете кнопку Save .
Верхний экран.
Как только вы войдете в меню Game , то у вас сразу будет выделена самая верхняя иконка (в правом, верхнем углу), у меня это контроллер:
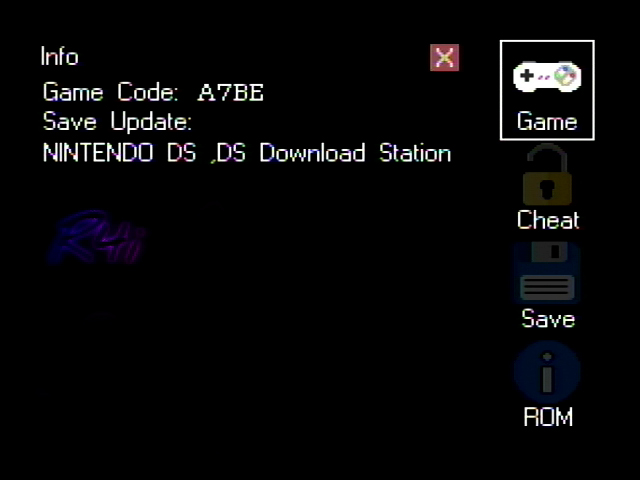
Это просто информация о роме игры.
Следующая вкладка – читы.
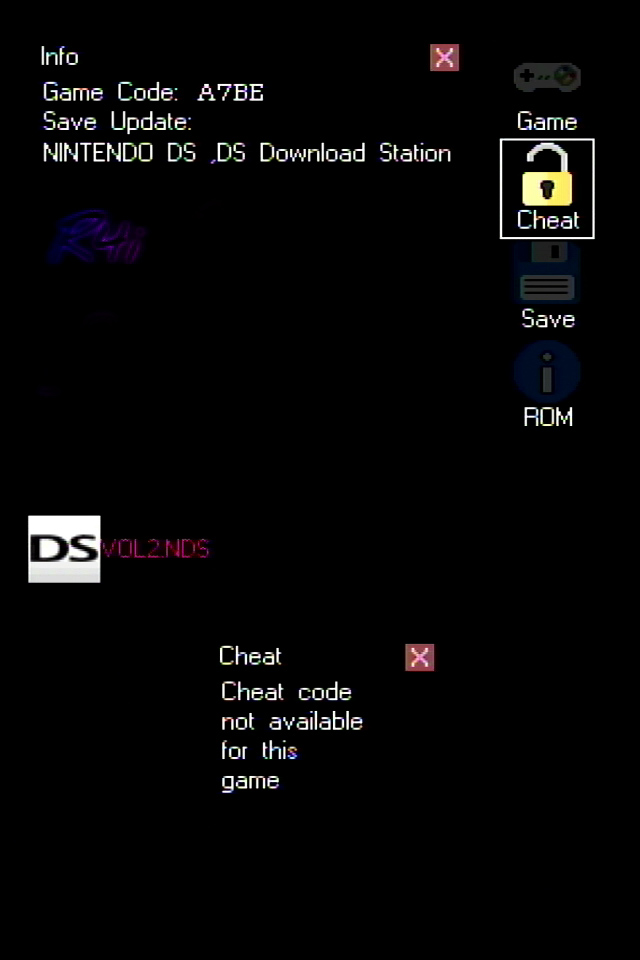
В нем все очень просто.
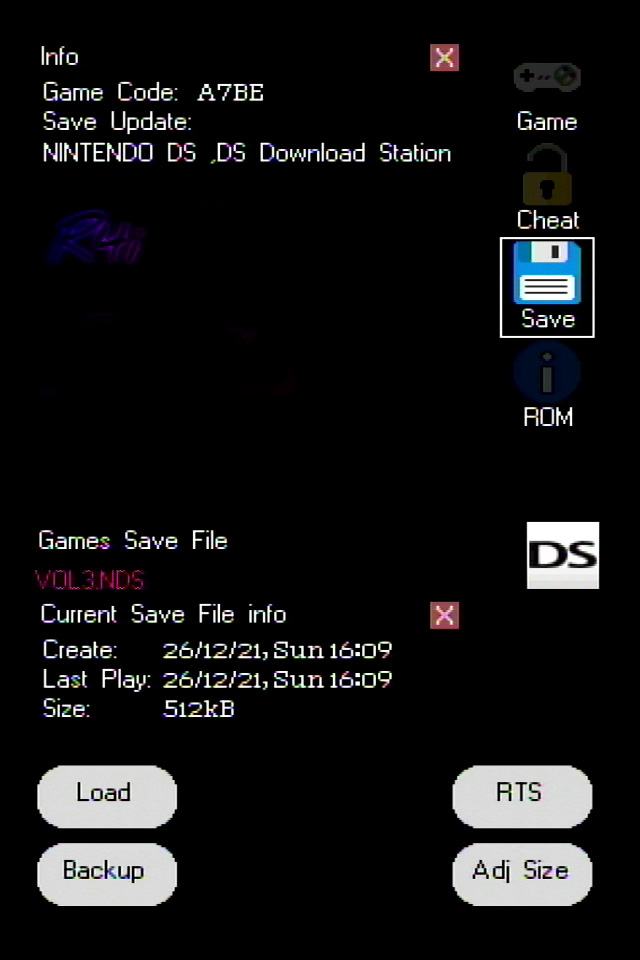
Здесь происходит менеджмент сохранений.
Слева две кнопки:
Backup – сделать бэкап сохранения. Выбираете ячейку от 1 до 5 и нажимаете Backup . Соответственно в эту ячейку делается копия вашего сохранения из игры.
Load – загрузить бэкап сохранения. Просто выбираете одну из 5 ячеек и нажимаете Load . Соответственно на место сохранения в игре запишется сохранение из бэкапа.
RTS – меню Real Time Save.
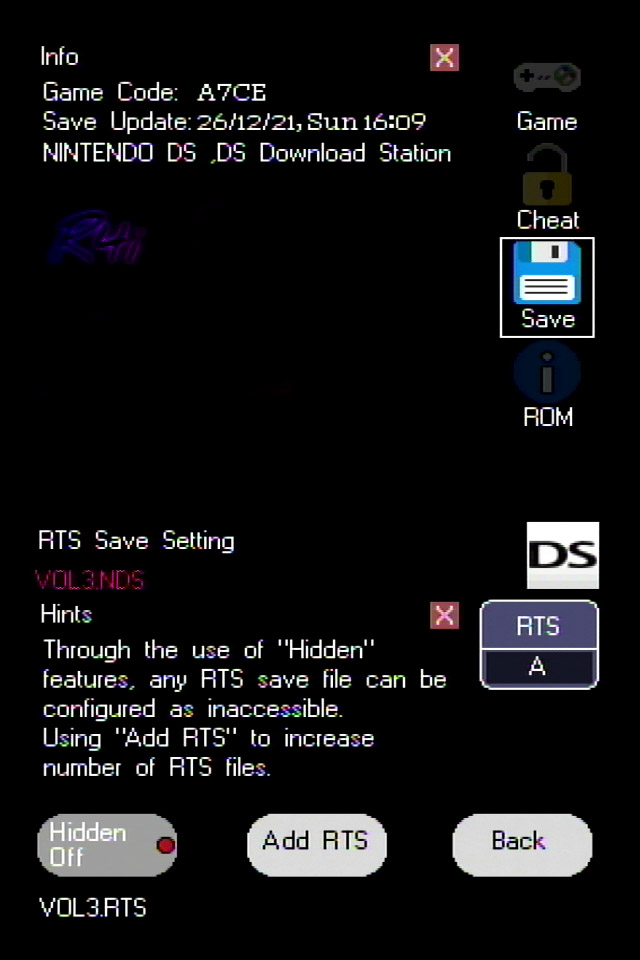
Если выбрать это меню, то:
Справа 1 ячейка для сохранений в реальном времени.
Add RTS – добавляет дополнительные ячейки для сохранения. То есть можно сделать, чтобы у вас было 4 слота для сохранения, а не 1 как дается по умолчанию.
Hidden Off – выбираете справа ячейку и нажимаете эту кнопку. Она не даст вам перезаписать эту ячейку. То есть фактически блокирует ее.
Back – вернуться назад.
Adj. size – увеличить размер файла сохранения. Видимо это нужно либо для homebrew игр, либо если вдруг размер сохранения не так определился.
И последнее меню ROM – это настройки игры.
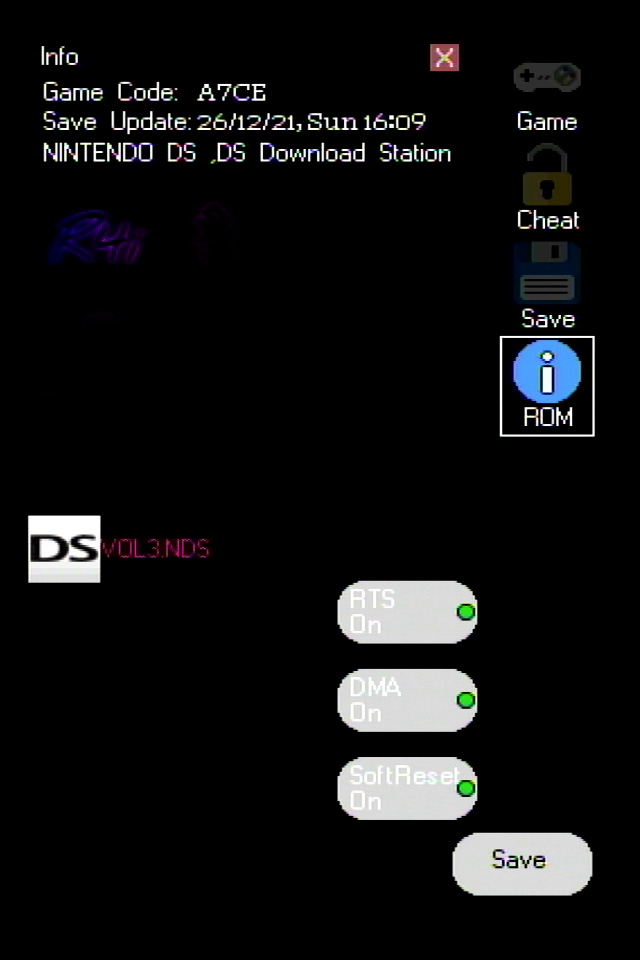
Все настройки в этом меню могут быть либо включены (ON) либо выключены (OFF). После изменения настроек нужно нажать кнопку Save .
RTS – Real Time Save. Сохранение в режиме реального времени. Если включить эту кнопку, то игру можно сохранять в любой момент, а не только в те моменты, которые определил разработчик.
DMA – Direct Memory Access. Эта функция ускоряет загрузку игр. Но как обычно может вызывать ошибки. Поэтому если вдруг у вас будут ошибки при запуске игры, то просто отключите эту функцию.
SoftReset – выход из игры, обратно в меню.
В: Как мне перейти с a9lh на boot9strap?
О: Переход с a9lh на b9s
В: Как устанавливать игры и приложения?
О: Выполните инструкции по ссылке.
В: Я обновил Luma3DS через Luma3DS Updater и теперь приставка не включается. Загорается синий диод и тухнет.
О: Вы установили Luma3DS на не поддерживаемый boot. Обратитесь к разделу проблемы и их решение
В: Как мне перенести свои сохранения с Gateway на консоль для установленных игр?
О: Ознакомьтесь с этим ресурсом (англ.)
Что нам нужно еще приобрести?
Из коробки картридж R4 поставляется только с кард ридером. Однако, для нормального использования этого картриджа в Nintendo DS необходимо докупить еще карту памяти:
Карта памяти Micro SD. Это может быть карта памяти Micro SDHC (до 128 GB)
Карту памяти необходимо докупить отдельно. И после того, как у вас будет сам картридж, карта памяти и карт ридер можно приступать дальше.
В: Как установить на консоль игры в формате 3DS?
О: Для начала их нужно сконвертировать в CIA. Как это сделать описано здесь.
Читайте также: