
Не работает hard edge в maya
Мы уже разобрались с теорией и терминологией, поговорили о типах карт нормалей и их различиях. Сегодня ты узнаешь, как подготовить модель к запеканию normal map, избегая типичных ошибок.
Hard Edge — жесткая грань между двумя плоскостями. В 3ds Max используется подход Smoothing Groups. Для создания жесткого эджа достаточно назначить на плоскости разные группы сглаживания.
Soft edge — гладкая грань. Чтобы создать ее в 3ds Max, на плоскости нужно назначить одинаковые группы сглаживания.
Чтобы грани запеклись как надо, пользуйся правилом «Hard edge — UV seam»: для каждой жесткой грани лоуполи модели нужно создавать шов на UV. Иначе детали и грани запекутся некорректно.
Важно! Это не значит, что UV швы нельзя делать и в других местах. Технически, их можно расположить где угодно, лишь бы на финальном ассете они не были заметны.
На маленьком цилиндре правило «Hard edge — UV seam» нарушено, поэтому там появился артефакт. На большом цилиндре все правильно.
Градиенты на normal map возникают, потому что карта нормалей пытается выровнять градиент на шейдинге объекта. Простыми словами, если на Low Poly во вьюпорте видно градиенты, а на High Poly их нет — они появятся на карте нормалей.
Карта нормалей таким образом пытается привести вид Low poly объекта к виду High poly.
Это может вызвать сложности, если для модели нужно создавать лоды (LODs — Level of details, несколько вариаций одной и той же модели с постепенным уменьшением детализации и снижением количества треугольников). В таком случае, после удаления некоторых граней, градиент может появиться на LOD01 и создать визуальные артефакты.
Потяжки можно отнести к градиентам, но разберемся с ними отдельно.
При некорректно построенной сетке, на шейдинге изогнутых элементов могут появляться артефакты. Так бывает, если на изогнутой плоскости оставить длинные треугольные полигоны, предназначенные для оптимизации модели.
В таких случаях лучше пренебречь оптимизацией и сделать сетку чуть тяжелее, но избежать появления артефактов.
При запекании карты нормалей, вся информация о деталях на поверхности и сглаженности граней полностью переносится с High poly модели. Если угол High poly в пространстве расположен не в том же месте, где и у Low poly, — на карте нормалей появится пробел.
Если что-то подобное появилось на твоем объекте — в первую очередь проверяй соответствие хайполи и лоуполи. Иногда хайполи перед сглаживанием нужно немного сдвинуть / увеличить относительно лоуполи, чтобы после сабдивайда / турбосмуза они оказались в одинаковых координатах. Это костыль, но в некоторых ситуациях он может помочь.
Проблема с выбором количества сечений на цилиндрах косвенно относится к теме сопоставления хайполи и лоуполи моделей. Если у Low poly слишком мало сечений, то после запекания появятся пробелы на верхней и нижней плоскости. Причина та же — несоответствие Low и High poly версий объекта.
Летающая геометрия (Float geometry) — это техника создания «парящих» над поверхностью элементов хайполи.
Она нужна для быстрого добавления вшитых деталей в объекты. Это намного проще, чем вшивать каждый элемент по-настоящему, а результат на карте нормалей выглядит так же.
В настройках запекания всегда можно найти функцию уравнивания нормалей. Она усредняет нормали для запекания — так можно сделать углы более плавными.
Но есть у этой настройки и обратная сторона: из-за выравнивания нормалей на углах, детали на ровных поверхностях могут начать «плыть». И чем ближе деталь к углу — тем сильнее.
В разных программах с этим эффектом можно бороться по разному. Мы поговорим подробнее на эту тему в следующей статье цикла.
Ложная перспектива, или Fake perspective, используется художниками при создании дополнительных элементов на high poly — деталей, которые не поддерживаются сеткой Low poly объекта. Например, любая летающая геометрия.
Суть ложной перспективы в том, чтобы немного сужать вершины элементов по отношению к их основе. Основа — место, в котором элемент «вшивается» в тело объекта.
Это нужно, чтобы элемент было видно на карте нормалей после запекания. Если не следовать этому правилу, геометрия может полностью или частично скрываться на normal map.
При работе с хайполи геометрий нужно учитывать, в каком разрешении будет запекаться финальная карта нормалей. Таким образом ты сможешь заранее продумать толщину фасок на High poly и тебе не придется создавать лишние детали.
Если на твоем проекте используется низкий тексель, старайся делать фаски толще, а запекаемые элементы — больше. Таким образом, они не будут теряться после запекания.
(Texel density — количество пикселей на единицу площади объекта. Texel density 1024px/m означает, что на один квадратный метр объекта должно выделяться 1024 пикселя)
Если в финальной версии объекта планируется запечь отверстия, но нет возможности промоделировать их геометрией — обязательно зашивай все эти дыры на High poly. Иначе на карте нормалей появятся странные артефакты.
В такой ситуации для создания отверстий лучше промоделить экструды, зашить их, а потом — закрасить черным цветом в карте Albedo.
«Чем плотнее сетка — тем лучше результат на карте нормалей» — хороший аргумент, но до определенного момента.
Если взять текстуру с разрешением 2048х2048 и развертку, которая занимает 100% UV пространства — максимальное количество доступных нам пикселей равняется 4 194 304. И это фантастическая ситуация. В реальной жизни развертка может быть заполнена на 70% плюс оверлапы и паддинг. В результате эта цифра уменьшается на 30-40% процентов.
Так как в один пиксель можно запечь информацию об одной плоскости — нет никакого смысла создавать хайполи модели на 20-30 млн треугольников.
Можно возразить: «Но ведь ничего плохого в большом количестве полигонов нет. Лучше перестраховаться и сделать чуть больше нужного». Отчасти это верно, но такой подход создаст две проблемы.
Во-первых, работая с перегруженным трискаунтом, художник создает детали, которые в итоге не попадут на финальную текстуру. Лишние действия забирают много времени, особенно, если речь идет о скульптинге.
Во-вторых, тяжелая геометрия тормозит работу программ и экспорт/импорт геометрии из софта в софт.
Вывод: хайполи должна выглядеть красиво и сглажено, но не стоит перегружать геометрию лишними треугольниками.
Пользуясь этими правилами, ты сможешь сэкономить десятки часов, которые художники тратят на решение каждой отдельной проблемы.
В следующей статье подойдем к вопросу запекания normal map с практической стороны и поговорим о кнопках в разных программах. Stay tuned!
I've made the transition from Max to Maya recently..and I've had a recurring issue that I've struggled with.
Often when working with geometry in Maya, I get to a point where I cant soften edges. So far I've tried deleting history, freezing transforms, grouping the mesh to a dummy object, among other things.
I was just curious if anybody had suggestions to avoid this issue happening or what they do to fix this. I usually end up having to export and fix in Max.
Replies

Hmm is it lock/unlock normals ?
Normals > Lock Normals
Locks vertex normals. Normals have a direct affect on the appearance of shaded polygons. You can modify their appearance by first unlocking, editing the normals, and then locking them.
To change the X, Y, or Z values for normals, you need to unlock the normals using Normals > Unlock Normals. The normal values you specify (or if you use the default values) are fixed for each normal associated with the vertex or vertex/face component. This means that if you change a vertex position, normals do not change position.
try Normals> set to face. then soften your edges?
not sure why it does this im sure ive had this problem too. maybe something to do with the normals locked? perhaps someone can answer better than i can but hopefully the set to faces method works. the only down side is youll loose any edge smoothing your already done
Usually when you send an .obj from max to maya, maya tries to lock the tangency normals to whatever it was before, this way you don't lose your "smoothing groups". If you unlock the normals you will have to redo the soft/hard edges.
respawnrt
I had already tried unlocking normals..in the past I've had that happen to me..but that isn't it.
pinkbox
I gave that a shot, that didn't work either.
bugo
Ahh interesting. I haven't sent this to max yet, but that may happen soon. I'm not too worried about losing smoothing groups from Max..All I'm trying to do is make all the edges soft, but all the edges are currently hard.
I'm guessing I can fix the issue in Max. but this happens to me pretty often. so I was wondering if anybody knew what I could be doing wrong or if theres an easier fix.


Could it be unmerged vertices or double faces or something like that? I usually check for such things by hitting 3 for a smooth preview and if it doesn't smooth as it should then that's a good indicator that something needs fixing.
I would if I could, but this is for something at work, so they probably wouldn't want me to do that.
o2_is_alright
Good point. Smooth preview still has hard edges.
Also a point I forgot to add. this mesh has been passed between Maya and Zbrush a little bit..if that opens up any ideas.
Ok, I got it. Cleanup didn't immediately fix it, nor did combining with a cube. but at some point. I cleaned up..did an undo on it or something, then it magically worked.

next time this happens, go to vert mode and marquee select what you think is just one vertex and see if it says two on the overlay at the top if you have it turned on, then you'll know IF it's because you dont have merged verts and voila problem solved
I can see these things:
1 - or you extruded the faces, merged the faces, and everything got messed up
2 - sometimes maya by extruding a face, or toying around with the mesh, maya likes to lock some of the normals, not sure which function does that.
3 - as I pointed out before, you could have exported from max to maya, which made ur mesh get locked normals.
Did you try normals -> unlock already?
I know this is a reeeally old thread, but I found it while trying to troubleshoot this problem myself, so I wanted to post here in case someone else encounters this issue. The problem described here seems to have been caused by corrupted maya preferences.
Like the OP, I tried all the usual things: unlocking the normals; freezing transforms / deleting history; cleaning up the mesh / trying to see if there were double verts; the cube-combining trick; and exporting it as an obj/ opening it in another version of maya (I use 2018 usually, but have 2020 installed as well)/ softening them there / importing it again. none of these tricks worked, which led me to believe it wasn't an issue with the mesh, and was probably just a maya problem.
If you encounter this, and none of the above fixes it-- I recommend exporting the problematic mesh, closing maya, and then deleting your prefs folder (or cut + paste them elsewhere). Then import the mesh back into a clean maya scene and the normals should be ok.
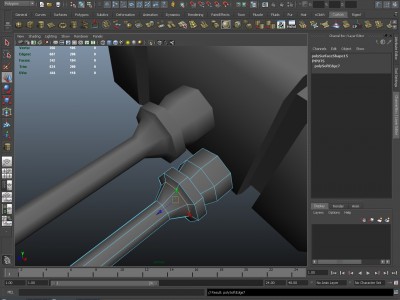
В общем какая-то странная вещь получилась, хотел сделать жесткие грани выбранному лупу, и ничего не выходит, на все модели грани можно сделать только мягкими, он никак не жесткими, создавал рядом цилиндр, куб с ними всё нормально, а с этой моделью ну никак, даже экспорт в ОБЖ не помог.
Может кто сталкивался с таким?
была один раз такая лажа, когда объединял два объекта.. в чем трабл так и не понял, прост удалил и перемоделил участок
Вариант с удалением поликов и заново их созданием вместе с разверткой уже было огорчил, как в друг нашел решение на забугорных форумах!
Решение если вдруг перестали работать жесткие грани:
- Перейдите в режим вертексов модели, и выделите их все;
- Далее во вкладке "Normals" выберите пункт "Set Vertex Normal" модель потеряет тени;
- Следом в той же вкладке "Normals" выберите пункт "Unlock Normals" вуаля теперь грани можно снова делать мягкими и жесткими
Аа точно я в нормалях тоже такое делал, в одном месте сработало )) ток потом забыл что делал и перемоделил участок
Закладка Normals--Hard edges может быть это?
| Цитата: |
| Закладка Normals--Hard edges может быть это? |
это то что как раз не работало,
Проблема уже давно решена)
+ решение именно моей проблемы я написал чутка выше
Случайные работы 3D


Replies

Are you baking the normals within maya? If so, that's probably it. Maya's baker is bad. You should get xNormal, which is free. You'll need to make a custom cage mesh for it and that should solve your issues.
Also make sure your vertex normals are actually soft. Maya sometimes won't smooth the vertex normals for some reason and you have to do something like Mesh Display > Set to face, and then try to soften them again. You can view the vertex normals by going to Display > Polygons > Vertex Normals. I created a shelf button to quickly check my VN before exporting for baking.


Try doing some tests, add lines i show above re-unwrap and try it again, i.e. do test bakes till it works out.


I would also go so far as to say jump on another baker entirely or put the object into marmoset and use these options

Mikk usually works for me to make them go away. (i am not a maya user but wanted to try to help you anyway.)
Think i remember someone using maya also complaining about this and just going the above routes ^ to find a solution. (i could be wrong, only one way to know, try the above.)
Are you baking the normals within maya? If so, that's probably it. Maya's baker is bad. You should get xNormal, which is free. You'll need to make a custom cage mesh for it and that should solve your issues.
Also make sure your vertex normals are actually soft. Maya sometimes won't smooth the vertex normals for some reason and you have to do something like Mesh Display > Set to face, and then try to soften them again. You can view the vertex normals by going to Display > Polygons > Vertex Normals. I created a shelf button to quickly check my VN before exporting for baking.
it may be slow but its a great normalmap baker. recommending xnormal which isnt baking in maya tangentspace will only look worse inside Maya.
@op: looks to me like color correction is turned on, set the viewport to raw, make sure the map is not color corrected and it _should_ work. sorry, speaking from memory, don't have maya here to check. but looks to me like this is the issue. Mayas normalmaps should look perfect in maya.
now the question is, will your target renderer stay maya or will you switch to something like unreal, unity etc?
if thats the case, a mikkt baker such as xnormal, marmoset amongst others would indeed be the correct choice.
Mayas normals will look broken in anything but maya, unless that engine is synced to Mayas tangentspace.
it may be slow but its a great normalmap baker. recommending xnormal which isnt baking in maya tangentspace will only look worse inside Maya.
Sorry if I was mistaken. I've read somewhere in one of the normal threads that it's better to use xnormal or something that allows for custom cages for better control of the normal maps. It was in the context of exporting and rendering in a different engine though.
maya has custom cages as well
they are called envelopes. make sure to turn off "reset envelopes on bake" why that option is default, is absolutely beyond me
@icegodofhungary Yeah I baked it in maya but I have the same problem in Substance painter. I've tried softening the edges again after doing the set to face and checked the vertex normals as well. I don't really want to download a dedicated normal map baker cause I want this to work on substance or maya to keep my workflow as simple as possible. Thanks for the help though! EDIT: I tried baking with xnormal and it still shows that hard edge.
@DavidCruz Thanks for the help even if you don't use maya. I appreciate you trying. I need to look into that thread you mentioned
@Neox My target renderer is Maya but I mean to bake on Substance painter. However, I have the same issue on substance painter as well. I tried turing the vieport to RAW and then doing the bake but it didn't help. EDIT: I tried baking with xnormal and it still shows that hard edge.
Upload the .ma and normalmap
Upload the .ma and normalmap
Bump! Still need help with this
The hard edges are UV seams. I don't want to say something wrong but I feel like you're not going to avoid seams all the time. There's always going to be seams somewhere. There could be some software feature or technique to get rid of them all that I'm unaware of. That being said you can reduce the seams you have and place them in an area you won't really see. How is this asset being used? If you're only going to see three sides of it at once, then you can place the seam on the fourth side. And trust me, that if you're playing a game you're not going to notice the right kind of seams. They'll be hidden or very hard to see unless the camera is right on them.
I would place the seam on a flat area of the plank as well. This lets your edges stay intact and will bake the nice edge detail without error. For example:

Third is that your lowpoly has unnecessary bevels. If this asset is supposed to be for a game that is. You really don't need all the little bevels on most edges. Think about how close the character will get to this, think about how close the camera will get to it. Also how much of the screen space it takes up. You can get away with 90 degree edges on your lowpoly as long as your high poly has beveled edges. You won't really notice the illusion, again, unless you're very close or at a weird angle. The bevels are in your way imo.
Finally, your high poly isn't right. It looks like you sculpted it then decimated it before exporting. There's not enough high poly detail to bake properly to the low poly. And decimation made a mess of the topology which adds to the errors. You should keep it at the max subdivision level you sculpted on and then use that to bake to the low. This is why you're getting some shading issues outside of the hard edges.
The only thing I did really that changed anything fundemental that looked definitvely problematic, was I triangulated the low poly. Since you were baking in maya and maya is the target renderer, not sure if thats the fix you are actually looking for as triangulation shouldn't change unless you do something to the model or move it around to different apps.
UV looked like it should bake ok tbh, I did press unfold on it again just because. I made sure there were no hard edges just to rule that out, in practice with chamfered edges like that you don't really need them. And then I reset transforms, exported and baked n marmoset.
The advice above isn't bad either. You aren't going to get rid of seams entirely, you can minimise them with UV changes, since this is mid poly looking with double chamfered edges, you don't need or really want to break UVs so much as it'll just introduce visual errors. I mean it's a plank that is beat up, so I expect it'll be pretty rough surface and that'll hide the seams well enough so it'll not a big deal imo.


The hard edges are UV seams. I don't want to say something wrong but I feel like you're not going to avoid seams all the time. There's always going to be seams somewhere. There could be some software feature or technique to get rid of them all that I'm unaware of. That being said you can reduce the seams you have and place them in an area you won't really see. How is this asset being used? If you're only going to see three sides of it at once, then you can place the seam on the fourth side. And trust me, that if you're playing a game you're not going to notice the right kind of seams. They'll be hidden or very hard to see unless the camera is right on them.
I would place the seam on a flat area of the plank as well. This lets your edges stay intact and will bake the nice edge detail without error. For example:
Third is that your lowpoly has unnecessary bevels. If this asset is supposed to be for a game that is. You really don't need all the little bevels on most edges. Think about how close the character will get to this, think about how close the camera will get to it. Also how much of the screen space it takes up. You can get away with 90 degree edges on your lowpoly as long as your high poly has beveled edges. You won't really notice the illusion, again, unless you're very close or at a weird angle. The bevels are in your way imo.
Finally, your high poly isn't right. It looks like you sculpted it then decimated it before exporting. There's not enough high poly detail to bake properly to the low poly. And decimation made a mess of the topology which adds to the errors. You should keep it at the max subdivision level you sculpted on and then use that to bake to the low. This is why you're getting some shading issues outside of the hard edges.
Welp first off, I wanna thank you for taking some time to take a look at the models and giving your opinion, it's much appreciated. However, I'm afraid you wasted some time and maybe didn't really read the post. I already knew that the hard edges were the uv seams, the problem is that I don't know how to get rid of them. I'm aware I could've hidden the seams "behind" the object or underneath it so that it wouldn't show that much, but they shouldn't be showing like this in the first place, that's the problem. As I mentioned I've done this before without this problem, that's why I came to search for help. It SHOULD be able to be done without hiding the seams, since I've done it before. I will keep in mind the bevels tip though. When I was modeling this I didn't really think enough about the render. The highpoly should be fine as well, just because I decimated it before exporting, it shouldn't have an effect on the bake. Again, I've done it with this workflow before with no issues. If I would keep it on max subdiv, it would take ages to export from zbrush and even longer still to import to maya. Anyways, thanks again for trying to help
Такая проблема: у меня есть обж с нормалями, которое было созданно в 3д максе со smoothing groops, но smoothing groops я в один момент забыл експортнуть и теперь у меня есть обж с нужными нормалями (где-то сглаженные где-то нет), но нет ни smoothing groops ни hard edges.
так вот
есть ли возможность в мае восстановить hard edges из геометрии с соответствующими нормалями?
если кто знает как восстановить hard edges или smoothing groops в других прогах пишите, скачаю что угодно, очень нужно восстановить, а то мудбокс понимает только haed edges или smoothing groops.
fruit_cake
Мастер
Знаток
я не совсем понял, это ответ на мой вопрос или нет? это ответ да, и рекомендации как это сделать? Или это просто место где можно включить harden edge?
HunterWolf
Знаток
Открыть файл обж и посмотреть есть ли там нормали(разные а не усреднённые), если их нет то досвидание, если вы пишите что есть, то должны быть и хард эйджи в майке
Знаток
вот это уже похоже на ответ. Они есть, и следовательно если я импортну в майку обж то они сами создадутся, если я правильно понял. Я это хотел уточнить потому что в 3д максе есть отдельно smoothing groops и отдельно нормали, которые ни есть одно и то же. Впадлу было бы качать и устанавливать маю для того что бы проверить. В общем буду знать, на будущее, а с мудбоксом я передумал, на первый взгляд удобная прога для текстуринга, а на практике - забаженная, хотя, может это только для лоу поли.
HunterWolf
Знаток
Смусс группы это просто так названы нормали, по сути это установленые на участок нормали, так что это одно и тоже просто группы нормалей с разными показателями названы смусс группы
мае это более кастомно(хотя в максе в последнем вроде тоже сразу видел хард ейджи) не может быть сглаженых поликов могут быть ребра а точне влияние на них образующих их точек. Смус группой в мае можно считать сет нормал на выделеные полигоны(но результат будет на ребрах этих поликов), а конкретно на одно ребро это хард и софт эёдж, но если взять выделить на группе поликов все ребра включеные то будет тоже самое когда установишь нужный угол для нормалей вертексов
Знаток
HunterWolf
Знаток
Мудбокс откроет с усреднёными сглаженными нормалями, и любая другая прога откроет так же, но тех кастомных что назначены как смус группы уже не будет если эх не экспортить
Знаток
мудбокс, да, по этому я и хотел их востановить. А вот про любой другую прогу не надо)
например, 3d coat, mari, bodypaint, uv layout все нормально работают с нормалями без смузин групс.
HunterWolf
Знаток
Т.е даже если кастомных нет нормалей они всё равно работают)) Так что не надо тут про там., если вы из макса их не вытащили то уже пардон откель им взяться, я понимаю что коат хорошая прога и ювилоат тоже, но не настолько что бы угадывать ваши желания в отношении нормалей
Знаток
Я не пойму, вы мне не верите что ли? Попробуйте. Или я не правильно понял вас, извините, если это так.
им не надо ничего угадывать, юви леяут и коат отлично читают нормали без смуз групп. Смуз группы и хард эджи нужны в принципе для того чтобы проще настроить те самые нормали. При экспорте из 3д макса есть ещё галочка, экспорт нормалей. Вот их они и читают. А мудбокс не читает.
Напомню я использовал смуз группы, просто не экспортнул их в один момент(перед развёрткой) и после этого нормали есть а групп нет.
Legionaire
Мастер
Вы бы сначала вникли бы в тему смуссгруп, нормалей софтэджей, хард эджей , а то путаетесь в понятиях и вас не понять.
если не экспортить, то их в файл и не запишет , а выдаст вам все эйджи софтом. Некоторые программы при импорте сами перезаписывают нормали вершин, которые и отвечают за то каким будет отображаться ребро - жестким или мягким. делается это по двум алгоритмам - проверяется развертка и по границам шелов назначется хард, остальное все софт. либо происходит перерасчет относительно угла нормалей вершины меж смежными полигонами. а некоторые программы читают то что им подсовывает обж . для этого и стоит галочка экспортить нормали, чтобы все как вы настроили так и импортнулось, а не пересчитало автоматом - бывают ведь и сложные модели а не кубики.
Случайные работы 2D


So I have this problem as you can see in the picture below. I have made the model in Maya and made the entire object have soft edges. For some reason when I bake the normal map from the high poly model it still shows hard edges where the UV seams are. What gives? Why is this happening? I used to be able to do this without problems. As you can see also, there are soft edges on the model and they show just fine without seams. PLEASE HELP I'M GETTING SUPER FRUSTRATED! TT_TT
Читайте также: