Mikrotik очистить кэш dhcp
The DHCP (Dynamic Host Configuration Protocol) is used for the easy distribution of IP addresses in a network. The MikroTik RouterOS implementation includes both server and client parts and is compliant with RFC 2131.
The MikroTik RouterOS DHCP client may be enabled on any Ethernet-like interface at a time. The client will accept an address, netmask, default gateway, and two DNS server addresses. The received IP address will be added to the interface with the respective netmask. The default gateway will be added to the routing table as a dynamic entry. Should the DHCP client be disabled or not renew an address, the dynamic default route will be removed. If there is already a default route installed prior to the DHCP client obtaining one, the route obtained by the DHCP client would be shown as invalid.
RouterOS DHCP client asks for the following options:
- option 1 - SUBNET_MASK,
- option 3 - GATEWAY_LIST,
- option 6 - TAG_DNS_LIST,
- option 33 - STATIC_ROUTE,
- option 42 - NTP_LIST,
- option 121 - CLASSLESS_ROUTE,
Rate limiting
It is possible to set the bandwidth to a specific IPv4 address by using DHCPv4 leases. This can be done by setting a rate limit on the DHCPv4 lease itself, by doing this a dynamic simple queue rule will be added for the IPv4 address that corresponds to the DHCPv4 lease. By using the rate-limit parameter you can conveniently limit a user's bandwidth.
For any queues to work properly, the traffic must not be FastTracked, make sure your Firewall does not FastTrack traffic that you want to limit.
First, make the DHCPv4 lease static, otherwise, it will not be possible to set a rate limit to a DHCPv4 lease:
Then you can set a rate to a DHCPv4 lease that will create a new dynamic simple queue entry:
By default allow-dual-stack-queue is enabled, this will add a single dynamic simple queue entry for both DCHPv6 binding and DHCPv4 lease, without this option enabled separate dynamic simple queue entries will be added for IPv6 and IPv4.
If allow-dual-stack-queue is enabled, then a single dynamic simple queue entry will be created containing both IPv4 and IPv6 addresses:
DHCP Snooping - что такое и как работает?
Давайте рассмотрим следующую схему:

В первый порт коммутатора SW1 у нас подключен DHCP-сервер, поэтому на коммутаторе мы включаем DHCP Snooping и помечаем первый порт как доверенный. В результате остальные узлы, подключенные к портам данного коммутатора, смогут получить адресную информацию только от авторизованного DHCP-сервера, так как DHCP-ответы на остальных портах коммутатор будет отбрасывать.
Но вот в нашей сети появился второй коммутатор SW2, который соединен с SW1 транзитным линком между вторыми портами. Если на втором коммутаторе DHCP Snooping отключен, то подключенные к нему узлы не имеют защиты от подмены DHCP-сервера, если же мы его включим, то нужно будет указать доверенный порт. В данном случае им будет порт транзитного линка под номером два, так как именно на него будут приходить DHCP-ответы.
Нужно ли делать доверенным порт 2 на первом коммутаторе? Исходя из текущей схемы сети - нет, но все может измениться, например, появится второй DHCP-сервер, подключенный ко второму коммутатору.

Если мы не сделаем второй порт первого коммутатора доверенным, то подключенные к нему устройства не смогут взаимодействовать со вторым DHCP-сервером. А теперь подумаем: сделать доверенным порт подключения нового DHCP-сервера мы не забудем, а вот вспомним ли о том, что на транзитном линке доверенный порт только с одной стороны? Вряд-ли. Поэтому хорошим тоном является делать порты доверенными на каждой стороне транзитного соединения.
Также это понадобится вам, если вы используете опцию 82, которая позволяет указать DHCP-серверу в какой порт какого коммутатора присоединен клиент, запрашивающий IP-адрес. Причем данную информацию в пакет запроса добавляют сами коммутаторы.
Коротко итоги: для нормальной работы DHCP Snooping делаем доверенными все транзитные порты, соединяющие между собой коммутаторы, порты доступа, куда подключены конечные участники сети доверенными быть не должны, кроме тех, к которым подключены собственные DHCP-сервера.
Properties
- 'test' -> ASCII to Hex 0x74657374
- '10.10.10.10' -> Unicode IP to Hex 0x0a0a0a0a
- s'10.10.10.10' -> ASCII to hex 0x31302e31302e31302e3130
- s'160' -> ASCII to hex 0x313630
- '10' -> Decimal to Hex 0x0a
- 0x0a0a -> No conversion
- $(VARIABLE) -> hardcoded values
RouterOS has predefined variables that can be used:
- HOSTNAME - client hostname
- RADIUS_MT_STR1 - from radius MT attr nr. 24
- RADIUS_MT_STR2 - from radius MT attr nr. 25
- REMOTE_ID - agent remote-id
- NETWORK_GATEWAY - the first gateway from '/ip dhcp-server network', note that this option won't work if used from lease
Now it is also possible to combine data types into one, for example: "0x01'vards'$(HOSTNAME)"
For example if HOSTNAME is 'kvm', then raw value will be 0x0176617264736b766d.
Example
Classless Route
A classless route adds a specified route in the clients routing table. In our example, it will add
- dst-address=160.0.0.0/24 gateway=10.1.101.1
- dst-address=0.0.0.0/0 gateway=10.1.101.1
According to RFC 3442: The first part is the netmask ("18" = netmask /24). Second part is significant part of destination network ("A00000" = 160.0.0). Third part is IP address of gateway ("0A016501" = 10.1.101.1). Then There are parts of the default route, destination netmask (0x00 = 0.0.0.0/0) followed by default route (0x0A016501 = 10.1.101.1)
A much more robust way would be to use built-in variables , the previous example can be rewritten as:
Setup example
Add a DHCP client on ether1 interface:
After the interface is added, you can use the "print" or "print detail" command to see what parameters the DHCP client acquired:
If the interface used by the DHCP client is part of the VRF configuration, then the default route and other received routes from the DHCP server will be added to the VRF routing table.
DHCP client status can be checked with:
Lease script example
It is possible to execute a script when a DHCP client obtains a new lease or loses an existing one. This is an example script that automatically adds a default route with routing-mark=WAN1 and removes it when the lease expires or is removed.
DHCP Options
With the help of the DHCP Option list, it is possible to define additional custom options for DHCP Server to advertise. Option precedence is as follows:
This is the order in which the client option request will be filled in.
According to the DHCP protocol, a parameter is returned to the DHCP client only if it requests this parameter, specifying the respective code in the DHCP request Parameter-List (code 55) attribute. If the code is not included in the Parameter-List attribute, the DHCP server will not send it to the DHCP client, but since RouterOS v7.1rc5 it is possible to force the DHCP option from the server-side even if the DHCP-client does not request such parameter:
Resolve default gateway when 'router' (option3) is from a different subnet
In some cases, administrators tend to set the 'router' option which cannot be resolved with offered IP's subnet. For example, the DHCP server offers 192.168.88.100/24 to the client, and option 3 is set to 172.16.1.1. This will result in an unresolved default route:
To fix this we need to add /32 route to resolve the gateway over ether1, which can be done by the running script below each time the DHCP client gets an address
Now we can further extend the script, to check if the address already exist, and remove the old one if changes are needed
The DHCP (Dynamic Host Configuration Protocol) is used for the easy distribution of IP addresses in a network. The MikroTik RouterOS implementation includes both server and client parts and is compliant with RFC 2131.
The router supports an individual server for each Ethernet-like interface. The MikroTik RouterOS DHCP server supports the basic functions of giving each requesting client an IP address/netmask lease, default gateway, domain name, DNS-server(s) and WINS-server(s) (for Windows clients) information (set up in the DHCP networks submenu)
In order for the DHCP server to work, IP pools must also be configured (do not include the DHCP server's own IP address into the pool range) and the DHCP networks.
It is also possible to hand out leases for DHCP clients using the RADIUS server; the supported parameters for a RADIUS server are as follows:
- NAS-Identifier - router identity
- NAS-IP-Address - IP address of the router itself
- NAS-Port - unique session ID
- NAS-Port-Type - Ethernet
- Calling-Station-Id - client identifier (active-client-id)
- Framed-IP-Address - IP address of the client (active-address)
- Called-Station-Id - the name of DHCP server
- User-Name - MAC address of the client (active-mac-address)
- Password - " "
- Framed-IP-Address - IP address that will be assigned to a client
- Framed-Pool - IP pool from which to assign an IP address to a client
- Rate-Limit - Datarate limitation for DHCP clients. Format is: rx-rate[/tx-rate] [rx-burst-rate[/tx-burst-rate] [rx-burst-threshold[/tx-burst-threshold] [rx-burst-time[/tx-burst-time][priority] [rx-rate-min[/tx-rate-min]]]]. All rates should be numbers with optional 'k' (1,000s) or 'M' (1,000,000s). If tx-rate is not specified, rx-rate is as tx-rate too. Same goes for tx-burst-rate and tx-burst-threshold and tx-burst-time. If both rx-burst-threshold and tx-burst-threshold are not specified (but burst-rate is specified), rx-rate and tx-rate are used as burst thresholds. If both rx-burst-time and tx-burst-time are not specified, 1s is used as default. Priority takes values 1..8, where 1 implies the highest priority, but 8 - the lowest. If rx-rate-min and tx-rate-min are not specified rx-rate and tx-rate values are used. The rx-rate-min and tx-rate-min values can not exceed rx-rate and tx-rate values.
- Ascend-Data-Rate - TX/RX data rate limitation if multiple attributes are provided, first limits tx data rate, second - RX data rate. If used together with Ascend-Xmit-Rate, specifies RX rate. 0 if unlimited
- Ascend-Xmit-Rate - tx data rate limitation. It may be used to specify the TX limit only instead of sending two sequential Ascend-Data-Rate attributes (in that case Ascend-Data-Rate will specify the receive rate). 0 if unlimited
- Session-Timeout - max lease time (lease-time)
DHCP server requires a real interface to receive raw ethernet packets. If the interface is a Bridge interface, then the Bridge must have a real interface attached as a port to that bridge which will receive the raw ethernet packets. It cannot function correctly on a dummy (empty bridge) interface.
Option
DHCP client has the possibility to set up options that are sent to the DHCP server. For example, hostname and MAC address. The syntax is the same as for DHCP server options.
Currently, there are three variables that can be used in options:
- HOSTNAME;
- CLIENT_MAC - client interface MAC address;
- CLIENT_DUID - client DIUD of the router, same as used for the DHCPv6 client. In conformance with RFC4361
DHCP client default options include these default Options:
Name code value clientid_duid 61 0xff$(CLIENT_DUID) clientid 61 0x01$(CLIENT_MAC) hostname 12 $(HOSTNAME) DHCP Client can receive delegated prefixes from the DHCPv6 server. The currently received prefix is added to the IPv6 pool, which later can be used for example in PPPoE server configuration. DHCPv6 client configuration can be found in the /ipv6 sub-menu
Leases
DHCP server lease submenu is used to monitor and manage server leases. The issued leases are shown here as dynamic entries. You can also add static leases to issue a specific IP address to a particular client (identified by MAC address).
Generally, the DHCP lease is allocated as follows:
- an unused lease is in the "waiting" state
- if a client asks for an IP address, the server chooses one
- if the client receives a statically assigned address, the lease becomes offered, and then bound with the respective lease time
- if the client receives a dynamic address (taken from an IP address pool), the router sends a ping packet and waits for an answer for 0.5 seconds. During this time, the lease is marked testing
- in the case where the address does not respond, the lease becomes offered and then bound with the respective lease time
- in other cases, the lease becomes busy for the lease time (there is a command to retest all busy addresses), and the client's request remains unanswered (the client will try again shortly)
A client may free the leased address. The dynamic lease is removed, and the allocated address is returned to the address pool. But the static lease becomes busy until the client reacquires the address.
IP addresses assigned statically are not probed!
Properties
- yes - replies to clients request for an address that is not available from this server, DHCP server will send a negative acknowledgment (DHCPNAK);
- no - DHCP server ignores clients requests for addresses that are not available from this server;
- after-10sec-delay - requests with "secs < 10" will be processed as in "no" setting case and requests with "secs >= 10" will be processed as in "yes" case;
- after-2sec-delay - requests with "secs < 2" will be processed as in "no" setting case and requests with "secs >= 2" will be processed as in "yes" case;
- forever - lease never expires
- lease-time - use time from lease-time parameter
- none - do not respond to BOOTP requests
- static - offer only static leases to BOOTP clients
- dynamic - offer static and dynamic leases for BOOTP clients
- leaseBound - set to "1" if bound, otherwise set to "0"
- leaseServerName - DHCP server name
- leaseActMAC - active mac address
- leaseActIP - active IP address
- lease-hostname - client hostname
- lease-options - an array of received options
- 0.0.0.0 - the DHCP server will be used only for direct requests from clients (no DHCP relay allowed)
- 255.255.255.255 - the DHCP server should be used for any incoming request from a DHCP relay except for those, which are processed by another DHCP server that exists in the /ip dhcp-server submenu.
- no - do not use RADIUS;
- yes - use RADIUS for accounting and lease;
- accounting - use RADIUS for accounting only.
Alerts
To find any rogue DHCP servers as soon as they appear in your network, the DHCP Alert tool can be used. It will monitor the ethernet interface for all DHCP replies and check if this reply comes from a valid DHCP server. If a reply from an unknown DHCP server is detected, an alert gets triggered:
When the system alerts about a rogue DHCP server, it can execute a custom script.
As DHCP replies can be unicast, the 'rogue DHCP detector' may not receive any offer to other DHCP clients at all. To deal with this, the rogue DHCP detector acts as a DHCP client as well - it sends out DHCP discover requests once a minute.
Lease Store Configuration
This sub-menu allows the configuration of how often the DHCP leases will be stored on disk. If they would be saved on a disk on every lease change, a lot of disk writes would happen which is very bad for Compact Flash (especially, if lease times are very short). To minimize writes on disk, all changes are saved on disk every store-leases-disk seconds. Additionally, leases are always stored on disk on graceful shutdown and reboot.
Manual changes to leases - addition/removal of a static lease, removal of a dynamic lease will cause changes to be pushed for this lease to storage.
Очистка таблицы ARP и Leases от ненужных устройств
Правила форума
Как правильно оформить вопрос.
Прежде чем начать настройку роутера, представьте, как это работает. Попробуйте почитать статьи об устройстве интернет-сетей. Убедитесь, что всё, что Вы задумали выполнимо вообще и на данном оборудовании в частности.
Не нужно изначально строить Наполеоновских планов. Попробуйте настроить простейшую конфигурацию, а усложнения добавлять в случае успеха постепенно.
Пожалуйста, не игнорируйте правила русского языка. Отсутствие знаков препинания и неграмотность автора топика для многих гуру достаточный повод проигнорировать топик вообще.1. Назовите технологию подключения (динамический DHCP, L2TP, PPTP или что-то иное)
2. Изучите темку "Действия до настройки роутера".
viewtopic.php?f=15&t=2083
3. Настройте согласно выбранного Вами мануала
4. Дочитайте мануал до конца и без пропусков, в 70% случаев люди просто не до конца читают статью и пропускают важные моменты.
5. Если не получается, в Winbox открываем терминал и вбиваем там /export hide-sensitive. Результат в топик под кат, интимные подробности типа личных IP изменить на другие, пароль забить звездочками.
6. Нарисуйте Вашу сеть, рисунок (схему) сюда. На словах может быть одно, в действительности другое.Приветствую. Подскажите как быть-у меня за день бывает что я 10-20 устройств пускаю в инет на некоторое время (10-20 минут) (кассовые аппараты) железяка подключилась, ей микротик выдал IP прописал в ARP и Leases (аренда 3 часа). После отключения железяки выданные IP висят и в ARP и Leases, интересует такой вопрос-эти таблицы автоматом очищаются от отсутствующих устройств или их надо руками удалять ? Спасибо.
Дома: Mikrotik hAP AC (RB962UiGS-5HacT2HnT )
MikroTik hAP AC^2 (RBD52G-5HacD2HnD)
Mikrotik mAP Lite (RBmAPL-2nD)
Работа: MikroTik RB750Gr3Если записи динамические (созданные DHCP-сервером), то автоматически удаляются по истечению аренды адреса, а если статические (созданные вами лично), то остаются.
Дома: Mikrotik hAP AC (RB962UiGS-5HacT2HnT )
MikroTik hAP AC^2 (RBD52G-5HacD2HnD)
Mikrotik mAP Lite (RBmAPL-2nD)
Работа: MikroTik RB750Gr3![Изображение]()
Извиняюсь. Может вопрос глупым покажется но вот в Leases нажал на ip make static а в ARP он показывает что динамический DC как тут понимать?? Или в ARP тоже нажать make static.
![Изображение]()
Извиняюсь. Может вопрос глупым покажется но вот в Leases нажал на ip make static а в ARP он показывает что динамический DC как тут понимать?? Или в ARP тоже нажать make static.
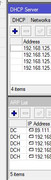
Вообще-то там буквы H не хватает (в статусе), то есть должно быть DCH, буква H - означает что адрес
был выдан через DHCP, но если есть DC - значит что комп с адресом в сети есть, но видимо
а) комп чужой
б) адрес был выдан роутером, но сам роутер(сам DHCP) сервер при этом был перезагружен,
поэтому (я на практике это всё прощупал и увидел), через какое-то время, статус поменяется
с DC на DCH, но увы, минус в том, что если DHCP ещё и шлюз выдаёт, то пока статус не будет
законным, комп с таким адресом как бы будет не совсем в сети/может не быть доступа/нет пингов и т.д.Поэтому проверяйте всё, ну и надо выбрать правильное время аренды адресов (и не маленькая, но и не большая).
У меня стоит 1 час, то есть если я перезагружу роутер и соответственно комп у меня не будет иметь законный адрес,
то в рамках часа всё это переинициируется. (у меня сделано что DHCP у меня черех HEX функцию отдаёт
стат-маршруты).![Изображение]()
На работе(ах): 2xCCR1016-12G, RB3011UiAS и hAP lite (RB941)
Дома: CCR1016-12G, RBcAP2n (standalone), RB wAP LTE kit
Для тестов(под рукой): RB3011UiAS, hAP mini (RB931) и что-то ещё по мелочи
MTCNA
MTCREСеть санатория на котором по всем этажам разброшены точки доступа WI-FI. Клиентов очень много и на микротике 254 адресов DHCP не хватает. Как можно решить задачу?
Сеть построена:
провайдер-микротик (192.168.0.1)-хаб не упр.- точки.![Zoominger]()
![Zoominger]()
![martin74ua]()
на 23, на 23
и диапазон у вас будет с 192.168.0.2 до 192.168.1.255будем мало - берите 22, диапазон соответственно до 192.168.3.255.
Рональд Макдональд, я на телефоне щас получил ip 1.1 255.255.255.0 192.168.0.1 и нет подключения к интернету.
![5de4e0c9d4e46678995203.jpg]()
Руслан Федосеев, верно же? Просто на телефоне получаю с единицей и доступа в интернет нет.
![martin74ua]()
Руслан Федосеев, нат только маскард стоит. больше нечего.
![Ruslan-Strannik]()
маску надо менять в нескольких местах
1. ip address
2. ip dhcp server network
3. firewall
4. проверить ip route![Ruslan-Strannik]()
![effko32]()
Спланируйте сколько Вам необходимо адресов и расширьте маску с учетом потребностей и масштабирования.
![anthtml]()
1. Берем кол-во койкомест = х
2. Берем среднюю максимальную продолжительность путевки = у = (пускай 21 день + 2 дня заезд/отезд)
3. Берем в среднем 1,5 девайса (ну это если кто-то приехал с телефоном и планшетом/ноутом)
1,5*х = средее необходимое кол-во адресов на заезд, y - срок аренды адреса (чтоб на каждом девайсе была статика)
4. Смотрим в какую маску укладывается полученное число - ее и забиваем в роутер во все места где встречается маскаNetwork
Property Description address (IP/netmask; Default: ) the network DHCP server(s) will lease addresses from boot-file-name (string; Default: ) Boot filename caps-manager (string; Default: ) A comma-separated list of IP addresses for one or more CAPsMAN system managers. DHCP Option 138 (capwap) will be used. dhcp-option (string; Default: ) Add additional DHCP options from the option list. dhcp-option-set (string; Default: ) Add an additional set of DHCP options. dns-none (yes | no; Default: no) If set, then DHCP Server will not pass dynamic DNS servers configured on the router to the DHCP clients if no DNS Server in DNS-server is set. By default, if there are no DNS servers configured, then the dynamic DNS Servers will be passed to DHCP clients. dns-server (string; Default: ) the DHCP client will use these as the default DNS servers. Two comma-separated DNS servers can be specified to be used by the DHCP client as primary and secondary DNS servers domain (string; Default: ) The DHCP client will use this as the 'DNS domain' setting for the network adapter. gateway (IP; Default: 0.0.0.0) The default gateway to be used by DHCP Client. netmask (integer: 0..32; Default: 0) The actual network mask is to be used by the DHCP client. If set to '0' - netmask from network address will be used. next-server (IP; Default: ) The IP address of the next server to use in bootstrap. ntp-server (IP; Default: ) the DHCP client will use these as the default NTP servers. Two comma-separated NTP servers can be specified to be used by the DHCP client as primary and secondary NTP servers wins-server (IP; Default: ) The Windows DHCP client will use these as the default WINS servers. Two comma-separated WINS servers can be specified to be used by the DHCP client as primary and secondary WINS servers DHCP Snooping в RouterOS
DHCP Snooping в Mikrotik реализован в самых общих чертах, но даже это все равно лучше, чем ничего. В RouterOS он реализован на базе сетевого моста (bridge), но при этом имеет ряд оговорок:
Важно! Аппаратно DHCP Snooping поддерживается только устройствами CRS3xx, на устройствах CRS1xx and CRS2xx может быть настроен только с VLAN-фильтрацией. На прочих устройствах поддерживается вместе с hardware offloading, но при этом на мосту не должно быть VLAN-фильтрации.
Что касается виртуальных сред, то в рамках подготовки данной статьи мы использовали RouterOS x86 и RouterOS CHR, в обоих из них DHCP Snooping на мостах работал нормально.
Для того, чтобы включить DHCP Snooping перейдем в Bridge, откроем свойства нужного моста и установим там одноименный флаг, там же, при необходимости, можно включить опцию 82.
![DHCP-Snooping-Mikrotik-003.jpg]()
Затем перейдем в Bridge - Ports, выберем нужный порт и установим для него флаг доверенный (Trusted), не забываем выполнить аналогичное действие для всех транзитных портов.
![DHCP-Snooping-Mikrotik-004.jpg]()
В целом DHCP Snooping в RouterOS, с оглядкой на существующие ограничения, представляет собой достаточно эффективный инструмент для защиты от чужих DHCP-серверов в периметре сети.
DHCP Snooping - настройка защиты от неавторизованных DHCP-серверов на оборудовании Mikrotik
Наверное, каждый системный администратор сталкивался в своей работе с появлением в своей сети неавторизованного DHCP-сервера и знает насколько неприятной может получиться такая ситуация. Пока сеть небольшая все узлы удается держать более-менее под контролем, но по мере ее роста и размера уследить за всем становится проблематично, особенно если требуется возможность обеспечить подключение к сети третьих лиц (скажем, арендаторы). При этом возможность появления в сети чужого DHCP-сервера только растет, можно даже сказать, что это только вопрос времени. Но не стоит беспокоиться, просто стоит переложить эту проблему на плечи сетевого оборудования.
Научиться настраивать MikroTik с нуля или систематизировать уже имеющиеся знания можно на углубленном курсе по администрированию MikroTik. Автор курса, сертифицированный тренер MikroTik Дмитрий Скоромнов, лично проверяет лабораторные работы и контролирует прогресс каждого своего студента. В три раза больше информации, чем в вендорской программе MTCNA, более 20 часов практики и доступ навсегда.
Очень часто многие начинающие администраторы оказываются удивлены: как же так при всем современном уровне развития сетей и многочисленных уровнях безопасности такой простой процесс как получение IP-адреса оказывается никак не защищен от стороннего вмешательства. Но более подробно изучив работу протокола DHCP приходит понимание, что какой-либо защиты на уровне протокола получить невозможно. Оказавшись в новой сети (или в старой, с истекшим сроком аренды) узел не имеет ни малейшего понятия о том, где он находится, поэтому запрашивает сетевые настройки с помощью широковещания и готов принять их от того, кто предложит первым.
Это вызывает массу проблем, если вдруг в сети появляется чужой DHCP-сервер. Это не обязательно злонамеренные действия, пользователи могут подключить роутер банально не тем портом или настройки устройства могут быть сброшены по умолчанию, что также приведет к включению неавторизованного DHCP.
Но можно ли как-то противостоять этой проблеме? Можно, для этого была разработана специальная технология - DHCP Snooping.
RADIUS Support
Since RouterOS v6.43 it is possible to use RADIUS to assign a rate limit per lease, to do so you need to pass the Mikrotik-Rate-Limit attribute from your RADIUS Server for your lease. To achieve this you first need to set your DHCPv4 Server to use RADIUS for assigning leases. Below is an example of how to set it up:
After that, you need to tell your RADIUS Server to pass the Mikrotik-Rate-Limit attribute. In case you are using FreeRADIUS with MySQL, then you need to add appropriate entries into radcheck and radreply tables for a MAC address, that is being used for your DHCPv4 Client. Below is an example for table entries:
Ошибка визуализации кода макроса: задано недействительное значение для параметра «com.atlassian.confluence.ext.code.render.InvalidValueException»
Examples
Parameters
DHCP Snooping в SwOS
SwOS - еще одна сетевая ОС от Mikrotik для недорогих коммутаторов, управление устройствами со SwOS доступно только через Web-интерфейс. Многие модели коммутаторов Mikrotik, скажем, CRS3xx, допускают двойную загрузку, как в SwOS, так и в RouterOS.
В отличие от RouterOS возможности SwOS более ограничены, но и устройства с SwOS более дешевы, далее мы рассмотрим возможности CSS326-24G, недорогого и популярного управляемого коммутатора от Mikrotik.
![DHCP-Snooping-Mikrotik-005.jpg]()
Как видим, возможности весьма скромные, DHCP Snooping объединили вместе с PPoE Snooping, предотвращающем появление неавторизованного PPPoE-сервера в сети, но в целом этих настроек вполне достаточно, чтобы обеспечить базовую защиту.
Здесь мы в очередной раз можем убедиться, что Mikrotik не является "Cisco для бедных" или иной сетевой панацеей, но это вполне уверенные лидеры своего ценового сегмента, представляющие достаточно богатые возможности за вполне умеренные деньги.
Научиться настраивать MikroTik с нуля или систематизировать уже имеющиеся знания можно на углубленном курсе по администрированию MikroTik. Автор курса, сертифицированный тренер MikroTik Дмитрий Скоромнов, лично проверяет лабораторные работы и контролирует прогресс каждого своего студента. В три раза больше информации, чем в вендорской программе MTCNA, более 20 часов практики и доступ навсегда.
Если в магазине вас угораздило купить роутер MikroTik себе домой и вы не знаете зачем он вам, а отравление DNS кэша вашим провайдером не дает вам спать по ночам, то этот пост для вас.
Можно не мучаться и поставить DNS от Yandex, Google, Adquard и прочее, а можно пойти более сложным путем:
![]()
Если их несколько, выбираем какой больше нравится вам :)
1. Первым делом удаляем автополучение DNS провайдера:
![]()
открываем настройки интерфейса и убираем галочку "use peer dns"
2. В настройке DNS (IP -> DNS), вводим IP DNS сервера (начиная с сервера который у вас в городе). Размер кэша укажите сколько не жалко (учитывайте свободное место).
![]()
На этом можно было бы закончить, но мы пойдем далее.
![]()
Далее открываем терминал и добавляем статические маршруты
/ip dns static add comment="OpenNIC" forward-to=185.121.177.177,169.239.202.202,2a05:dfc7:5::53::1,2a05:dfc7:5::5353::1 regexp=".*(\\.bbs|\\.chan|\\.cyb|\\.dyn|\\.geek|\\.gopher|\\.indy|\\.libre|\\.neo|\\.null|\\.o)\$" type=FWD
/ip dns static add comment="OpenNIC" forward-to=185.121.177.177,169.239.202.202,2a05:dfc7:5::53::1,2a05:dfc7:5::5353::1 regexp=".*(\\.oss|\\.oz|\\.parody|\\.pirate|\\.opennic.glue|\\.dns\\.opennic\\.glue)\$" type=FWD
![]()
В настройках DNS делаем очистку кэша.
![]()
Если пользуетесь Microsoft Edge, отключаем "улучшайзеры", в других браузерах аналогично.
![]()
Ребутим все что можно отребутить :)
![]()
Что мне это дало? Нормально заработали уведомления от mihome, перестали "тупить" китайские лампочки. Ну и немного ощущаешь себя
кулхацкеромчуть более независимым от своего провайдера.upd: корневой сервер DNS (в городе) не является публичным резолвером и не отвечает на запросы, нужно вводить ip публичного резолвера данного корневого сервера DNS.
Секреты настройки
файрвола через![]()
Обнаружена блокировка рекламы: Наш сайт существует благодаря показу онлайн-рекламы нашим посетителям. Пожалуйста, подумайте о поддержке нас, отключив блокировщик рекламы на нашем веб-сайте.
Читайте также: