
Kvm red hat установка
Kernel-based Virtual Machine (KVM in short) is an open-source and de facto standard virtualization solution that is tightly integrated into Linux. It is a loadable kernel module that turns Linux into a type-1 (bare-metal) hypervisor that creates a virtual operating platform used to run virtual machines (VMs).
Under KVM, each VM is a Linux process that is scheduled and managed by the kernel and has private virtualized hardware (i.e CPU, network card, disk, etc.). It also supports nested virtualization, which allows you to run a VM inside another VM.
Some of its key features include support for a wide range of Linux-supported hardware platforms (x86 hardware with virtualization extensions (Intel VT or AMD-V)), it provides enhanced VM security and isolation using both SELinux and secure virtualization (sVirt), it inherits kernel memory management features, and it supports both offline and real-time migration (migration of a running VM between physical hosts).
In this article, you will learn how to install KVM virtualization, create and manage Virtual Machines in CentOS 8 and RHEL 8 Linux.
Prerequisites
Additionally, make sure that your hardware platform supports virtualization by running the following command.
Also, confirm that KVM modules are loaded in the kernel (they should be, by default).
Here is sample output on the test system which is Intel-based:

In a previous series of KVM guides, we showed how to create virtual machines in Linux using KVM (Kernel-based Virtual Machine) where we demonstrated how to create and manage VMs using virt-manager GUI tool (which is now deprecated according to the RHEL 8 documentation). For this guide, we will take a different approach, we will use the Cockpit web console.
One thought on “ Установка и настройка KVM (интерфейс Мост) на CentOS 7 / RHEL 7 ”
Установка KVM на RHEL 8
Первый шаг – проверить поддержку вашего процессора для расширений виртуализации Intel VT или AMD-V.
В некоторых системах это отключено в BIOS, и вам может потребоваться включить его.
Вы также можете сделать то же самое командой lscpu
Шаг 2: Установите KVM / QEMU на RHEL 9
Пакеты KVM распространяются на RHEL 8 через репозиторий AppStream.
Установите KVM на свой сервер RHEL 8, выполнив следующие команды:
После установки убедитесь, что загружены модули ядра
Также установите полезные инструменты для управления виртуальными машинами.
Listing existing Virtual Machines
Another tool at our disposal is ‘virsh’. This can be used to perform all sorts of operations on your Virtual Machines. For instance, if you wish to see a list of all of your Virtual Machines (started or stopped), all you need to do is run:
Установка и запуск
Установка выполняется из репозитория следующей командой:
yum install qemu-kvm libvirt virt-install
* где qemu-kvm — сам гипервизор; libvirt — библиотека управления виртуализацией; virt-install — утилита для управления виртуальными машинами.
systemctl enable libvirtd
systemctl start libvirtd
Step 2: Installing KVM Virtualization CentOS 8
5. Next, install the virtualization module and other virtualization packages as follows. The virt-install package provides a tool for installing virtual machines from the command-line interface, and a virt-viewer is used to view virtual machines.
6. Next, run the virt-host-validate command to validate if the host machine is set up to run libvirt hypervisor drivers.

7. Next, start the libvirtd daemon (libvirtd) and enable it to start automatically on each boot. Then check its status to confirm that it is up and running.

Related Posts


6. Создайте мост KVM Linux Bridge (модемный сетевой интерфейс гипервизора KVM с сетевыми интерфейсами VM)
В этом уроке мы хотим, чтобы виртуальные машины получали свои IP-адреса из той же сети, где подключен хост KVM Hypervisor, поэтому мы подключим его основной сетевой интерфейс (em1) к сетевым интерфейсам VM.
Для этого нам нужно создать Linux Bridge из интерфейса em1 на хосте KVM Hypervisor.
Текущая конфигурация сети Hypervisor (сразу после установки KVM):
Файл конфигурации ifcfg-em1 (до создания моста KVM Linux Bridge):
Для настройки сети KVM мы будем использовать приложение virt-manager, которое является удобным интерфейсом GUI для интерфейса командной строки KVM.
Примечание. Интерфейс virbr0 был создан автоматически вместе с установкой KVM и представляет виртуальную сеть, существующую «внутри» среды KVM с NAT (трансляция сетевых адресов).
Поскольку мы не нуждаемся в NAT в среде KVM (мы хотим скрыть интерфейс Hypervisor), мы можем удалить существующую виртуальную сеть KVM на основе интерфейса virbr0.
Запустите virt-manager от пользователя root:
… должно появиться окно virt-manager:

Правый щелчок на QEMU/KVM -> Details -> Virtual Networks -> Disable network: “default” -> Delete network: “default” based on virbr0

Теперь мы можем подключить интерфейс Hypervisor KVM (em1):
Щелкните правой кнопкой мыши:QEMU/KVM -> Details -> Network Interfaces -> Add Interface:
- Interface type: Bridge
- Interface name: br-em1
- Start mode: on boot
- Activate now: enabled
- IP settings: copy configuration from ’em1′
- Bridge settings: STP on, delay 0.00 sec

… нажмите Finish, чтобы переопределить существующую конфигурацию и создать KVM Linux Bridge.
Теперь мы можем проверить вновь созданный Linux Bridge (br-em1):

Проверьте текущую конфигурацию IP (теперь IP назначается br-em1, а em1 действует теперь только как интерфейс):
Проверьте настройку моста:
Теперь KVM Linux мост настроен, и мы можем продолжить установку виртуалки.
Install KVM and associated software components
For the purposes of this article, the assumption is that this RHEL machine running KVM will be used as a standalone hypervisor, so we will not be installing any graphical tools to manage the Virtual Machines.
To install KVM along with the components required to provision Virtual Machines from the command line, run the following command:
This command will also process a number of dependencies required during installation. Whilst we’re at it, let’s install ‘wget’ as we’ll be needing this later on:
Once the above has completed, we should check to ensure that the relevant KVM modules have been loaded to allow us to make full use of KVM. You can do this by running:
Your output should be as follows:
Excellent! We’re almost ready to begin creating Virtual Machines!
Installing RHEL
For the purposes of this article, I’m going to be showing you how to manually install KVM from the command line, rather than opt to have it installed as part of the RHEL installation process. This will allow us to fine tune the installation by only installing what we need, and it also gives us a better understanding of how everything fits together. With this in mind, we will be working on the basis that you have opted for a ‘minimal install’ of RHEL. After first boot, you will want to register to the Red Hat network to receive updates and download software. This can be done by running the following command:
You will be prompted to enter your username and password.
4. Запустите и включите демон libvirtd
Resources
Final Thoughts
KVM is an incredibly powerful hypervisor and is used as the backbone of many virtualisation solutions out there (Openstack, for instance). We’ve only touched the surface of what KVM is capable of, but you now have the building blocks for getting your own virtualisation solution in place.
Подготовка сервера
Проверяем наличие поддержки со стороны процессора:
cat /proc/cpuinfo | egrep "(vmx|svm)"
Если команда ничего не вернет, на сервере отсутствует поддержка виртуализации или она отключена в настройках БИОС. Сам KVM поставить на такой сервер можно, но при попытке ввести команду управления гипервизором мы получим ошибку «WARNING KVM acceleration not available, using 'qemu'». В таком случае необходимо перезагрузить сервер, войти в БИОС, найти поддержку технологии виртуализации (Intel VT или AMD-V) и включить ее.
Создадим каталоги, в которых будем хранить все, что касается виртуализации (предлагаемые по умолчанию не удобные):
* каталог /kvm/images для виртуальных дисков; /kvm/iso — для iso-образов.
5. Установите общесистемные привилегии для KVM
Нам нужно добавить нашего обычного пользователя tuxfixer в группу kvm, чтобы он мог запустить virt-manager
и добавьте следующее:
Step 5: Accessing a Virtual Machine Guest OS via SSH
16. To access the newly installed guest OS from the host network via SSH, run the following command (replace 10.42.0.197 with your guest’s IP address).

17. To shut down, restart or delete a VM, click on it from the list of VMs, then use the buttons highlighted in the following screenshot.

That’s all for now! In this guide, we have shown how to install KVM virtualization packages, and create and manage VMs via the cockpit web console. For more detail, see: Getting started with virtualization in RHEL 8.
If you liked this article, then do subscribe to email alerts for Linux tutorials. If you have any questions or doubts? do ask for help in the comments section.
Creating a Virtual Machine
Once we have our ISO, we’re ready to do the fun bit and get a Virtual Machine up and running on our hypervisor! Whilst there are many options available when provisioning a new Virtual Machine, I’m going to include a simple one-liner below which will get you up and running.
You should now see the following:
The above means that it’s waiting for you to proceed with the setup. We need to find out what VNC port the Virtual Machine Console is bound to. In order to do this run virsh vncdisplay fedora23. If this is the first Virtual Machine you’ve provisioned, then it’s likely it will return with “:0”. This means it’s listening on port 5900. If it was “:1” then the port would be 5901.
Now that we have the port of the VNC Console, use your favourite VNC client to connect to the address of the hypervisor and port. In my case, this would be 192.168.10.109:5900.
As you can see from the above screenshot, the VNC viewer shows the console of our Virtual Machine, and we can also see that an IP from the network range we discussed earlier has been assigned successfully!
Step 3: Set Up Network Bridge (Virtual Network Switch) via Cockpit
8. Now create a network bridge (virtual network switch) to integrate virtual machines to the same network as the host. By default, once libvirtd daemon is started, it activates the default network interface virbr0 that represents the virtual network switch which operates in NAT mode.
For this guide, we will create a network interface in a bridged mode called br0. This will enable virtual machines to be accessible on the host networks.
From the cockpit main interface, click on Networking, then click Add Bridge as indicated in the following screenshot.

9. From the pop-up window, enter the bridge name and select the bridge slaves or port devices (e.g enp2s0 representing the Ethernet interface) as shown in the following screenshot. Then click Apply.

10. Now when you look at the list of Interfaces, the new bridge should appear there and after a few seconds, the Ethernet interface should be disabled (taken down).

If You Appreciate What We Do Here On TecMint, You Should Consider:
TecMint is the fastest growing and most trusted community site for any kind of Linux Articles, Guides and Books on the web. Millions of people visit TecMint! to search or browse the thousands of published articles available FREELY to all.
If you like what you are reading, please consider buying us a coffee ( or 2 ) as a token of appreciation.

We are thankful for your never ending support.
About Keith Rogers
Keith has spent years working with Linux by utilizing Apache, MySQL and PHP to build full web stacks along with creating more complex load balanced and redundant solutions suitable for high availability. In the last 2 to 3 years he has found himself using new cloud- based infrastructures such as those provided by AWS and Azure to assist in achieving these goals.
Currently, he’s working in the DevOps space with a focus on utilizing new automation tools such as Terraform / Ansible / Cloud-Init to efficiently and consistently deploy infrastructure. Along with this, he has been focusing on improving the bridge between Operations and Development by deploying new tools like Graylog to make it easier to parse log data and visualize any patterns within these logs.
In his spare time, he likes to spend time furthering his tech knowledge by utilizing new technologies at home.
В этом руководстве будет рассмотрена полная установка гипервизора KVM и инструментов управления RHEL 8.
KVM (виртуальная машина на основе ядра) – это полное решение для виртуализации для Linux Systems, работающее на оборудовании x86 с расширениями виртуализации (Intel VT или AMD-V).
KVM состоит из загружаемого модуля ядра, kvm.ko, который обеспечивает основную инфраструктуру виртуализации и процессорный модуль, kvm-intel.ko или kvm-amd.ko.
Выполните следующие шаги, чтобы установить KVM на свой сервер RHEL 8.
2. Отключите и остановите NetworkManager
Известно, что NetworkManager вызывает проблемы при работе с Linux Bridge, поэтому для нас лучше отключить его:
Our Objectives
- Set up a RedHat Enterprise Linux (RHEL 7.2) server
- Identify whether Virtualisation extensions are present
- Install KVM and associated software components
- Networking Considerations
- Configure VNC
- Demonstrate how to fire up a new Virtual Machine running on the KVM hypervisor
- Listing existing Virtual Machines
Шаг 4. Установка графического интерфейса менеджера виртуальных машин – необязательно.
Если на вашем RHEL 8 есть среда рабочего стола, вы можете установить инструмент virt-manager, который позволяет вам управлять виртуальными машинами из графического интерфейса.
Networking Considerations
By default, KVM will set up a network interface on your hypervisor named ‘virbr0’. It creates a network for your Virtual Machines which uses NAT (Network Address Translation) to access resources outside of the network it resides on, which in our case is 192.168.122.0/24.
Depending on your environment, you may wish to create a bridge interface on your KVM hypervisor to allow the Virtual Machines to use the same network as the hypervisor by default and remove the layer of NAT.
Step 1: Setup Cockpit Web Console on CentOS 8
1. The cockpit is an easy-to-use, integrated and extendable web-based interface to administer a Linux server in a web browser. It enables you to perform system tasks such as configuring networks, administering storage, creating VMs, and inspecting logs with a mouse. It uses your system’s normal user logins and privileges, but other authentication methods are supported as well.
It comes pre-installed and enabled on freshly installed CentOS 8 and RHEL 8 system, if you don’t have it installed, install it using the following dnf command. The cockpit-machines extension should be installed to manage VMs based on Libvirt.
2. When the package installation is complete, start the cockpit socket, enable it to auto-start at system boot and check its status to confirm that it is up and running.

3. Next, add the cockpit service in the system firewall which is enabled by default, using the firewall-cmd command and reload the firewall configuration to apply the new changes.
4. To access the cockpit web console, open a web browser and use the following URL to navigate.


Step 1: Setup Cockpit Web Console on CentOS 8
1. The cockpit is an easy-to-use, integrated and extendable web-based interface to administer a Linux server in a web browser. It enables you to perform system tasks such as configuring networks, administering storage, creating VMs, and inspecting logs with a mouse. It uses your system’s normal user logins and privileges, but other authentication methods are supported as well.
It comes pre-installed and enabled on freshly installed CentOS 8 and RHEL 8 system, if you don’t have it installed, install it using the following dnf command. The cockpit-machines extension should be installed to manage VMs based on Libvirt.
2. When the package installation is complete, start the cockpit socket, enable it to auto-start at system boot and check its status to confirm that it is up and running.
3. Next, add the cockpit service in the system firewall which is enabled by default, using the firewall-cmd command and reload the firewall configuration to apply the new changes.
4. To access the cockpit web console, open a web browser and use the following URL to navigate.
Step 4: Creating and Managing Virtual Machines via Cockpit Web Console
11. From the cockpit main interface, click on the Virtual Machines option as highlighted in the following screenshot. From the Virtual Machines page, click on Create VM.

12. A window with options to create a new VM will display. Enter the Connection, Name (e,g ubuntu18.04), Installation Source Type (on the test system, we have stored ISO images under the storage pool i.e /var/lib/libvirt/images/), Installation Source, Storage, Size, Memory as shown in the following image. The OS Vendor and Operating System should be picked automatically after entering Installation Source.
Also check the option to immediately start the VM, then click Create.

13. After clicking Create from the previous step, the VM should be automatically started and it should boot using the ISO image provided. Proceed to install the guest operating system (Ubuntu 18.04 in our case).

If you click on Network Interfaces of the VM, the network source should indicate the newly created bridge network interface.

And during the installation, at the step of configuring a network interface, you should be able to notice that the VMs Ethernet interface receives an IP address from the DHCP server of the host network.

Note that you need to install the OpenSSH package to access the guest OS via SSH from any machine on the host network, as described in the last section.
14. When the guest OS installation is complete, reboot the VM, then go to Disks and detach/remove the cdrom device under the VMs disks. Then click Run to start the VM.


15. Now under Consoles, you can log into the guest OS using a user account you created during the installation of the OS.

3. Установите пакеты, связанные с KVM
1. Проверьте поддержку виртуализации оборудования процессора
Наш процессор должен поддерживать аппаратную виртуализацию (VT-x), чтобы стать Hypervisor KVM и хостом виртуальных машин (гостевые операционные системы):
14 thoughts on “How to Install KVM on CentOS/RHEL 8”
I followed your article still failed :
ERROR internal error: process exited while connecting to monitor: 2022-03-06T02:08:53.985803Z qemu-kvm: -blockdev : Could not open ‘/var/lib/libvirt/images/Win10MGMT.qcow2’: Permission denied Domain installation does not appear to have been successful. If it was, you can restart your domain by running: virsh –connect qemu:///system start Win10MGMT otherwise, please restart your installation.
Suggest you disable SELinux or try setting execute permissions on the pool..
I followed all steps KVM installed successfully but when to try to install ubuntu vm in KVM via the cockpit, vm get paused with the following log error
KVM: entry failed, hardware error 0x80000021
If you’re running a guest on an Intel machine without unrestricted mode support, the failure can be most likely due to the guest entering an invalid state for Intel VT. For example, the guest may be running in big real mode.
which is not supported on less recent Intel processors.
EAX=00009900 EBX=00000000 ECX=00000000 EDX=00000600
ESI=00000000 EDI=00000000 EBP=00000000 ESP=00000000
EIP=00001010 EFL=00010002 [-------] CPL=0 II=0 A20=1 SMM=0 HLT=0
ES =9900 00099000 0000ffff 00009300
CS =9900 00099000 0000ffff 00009b00
SS =9900 00099000 0000ffff 00009300
DS =9900 00099000 0000ffff 00009300
FS =0000 00000000 0000ffff 00009300
GS =0000 00000000 0000ffff 00009300
LDT=0000 00000000 0000ffff 00008200
TR =0000 00000000 0000ffff 00008b00
GDT= 00000000 0000ffff
IDT= 00000000 0000ffff
In order to get the “Virtual Machines” menu item to appear in Cockpit, I had to install the following package:
Hope this helps!
How do you set up a bond network to a bridge for KVM and can you use nmtui?
That makes copy-paste of multiple lines into a terminal nightmare!
I have two network cards where I configured one for bridge mode and the other I left in NAT.
Could you tell me how to create an “internal network” in the virt manager just like the virtual box so that the VMS communicate between them?
I can’t seem to assign anything upward of 1CPU to any VM – any ideas how this can be done?
It is ok I have got this sorted now..
By default when creating a VM the disks created are thin provisioned or thick provisioned? if are thick provisioned how can I create disks in thin provision?
There’s a typo in section 2:7. I assume you don’t mean to start the `libvirtd.service‘ 3 times. :)
The kernel-based Virtual Machine (KVM) is a virtualization infrastructure many have become familiar with throughout the industry. This article will guide you through getting a basic KVM hypervisor up and running and ready for use. In order to fully utilize the KVM, you will need a CPU that has virtualization extensions, and these will need to be enabled in the BIOS of the machine you’re working on. In general, you’ll need to look to enable VT-X or AMD-V depending on your system architecture.
Virtualisation Extensions
Now that we’re in a position to begin installing KVM and its components, I thought this would be a good time to show you how to check whether virtualisation extensions are being seen on our CPU from within RHEL. To do this, simply run:
You should see something similar to the following:
If you receive no output then it’s likely that virtualization extensions are not enabled in your BIOS and you will need to take steps to rectify this before moving forward with the KVM installation.
Настройка сети
В данной инструкции рассмотрим использование сетевого моста.
Настраивая сетевой мост через удаленное подключение, внимательно проверяйте вводимые данные. В случае ошибки соединение будет прервано.
Устанавливаем пакет для работы с bridge:
yum install bridge-utils
Смотрим список сетевых интерфейсов и их настроек:
В моем примере были следующие данные:
1: lo: mtu 65536 qdisc noqueue state UNKNOWN qlen 1
link/loopback 00:00:00:00:00:00 brd 00:00:00:00:00:00
inet 127.0.0.1/8 scope host lo
valid_lft forever preferred_lft forever
inet6 ::1/128 scope host
valid_lft forever preferred_lft forever
2: enp4s0f0: mtu 1500 qdisc pfifo_fast state UP qlen 1000
link/ether 00:16:76:04:26:c6 brd ff:ff:ff:ff:ff:ff
inet 192.168.1.24/24 brd 192.168.1.255 scope global enp4s0f0
valid_lft forever preferred_lft forever
inet6 fe80::216:76ff:fe04:26c6/64 scope link
valid_lft forever preferred_lft forever
3: enp5s5: mtu 1500 qdisc pfifo_fast state DOWN qlen 1000
link/ether 00:16:76:04:26:c7 brd ff:ff:ff:ff:ff:ff
4: virbr0: mtu 1500 qdisc noqueue state DOWN qlen 1000
link/ether 52:54:00:cd:86:98 brd ff:ff:ff:ff:ff:ff
inet 192.168.122.1/24 brd 192.168.122.255 scope global virbr0
valid_lft forever preferred_lft forever
5: virbr0-nic: mtu 1500 qdisc pfifo_fast master virbr0 state DOWN qlen 1000
link/ether 52:54:00:cd:86:98 brd ff:ff:ff:ff:ff:ff
* из этого для нас важны enp4s0f0 — реальный сетевой интерфейс с настроенным IP-адресом 192.168.1.24, через который идет подключение сервера к локальной сети (из него мы будем делать мост); 00:16:76:04:26:c6 — mac-адрес реального ethernet адаптера; virbr0 — виртуальный сетевой адаптер.
Редактируем настройки реального адаптера:
Приводим его к виду:
ONBOOT=yes
BRIDGE=br0
TYPE=Ethernet
DEVICE=enp4s0f0
BOOTPROTO=none
Создаем интерфейс для сетевого моста:
DEVICE=br0
TYPE=Bridge
ONBOOT=yes
BOOTPROTO=static
IPADDR=192.168.1.24
NETMASK=255.255.255.0
GATEWAY=192.168.1.1
DNS1=8.8.8.8
DNS2=77.88.8.8
Перезапускаем сетевую службу:
systemctl restart network
Сетевые настройки должны измениться — в моем случае:
2: enp4s0f0: mtu 1500 qdisc pfifo_fast master br0 state UP qlen 1000
link/ether 00:16:76:04:26:c6 brd ff:ff:ff:ff:ff:ff
3: enp5s5: mtu 1500 qdisc pfifo_fast state DOWN qlen 1000
link/ether 00:16:76:04:26:c7 brd ff:ff:ff:ff:ff:ff
4: virbr0: mtu 1500 qdisc noqueue state DOWN qlen 1000
link/ether 52:54:00:cd:86:98 brd ff:ff:ff:ff:ff:ff
inet 192.168.122.1/24 brd 192.168.122.255 scope global virbr0
valid_lft forever preferred_lft forever
5: virbr0-nic: mtu 1500 qdisc pfifo_fast master virbr0 state DOWN qlen 1000
link/ether 52:54:00:cd:86:98 brd ff:ff:ff:ff:ff:ff
6: br0: mtu 1500 qdisc noqueue state UP qlen 1000
link/ether 00:16:76:04:26:c6 brd ff:ff:ff:ff:ff:ff
inet 192.168.1.24/24 brd 192.168.1.255 scope global br0
valid_lft forever preferred_lft forever
inet6 fe80::216:76ff:fe04:26c6/64 scope link
valid_lft forever preferred_lft forever
Configure VNC
It’s worth mentioning at this point that you’ll most likely want to add a firewall rule to allow the VNC traffic to your hypervisor—otherwise you won’t be able to connect. Generally, the VNC port range will start from TCP 5900. It’s unlikely that we will be running more than 200 Virtual Machines on our hypervisor, so if we open up TCP 5900 -> 6100, this should be enough to allow connections to succeed. We should first check which zone is active by running:
In my case, this is ‘public’. Now, we need to add a permanent firewall rule to allow traffic in on the ports defined above:
We can verify our rule entry by running:
This command should return the following:
Добавить комментарий Отменить ответ

Эта простая однострочная программа для Powershell выведет текущее время работы вашего компьютера. Вывод показан в несколько столбцов, но может быть выведен и в одну строку. PS C:\Users\Windows 11> (get-date) - (gcim Win32_OperatingSystem).LastBootUpTime Days : 0 Hours : 0 Minutes : 41 Seconds : 27 Milliseconds : 915 Ticks : 24879150105 TotalDays : 0.0287953126215278.
Ошибка 504 gateway time-out возникает тогда, когда Nginx не может получить ответ от службы достаточно долго. Например, от PHP-FPM. Nginx и PHP-FPM Наиболее распространенной причиной этой ошибки является совместная работа Nginx и PHP-FPM. В случае очень медленных PHP-скриптов Nginx выдает тайм-аут шлюза 504, когда не ожидает ответа в течение 30 секунд (по умолчанию). Чтобы избавиться.
17 сентября 2021 года произошло событие, всколыхнувшее кинематографический мир. На платформе Netflix появился корейский сериал “Игра в кальмара”. Всего пары недель ему хватило для того, чтобы выйти на первые позиции по популярности не только на Родине, но и в Соединенных Штатах, России. Оценить сюжет сериал можно не только просмотром, но и игрой squid game challenge скачать которую.
Шаг 3: Запустите и включите демон KVM
По умолчанию, демон kvm libvirtd не запускается, запустите службу с помощью команды:
Добавить комментарий Отменить ответ
Эта простая однострочная программа для Powershell выведет текущее время работы вашего компьютера. Вывод показан в несколько столбцов, но может быть выведен и в одну строку. PS C:\Users\Windows 11> (get-date) - (gcim Win32_OperatingSystem).LastBootUpTime Days : 0 Hours : 0 Minutes : 41 Seconds : 27 Milliseconds : 915 Ticks : 24879150105 TotalDays : 0.0287953126215278.
Ошибка 504 gateway time-out возникает тогда, когда Nginx не может получить ответ от службы достаточно долго. Например, от PHP-FPM. Nginx и PHP-FPM Наиболее распространенной причиной этой ошибки является совместная работа Nginx и PHP-FPM. В случае очень медленных PHP-скриптов Nginx выдает тайм-аут шлюза 504, когда не ожидает ответа в течение 30 секунд (по умолчанию). Чтобы избавиться.
17 сентября 2021 года произошло событие, всколыхнувшее кинематографический мир. На платформе Netflix появился корейский сериал “Игра в кальмара”. Всего пары недель ему хватило для того, чтобы выйти на первые позиции по популярности не только на Родине, но и в Соединенных Штатах, России. Оценить сюжет сериал можно не только просмотром, но и игрой squid game challenge скачать которую.

KVM – это инфраструктура виртуализации для Linux, для которой процессор с аппаратным расширением виртуализации может принимать гостевые системы.
KVM – это удобное решение для тестирования различных операционных систем, если у вас нет возможности приобретать дорогостоящие и энергоемкие физические устройства.
В приведенном ниже руководстве представлена установка и настройка KVM (QEMU) вместе с конфигурацией Linux Bridge в операционной системе CentOS7 / RedHat7.
Шаг 5: Создайте экземпляр виртуальной машины на KVM
Сначала начните с создания сети мост, которая будет прикрепляться к вашим экземплярам, мы создадим ее с помощью инструмента управления сетью nmcli.
Подтверждение создания моста
После того, как вы подготовили свой интерфейс типа мост, создайте тестовый экземпляр, используя CLI или Virtual Machine Manager.
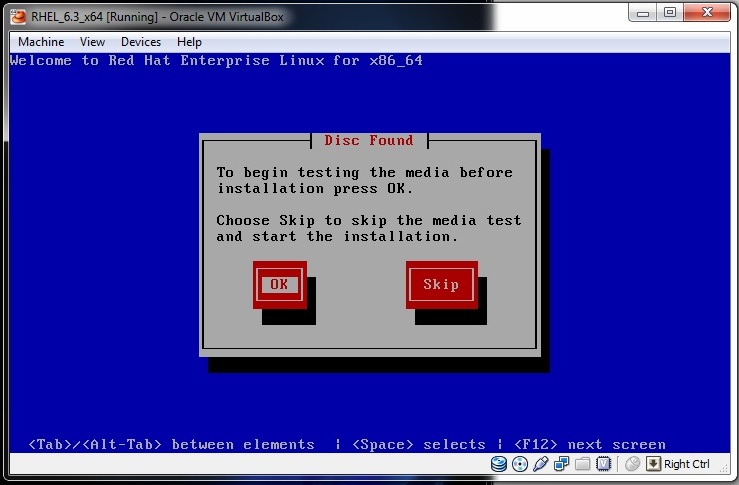
Ниже приведен пример создания виртуальной машины Fedora 29.
Установка выполняется в текстовом режиме, но процедура установки похожа на GUI.
После завершения установки перезагрузите экземпляр и войдите в систему
Вы также можете войти в консоль:
Нажмите клавишу при получении:
Читайте также: