
Не работает insert в excel
Excel 2013 Word 2013 PowerPoint 2013 Visio Standard 2013 Visio Professional 2013 Excel 2010 Microsoft Word 2010 PowerPoint 2010 Visio Professional 2010 Visio Premium 2010 Visio Standard 2010 More. Less
Symptoms
After you install security update that is described in Microsoft Security Bulletin MS14-082, you may experience one of the following symptoms:
Symptom 1
When you insert a Forms ActiveX control (forms3) into a Microsoft Office document, or when you edit the properties of a control, you may receive an error message that resembles one of the following in an ActiveX custom Office solution:
Visio cannot insert this control because its TypeInfo did not merge correctly. Ensure all parameter types are VBA friendly. Delete TEMP *.exd file if necessary.
Object library invalid or contains references to object definitions that could not be found.
Cannot insert object.
The program used to create this object is Forms. That program is either not installed on your computer or it is not responding. To edit this object, install Forms or ensure that any dialog boxes in Forms are closed.
Note In this last error message, the Forms text may be replaced by the GUID of the control.
Symptom 2
When you use Office Click-to-Run to install Office 2013 on a computer that has a Side-by-Side installation of the 2007 Office suite or Office 2010, you may experience the same errors that are mentioned in the "Symptom 1" section.
Symptom 3
After you save a Microsoft Excel workbook that includes ActiveX control (forms3) on a computer that has MS14-082 installed, the Excel macro may not work on computers that do not have MS14-082 installed.
Resolution
To resolve all the issues that are described in the "Symptoms" section, install the following updates to affected computers for all versions of Office that you have installed.
Note You should install all the updates for all the versions of Office that you have installed to obtain the full result of the fix. If you use a side-by-side combination of Office 2013 C2R-installed and Office MSI-installed products, you have to update all products at the same time. For more information, see the "Important information about the change" section.
Office 2013 (Click-to-Run installations)
Office 2013 Click-to-Run (C2R) clients should automatically receive updates that include this fix. Verify that you are running version 15.0.4701.1002 or a later version to make sure that the fix will be installed. See the "More Information" section for information about how to determine whether you are using the C2R version of Office 2013 and what the currently installed version is. If you are not running version 15.0.4701.1002 or a later version, you can force an online manual repair of Office 2013 to make sure that you obtain the most recent updates.
Office 2013 (MSI installations)
2920754 March 10, 2015, update for Office 2013
2956145 March 10, 2015, update for Excel 2013
2956163 MS15-022: Description of the security update for Word 2013: March 10, 2015
2965206 March 10, 2015, update for PowerPoint 2013
2956176 March 10, 2015, update for Access 2013
2956155 March 10, 2015, update for Visio 2013
Office 2010
2920813 March 10, 2015, update for Office 2010
2956142 MS15-022: Description of the security update for Microsoft Excel 2010: March 10, 2015
2956139 MS15-022: Description of the security update for Word 2010: March 10, 2015
2920812 MS15-022: Description of the security update for PowerPoint 2010: March 10, 2015
2837601 March 10, 2015, update for Access 2010
2878283 March 10, 2015, update for Visio 2010
The 2007 Office system
2984939 MS15-022: Description of the security update for the 2007 Microsoft Office suite: March 10, 2015
2920794 March 10, 2015, update for the 2007 Office system
2956103 MS15-022: Description of the security update for Microsoft Excel 2007 Service Pack 3: March 10, 2015
2956109 MS15-022: Description of the security update for Word 2007 SP3: March 10, 2015
2899580 MS15-022: Description of the security update for PowerPoint 2007 Service Pack 3: March 10, 2015
2817561 March 10, 2015, update for Visio 2007
More Information
Important information about the change
The Microsoft Forms Control package (FM20.dll) is a shared component that is used between applications in side-by-side installations of Office. Make sure that the fix is applied to all side-by-side-installed versions of Office to make sure that all versions are updated correctly to work together with the changes to the controls. For minimal disruption, these updates should be applied together. Be aware earlier versions of Office (that is, versions that are earlier than the 2007 Office system) will not be updated to work with the updated Forms (FM20) shared component. This means that an installation of this update on a computer that has a pre-2007 Office system version installed side by side with a later version may prevent the earlier version from functioning correctly with the standard Forms controls. This is a known limitation and can be resolved only by updating older versions to one of the supported versions that are mentioned in the "Resolution" section.
After this update is installed, you will be unable to use forms controls from Internet Explorer or HTA web projects. Microsoft has never officially supported these controls for such use, and we strongly encourage anyone who used them to find replacement controls or rework the project to use HTML5 without the need for ActiveX controls. Removing the security (killbit) keys for any forms control is unsupported and is strongly discouraged. It is our intention that these controls never be used from webpage solutions.
Third-party products that use forms controls from native code should not be affected unless those products have explicit code to follow Internet Explorer security checks (killbit settings) or use Internet Explorer for webpage viewing together with controls in those webpages. Those applications have to make their own code changes to handle exception cases for those uses. Software developers can contact Microsoft for support help on such issues.
How to determine whether Office 2013 is MSI or Click-to-Run
To determine whether the installation of Office 2013 on your system is MSI based or Click-to-Run based, follow these steps:
Start an Office 2013 application, such as Microsoft Word 2013.
On the File menu, click Account.
For Office 2013 Click-to-Run-based installations, an Update Options item is displayed. For MSI-based installations, the Update Options item is not displayed.
Office 2013 Click-to-Run installation
MSI-based Office 2013
Handling outdated extenders
The updates that are included in the "Resolution" section will make sure that the cache extender file for the Microsoft Forms Control package (MSForms.exd) is removed and updated as needed for each user who loads any of these controls. However, if you suspect a problem with an incorrect extender, you may want to manually remove the extenders to verify that you have a clean copy after an application restart.
To manually remove cached control extender objects, follow these steps:
In Windows Explorer, open the %TEMP% folder, and then search for "*.exd" in all subfolders.
Delete all instances in which that file is found. This includes all subfolders.
Note The .exd files will be re-created automatically when you use the new controls the next time that you use VBA. These extender files will be under the user's profile and may also be in other locations, such as the following folders:
Here's an easy fix
Note Before you run either of the following easy fix solutions, make sure that the affected applications are closed.
To automatically remove cached control extender files, run either of the following easy fix solutions:
The following easy fix solution will delete the .exd files for the currently logged-on user:
The following easy fix solution must be run by an administrator and will delete the .exd files for all user accounts on the computer:
If you are an experienced Excel user, then you must be quite familiar with the several functionalities of this application. Like formulas, functions, calculations, and inserting objects into the spreadsheet. Well, our today’s topic is about this specific functionality of inserting objects in Excel workbook.
Have you ever stuck with this “Excel cannot insert object” issue meanwhile attempting to incorporate an external object into the Excel spreadsheet? Do you have any idea why it’s occurring or how to resolve it?
If not, then without any further ado…!
Let’s have a look over the quick tutorial which is mainly aimed to explain how fix cannot Insert Object error In Excel. we will demonstrate the complete symptom, causes, and resolution of the cannot Insert Object In Excel 2007/2013/2016/2019.
To fix corrupt Excel objects , we recommend this tool:
This software will prevent Excel workbook data such as BI data, financial reports & other analytical information from corruption and data loss. With this software you can rebuild corrupt Excel files and restore every single visual representation & dataset to its original, intact state in 3 easy steps:
- Download Excel File Repair Tool rated Excellent by Softpedia, Softonic & CNET.
- Select the corrupt Excel file (XLS, XLSX) & click Repair to initiate the repair process.
- Preview the repaired files and click Save File to save the files at desired location.
Why I Can’t Insert Object In Excel?
This problem may be generated because of having some issue in the document you are trying to add. Or the setting you have done on your excel worksheet is somewhere get wrong. Or the security provision applied on your PC is set properly. Let’s discuss them in detail…!
Microsoft Excel protection features, present on the Excel ribbon’s review tab. Actually, this will lock the worksheet cells or workbook documents for preserving up its content. After applying such users are unable to insert any object into the Excel document.
Before protecting the worksheet, you can easily unlock some of the specific cells. But this will help you in performing calculations and for entering text, not for file insertion. For achieving file insertion capabilities, you need to turn off the protection feature in your Excel workbook.
Sometimes system administrator of the PC network also activates various levels of security requirements. This ultimate show affects in how Excel and other Office applications respond to files which you will be receiving through network connections or email attachments. Files that contain macro code, ActiveX controls, and other linked assets go through the additional inquiry round when any user tries to access them. At that time Office security features will get active.
To make the specific file accessible in your Excel workbook you need to change the system administrator security setting temporarily.
Besides that, you can also approach the compliant version having controls, macros, and remove links from the person who has sent you the document.
Excel users can also insert objects like PDF files into their MS Excel Worksheet. This gives you the option to crop or resize the PDF File but not to edit it. If during the insertion of a PDF file in excel you will get an error message then the chances are also that some issue occurred in the Adobe Reader Feature called Protected Mode.
Well, this protected mode is mainly used to prevent the execution of malicious code from PDF files. And thus, it limits the PDF File to get executed properly.
For changing the level of protectiveness, you need to make changes in the Adobe Reader’s preferences.
The external file which you are trying to insert in the Excel worksheet is maybe the damaged one. Or it may contain corrupt resources or not having a piece of information necessary for viable documents. At that time the excel application will display an error message regarding Can’t Insert Object In Excel.
Maybe your external file is damaged by email attachment, storage media issue, or electrical power fluctuation, mainly at the time of saving the file.
Apart from this, if you attempt to access a file that another user is still saving or uploading on your network. This will automatically declare the object as a corrupted one and it won’t work even if you insert it within your Excel workbook.
To fix this issue, you need to obtain another fresh copy of the document from the source. After then perform the file insertion process again.
It is usually seen that “Cannot Insert Object In Excel 2013” is encountered in an ActiveX custom Office solution after the installation of the MS14-082 security update.
What Are The Circumstances Under Which Cannot Insert Object In Excel Issue Occurs?
After installing the security update mentioned in Microsoft Security Bulletin MS14-082, Excel user may face one of the below-mentioned symptoms.

Symptom 1
While inserting a Forms ActiveX control within a Microsoft Office document,
Or while you are trying to edit the control’s property. You may get the following error messages in an ActiveX custom Office solution:
- Visio cannot insert this control because its TypeInfo did not merge correctly. Ensure all parameter types are VBA friendly. Delete TEMP *.exd file if necessary.
- Object library invalid or contains references to object definitions that could not be found.
- Cannot insert the object.
- The program used to create this object is Forms. That program is either not installed on your computer or it is not responding. To edit this object, install Forms or ensure that any dialog boxes in Forms are closed.
Note: in the above last error message, the text Forms can be replaced with GUID of control.
Symptom 2
If you are using the Office, Click-to-Run for installing Office 2013 on your PC that has a Side-by-Side installation of the Office 2010 OR 2007 suite. at that time also you may encounter the same errors which are mentioned above in the “Symptom 1” section.
Symptom 3
After saving up your Microsoft Excel workbook which contains ActiveX control on a PC having MS14-082 installed. In that case, Excel macro won’t work properly that doesn’t have MS14-082 installed.
Symptom 4
When the recent office update contains a broken ActiveX controls on Excel worksheets. At that time also the following symptom will appear:
- Unable to change or use properties of any Active controls on Excel worksheets
- Excel Error messages “Can’t insert object”
- Error 438 when referring to an ActiveX control like a member of Excel worksheet in code
How To Fix “Cannot Insert Object” Error In Excel?
Resolution 1
For fixing up cannot insert object in Excel or the issue mentioned in the above symptoms. you need to install the following updates on the affected PC for the entire version of the Office which you have already installed.
It’s important to install updates for the entire office version you have installed to acquire the complete result of the fix. In case you are using the combination of Office MSI-installed products and Office 2013 C2R-installed. Then in that case you have to update all products simultaneously.
Resolution 2
- At first close all the Office applications.
- In the Window, explorer makes a search for *.exd files including the hidden and system folders and files. Once you get all those files and folders, delete them off.
Make sure that you will get the following after making search:
C:\users\username\AppData\Local\Temp\Excel8.0\MSForms.exd
C:\users\username\AppData\Local\Temp\VBE\MSForms.exd
- Now reboot your PC
- After then restart your Office applications and check the controls whether it’s working properly or not.
Note:
Whenever you use the Excel workbook with active control this will recreate the .exd files again. So, it’s not that big issue just delete it again if you find Cannot Insert Object In Excel error again.
Hopefully, that will resolve the problem for you.
Remarks:
If you are facing difficulty to get these .exd files, then press Win+R for opening up the Run box. After then type %temp% in the box and then press the Enter button. This will open the Temp folder location and here you make a search for .exd files in the VBE and Excel 8.0.
FAQ:
- Tap within the cell where you need to insert your object in an Excel spreadsheet.
- Go to the Insert tab, and then from the “Text” group, hit the Object icon.

- Hit the “Create from File” option.
- Tap to Browse option, and then choose the file which you have to insert.
- Instead of showing the content file, if you want to insert an icon within your excel sheet. In that case, you need to choose the check box present across Display as icon option.

- Excel will show your file’s 1 st page, if this display as the icon check box is not selected.
- To open the attached object you need to double click on it. Hit the OK button.
You have the option to find and choose all embedded objects in Excel worksheet by using the feature of Go To Special.
Here are the steps that you need to follow:
- Open the worksheet in which you have to find all your embedded objects.
- Hit the F5 key this will open the Go To dialog box.

- In the opened window tap the special button.
- Within the dialog box of Go To Special, you need to choose the objects option.
- After that hit the ok button.

Now you will see that all the embedded objects start appearing in your active worksheet.
Wrap Up:
Now you must have got enough idea on how to troubleshoot can’t insert object In Excel issue. So, perform all the suggested solutions carefully and easily resolve can’t insert object error in Excel.
Get complete information on “Cannot Insert Object In Excel” error causes, symptoms and more. Learn how to fix cannot insert object error in Excel 2007/2010/2013/2016.
Margret
Margret Arthur is an entrepreneur & content marketing expert. She writes tech blogs and expertise on MS Office, Excel, and other tech subjects. Her distinctive art of presenting tech information in easy to understand language is very impressive. When not writing, she loves unplanned travels.
Во всех версиях текстового процессора MS Word есть два основных режима ввода текста. Это режим вставки и режим замены. В большинстве случае по умолчанию активирован режим вставки. Это значит, что при вводе текста с клавиатуры, символы, уже имеющиеся справа от курсора, не будут удалены, а вводимый текст будет вставлен перед ними.

Различия режимов редактирования текста в Word
При активации режима замены, который активируется единоразовым нажатием клавиши Insert на клавиатуре, при вводе новых символов уже имеющиеся знаки справа от курсора будут заменены на вновь введенные.

Расположение кнопки Insert на стандартной клавиатуре компьютера
Данный режим весьма полезен при редактировании и исправлении уже имеющегося текста, когда некоторые слова и фразы в нем нужно заменить на новые.
Но далеко не всегда в Microsoft Word включена функция переключения режимов замены/вставки кнопкой Insert, к которой многие пользователи так привыкли. Из-за чего некоторые ошибочно полагают, что у них не работает эта самая кнопка Insert.
На самом деле проблема в том, что в настройках MS Word отключен режим использования кнопки insert для переключения режимов вставки и замены.
О том, как его включить вы узнаете в этой статье.
Активация переключения режимов вставки и замены кнопкой Insert в Ворде
Для начала заходим в настройки Word. Делается это нажатием на кнопку в верхнем левом углу (кнопка “Файл”) и в появившемся меню выбором пункта “параметры (параметры word)”.
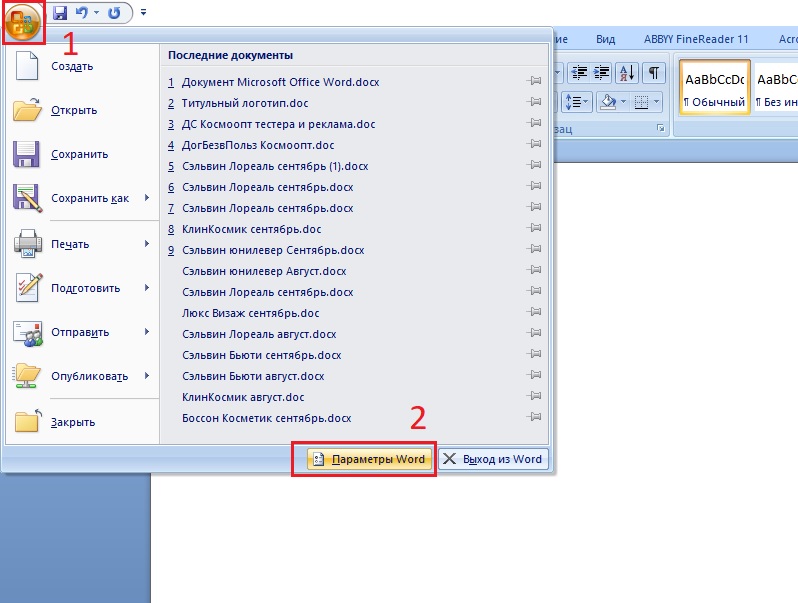

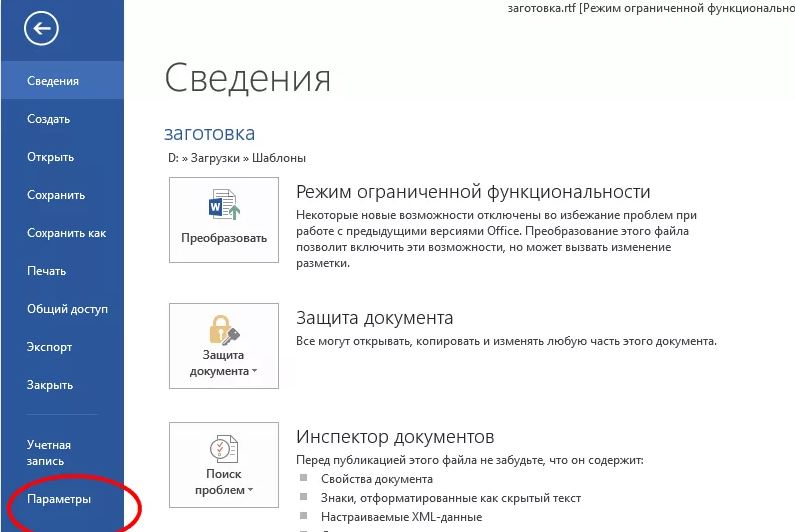
В открывшемся окне настроек нужно перейти на вкладку “Дополнительно”.

Включение смены режимов замены и вставки кнопкой insert в ворде
В правой части окна появятся различные пункты настроек. Среди них нужно найти “Использовать клавишу INS для переключения режимов вставки и замены”. Включаем его установкой галочки напротив.
Остается лишь нажать “ок” в низу окна для применения настроек.
Теперь клавишей Insert на клавиатуре вы можете включать и отключать режим замены в Microsoft Word.
Не редки случаи, когда в экселевской таблице нужно набирать не только цифры, но также слова и даже целые предложения. Если вы попробуете это сделать, при этом ячейка, следующая за той, в которой вы набираете текст, будет пустой, то наверняка столкнетесь с тем, что ваш набранный текст некрасиво залезет на соседнюю ячейку.
Что с этим можно делать мы расскажем в данной статье.
Изменение границ ячейки
Данный способ является самым простым. Все, что вам нужно сделать это установить курсор на границу названий столбцов, зажать левую кнопку мыши и, не отпуская ее, потянуть в сторону, пока границы ячеек в столбце не раздвинуться до нужного размера и текст не перестанет выходить за границы ячейки.

Изменение границ ячеек в столбце

Включение автоматического переноса
Второй вариант предполагает включение автоматического переноса в ячейке. В этом случае ячейка будет увеличиваться в высоту и текст в ней будет автоматически переноситься пока не впишется в границы.
Для этого нужно кликнуть правой кнопкой мыши по нужной ячейке или группе ячеек и в открывшемся меню выбрать “Формат ячеек”.

Открываем формат ячеек
В появившемся окне на вкладке “Выравнивание” устанавливаем флажок “Переносить по словам”.

Установка переноса по словам в ячейке экселя

Результат автоматического переноса по словам
Установка пробела в соседнюю справа ячейку
Данный вариант кому – то может показаться не совсем правильным, но тем не менее от работает. Чтобы текс, который вылез за границы ячейки, автоматически скрылся, всего навсего нужно в соседнюю справа ячейку вписать какой – нибудь текст. Сойдет даже пробел. В этом случае соседняя ячейка будет выглядеть пустой.

Постановка задачи
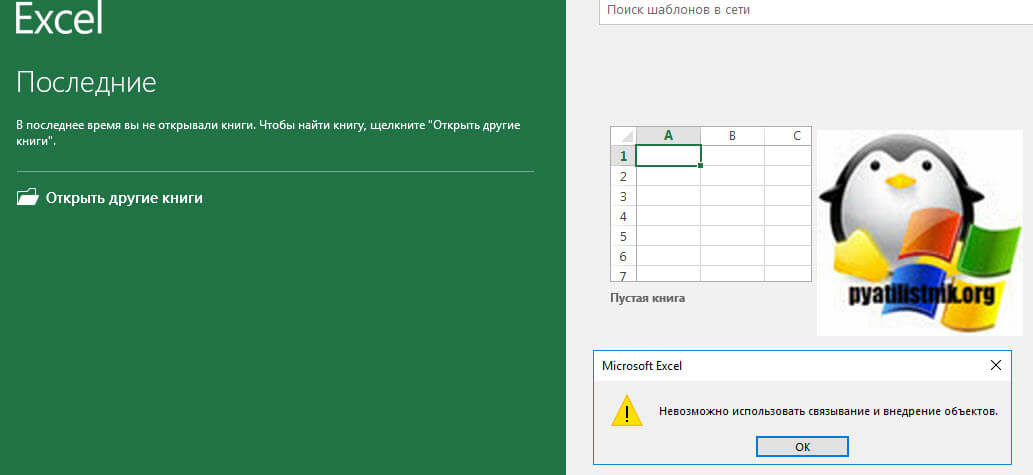
И так у меня есть виртуальная машина ESXI с гостевой операционной системой Windows Server 2019. Один из сотрудников обратился с проблемой, что у него перестало в Ecxel копироваться содержимое ячеек в другие ячейки. Выглядело это вот так. Сначала при открытии Ecxel 2016 появлялась ошибка:
Далее если попытаться скопировать одну ячейку в другую:
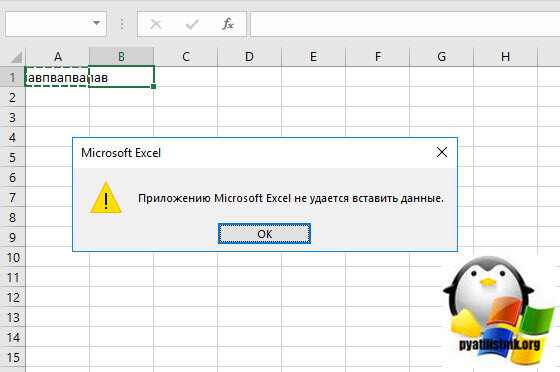
Хочу отметить, что такое поведение было и в совершенно новых документах, которые были созданы для тестирования, так же под эту ошибку попадали ячейки в которых вообще не было данных (пусты).
Что сделать если не удается копировать и вставлять данные на листе
Первое, что вы должны сделать, это обязательно установить все имеющиеся обновления для Microsoft Office, напоминаю делается это через параметры Windows, раздел "Обновление и Безопасность".
Далее перейдите в дополнительные параметры.
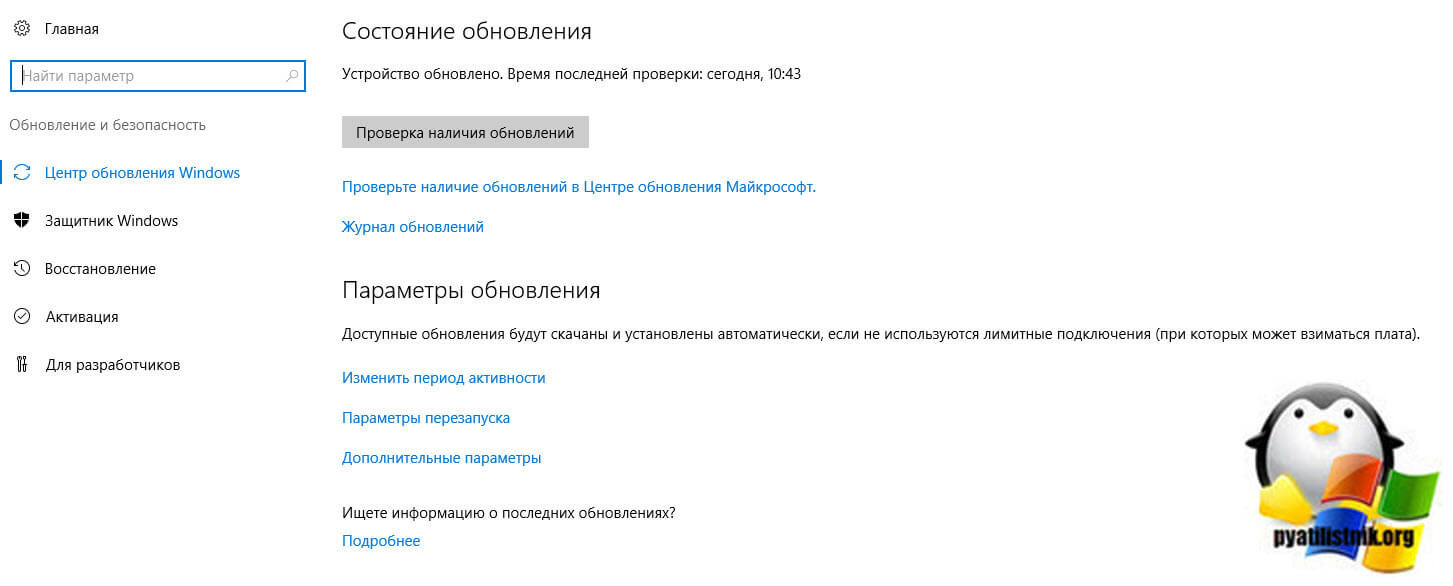
Убедитесь, что установлена галка "При обновлении Windows предоставить обновления для других продуктов Microsoft"

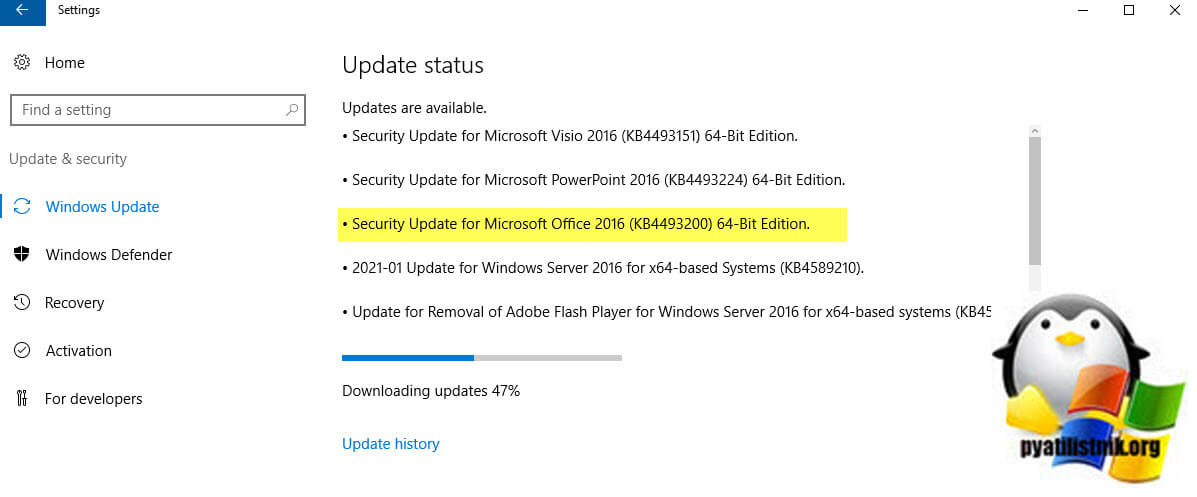
Если Windows что-то обнаружит в списке доступных обновления, то будет произведена установка. Не забываем на всякий случай перезагрузить компьютер или сервер.
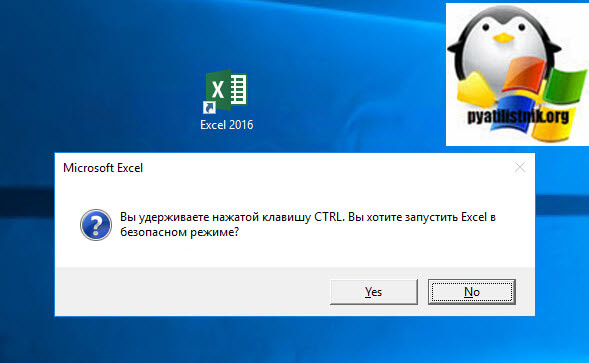
Отключение надстроек в безопасном режиме
У Microsoft Excel есть как и у Windows безопасный режим, который позволяет проверить работу приложения с минимальными настройками. Для того, чтобы вам запустить Excel в безопасном режиме, нужно зажать клавишу CTRL и запустить само приложение.
Далее вам нужно перейти в меню "Файл".
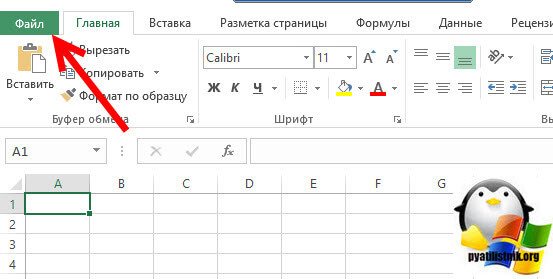
Далее переходим в параметры.

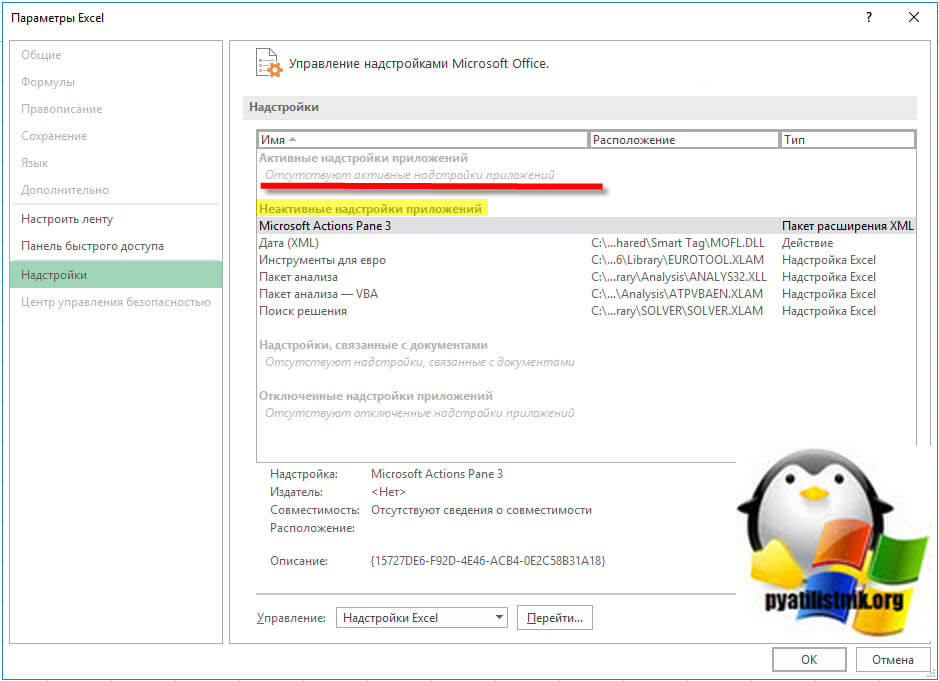
Переходим в пункт "Надстройки". Посмотрите какие из них у вас находятся в активном состоянии и по очереди отключайте. Проверьте помогло ли это решить ошибку "Невозможно использовать связывание и внедрение объектов (cannot use object linking and embedding)".
Восстановление Microsoft Office
Следующий метод, который может помочь в устранении ошибки "Приложению Microsoft Excel не удалось вставить данные (Microsoft Excel was unable to insert data)", это попробовать произвести восстановление офисного пакета. Чтобы это осуществить, вам необходим вызвать окно выполнить и вписать в нем:
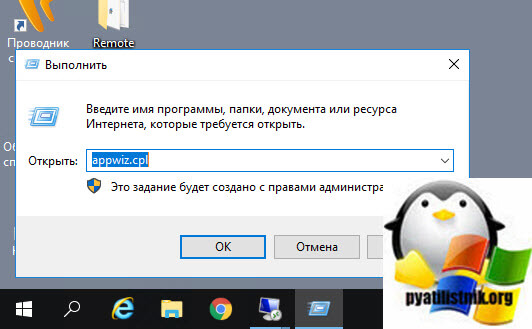
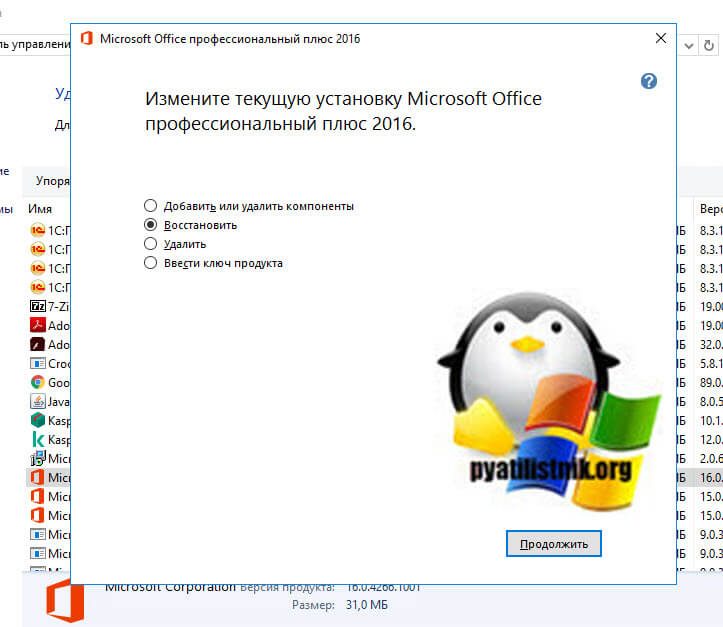
В открывшемся окне "Программы и компоненты" вам необходимо выбрать в списке ваш офисный пакет, у меня это "Microsoft Office профессиональный плюс 2016" и в самом верху нажать кнопку "Изменить".
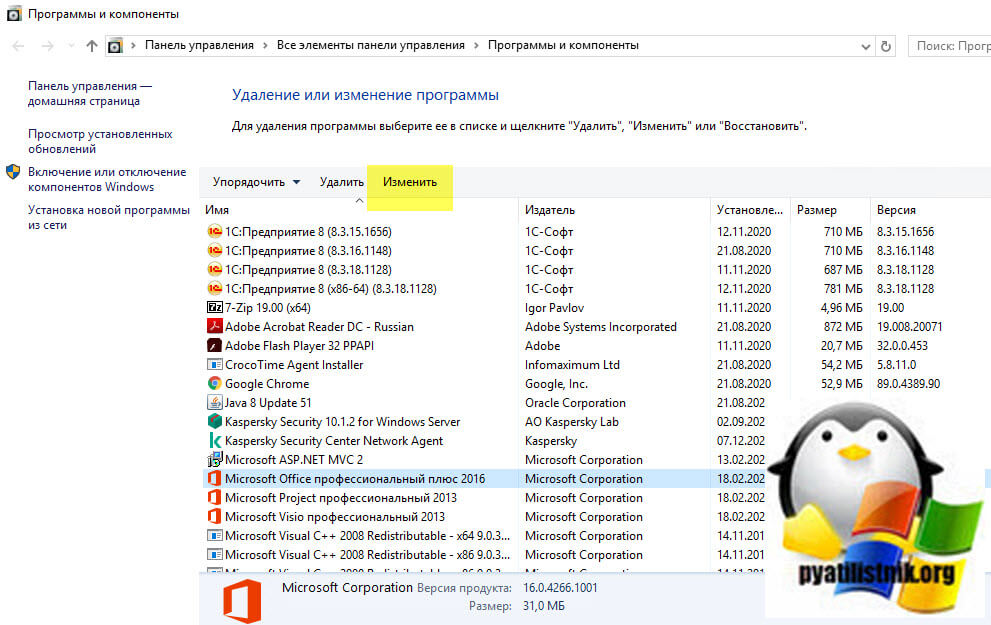
В списке доступных операций, выберите "Восстановить".
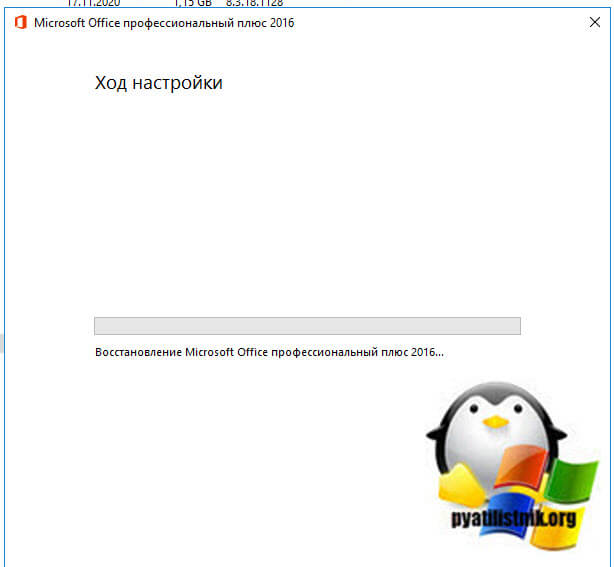
Начинается процесс восстановления Microsoft Office и в том числе его пакета Excel. Данная операция может быть не такой быстрой, поэтому придется подождать минут 5-10.
Проверка учетной записи в DCOM
Ранее я вам рассказывал, как производится настройка DCOM для Exel, кото не читал посмотрите. DCOM - это программная конструкция, которая позволяет компьютеру запускать программы по сети на другом компьютере, как если бы программа выполнялась локально. DCOM - это аббревиатура от Distributed Component Object Model. Если вы получаете ошибку "Невозможно использовать связывание и внедрение объектов (cannot use object linking and embedding)", то с большой долей вероятности у вас используется для запуска не тот режим. Чтобы это проверить, вновь вызовите окно выполнить и введите:

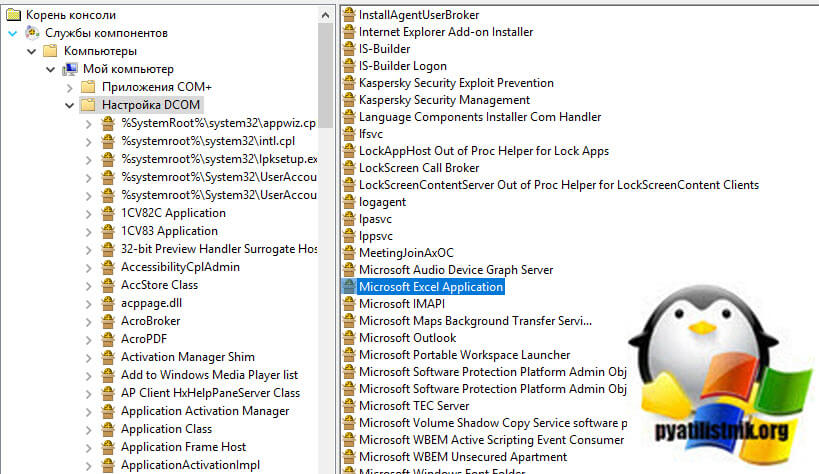
Откройте "Службы компонентов - Компьютеры - Приложения COM+ - Настройка DCOM - Microsoft Excel Application (Component Services - Computers - My computer - DCOM Config - Microsoft Excel Application)". Щелкните правым кликом по "Microsoft Excel Application" и перейдите в его свойства.
Перейдите на вкладку "Удостоверение (Identity)" и удостоверьтесь, что у вас выставлен пункт "Запускающий пользователь (The launching user)".
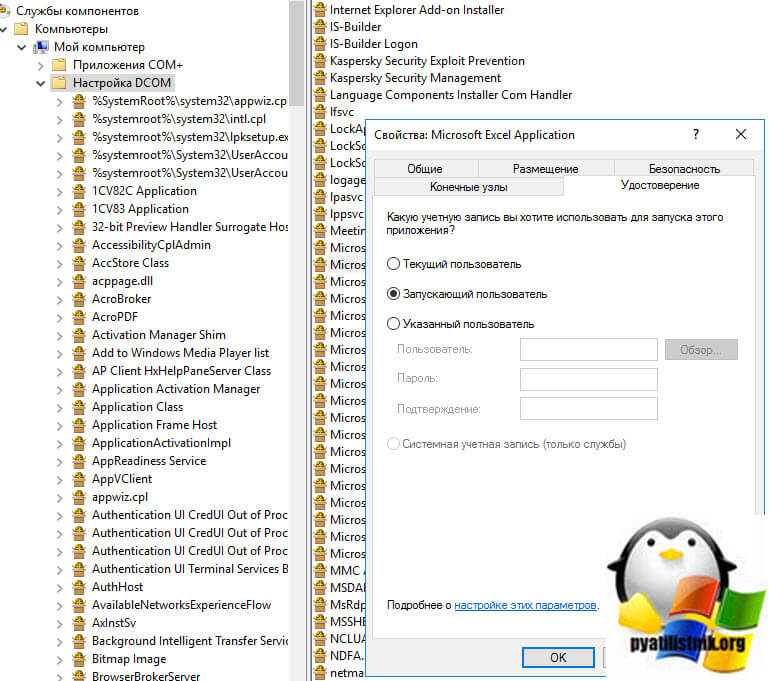
У меня же было как раз в другом режиме, и запуск был от конкретного пользователя.
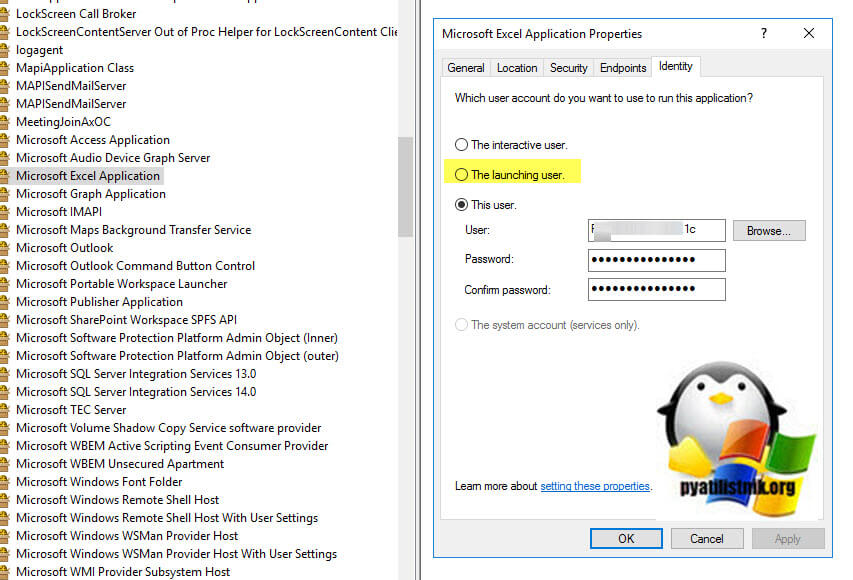
Как только я выставил правильные настройки у меня заработала вставка содержимого ячеек Exel и ошибка "Приложению Microsoft Excel не удалось вставить данные (Microsoft Excel was unable to insert data)" исчезла.
Очистка временных файлов
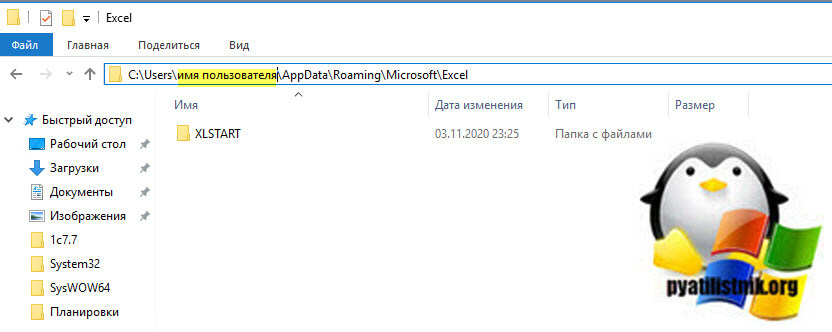
Еще одним способом устранения проблем с копированием ячеек в Excel является очистка временных данных из профиля пользователя, для этого вам необходимо включить скрытые папки Windows. Далее перейти по пути:
Не забудьте только выбрать своего пользователя. В результате у вас появится папка XLSTART или еще какие-то, попробуйте их вырезать или удалить. После чего запустите Microsoft Excel и проверьте, дало ли это эффект.
Есть еще совсем иезуитский метод, о котором я читал и якобы у людей он работал, его суть заключалась в том, что вы должны были просто открыть Excel, затем перейти в меню файл и из него уже выбрать открыть документ из указанного места, и якобы в такой момент у вас пропадала ошибка, как по мне это очень не удобно и занудно.
Читайте также: