
Как в ворде сделать таймлайн
This free timeline template collection was created for professionals who need outstanding timeline presentations that will thrill clients and impress management. These timeline chart templates were designed to be powerful, customizable and easy to present in important meetings. You can edit each template manually or automatically with the free timeline maker from Office Timeline. It plugs right into PowerPoint and makes it incredibly easy to add your own data, change template colors and styles, and update timelines instantly as things change.
Instantly customize the templates below or easily make your own timeline right inside PowerPoint.
Timelines are the most effective way to visualize business roadmaps, project plans, event schedules or workflows and to ensure important deadlines are hit. This page offers you a series of project timeline templates for PowerPoint that you can easily download, customize and use to set your project up for success.
PowerPoint Timeline
Easily customizable PowerPoint slide designed as a timeline for professionals who need high-level, clear visuals when reviewing any project plans, program or business summaries.
Swimlane Diagram
Swimlane PowerPoint template that clearly lays out the framework of a project, from scheduling activities to task assignment and resource management.
Project Plan
Intuitive PowerPoint slide that serves as a quick yet visually effective alternative to complex project management tools to produce clear, well-laid-out plans for launching a project.
Sales Plan
Easy-to-edit sales plan sample for sales leaders, marketers or account executives to lay out objectives against a timeband in weeks; it can be customized to show campaign plans and targets in months, quarters or years.
Example Timeline
Visual template with Today’s Date indicator that helps enterprise workers get a quick start on creating timelines for project reviews, status reports, or any presentations that require a simple project schedule.
Project Chart
Free timeline chart example that outlines the major deliverables of a project in chronological order, helping project planners and managers visually communicate all the critical project actions, deadlines and events from start to finish.
Project Schedule
Easy-to-follow timeline example to create high-level representations of work breakdown structures that estimate the effort, time and resources needed to achieve a project’s objectives.
Project Implementation Plan
Visual timeline example that provides a bird’s eye view of what a project team is expected to deliver, when, and what steps they need to complete; helpful in tracking task progress as the project moves forward, or in identifying at-risk items.
Hourly Schedule
Simple template with timeband in hours and layout that accommodates overlapping items; useful in creating 24-hour schedules, such as training and class schedules, it can also be used for visualizing plans that take less than 60 minutes or span over multiple hours.
Graphic Chart
Visual timeline template with multi-shaped and -colored milestones to easily create high-level graphic charts that are simple to understand by audiences.
Project Budget
Budget-and-timeline template displaying the major phases and tasks of a project, each accompanied by their duration, cost estimation and budget utilization (%).
Incident Response Plan
Free, downloadable timeline graphic using hours and minutes to give a clear overview on how an organization needs to plan its reaction to incidents so that outage be limited and activity resumed as soon as possible.
Marketing Plan
Free marketing timeline model that, once customized, effectively outlines your overall marketing strategy and serves as a solid visual aid to support marketing plan presentations.
1-Year Plan
Clear timeline sample for outlining the objectives of a business that operates on an annual rhythm, or of a plan that spans over 12 months or less.
Event Planning Timeline
Simple timeline model showing all the major deadlines on a single summary slide, acting as a useful resource for event planners who are managing teams and vendors.
Milestone Chart
Milestone chart sample that focuses on the main sequence of events, targets and objectives that need to be achieved throughout a project’s lifecycle, from which planners can build more comprehensive plans.
5-Year Plan
Easy-to-understand timeline template that helps summarize long-term plans and illustrate the stages, milestones and resources needed to deliver a 5-year project.
Task List
Swimlane-based timeline sample that helps better organize and track tasks across departments and teams, highlighting the impact of changes on other stages of the project.
Action Plan
Flexible timeline example structured into 3 generic process stages set against an adjustable timeline backdrop, complete with fully customizable milestones.
Project Overview
Timeline example with multi-colored and diversely shaped objects to represent tasks and milestones and ensure a clear structure and layout to any project presentation, helping business professionals present the management framework for their project in a clear manner.
Business Plan
Clear, ready-made timeline sample with tasks well-delimited through three separate color codes and in-a-row layout to enable planners to create effective, one-page business plans that channel the audience’s attention to its most important aspects.
Criminal Investigation Timeline
Native PowerPoint timeline slide with a simple-to-follow layout of key facts that lawyers can use to create clear chronological, fact-based visual exhibits for their court arguments.
Daily Schedule
Template displayed graphically as an hourly Gantt chart, providing a simpler way of seeing and checking schedules at a glance.
Meeting Schedule
Meeting schedule template designed in a Gantt chart style to assist with the scheduling and organization of a meeting itinerary or agenda.
Legal Litigation Timeline
Native PowerPoint timeline sample that is easy to edit and share; designed to enable litigators exhibit their trial data and case information to the jury in a refreshing and easy-to-follow way.
Project Management
Intuitive timeline example created to help project managers plan and communicate their projects broadly. Illustrating critical tasks, milestones and general progress, it gives a clear overview at a glance.
Crisis Management Plan
Professionally-designed timeline example structured in swimlanes that covers all the steps and processes one needs to follow in a crisis management process, from when the crisis occurs to response, business continuity process, recovery, and review.
Program Plan
Color-coded timeline split into blocks to help program managers visually map multiple projects or phases with a complex program, thus giving a high-level and complete picture of their plans.
Work Plan
Planner timeline template chronologically illustrating the major milestones and key tasks of a project to make a high-level model of what work needs to be done.
Marketing Swimlanes Roadmap
Swimlane diagram example that provides a crisp, well-structured illustration of the tasks and milestones of your marketing campaign, according to the phase of the campaign to which they belong.
Court Timeline
Intuitive template with multi-colored milestones and simple formatting that lawyers and legal professionals can use to create compelling courtroom chronological visuals for trial presentations, such as opening arguments, witness examination or closing statements.
Weekly Work Schedule
Simple-to-communicate PowerPoint slide that can be used for a variety of scenarios, from simplifying staffing timetables or coverage charts, to creating weekly agendas or shift schedules.
Blank Timeline
Generic timeline example that can be easily customized to quickly make an impressive, high-level summary of important events in a chronological order.
What is a project timeline template?
A project timeline template is a pre-made model of a horizontal bar chart that you can customize with your own data to chronologically display the events and activities involved in a project. Providing you with a predefined structure for your tasks and milestones, a project timeline template will simplify the work of creating a clear schedule of your project.
Does Office have a timeline template?
Yes, Microsoft Office does offer several basic timeline templates within its suite of programs (MS Word, Excel, PowerPoint). However, these timeline templates can prove limited or unsuited for bigger and more complex projects.
If you want to learn how to make a timeline using Microsoft Office tools, we’ve put together a whole collection of free tutorials to help you get started.
Is there a timeline template for PowerPoint?
As part of the MS Office suite of programs, PowerPoint does provide a few simple types of graphics and charts that users can manually format and adjust to create a basic timeline.
However, manually building timelines in PowerPoint is not only time-consuming, but also frustrating when it comes to updating the visual. To help you save time and effort, we’ve created this collection of free PowerPoint timeline templates that you can download and easily customize for your specific purposes.
You can modify any of these project timeline templates manually or automatically, after you install the free timeline maker add-in for PowerPoint called Office Timeline. The add-in will automate the entire process of creating, updating and customizing a timeline chart. You also get access to additional professionally-designed project timeline templates right inside the presentation platform.
Updating your template is simple and fast.
Use the Office Timeline PowerPoint add-in to quickly update any of these timeline templates or create your own project visuals. Easily change the texts, dates, colors, shapes and styles of your timeline, right from inside PowerPoint.
Excel for Microsoft 365 Word for Microsoft 365 Outlook for Microsoft 365 PowerPoint for Microsoft 365 Excel for Microsoft 365 for Mac Word for Microsoft 365 for Mac Outlook for Microsoft 365 for Mac Excel 2021 Word 2021 Outlook 2021 PowerPoint 2021 Excel 2021 for Mac Word 2021 for Mac Outlook 2021 for Mac PowerPoint 2021 for Mac Excel 2019 Word 2019 Outlook 2019 PowerPoint 2019 Excel 2019 for Mac Word 2019 for Mac Outlook 2019 for Mac PowerPoint 2019 for Mac Excel 2016 Word 2016 Outlook 2016 PowerPoint 2016 Excel 2016 for Mac Word 2016 for Mac Outlook 2016 for Mac PowerPoint 2016 for Mac Excel 2013 Word 2013 Outlook 2013 PowerPoint 2013 Excel 2010 Word 2010 Outlook 2010 PowerPoint 2010 Excel 2007 Word 2007 Outlook 2007 PowerPoint 2007 More. Less
If you want to create a graphical representation of a sequence of events, such as the milestones in a project or the main events of a person's life, you can use a SmartArt graphic timeline. After you create the timeline, you can add more dates, move dates, change layouts and colors, and apply different styles.

Create a timeline
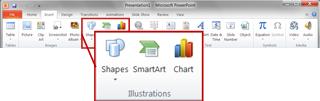
On the Insert tab, click SmartArt.

In the Choose a SmartArt Graphic gallery, click Process, and then double-click a timeline layout.
Tip: There are two timeline SmartArt graphics: Basic timeline and Circle Accent Timeline, but you can also use almost any process-related SmartArt graphic.

Click [Text], and then type or paste your text in the SmartArt graphic.
Note: You can also open the Text Pane and type your text there. If you do not see the Text Pane, on the SmartArt ToolsDesign tab, click Text Pane.
Click a shape in the timeline.

On the SmartArt ToolsDesign tab, do one of the following:
To add an earlier date, click Add Shape, and then click Add Shape Before.
To add a later date, click Add Shape, and then click Add Shape After.

In the new date box, type the date that you want.
On the timeline, click the date you want to move.

On the SmartArt ToolsDesign tab, do one of the following:
To move a date sooner than the selected date, click Move Up.
To move a date later than the selected date, click Move Down.

Click the SmartArt graphic timeline.

On the SmartArt ToolsDesign tab, in the Layouts group, click More .
Note: To view only the timeline and process-related layouts, at the bottom of the layouts list, click More Layouts, and then click Process.
Pick a timeline or process-related SmartArt graphic, like the following:
To show progression in a timeline, click Accent Process.
To create a timeline with pictures or photos, click Continuous Picture List. The circular shapes are designed to contain pictures.
Click the SmartArt graphic timeline.
On the SmartArt ToolsDesign tab, click Change Colors.
Note: If you don't see the SmartArt ToolsDesign tab, make sure you’ve selected the timeline.
Click the color combination that you want.
Tip: Place your pointer over any combination to see a preview of how the colors look in your timeline.
A SmartArt style applies a combination of effects, such as line style, bevel, or 3-D perspective, in one click, to give your timeline a professionally polished look.
Click the timeline.
On the SmartArt ToolsDesign tab, click the style you want.

Tip: For more styles, click More , in the lower right corner of the Styles box.
See also
Create a timeline
On the Insert tab, in the Illustrations group, click SmartArt.
In the Choose a SmartArt Graphic gallery, click Process, and then double-click a timeline layout (such as Basic Timeline).
To enter your text, do one of the following:
Click [Text] in the Text pane, and then type your text.
Copy text from another location or program, click [Text] in the Text pane, and then paste your text.
Note: If the Text pane is not visible, click the control.
Click in an entry in the SmartArt graphic, and then type your text.
Note: For best results, use this option after you add all of the entries that you want.
Other timeline tasks
Click the SmartArt graphic that you want to add another entry to.
Click the existing entry that is located closest to where you want to add the new entry.
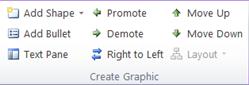
Under SmartArt Tools, on the Design tab, in the Create Graphic group, click the arrow next to Add Shape.
If you don't see the SmartArt Tools or Design tabs, make sure that you've selected the SmartArt graphic. You might have to double-click the SmartArt graphic to open the Design tab.
Do one of the following:
To insert an entry after the selected entry, click Add Shape After.
To insert an entry before the selected entry, click Add Shape Before.
To delete an entry from your timeline, do one of the following:
In the SmartArt graphic, select the text for the textbox for the entry that you want to delete, and then press DELETE.
In the Text pane, select the all of the text for the entry that you want to delete, and then press DELETE.
To add a shape from the Text pane:
At the shape level, place your cursor at the end of the text where you want to add a new shape.
Press ENTER, and then type the text that you want in your new shape.
In the text pane, select the entry that you want to move.
Do one of the following:
To move the entry to an earlier date, under SmartArt Tools, on the Design tab, in the Create Graphic group, click Move Up.
To move the entry to a later date, under SmartArt Tools, on the Design tab, in the Create Graphic group, click Move Down.
If you don't see the SmartArt Tools or Design tabs, make sure that you've selected the SmartArt graphic. You might have to double-click the SmartArt graphic to open the Design tab.
Right-click the timeline that you want to change, and then click Change Layout.
Click Process, and then do one of the following:
For a simple but effective timeline, click Basic Timeline.
To show a progression, a timeline, or sequential steps in a task, process, or workflow, click Accent Process.
To illustrate a timeline with pictures or photos, click Continuous Picture List. The circular shapes are designed to contain pictures.
Note: You can also change the layout of your SmartArt graphic by clicking a layout option in the Layouts group on the Design tab under SmartArt Tools. When you point to a layout option, your SmartArt graphic changes to show you a preview of how it would look with that layout.
To quickly add a designer-quality look and polish to your SmartArt graphic, you can change the colors or apply a style to your timeline. You can also add effects, such as glows, soft edges, or 3-D effects. Using Microsoft PowerPoint 2010, you can also animate your timeline.
You can apply color combinations that are derived from the theme colors to the entries in your SmartArt graphic.
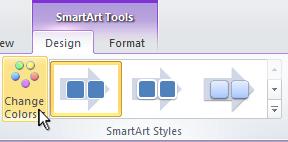
Click the SmartArt graphic whose color you want to change.
Under SmartArt Tools, on the Design tab, in the SmartArt Styles group, click Change Colors.
If you don't see the SmartArt Tools or Design tabs, make sure that you've selected the SmartArt graphic.
Click the color combination that you want.
Tip: When you place your pointer over a thumbnail, you can see how the colors affect your SmartArt graphic.
In the SmartArt graphic, right-click the border of the entry you want to change, and then click Format Shape.
To change the color of the entry's border, click Line Color, click Color , and then click the color that you want.
To change the style of the entry's border, click Line Style, and then choose the line styles you want.
Click the SmartArt graphic you want to change.
Right-click the border of an entry, and then click Format Shape.
Click Fill, and then click Solid fill.
Click Color , and then click the color that you want.
To change the background to a color that is not in the theme colors, click More Colors, and then either click the color that you want on the Standard tab, or mix your own color on the Custom tab. Custom colors and colors on the Standard tab are not updated if you later change the document theme.
To specify how much you can see through the background color, move the Transparency slider, or enter a number in the box next to the slider. You can vary the percentage of transparency from 0% (fully opaque, the default setting) to 100% (fully transparent).
A SmartArt Style is a combination of various effects, such as line style, bevel, or 3-D perspective that you can apply to the entries in your SmartArt graphic to create a unique and professionally-designed look.
Click the SmartArt graphic you want to change.
Under SmartArt Tools, on the Design tab, in the SmartArt Styles group, click the SmartArt Style that you want.

To see more SmartArt Styles, click the More button .
Note: When you place your pointer over a thumbnail, you can see how the SmartArt Style affects your SmartArt graphic.

Microsoft Word allows users to build a basic timeline that they can manually customize and adjust to their project’s requirements. However, since the tool is designed mainly for editing copy, it may lack the flexibility that one needs to create more professional-looking visuals and update them easily.
Those who need to constantly create and update project visuals for presentations to clients or executives may find it easier to build their timelines using PowerPoint. On this page, we will show you how to make a timeline both manually in Word and automatically in PowerPoint.
Which tutorial would you like to see?

2 mins

30 mins
How to make a timeline in Word
1. Create a basic timeline.
Open a new Word document and change the page orientation from Portrait to Landscape, which will make room for more items to be placed on the timeline. To do so, go to the Layout tab on the Word ribbon and click on Orientation.

Select the Insert tab and click on the SmartArt button in the Illustrations section.
Select the Process category within the window that pops up and pick the graphic type that you want to use for your Word timeline. You have a variety of options to choose from, but for a simple timeline that shows the main milestones of a project, we’d recommend going with the Basic Timeline, which you can see bordered below.

If you want to try out different layouts for your timeline, you can always change the style and colors from the SmartArt Design tab on the ribbon.
2. Enter your data.
Once Word has generated your basic timeline, open the Text Pane by clicking on whichever of the two areas bordered in the image below. You’ll find that updating the default graphic is much easier this way than entering your data directly in the input fields on the timeline.

Enter your milestone dates and descriptions inside the Text Pane - the graphic will be automatically updated. To show a milestone’s date below or above its description, you can insert a line break using Shift + Enter.

Note: Since Word is not able to automatically calculate time intervals between milestone dates, your milestones will be placed at equal distances on the timeline regardless of the number of days between them. You have the option of manually dragging them closer or farther from one another, but the graphic will get distorted as you add more items. This is why we recommend leaving them as they are.
To insert extra events or deliverables on your timeline, simply press Enter after an existing milestone label inside the Text Pane. The more events you add, the more the text size will shrink. This is why a maximum of 7 milestones is recommended to make sure that your data remains legible.

Note: Manually increasing the text size for improved readability may ruin the entire layout of your timeline. A better alternative would be for you to expand the graphic box, which will automatically make the texts larger too.
3. Customize your timeline.
Now that your basic timeline is outlined, you can customize its overall look by changing its primary color theme from the Change Colors dropdown menu or by selecting a different style from the SmartArt Styles section. In our example, we applied the Intense Effect style, which made the milestone shapes more prominent.

To customize individual items on the timeline, use the formatting options available in the small window that appears once you right-click on the specific element you want to personalize. For example, you can change the color of a milestone or of the arrow-shaped band using Shape Fill, and that of the text using Font Color.

Next, you can use Drag & Drop to decrease the width of the arrow shape and move the circles a little higher or lower on the timeline to position them closer to their corresponding descriptions. This should make it easier for your audience to follow the succession of milestones.

Finally, to make certain milestones stand out even more, you can also resize them or change their shape using the options in the Format tab. Select more items at once by pressing and holding the Ctrl key while you click on the needed items.

After experimenting with several shape and size options, our MS Word timeline looks like this:

How to make a timeline in PowerPoint automatically
Apart from being time-consuming, manually creating a timeline in Word may also get frustrating if you want to apply custom changes or need to regularly update the visuals for important presentations.
PowerPoint is better suited than MS Word for building visuals to present in client meetings or executive reviews. Below, we will demonstrate how to automatically create and update your graphic using a simple add-in for PowerPoint called Office Timeline. To get started, you first need to install Office Timeline, which will add a timeline maker tab to the PowerPoint ribbon.
1. Open PowerPoint and enter your data into the Office Timeline Wizard.
Go to the Office Timeline tab you’ll see on the PowerPoint ribbon and click on New.

You will be taken to a gallery where you can choose from a variety of styles and templates that you can use for your timeline.

Double-click on the template or style you prefer and then select Use Template in the preview window to open the Data Entry Wizard. For our example, we chose a custom template made earlier, which you can download here.

In the Data Entry window, you can either manually enter your milestones and set their dates, or you can copy and paste them from an existing Excel file. This is also a good place to start making a few quick customizations, such as changing the color or shape of each item you’ve added. Once you finish, click the Create button.

2. A new timeline slide will be instantly generated in PowerPoint.
Depending on your template choice and the customizations you make, your timeline can look similar to this:

Once you’ve built your timeline, you can easily restyle or update it automatically using Office Timeline. For instance, you can change the color, position and date format of any milestone or add new ones on the fly as your plans change, or you can insert tasks as well to create a Gantt chart.
Download auto-generated timeline slide
For more information on how to make timelines using other office or Google tools, check out our comprehensive tutorials.

Microsoft PowerPoint enables users to create a basic timeline that they can manually adjust and restyle to fit their needs. The result is a simple graphic fit for presentations to clients or executives, but not quite flexible enough for those who need to show more accurate details or update the timeline regularly.
If you need to regularly create and update timeline slides for high-level presentations, a simple and fast solution would be to use a timeline maker for PowerPoint that automates the process. On this page, you will see both the manual and the automatic way to make a timeline in PowerPoint.
Which tutorial would you like to see?

2 mins

30 mins
How to manually make a timeline in PowerPoint
1. Create a basic timeline graphic.
If you prefer to manually build a PowerPoint timeline, you will need to use PowerPoint's SmartArt tools to create a basic visual and then adjust that graphic to make it look better for presentations. Here are the exact steps:
Create a new presentation or open an existing one and add a new blank slide.

Go to the Insert tab on the PowerPoint ribbon and click on the SmartArt button in the Illustrations section.
In the window that pops up, select the Process category, where you will find a variety of graphic options to choose from for your PowerPoint timeline. For a simple graphic that clearly shows the key events or milestones of a project, we’d recommend choosing the Basic Timeline.

You can change the style at any time from the SmartArt Tools Design tab on the ribbon if you want to try out different layouts for your graphic.
2. Add your data.
The default graphic generated by PowerPoint will have placeholder text and only 3 milestones. You can insert your own data directly on the graphic by typing inside the [Text] boxes on the slide, but adding new milestones or events besides the 3 default ones can become a little tricky this way. That’s why we’d recommend using the Text Pane instead, as it’s faster and it allows you to easily add extra milestones to your PowerPoint timeline. Here’s how it works:
If the Text Pane is not already visible, click on the small icon right on the left of your timeline arrow to open it.

Here, type in your milestone dates and descriptions, and PowerPoint will automatically update the graphic. Press Shift + Enter to insert a line break and show the date and description of a milestone one below the other.

Note: You’ll notice that PowerPoint places your milestones equidistant on the timeline, regardless of the relative distance between their dates. This is because the tool “reads” the dates you enter as plain text, so it can’t calculate the number of days between two milestones. You can manually drag milestones closer to or farther away from each other, but as you add more items on the timeline, the layout will get distorted. That’s why we’d recommend leaving them as they are.
To add more milestones to your PowerPoint timeline, simply press Enter after an existing item in the Text Pane and insert your data. You’ll notice that PowerPoint automatically shrinks the text size the more events you add to your timeline. To ensure your data remains easy to read, it would be safe to keep a maximum of 5 to 7 milestones.

When building your PowerPoint timeline, you may be tempted to manually increase the size of the text for improved legibility. We would suggest avoiding that because it tends to ruin the whole layout. Instead, you can expand the size of the graphic box as we did above, and PowerPoint will automatically make the milestone descriptions larger too.
3. Customize your timeline.
Now you can apply some styling choices if you want to make your PowerPoint timeline look more unique.
To customize the overall look of your timeline, you can change the SmartArt Styles and color palettes from the SmartArt Design tab on the ribbon. In our example, we chose a darker color scheme from the Change Colors dropdown and selected the Intense Effect option from the Styles menu to make the milestone circles stand out a bit better.

While the SmartArt functions apply to the whole graphic, you can also customize individual items to make a more unique PowerPoint timeline. To do this quickly, right-click on any item and use the formatting options that pop up to restyle it. For instance, you can use Shape Fill to make specific milestones stand out or change the dates’ Font Color to differentiate them better from the milestone descriptions.

Now, to make the milestones easier to follow, you can use drag & drop to slightly narrow the arrow shape and move the circles closer to their corresponding descriptions. It may take a while to find the ideal positioning, but it will help guide your audience’s eye when looking at your timeline in PowerPoint.

Finally, you can also play with the milestones’ sizes and shapes to get a more unique visual or draw attention to key data. To do so, select the objects you wish to customize and, using the options in the Format tab, you can resize them quickly or switch to other shapes.

After testing more shapes and sizes using the Format tab, our timeline now looks like this:

That’s it – these were the steps to manually making a timeline in PowerPoint. If you’d like to use the timeline created in this guide as a template to help you move faster, you can download the slide below, free of charge.
Download manual timeline slide
How to make a timeline in PowerPoint automatically
Manually creating and managing a timeline in PowerPoint is not only time-consuming but can also get quite frustrating if you want to make custom changes or updates to the visual.
In the steps below, we will show you how to quickly build, customize and update your graphic using Office Timeline, a lightweight PowerPoint timeline maker add-in that automates the whole process. To begin, you will need to install Office Timeline, which will add a new tab to the PowerPoint ribbon.
1. Open PowerPoint and insert your data into the Office Timeline wizard.
Inside PowerPoint, go to the Office Timeline tab, and then click on the New icon.

This will open a gallery that provides a variety of styles and templates you can choose from for making a timeline in PowerPoint.

To select your preferred template or style from the gallery, double-click it and then click Use Template in the preview window to open the Data Entry Wizard. In this example, we will be using a custom PowerPoint timeline template we made earlier, which is available for download at the end of this tutorial.

Now enter your milestones and set their dates, or copy & paste an existing schedule from Excel to save time. You can also make a few quick styling choices here, such as changing the color or shape of each item. Once ready, click the green Create button.

2. Instantly, you will have a new timeline slide in PowerPoint.
Depending on the style or template you’ve selected, you will get a PowerPoint timeline that looks similar to this:

Once created, the timeline can be easily styled further or updated automatically using Office Timeline. For example, you can instantly change colors, shapes, and positions, switch the timescale from months to quarters, add tasks or swimlanes for a more complex visual, or adjust dates on the fly as your plans change.

Одна картинка стоит тысячи слов. Когда дело доходит до изображения маршрута, расписания, плана проекта или другой последовательности событий или этапов, использование графика времени намного эффективнее, чем простой текст. Microsoft Word предлагает встроенные инструменты и макеты, созданные специально для этой цели, позволяя вам составить график с минимальными усилиями.
Приведенные ниже учебные пособия предназначены для Word для Office 365, Word 2019, Word 2016 и Word 2013. В Word Online нельзя создавать временные шкалы.
Как создать временную шкалу в Word для Windows
Чтобы начать, сначала откройте новый документ Word или продолжите работу в уже существующем.
Выберите « Вставка» > « SmartArt» .
Должен открыться новый интерфейс, перекрывающий главное окно Word и помеченный «Выберите рисунок SmartArt».
Выберите « Обработка» в левой части меню, затем выберите один из предлагаемых типов шкалы времени. Если это ваша первая попытка создания временной шкалы в Word, выберите « Основная временная шкала» .

Как только вы освоитесь, вы можете попробовать что-то более продвинутое, например, Circle Accent Timeline.
Выберите ОК . Шаблон временной шкалы должен быть вставлен в ваш документ вместе с плавающим интерфейсом SmartArt Text, теперь сопровождающим главное окно Word.
Выберите любое из полей с надписью «Текст» в этом плавающем интерфейсе и введите или вставьте словоблудие, которое вы хотите добавить в соответствующий раздел, каждое из которых подсвечивается при выборе его значения.

На приведенном выше снимке экрана мы изменили три метки по умолчанию: «Бета-версия», «Этап тестирования» и «Запуск производства» для имитации графика разработки программного обеспечения.
Чтобы добавить дополнительные элементы в вашу временную шкалу, нажмите Enter в любом из текстовых полей в плавающем интерфейсе, чтобы создать новую строку. Чтобы удалить элемент, просто удалите всю строку, связанную с ним в этом интерфейсе.
По умолчанию все элементы временной шкалы отображаются на самом верхнем уровне с точки зрения иерархии, что делает каждый основной или родительский этап. Вы также можете понизить (или продвинуть) элемент временной шкалы, чтобы он стал промежуточным этапом. Просто щелкните правой кнопкой мыши и выберите разжаловать или поощрять .
Чтобы переместить элемент на более раннюю или более позднюю шкалу времени, щелкните его правой кнопкой мыши и выберите « Вверх» или « Вниз» .
Как создать временную шкалу в Word для MacOS
Откройте новый документ Word или продолжите работу в уже существующем.
Нажмите « Вставка» > « SmartArt» или « Вставить рисунок SmartArt» , в зависимости от версии Word.
Нажмите « Обработка» и выберите один из предложенных типов шкалы времени. Если это ваша первая попытка создания временной шкалы в Word, выберите « Основная временная шкала» .

Как только вы почувствуете себя комфортно, вы можете попробовать что-то более продвинутое, например, Circle Accent Timeline.
Шаблон временной шкалы должен быть вставлен в ваш документ вместе с плавающим интерфейсом SmartArt Text, теперь сопровождающим главное окно Word.
Выберите любое из полей с надписью «Текст» в этом плавающем интерфейсе и введите или вставьте словоблудие, которое вы хотите добавить в соответствующий раздел, каждое из которых подсвечивается при щелчке по его значению.

На приведенном выше снимке экрана мы изменили три метки по умолчанию: «Бета-версия», «Этап тестирования» и «Запуск производства» для имитации графика разработки программного обеспечения.
Чтобы добавить или удалить элементы из временной шкалы, выберите « Плюс» (зеленый) или « Минус» (красный) в текстовом интерфейсе SmartArt.
По умолчанию все элементы временной шкалы отображаются на самом верхнем уровне с точки зрения иерархии, что делает каждый основной или родительский этап. Вы можете понизить (или продвинуть) элемент временной шкалы, чтобы он стал промежуточным этапом. Нажмите на нее, затем нажмите стрелку вправо (Понижение) или стрелку влево (Повышение) на панели инструментов Текст SmartArt.
Чтобы переместить элемент на более раннюю или более позднюю шкалу времени, нажмите зеленые стрелки « Вверх» или « Вниз» .
Как использовать другой макет временной шкалы
Теперь, когда ваша временная шкала установлена, возможно, вы захотите перейти на другой макет.
Изменения макета не должны быть постоянными, поэтому не стесняйтесь экспериментировать, выбирая различные варианты и определяя, подходит ли он для вашей конкретной временной шкалы.
В macOS выберите вашу временную шкалу, чтобы она была выделена, а раздел SmartArt Design активирован на главной панели инструментов Word. В Windows щелкните правой кнопкой мыши на временной шкале и выберите « Макет» .
Будет отображено несколько миниатюрных изображений, представляющих доступную временную шкалу и макеты процесса. Чтобы просмотреть больше, нажмите соответствующие стрелки влево и вправо в macOS или прокрутите вниз в Windows.
Чтобы увидеть, как ваша временная шкала будет выглядеть в определенном макете, выберите ее один раз, и ее содержимое будет мгновенно изменено в соответствии с новым форматом. Чтобы в любой момент вернуться к исходному макету, выберите эскиз « Основная временная шкала» .
Как изменить цветовую схему вашей временной шкалы
После того, как вы выбрали содержимое и расположение вашей временной шкалы, пришло время настроить ее цвета.
Подобно изменениям макета, цветовые схемы применяются немедленно, но их можно легко отменить одним щелчком мыши, чтобы вы могли опробовать несколько цветов, пока не найдете идеальное соответствие.
В macOS выберите вашу временную шкалу, чтобы она была выделена, а раздел SmartArt Design активирован на панели инструментов Word. В Windows щелкните правой кнопкой мыши, чтобы появилось контекстное меню.
В macOS выберите « Изменить цвета» на панели инструментов. В Windows выберите Цвет .
Теперь должно появиться всплывающее окно, содержащее десятки миниатюрных изображений, каждое из которых имеет свою цветовую схему. Чтобы сразу применить один к вашей временной шкале, просто выберите его изображение предварительного просмотра.
Вы можете заметить параметр, расположенный в нижней части интерфейса «Изменить цвета» с пометкой «Перекрасить картинки в SmartArt Graphic». Это применимо только к макетам, содержащим изображения, поэтому не влияет на вашу временную шкалу и может быть проигнорировано.
Обновление вашей временной шкалы с помощью стилей SmartArt
В дополнение к изменению макета и цветовой схемы вашей временной шкалы Word также предлагает предварительно определенные стили SmartArt, которые могут еще больше улучшить визуальные эффекты с помощью различных стилей линий, трехмерных индикаторов вехи и многого другого.
Чтобы применить стиль SmartArt, в macOS щелкните свою временную шкалу, чтобы отобразился раздел «Дизайн SmartArt»; в Windows щелкните правой кнопкой мыши на временной шкале и выберите значок « Стиль» .
Оттуда выберите одно из нескольких миниатюрных изображений, которые находятся в правой части панели инструментов Word в macOS, или наложите временную шкалу в Windows, чтобы увидеть, как соответствующий стиль выглядит при применении.
Как и в случае с макетами и цветовыми схемами, эти изменения происходят мгновенно, но их также можно отменить, выбрав оригинальный стиль в любое время.
Читайте также: