
Как установить с в visual studio 2015
Распространяемые пакеты Microsoft Visual C++ (Visual C++ Redistributable) содержат необходимые компоненты для запуска игр и программ, разработанных с помощью соответствующих версий Visual Studio и, как правило, нужны при ошибках вида «Запуск программы невозможен» так как файлы DLL с названиями, начинающимися с msvcr или msvcp отсутствуют на компьютере. Чаще всего требуются компоненты Visual Studio 2012, 2013 и 2015, но есть возможность загрузки и установки распространяемых пакетов Visual C++ 2005-2019.
В этой статье вы узнаете, как скачать распространяемые пакеты Visual C++ с сайта Майкрософт
Далее в инструкции способы скачать распространяемые компоненты Visual C++ для Windows 10, 8.1 и Windows 7, x64 и x86 (32-бит) официальным способом с сайта Майкрософт и путем установки из стороннего источника, о проблемах, с которыми можно столкнуться при установке и дополнительная информация, которая может оказаться полезной.
Загрузка распространяемых пакетов Visual C++ с сайта Майкрософт
Первый из способов скачать компоненты Visual C++ — официальный и, соответственно, самый безопасный. Для загрузки доступны следующие компоненты (при этом некоторые из них можно загрузить разными способами).
- Visual Studio 2015-2019 — при установке этого набора устанавливаются все необходимые компоненты Visual C++ 2015, 2017 и 2019 в рамках одного файла установщика.
- Visual Studio 2013 (Visual C++ 12.0)
- Visual Studio 2012 (Visual C++ 11.0)
- Visual Studio 2010 SP1
- Visual Studio 2008 SP1
Важно: если вы загружаете библиотеки для исправления ошибок при запуске игр и программ (DLL отсутствует), а ваша система — 64-разрядная, следует скачать и установить как x86 компоненты (для 32-бит), так и x64 версии, так как многим программам для запуска нужны библиотеки 32-бит (x86) даже в x64 Windows 10, 8.1 и Windows 7.
Порядок загрузки компонентов будет следующим:
Также на сайте Майкрософт доступны отдельные страницы для загрузки распространяемых пакетов Microsoft Visual C++ список таких страниц далее:
После скачивания нужных компонентов Visual C++, запускаем загруженные файлы и проходим весь процесс установки.
If you haven't downloaded and installed Visual Studio and the Microsoft C/C++ tools yet, here's how to get started.
Visual Studio 2022 Installation
Welcome to Visual Studio 2022! In this version, it's easy to choose and install just the features you need. And because of its reduced minimum footprint, it installs quickly and with less system impact.
Want to know more about what else is new in this version? See the Visual Studio release notes.
Ready to install? We'll walk you through it, step-by-step.
Step 1 - Make sure your computer is ready for Visual Studio
Before you begin installing Visual Studio:
Check the system requirements. These requirements help you know whether your computer supports Visual Studio 2022.
Apply the latest Windows updates. These updates ensure that your computer has both the latest security updates and the required system components for Visual Studio.
Reboot. The reboot ensures that any pending installs or updates don't hinder the Visual Studio install.
Free up space. Remove unneeded files and applications from your %SystemDrive% by, for example, running the Disk Cleanup app.
For questions about running previous versions of Visual Studio side by side with Visual Studio 2022, see the Visual Studio 2022 Platform Targeting and Compatibility page.
Step 2 - Download Visual Studio
Next, download the Visual Studio bootstrapper file. To do so, choose the following button to go to the Visual Studio download page. Select the edition of Visual Studio that you want and choose the Free trial or Free download button.
Step 3 - Install the Visual Studio installer
Run the bootstrapper file you downloaded to install the Visual Studio Installer. This new lightweight installer includes everything you need to both install and customize Visual Studio.
From your Downloads folder, double-click the bootstrapper that matches or is similar to one of the following files:
- vs_community.exe for Visual Studio Community
- vs_professional.exe for Visual Studio Professional
- vs_enterprise.exe for Visual Studio Enterprise
If you receive a User Account Control notice, choose Yes to allow the bootstrapper to run.
We'll ask you to acknowledge the Microsoft License Terms and the Microsoft Privacy Statement. Choose Continue.
Step 4 - Choose workloads
After the installer is installed, you can use it to customize your installation by selecting the workloads, or feature sets, that you want. Here's how.
Find the workload you want in the Installing Visual Studio screen.

For core C and C++ support, choose the "Desktop development with C++" workload. It comes with the default core editor, which includes basic code editing support for over 20 languages, the ability to open and edit code from any folder without requiring a project, and integrated source code control.
Additional workloads support other kinds of development. For example, choose the "Universal Windows Platform development" workload to create apps that use the Windows Runtime for the Microsoft Store. Choose "Game development with C++" to create games that use DirectX, Unreal, and Cocos2d. Choose "Linux development with C++" to target Linux platforms, including IoT development.
The Installation details pane lists the included and optional components installed by each workload. You can select or deselect optional components in this list. For example, to support development by using the Visual Studio 2017 or 2015 compiler toolsets, choose the MSVC v141 or MSVC v140 optional components. You can add support for MFC, the experimental Modules language extension, IncrediBuild, and more.
After you choose the workload(s) and optional components you want, choose Install.
Next, status screens appear that show the progress of your Visual Studio installation.
At any time after installation, you can install workloads or components that you didn't install initially. If you have Visual Studio open, go to Tools > Get Tools and Features. which opens the Visual Studio Installer. Or, open Visual Studio Installer from the Start menu. From there, you can choose the workloads or components that you wish to install. Then, choose Modify.
Step 5 - Choose individual components (Optional)
If you don't want to use the Workloads feature to customize your Visual Studio installation, or you want to add more components than a workload installs, you can do so by installing or adding individual components from the Individual components tab. Choose what you want, and then follow the prompts.
Step 6 - Install language packs (Optional)
By default, the installer program tries to match the language of the operating system when it runs for the first time. To install Visual Studio in a language of your choosing, choose the Language packs tab from the Visual Studio Installer, and then follow the prompts.

Change the installer language from the command line
Another way that you can change the default language is by running the installer from the command line. For example, you can force the installer to run in English by using the following command: vs_installer.exe --locale en-US . The installer will remember this setting when it's run the next time. The installer supports the following language tokens: zh-cn, zh-tw, cs-cz, en-us, es-es, fr-fr, de-de, it-it, ja-jp, ko-kr, pl-pl, pt-br, ru-ru, and tr-tr.
Step 7 - Change the installation location (Optional)
You can reduce the installation footprint of Visual Studio on your system drive. You can choose to move the download cache, shared components, SDKs, and tools to different drives, and keep Visual Studio on the drive that runs it the fastest.
You can select a different drive only when you first install Visual Studio. If you've already installed it and want to change drives, you must uninstall Visual Studio and then reinstall it.
Step 8 - Start developing
After Visual Studio installation is complete, choose the Launch button to get started developing with Visual Studio.
On the start window, choose Create a new project.
In the search box, enter the type of app you want to create to see a list of available templates. The list of templates depends on the workload(s) that you chose during installation. To see different templates, choose different workloads.
You can also filter your search for a specific programming language by using the Language drop-down list. You can filter by using the Platform list and the Project type list, too.
Visual Studio opens your new project, and you're ready to code!
Visual Studio 2019 Installation
Welcome to Visual Studio 2019! In this version, it's easy to choose and install just the features you need. And because of its reduced minimum footprint, it installs quickly and with less system impact.
Want to know more about what else is new in this version? See the Visual Studio release notes.
Ready to install? We'll walk you through it, step-by-step.
Step 1 - Make sure your computer is ready for Visual Studio
Before you begin installing Visual Studio:
Check the system requirements. These requirements help you know whether your computer supports Visual Studio 2019.
Apply the latest Windows updates. These updates ensure that your computer has both the latest security updates and the required system components for Visual Studio.
Reboot. The reboot ensures that any pending installs or updates don't hinder the Visual Studio install.
Free up space. Remove unneeded files and applications from your %SystemDrive% by, for example, running the Disk Cleanup app.
For questions about running previous versions of Visual Studio side by side with Visual Studio 2019, see the Visual Studio 2019 Platform Targeting and Compatibility page.
Step 2 - Download Visual Studio
Next, download the Visual Studio bootstrapper file. To do so, choose the following button to go to the Visual Studio download page. Choose the Download button, then you can select the edition of Visual Studio that you want.
Step 3 - Install the Visual Studio installer
Run the bootstrapper file you downloaded to install the Visual Studio Installer. This new lightweight installer includes everything you need to both install and customize Visual Studio.
From your Downloads folder, double-click the bootstrapper that matches or is similar to one of the following files:
- vs_community.exe for Visual Studio Community
- vs_professional.exe for Visual Studio Professional
- vs_enterprise.exe for Visual Studio Enterprise
If you receive a User Account Control notice, choose Yes to allow the bootstrapper to run.
We'll ask you to acknowledge the Microsoft License Terms and the Microsoft Privacy Statement. Choose Continue.
Step 4 - Choose workloads
After the installer is installed, you can use it to customize your installation by selecting the workloads, or feature sets, that you want. Here's how.
Find the workload you want in the Installing Visual Studio screen.

For core C and C++ support, choose the "Desktop development with C++" workload. It comes with the default core editor, which includes basic code editing support for over 20 languages, the ability to open and edit code from any folder without requiring a project, and integrated source code control.
Additional workloads support other kinds of development. For example, choose the "Universal Windows Platform development" workload to create apps that use the Windows Runtime for the Microsoft Store. Choose "Game development with C++" to create games that use DirectX, Unreal, and Cocos2d. Choose "Linux development with C++" to target Linux platforms, including IoT development.
The Installation details pane lists the included and optional components installed by each workload. You can select or deselect optional components in this list. For example, to support development by using the Visual Studio 2017 or 2015 compiler toolsets, choose the MSVC v141 or MSVC v140 optional components. You can add support for MFC, the experimental Modules language extension, IncrediBuild, and more.
After you choose the workload(s) and optional components you want, choose Install.
Next, status screens appear that show the progress of your Visual Studio installation.
At any time after installation, you can install workloads or components that you didn't install initially. If you have Visual Studio open, go to Tools > Get Tools and Features. which opens the Visual Studio Installer. Or, open Visual Studio Installer from the Start menu. From there, you can choose the workloads or components that you wish to install. Then, choose Modify.
Step 5 - Choose individual components (Optional)
If you don't want to use the Workloads feature to customize your Visual Studio installation, or you want to add more components than a workload installs, you can do so by installing or adding individual components from the Individual components tab. Choose what you want, and then follow the prompts.

Step 6 - Install language packs (Optional)
By default, the installer program tries to match the language of the operating system when it runs for the first time. To install Visual Studio in a language of your choosing, choose the Language packs tab from the Visual Studio Installer, and then follow the prompts.
Change the installer language from the command line
Another way that you can change the default language is by running the installer from the command line. For example, you can force the installer to run in English by using the following command: vs_installer.exe --locale en-US . The installer will remember this setting when it's run the next time. The installer supports the following language tokens: zh-cn, zh-tw, cs-cz, en-us, es-es, fr-fr, de-de, it-it, ja-jp, ko-kr, pl-pl, pt-br, ru-ru, and tr-tr.
Step 7 - Change the installation location (Optional)
You can reduce the installation footprint of Visual Studio on your system drive. You can choose to move the download cache, shared components, SDKs, and tools to different drives, and keep Visual Studio on the drive that runs it the fastest.

You can select a different drive only when you first install Visual Studio. If you've already installed it and want to change drives, you must uninstall Visual Studio and then reinstall it.
Step 8 - Start developing
After Visual Studio installation is complete, choose the Launch button to get started developing with Visual Studio.
On the start window, choose Create a new project.
In the search box, enter the type of app you want to create to see a list of available templates. The list of templates depends on the workload(s) that you chose during installation. To see different templates, choose different workloads.
You can also filter your search for a specific programming language by using the Language drop-down list. You can filter by using the Platform list and the Project type list, too.
Visual Studio opens your new project, and you're ready to code!
Visual Studio 2017 Installation
In Visual Studio 2017, it's easy to choose and install just the features you need. And because of its reduced minimum footprint, it installs quickly and with less system impact.
Prerequisites
A broadband internet connection. The Visual Studio installer can download several gigabytes of data.
A computer that runs Microsoft Windows 7 or later versions. We recommend the latest version of Windows for the best development experience. Make sure that the latest updates are applied to your system before you install Visual Studio.
Enough free disk space. Visual Studio requires at least 7 GB of disk space, and can take 50 GB or more if many common options are installed. We recommend you install it on your C: drive.
For details on the disk space and operating system requirements, see Visual Studio Product Family System Requirements. The installer reports how much disk space is required for the options you select.
Download and install
To download the latest Visual Studio 2017 installer for Windows, go to the Microsoft Visual Studio Older downloads page. Expand the 2017 section, and choose the Download button.
The Community edition is for individual developers, classroom learning, academic research, and open source development. For other uses, install Visual Studio 2017 Professional or Visual Studio 2017 Enterprise.
Find the installer file you downloaded and run it. The downloaded file may be displayed in your browser, or you may find it in your Downloads folder. The installer needs Administrator privileges to run. You may see a User Account Control dialog asking you to give permission to let the installer make changes to your system; choose Yes. If you're having trouble, find the downloaded file in File Explorer, right-click on the installer icon, and choose Run as Administrator from the context menu.
The installer presents you with a list of workloads, which are groups of related options for specific development areas. Support for C++ is now part of optional workloads that aren't installed by default.

For C and C++, select the Desktop development with C++ workload and then choose Install.
When the installation completes, choose the Launch button to start Visual Studio.
The first time you run Visual Studio, you're asked to sign in with a Microsoft Account. If you don't have one, you can create one for free. You must also choose a theme. Don't worry, you can change it later if you want to.
It may take Visual Studio several minutes to get ready for use the first time you run it. Here's what it looks like in a quick time-lapse:
Visual Studio starts much faster when you run it again.
When Visual Studio opens, check to see if the flag icon in the title bar is highlighted:

If it's highlighted, select it to open the Notifications window. If there are any updates available for Visual Studio, we recommend you install them now. Once the installation is complete, restart Visual Studio.
Visual Studio 2015 Installation
To install Visual Studio 2015, go to the Microsoft Visual Studio Older downloads page. Expand the 2015 section, and choose the Download button. Run the downloaded setup program and choose Custom installation and then choose the C++ component. To add C and C++ support to an existing Visual Studio 2015 installation, click on the Windows Start button and type Add Remove Programs. Open the program from the results list and then find your Visual Studio 2015 installation in the list of installed programs. Double-click it, then choose Modify and select the Visual C++ components to install.
In general, we highly recommend that you use the latest version of Visual Studio even if you need to compile your code using the Visual Studio 2015 compiler. For more information, see Use native multi-targeting in Visual Studio to build old projects.
When Visual Studio is running, you're ready to continue to the next step.
Вы находитесь здесь, так как ищете скачивание одного из файлов среды выполнения Visual C++? Перейдите на страницу последних поддерживаемых Распространяемый компонент Visual C++ скачивания.
Распространяемые файлы и лицензирование
При развертывании приложения необходимо также развернуть файлы, поддерживающие это приложение. Если какой-либо из этих файлов предоставляется корпорацией Майкрософт, проверьте, разрешено ли повторно распространять их. Вы найдете ссылку на условия лицензии Visual Studio в интегрированной среде разработки. Используйте ссылку "Условия лицензии" в диалоговом окне "О Microsoft Visual Studio". Также можно скачать соответствующие EULA и лицензии из каталога лицензий Visual Studio.
Чтобы просмотреть список REDIST, на который ссылается раздел "Распространяемый код" Visual Studio 2022 условия лицензионного соглашения на использование программного обеспечения Майкрософт, см. раздел "Файлы распространяемого кода" для Microsoft Visual Studio 2022 г.
Чтобы просмотреть список REDIST, на который ссылается раздел "Распространяемый код" условий лицензионного соглашения на Visual Studio 2019 г., см. раздел "Файлы распространяемого кода" для Microsoft Visual Studio 2019 г.
Чтобы просмотреть список REDIST, на который ссылается раздел "Распространяемый код" Visual Studio 2017 условий лицензионного соглашения на использование программного обеспечения Майкрософт, см. раздел "Файлы распространяемого кода" для Microsoft Visual Studio 2017 года.
Чтобы просмотреть список REDIST, на который ссылается раздел "Распространяемый код" Visual Studio 2015 условий лицензионного соглашения на использование программного обеспечения Майкрософт, см. раздел "Файлы распространяемого кода" для Microsoft Visual Studio 2015 года.
Дополнительные сведения о распространяемых файлах см. в разделе "Определение библиотек DLL для распространения и примеров развертывания".
Поиск распространяемых файлов
Для развертывания распространяемых файлов можно использовать распространяемые пакеты, установленные Visual Studio. В версиях Visual Studio с 2017 года эти файлы называются vc_redist.arm64.exe и vc_redist.x64.exe vc_redist.x86.exe . В Visual Studio 2015, 2017 и 2019 годах они также доступны под именами vcredist_x86.exe , vcredist_x64.exe и (только 2015). vcredist_arm.exe
Самый простой способ найти распространяемые файлы — использовать переменные среды, заданные в командной строке разработчика. В Visual Studio 2022 распространяемые файлы находятся в папке %VCINSTALLDIR%Redist\MSVC\v143 . В последней версии Visual Studio 2019 вы найдете распространяемые файлы в папке %VCINSTALLDIR%Redist\MSVC\v142 . В Visual Studio 2017 и Visual Studio 2019, они также находятся в %VCToolsRedistDir% . В Visual Studio 2015 эти файлы можно найти в %VCINSTALLDIR%redist\ расположении языкового стандарта распространяемых пакетов.
В Visual Studio 2022 и 2019 файлы модулей слияния являются частью дополнительно устанавливаемого компонента с именем распространяемых MSM версии> C++ в Visual Studio Installer. Модули слияния устанавливаются по умолчанию как часть установки C++ в Visual Studio 2017 и Visual Studio 2015. При установке в Visual Studio 2022 вы найдете распространяемые модули слияния в %VCINSTALLDIR%Redist\MSVC\v143\MergeModules . В последней версии Visual Studio 2019 распространяемые модули слияния находятся в %VCINSTALLDIR%Redist\MSVC\v142\MergeModules . В обоих Visual Studio 2019 и Visual Studio 2017 года они также находятся в %VCToolsRedistDir%MergeModules . В Visual Studio 2015 года они находятся в Program Files [(x86)]\Common Files\Merge Modules .
Установка распространяемых пакетов
Распространяемые пакеты Visual C++ позволяют устанавливать и регистрировать все библиотеки Visual C++. Если вы используете его, запустите его в качестве необходимого компонента в целевой системе перед установкой приложения. Рекомендуется использовать эти пакеты для развертываний, поскольку они включают функцию автоматического обновления библиотек Visual C++. Пример использования этих пакетов см. в разделе Пошаговое руководство. Развертывание приложения Visual C++ с помощью распространяемого пакета Visual C++.
Установка распространяемых модулей слияния
Модули слияния ( .msm файлы) для Распространяемый компонент Visual C++ файлов устарели. Мы не рекомендуем использовать их для развертывания приложений. Вместо этого рекомендуется централизованное развертывание пакета Распространяемый компонент Visual C++. Централизованное развертывание распространяемым пакетом позволяет корпорации Майкрософт обслуживать файлы библиотеки среды выполнения независимо. Кроме того, удаление приложения не может повлиять на другие приложения, которые также используют централизованное развертывание. При использовании распространяемого пакета для централизованного развертывания вы не несете ответственности за отслеживание и обслуживание библиотек среды выполнения. В противном случае обновление файлов библиотеки среды выполнения требует обновления и повторного развертывания установщика .msi . Ваше приложение может быть уязвимо к ошибкам или проблемам безопасности до тех пор, пока вы не сделаете это.
Распространяемые модули слияния должны быть включены в пакет установщика Windows (или аналогичный пакет установки), используемый для развертывания приложения. Дополнительные сведения см. в разделе "Распространение с помощью модулей слияния". Пример см. в пошаговом руководстве. Развертывание приложения Visual C++ с помощью проекта установки.
Установка отдельных распространяемых файлов
Также можно напрямую установить распространяемые библиотеки DLL в локальной папке приложения. Локальная папка приложения — это папка, содержащая исполняемый файл приложения. По соображениям обслуживания мы не рекомендуем использовать это расположение установки.
Потенциальные ошибки во время выполнения
Чтобы устранить эту ошибку, убедитесь, что установщик приложения выполняет сборку правильно. Убедитесь, что распространяемые библиотеки правильно развернуты в целевой системе. Дополнительные сведения см. в разделе Основные сведения о зависимостях приложения Visual C++.
Связанные статьи
Распространение с помощью модулей слияния
Описывает, как использовать модули слияния Распространяемый компонент Visual C++ для установки библиотек среды выполнения Visual C++ в качестве общих библиотек DLL в папке %windir%\system32\ .
Распространение элементов управления ActiveX в Visual C++
Описание процедуры повторного распространения приложения, которое использует элементы управления ActiveX.
Распространение библиотеки MFC
Описание процедуры повторного распространения приложения, которое использует MFC.
Повторное распространение приложения ATL
Описание способа распространения приложения, которое использует ATL. В Visual Studio 2012 и более поздних версиях библиотека ATL не требуется.
Примеры развертывания
Ссылки на примеры, демонстрирующие развертывание приложений Visual C++.
Развертывание классических приложений
Представлены технологии развертывания Visual C++ и связанные понятия.
Вы, наверное, уже знаете, что компания Microsoft выпустила новую версию среды программирования Visual Studio 2015, и сегодня, как я и обещал, мы подробно рассмотрим данную среду в редакции Community, а также установим ее на операционную систему Windows 7.
Примечание! Если Вы впервые слышите о том, что уже существует 2015 версия Visual Studio, то можете сначала ознакомиться с материалом «Visual Studio 2015 – новая версия среды разработки от компании Microsoft».
Visual Studio 2015 Community
Visual Studio 2015 Community – это бесплатная, интегрированная среда разработки для создания приложений для Windows, Android и iOS, а также web-приложений.

В Visual Studio 2015 Community в отличие от предыдущего поколения бесплатных редакций Visual Studio Express весь функционал, все возможности находятся в одном месте, напомню, что Express версии существовали в трех выпусках это: для Desktop, для Web и для Windows. Мы с Вами рассматривали выпуски Visual Studio Express 2013 для Windows Desktop и Visual Studio Express 2013 для Web.
Как я уже сказал Visual Studio 2015 Community это бесплатная среда разработки, и она может быть использована индивидуальными разработчиками для создания собственных приложений, а также для проектов с открытым кодом, научных исследований и образования (полные «Условия лицензионного соглашения»).
Visual Studio в редакции Community обладает всем необходимым функционалом для создания полноценных приложений, однако она все равно имеет меньше возможностей по сравнению с другими платными редакциями (сравнение редакций можете посмотреть на официальной странице «Сравнение предложений Visual Studio 2015»).
Системные требования Visual Studio 2015 Community
Поддерживаемые операционные системы:
- Windows 7 с пакетом обновления 1;
- Windows 8;
- Windows 8.1;
- Windows Server 2008 R2 с пакетом обновления 1 (SP1);
- Windows Server 2012: ;
- Windows Server 2012 R2;
- Windows 10.
Требования к оборудованию:
- Процессор с частотой 1.6 ГГц (или выше);
- 1 Гб оперативной памяти (1,5 ГБ при работе на виртуальной машине);
- 6 Гб свободного пространства на жестком диске;
- Жесткий диск (5400 об/мин);
- Видеоадаптер с поддержкой DirectX 9, минимально допустимое разрешение экрана — 1024 x 768.
Где скачать Visual Studio 2015 Community?
Загрузить 2015 версию Visual Studio в редакции Community можно, конечно же, с официального сайта, вот страница загрузки.
После того как перешли на страницу жмем «Скачайте Community 2015»
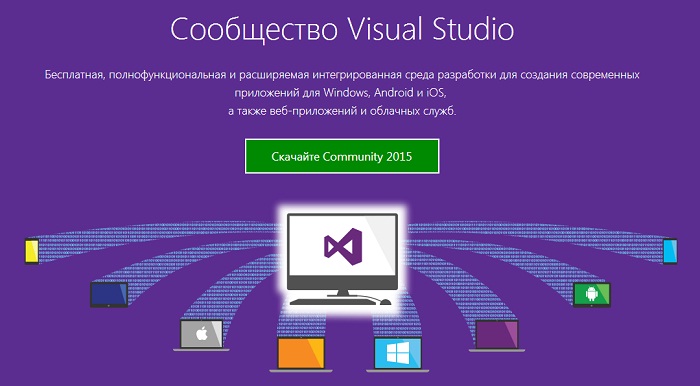
В итоге у Вас загрузится установщик vs_community.exe.
Установка Visual Studio 2015 Community
Примечание! Как я уже сказал, установку я буду производить на операционную систему Windows 7.
Для установки Visual Studio 2015 Community запускаем файл vs_community.exe, также для установки нам нужно будет подключение к Интернету.
После запуска на некоторое время появится заставка Visual Studio

Затем откроется программа установки, но если в процессе запуска программа установки обнаружит какие-либо факторы, которые могут повлиять на ход установки Visual Studio, она Вам об этом сообщит.
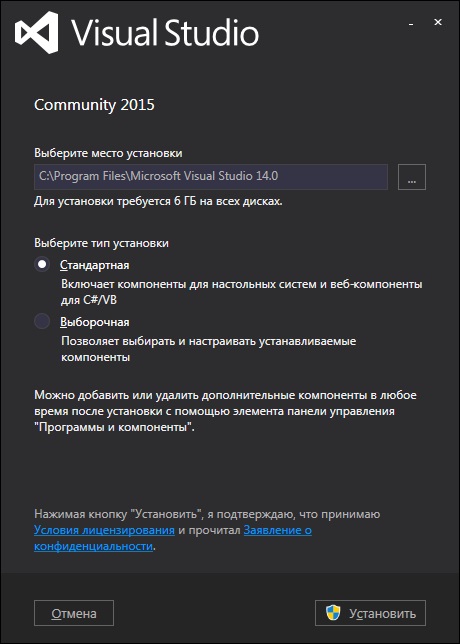
Здесь нам предлагают выбрать «Тип установки», я выбираю «Стандартный», но если Вы не планируете использовать какой-либо функционал в Visual Studio 2015 Community, то можете выбрать тип «Выборочная» где Вы вручную укажете, что конкретно будите использовать. А я жму «Установить» и у меня сразу начнется процесс установки.
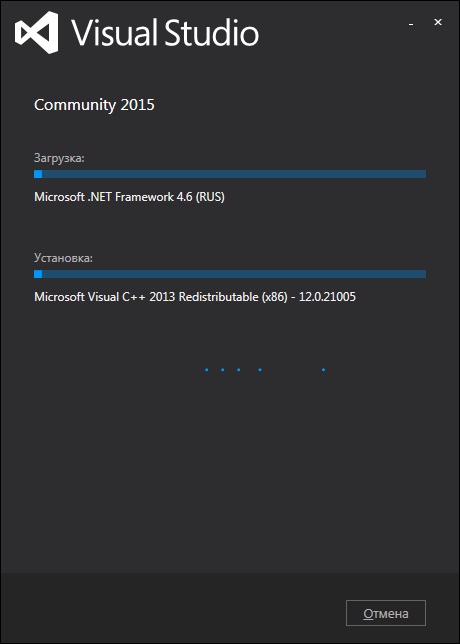
Данный процесс займет примерно минут 30-40 и в завершение появится окно, в котором мы нажимаем «Перезагрузить сейчас»

После того как компьютер перезагрузится, можно запускать Visual Studio (Пуск->Все программы->Visual Studio 2015)
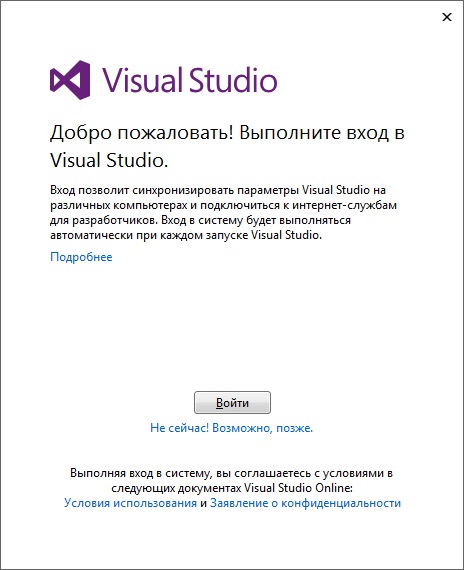
И при первом запуске нам предлагают выполнить вход в Visual Studio, для того чтобы синхронизировать параметры при подключении с разных компьютеров (более подробную информацию можно получить, перейдя по ссылке «Подробнее»). Но это не обязательно можно нажать «Не сейчас! Возможно, позже» я так и поступаю.
Далее мы можем выбрать цветовую схему и параметры запуска, я выбираю «Общие» и «Синяя», жму «Запуск Visual Studio»
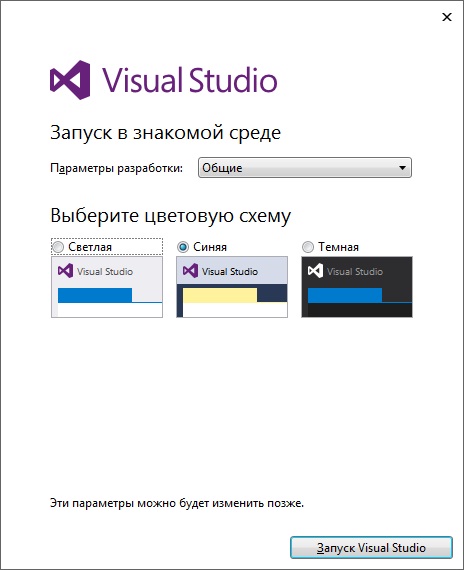
В итоге у нас запустится начальная страница Visual Studio.
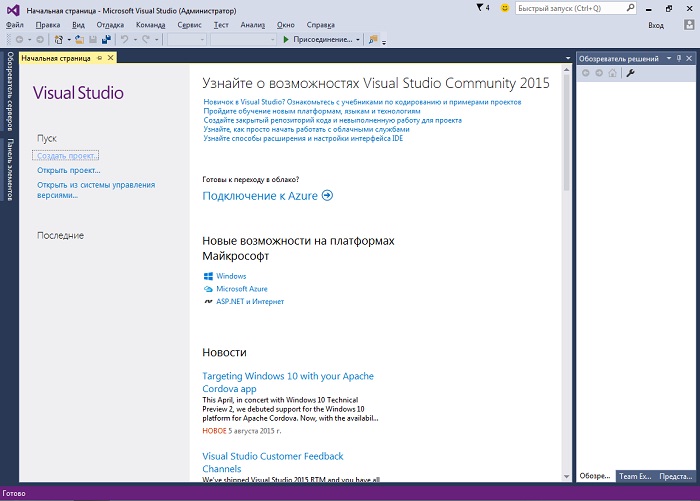
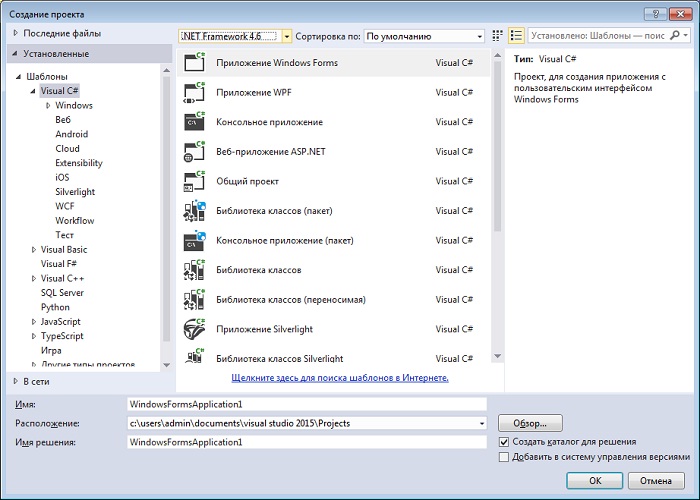
Скриншоты Visual Studio 2015 Community
Меню создание проекта
Проект приложения Windows Forms
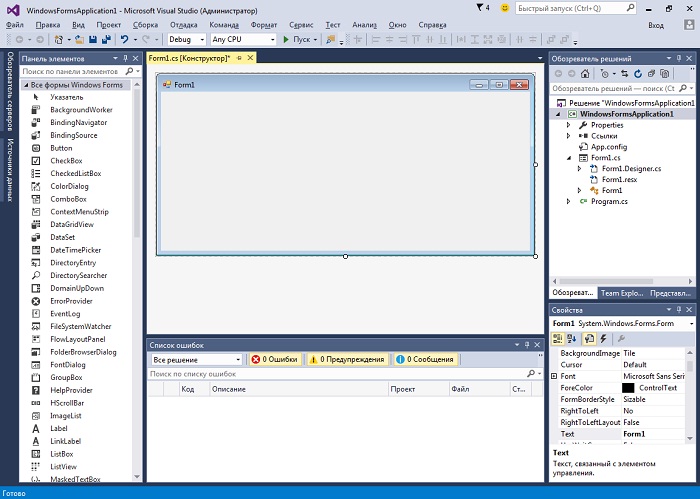
На этом все, в следующих материалах мы рассмотрим процесс создания приложений в среде Visual Studio 2015 Community, Удачи!
Сейчас мы с Вами поговорим о таком компоненте операционной системе Windows как Microsoft Visual C++ Redistributable Package, а именно ответим на такие вопросы как: Что это такое и зачем это нужно? Где скачать и как установить данный компонент?
А также я расскажу, какие ошибки могут возникать, если этот компонент нужен, но он не установлен в системе, что в этих случаях нужно делать и каким системным требованиям должен отвечать компьютер, для того чтобы установить Microsoft Visual C++ Redistributable Package.
Что такое Microsoft Visual C++ Redistributable Package?

Microsoft Visual C++ Redistributable Package – это распространяемые пакеты, которые устанавливают компоненты среды выполнения библиотек Visual C++. Данные компоненты необходимы для выполнения приложений, разработанных с помощью среды программирования Visual Studio. В состав этих компонентов входят: среда выполнения C (CRT), стандартный C++, MFC, C++ AMP и OpenMP. То есть, другими словами, программы, которые разработаны в Visual Studio с использованием этих библиотек не будут работать, если не установлена сама среда Visual Studio или эти распространяемые пакеты, т.е. Microsoft Visual C++ Redistributable Package. Эти пакеты созданы специально для того, чтобы обычным пользователям не нужно было устанавливать полноценную среду разработки Visual Studio. Многие разработчики в состав своего дистрибутива программы, которая требует эти библиотеки, включают установку необходимой версии Microsoft Visual C++ Redistributable Package (если она отсутствует). Многие просто в системных требованиях указывают обязательное наличие определенной версии этих распространяемых пакетов, и в этом случае Microsoft Visual C++ Redistributable Package нам необходимо скачивать и устанавливать самим. Это делается, на самом деле, достаточно просто я чуть ниже все покажу.
Но прежде чем переходить к загрузке и установке Microsoft Visual C++ Redistributable Package давайте я расскажу, какие ошибки будут возникать, если попытаться запустить программу, которая требует наличие распространяемых пакетов Microsoft в операционной системе без установленной необходимой версии этих самых пакетов.
Ошибка отсутствует VCRUNTIME140.dll или MSVCR110.dll и другие
Итак, если у Вас при запуске программы или игры появляются следующие ошибки, то это означает, что у Вас нет нужной установленной версии Microsoft Visual C++ Redistributable Package, которая нужна для работы программы или игры которую Вы запускаете.
Ошибка отсутствует VCRUNTIME140.dll
Запуск программы невозможен, так как на компьютере отсутствует VCRUNTIME140.dll. Попробуйте переустановить программу.
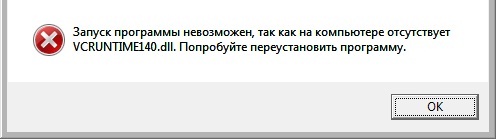
Решение. Установить Microsoft Visual C++ Redistributable Package 2015.
Ошибка отсутствует MSVCR110.dll
Запуск программы невозможен, так как на компьютере отсутствует MSVCR110.dll. Попробуйте переустановить программу.
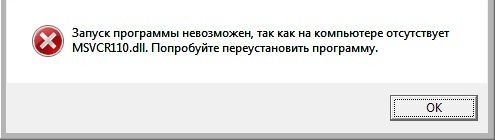
Решение. Установить Microsoft Visual C++ Redistributable Package 2012.
Для каждой версии распространяемых пакетов будет появляться свой набор ошибок, примерное соответствие ошибок и версий представлено чуть ниже.
- Отсутствует VCRUNTIME140.dll – нужно установить Microsoft Visual C++ Redistributable Package 2015;
- Отсутствует MSVCR120.dll или MSVCP120.dll — нужно установить Microsoft Visual C++ Redistributable Package 2013;
- Отсутствует MSVCR110.dll или MSVCP110.dll — нужно установить Microsoft Visual C++ Redistributable Package 2012;
- Отсутствует MSVCR100.dll или MSVCP100.dll — нужно установить Microsoft Visual C++ Redistributable Package 2010;
- Отсутствует MSVCR90.dll или MSVCP90.dll — нужно установить Microsoft Visual C++ Redistributable Package 2008;
- Отсутствует MSVCR80.dll или MSVCP80.dll — нужно установить Microsoft Visual C++ Redistributable Package 2005.
Где скачать Microsoft Visual C++ Redistributable Package?
Загрузить распространяемые пакеты Microsoft Visual C++ можно бесплатно с официального сайта Microsoft, вот ссылки:
- Microsoft Visual C++ 2015 Redistributable Package — скачать;
- Microsoft Visual C++ 2013 Redistributable Package — скачать;
- Microsoft Visual C++ 2012 Redistributable Package — скачать;
- Microsoft Visual C++ 2010 Redistributable Package (x86) — скачать;
- Microsoft Visual C++ 2008 Redistributable Package (x86) — скачать;
- Microsoft Visual C++ 2005 Redistributable Package (x86) — скачать.
Затем в зависимости от Вашей системы выбирайте 32 или 64 битную версию, ставьте галочку и нажимайте «Next». Я в качестве примера буду скачивать, и устанавливать версию Microsoft Visual C++ 2015 Redistributable Package для 32 битной Windows.
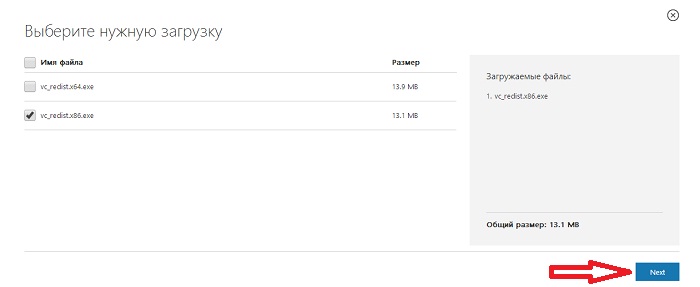
В итоге у меня загрузился файл vc_redist.x86.exe.
Системные требования для установки Microsoft Visual C++ Redistributable Package 2015
Для каждой версии Microsoft Visual C++ Redistributable Package будут свои системные требования, но так как самой актуальной на данный момент является 2015 версия и у нее естественно самые высокие системные требования, поэтому именно их мы и рассмотрим, но предыдущие версии я также затрону.
2015 версия поддерживает следующие операционные системы:
- Windows 10;
- Windows 7 Service Pack 1;
- Windows 8;
- Windows 8.1;
- Windows Server 2003 Service Pack 2;
- Windows Server 2008 R2 SP1;
- Windows Server 2008 Service Pack 2;
- Windows Server 2012;
- Windows Vista Service Pack 2;
- Windows XP Service Pack 3.
Если у Вас Windows 7 то, начиная с Microsoft Visual C++ Redistributable Package 2012, требуется наличие установленного Service Pack 1, т.е. распространяемые пакеты 2012, 2013, и 2015 можно установить только на Windows 7 Service Pack 1.
Требования к оборудованию:
- Процессор с тактовой частотой 1,6 ГГц или больше (в версиях, которые ниже 2015 достаточно 900 MГц);
- Объем оперативной памяти 1 ГБ (в версиях, которые ниже 2015 всего 512 мегабайт);
- 50 МБ доступного пространства на жестком диске (во всех версиях);
- Жесткий диск с частотой вращения 5 400 об/мин (во всех версиях).
Установка Microsoft Visual C++ Redistributable Package 2015 на Windows 7
Microsoft Visual C++ Redistributable Package 2015 я буду устанавливать на 32 битную операционную систему Windows 7 с установленным Service Pack 1.
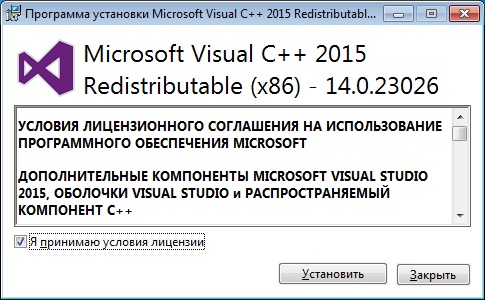
Запускаем скаченный файл vc_redist.x86.exe, в итоге откроется окно, в котором нам необходимо согласиться с условиями лицензионного соглашения, т.е. поставить галочку и затем нажать «Установить».
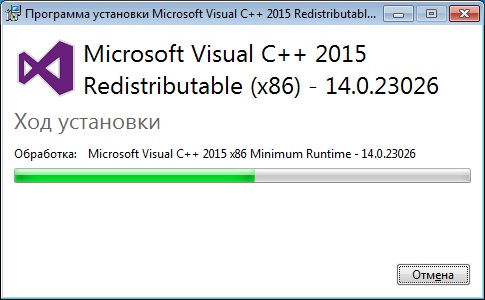
Начался процесс установки.
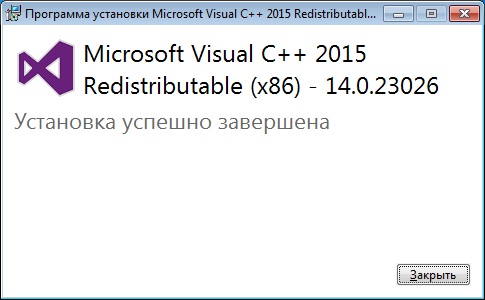
Он займет буквально несколько секунд и после чего появится соответствующее окно, в котором мы нажимаем «Закрыть».
Вот и все, теперь можно устанавливать программы или игры которые требуют наличие Microsoft Visual C++ Redistributable Package 2015.
Читайте также: