
Gigabyte z590 aorus elite ax биос обновить

Intel SATA Preinstall driver (For AHCI / RAID Mode)
(Note) Windows setup to read from USB thumb drive.
Intel SATA Preinstall driver
(For AHCI / RAID Mode)
(Note) Win10 20H2 supported.
(Note) Windows setup to read from USB thumb drive.
- Checksum : 02CF
- Improve the compatibility of non-K CPU with CXMT / Unic memory
Major vulnerabilities updates, customers are strongly encouraged to update to this release at the earliest.
- Checksum : 2964
- Add Intel Adaptive Boost Technology support for Core i9-11900K & Core i9-11900KF processors
- Add DDR4 5000/5066/5133/5333MHz support
- Checksum : 735C
- Update CPU microcode version 0x34
Realtek Gaming LAN bandwidth Control Utility
(Note) Support Intel 600 / 500 / 400 series and AMD 500 series motherboards (support may vary by model).
@BIOS
(Note) Support Intel 600 / 500 / 400 / 300 and AMD 500 / AM4 / TRX40 series motherboards (support may vary by model).
(Note) Please install APP Center first before install this utility.
Easy Tune
(Note) Support Intel 600 / 500 / 400 / 300 and AMD 500 / AM4 / TRX40 series motherboards (support may vary by model).
(Note) Please install APP Center first before install this utility.
Fast Boot
(Note) Support Intel 600 / 500 / 400 / 300 and AMD 500 / AM4 / TRX40 series motherboards (support may vary by model).
(Note) Please install APP Center first before install this utility.
System Information Viewer
(Note) Support Intel 600 / 500 / 400 / 300 and AMD 500 / AM4 / TRX40 series motherboards (support may vary by model).
(Note) Please install APP Center first before install this utility.
On/Off Charge™ / On/Off Charge™ 2
(Note) Support Intel 600 / 500 / 400 and AMD 500 / AM4 series motherboards (support may vary by model).
(Note) Please install APP Center first before install this utility.
Smart Backup
(Note) Support Intel 600 / 500 / 400 / 300 and AMD 500 / AM4 / TRX40 series motherboards (support may vary by model).
(Note) Please install APP Center first before install this utility.
Game Boost
(Note) Support Intel 600 / 500 / 400 / 300 and AMD 500 / AM4 / TRX40 series motherboards (support may vary by model).
(Note) Please install APP Center first before install this utility.
Arabic, Bulgarian, Croatian, Czech, English, French, German, Greek, Hebrew, Hungarian, Indonesian, Italian, Japanese, Korean, Persian, Polish, Portuguese, Romanian, Russian, Simplified Chinese, Serbian, Spanish, Thai, Traditional Chinese, Turkish, Vietnamese
1. Due to different Linux support condition provided by chipset vendors, please download Linux driver from chipset vendors' website or 3rd party website.
2. Most hardware/software vendors may no longer offer drivers to support Win9X/ME/2000/XP SP1/SP2. If drivers are available from the vendors, we will update them on the GIGABYTE website.
Warning:
Because BIOS flashing is potentially risky, if you do not encounter problems using the current version of BIOS, it is recommended that you not flash the BIOS. To flash the BIOS, do it with caution. Inadequate BIOS flashing may result in system malfunction.
Update CPU ID/Micro codes in new BIOS means?
[1] To support new series of CPUs, or [2] To support the same CPU but with new stepping. CPU support of motherboard is consist of BIOS and hardware design, detail CPU support information please see CPU support list.
Intel SATA Preinstall driver (For AHCI / RAID Mode)
(Note) Windows setup to read from USB thumb drive.
Intel SATA Preinstall driver
(For AHCI / RAID Mode)
(Note) Win10 20H2 supported.
(Note) Windows setup to read from USB thumb drive.
- Checksum : E4E7
- Improve the compatibility of non-K CPU with CXMT / Unic memory
Major vulnerabilities updates, customers are strongly encouraged to update to this release at the earliest.
- Checksum : AFAF
- Add Intel Adaptive Boost Technology support for Core i9-11900K & Core i9-11900KF processors
- Add DDR4 5000/5066/5133/5333MHz support
- Checksum : 353E
- Update CPU microcode version 0x34
Realtek Gaming LAN bandwidth Control Utility
(Note) Support Intel 600 / 500 / 400 series and AMD 500 series motherboards (support may vary by model).
@BIOS
(Note) Support Intel 600 / 500 / 400 / 300 and AMD 500 / AM4 / TRX40 series motherboards (support may vary by model).
(Note) Please install APP Center first before install this utility.
Easy Tune
(Note) Support Intel 600 / 500 / 400 / 300 and AMD 500 / AM4 / TRX40 series motherboards (support may vary by model).
(Note) Please install APP Center first before install this utility.
Fast Boot
(Note) Support Intel 600 / 500 / 400 / 300 and AMD 500 / AM4 / TRX40 series motherboards (support may vary by model).
(Note) Please install APP Center first before install this utility.
System Information Viewer
(Note) Support Intel 600 / 500 / 400 / 300 and AMD 500 / AM4 / TRX40 series motherboards (support may vary by model).
(Note) Please install APP Center first before install this utility.
On/Off Charge™ / On/Off Charge™ 2
(Note) Support Intel 600 / 500 / 400 and AMD 500 / AM4 series motherboards (support may vary by model).
(Note) Please install APP Center first before install this utility.
Smart Backup
(Note) Support Intel 600 / 500 / 400 / 300 and AMD 500 / AM4 / TRX40 series motherboards (support may vary by model).
(Note) Please install APP Center first before install this utility.
Game Boost
(Note) Support Intel 600 / 500 / 400 / 300 and AMD 500 / AM4 / TRX40 series motherboards (support may vary by model).
(Note) Please install APP Center first before install this utility.
Arabic, Bulgarian, Croatian, Czech, English, French, German, Greek, Hebrew, Hungarian, Indonesian, Italian, Japanese, Korean, Persian, Polish, Portuguese, Romanian, Russian, Simplified Chinese, Serbian, Spanish, Thai, Traditional Chinese, Turkish, Vietnamese
1. Due to different Linux support condition provided by chipset vendors, please download Linux driver from chipset vendors' website or 3rd party website.
2. Most hardware/software vendors may no longer offer drivers to support Win9X/ME/2000/XP SP1/SP2. If drivers are available from the vendors, we will update them on the GIGABYTE website.
Warning:
Because BIOS flashing is potentially risky, if you do not encounter problems using the current version of BIOS, it is recommended that you not flash the BIOS. To flash the BIOS, do it with caution. Inadequate BIOS flashing may result in system malfunction.
Update CPU ID/Micro codes in new BIOS means?
[1] To support new series of CPUs, or [2] To support the same CPU but with new stepping. CPU support of motherboard is consist of BIOS and hardware design, detail CPU support information please see CPU support list.
So, you’ve purchased yourself the brand new Z390 AORUS Ultra motherboard to go into your new beast of a gaming rig. The motherboard is installed, the RTX 2070 is hooked up and ready go, and your keen to jump straight into some CS:GO to start laying down the law to those that oppose you.
However, it's not quite time to spray and pray just yet. There is still one more crucial piece of the puzzle before your new build is complete. The dreaded BIOS update… Ok, that’s probably a little overdramatic, but there was a time that BIOS updates were the cause of pain for many PC users. A time where it was very common to see computers failing to boot because of problems from flashing the BIOS.
Ensuring that your motherboard has the latest BIOS installed is crucial to the performance of your computer, and the AORUS BIOS update utility makes the entire process very simple as well as very safe.
This 2 Part series will cover why it's important to keep the motherboard BIOS update to date, how simple is to do so, and what to do if things go wrong.
The importance of keeping your bios up to date
There are a couple of key reasons why you should be running the latest BIOS version for your motherboard that ensures that it keeps running at peak performance.
Hardware compatibility
New hardware and technology are being developed daily when it comes to computing. Before you have had a chance to reach the level cap in your game, the latest GPU, CPU, or storage technology has already been released.
The problem with an ever-evolving tech landscape is that compatibility issues can arise for hardware that you are already running on your PC. This is where BIOS updates come in.
BIOS updates allow companies such as GIGABYTE to roll out compatibility updates to our existing PC to provide compatibility for the latest hardware. This means that you don’t need to buy a new motherboard every couple of months just because a new piece of hardware has been released.
Stability and performance improvements
Like with all things, technology isn’t perfect. There are times when bugs find their way in which can cause issues for you. The beauty of this is that these issues are very often easily resolved by a simple flashing of the latest BIOS.
BIOS updates come packed with fixes for stability or performance issues, allowing you to squeeze every ounce of performance from your motherboard and your gaming PC.
Updates for Security
Above all else, the most important aspect when it comes to computers is security. The last thing anybody needs is someone gaining unauthorized access to your computer or home network and acting maliciously.
Manufacturers can push updates to your motherboard to close any holes that may be present that could be targeted by attackers. One quick BIOS update could mean the difference between having your computer compromised or not.
The easiest way to update your motherboard BIOS with @BIOS from GIGABYTE AORUS
Gone of the days of having to manually flash the BIOS thanks to @BIOS.
This BIOS update utility was developed by GIGABYTE to make is incredibly simple to update your BIOS to the latest version. All it takes is a few steps.
Step 1: Download and install the GIGABYTE APP Center
The first step is to download and install the GIGABYTE APP from the GIGABYTE website. The APP Center allows you to install many different utilities to allow you to manage your AORUS powered gaming PC fully.
The first step is to download and install the GIGABYTE APP from the GIGABYTE website. The APP Center allows you to install many different utilities to allow you to manage your AORUS powered gaming PC fully.
Step 2: Install the @BIOS Utility
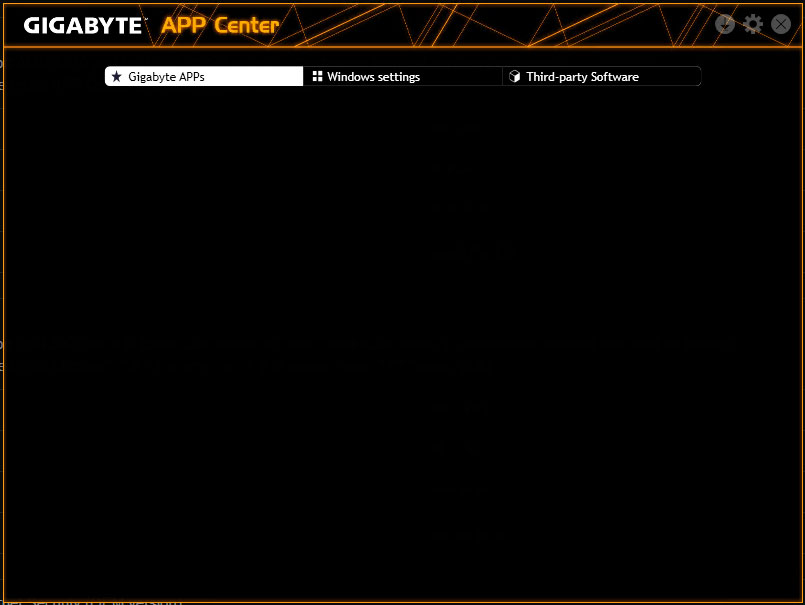
Launch the APP Center and click on the Live Update button that is indicated by the down arrow icon at the top right of the window.

Next, click on the Not Installed tab. Here you will find a list of all the utilities and updates that can be installed.
Scroll down until you find the @BIOS utility. Select the checkbox next to @BIOS and then click the Install button.
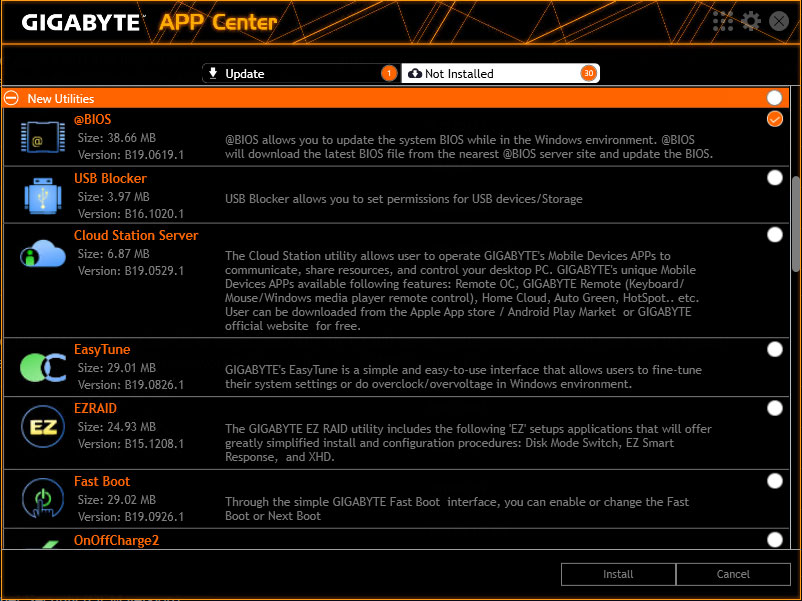
The @BIOS utility shall now begin installing.

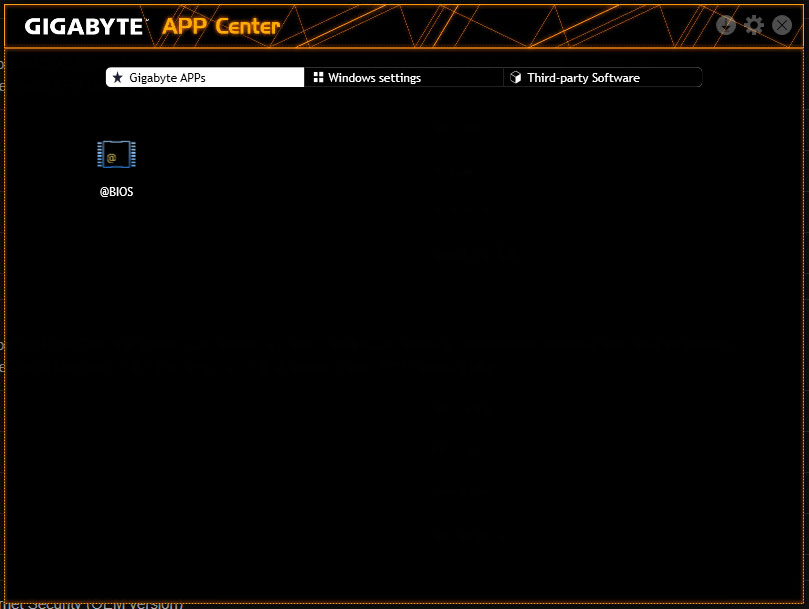
Step 3: Launch @BIOS
Once @BIOS has been installed, head back to the APP Center home screen where you will now find the @BIOS icon
Click the icon to launch the @BIOS utility.
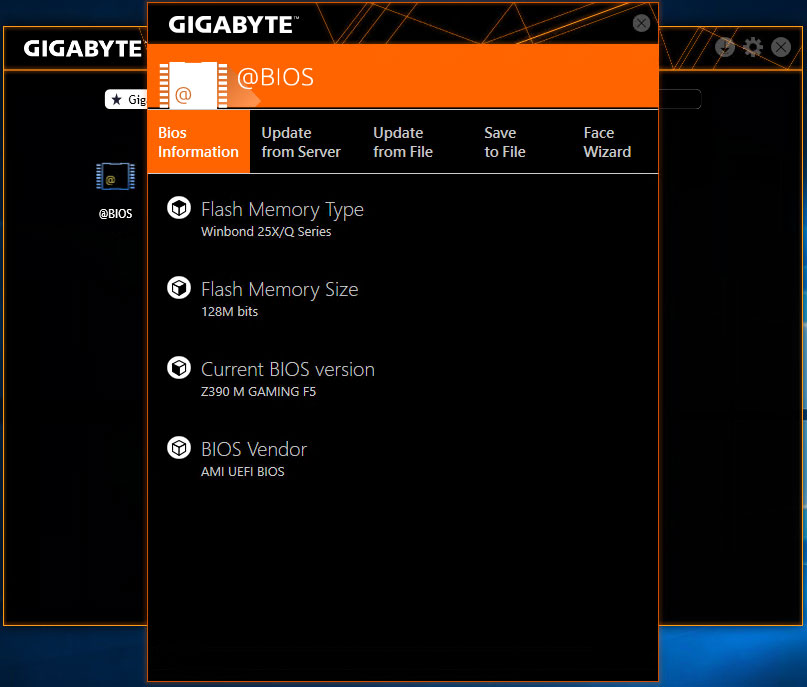
Now that you have @BIOS launched, you will see details relating to your motherboard such as Flash Memory Type, Flash Memory Size, Current BIOS Version, and BIOS Vendor.
You want to go to the Update from Server tab, which is where we will update the BIOS.
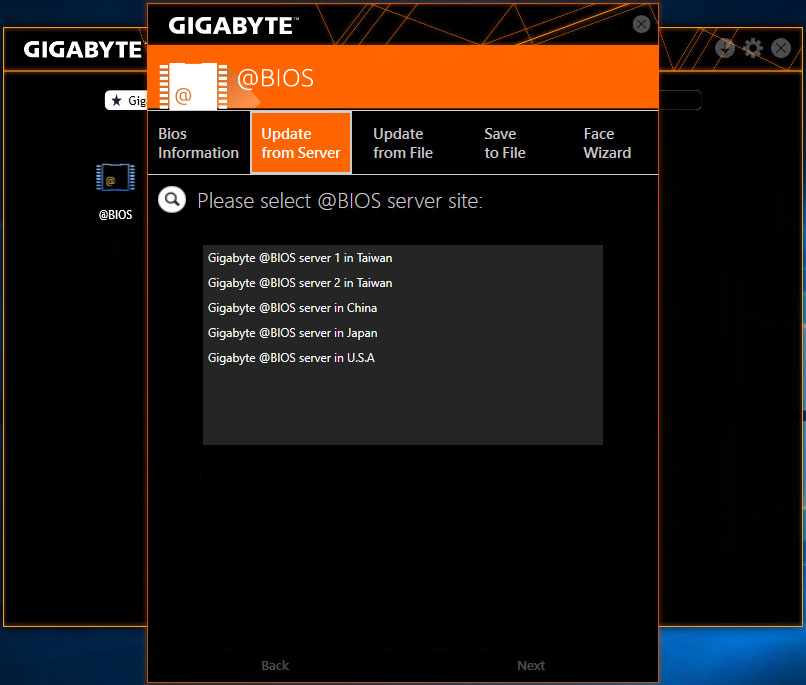
Step 4: Select server location
Here is where you select where you would like to connect to update your BIOS. Select the location that best suits you.
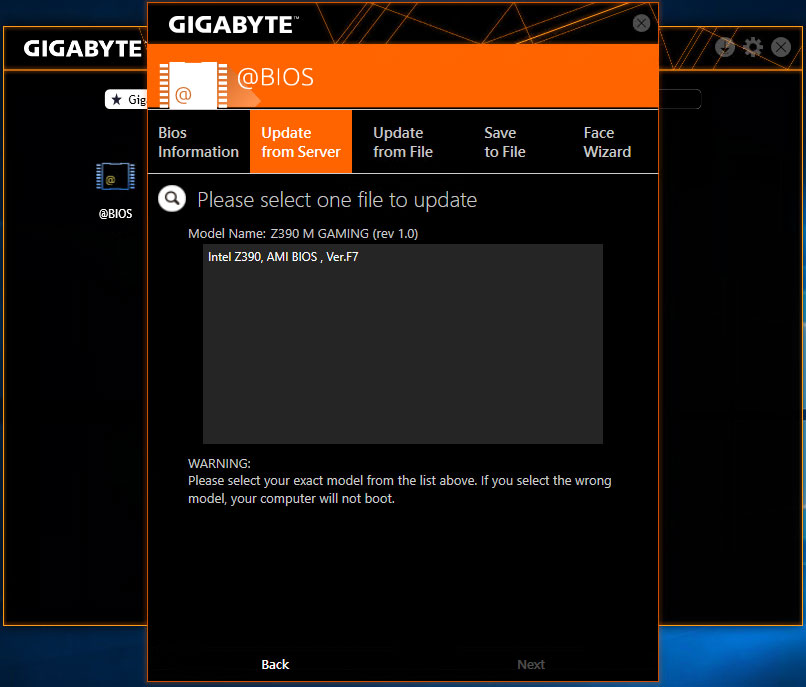
Step 5: Select the BIOS update to install
It is now time to select the BIOS update that you would like to install. This is very straight forward; however, it is important to make sure that you select the right model from the list of available options.
Once you have selected the correct model, click the Install button.
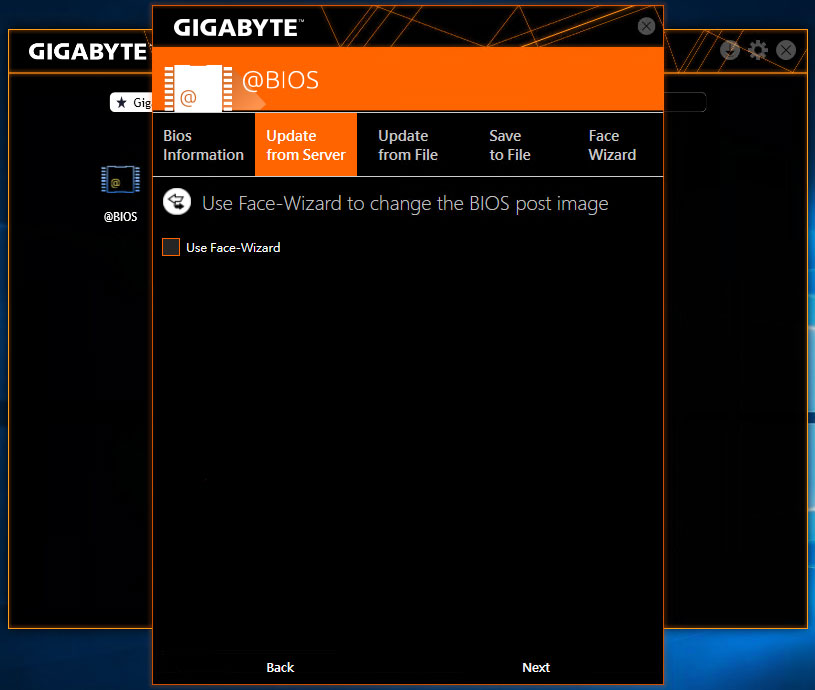
Step 6: Face-Wizard (optional)
You will be shown the Face-Wizard screen, which allows you to upload an alternate logo to display on boot. This is completely optional, and in most cases, you just need to skip this step and click the Next button.
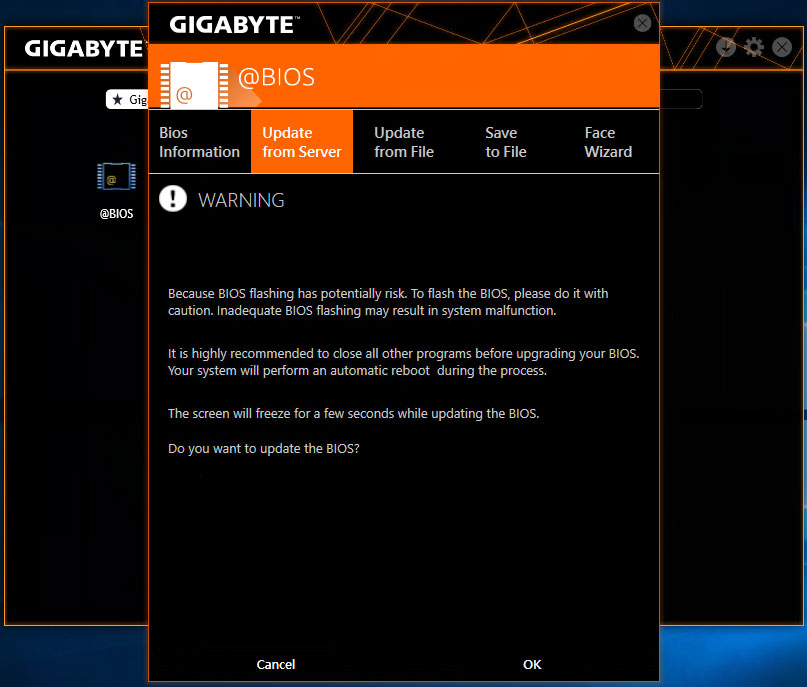
Step 7: Confirm BIOS installation
Once past the Face-Wizard screen, you will be asked to confirm that you would like to proceed with updating the BIOS. Click the OK button to proceed.
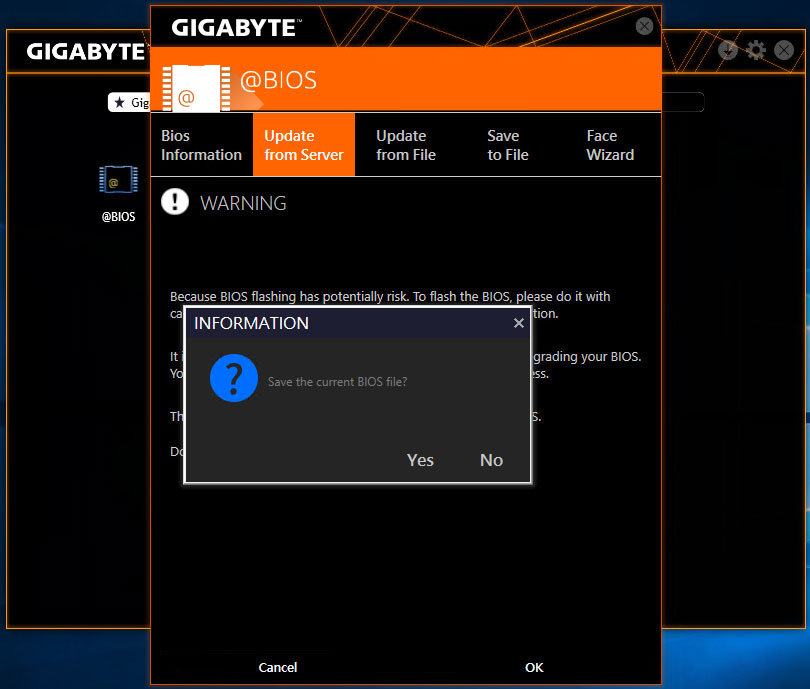
Step 8: Save your current BIOS
You will now be asked if you would like to save your current BIOS. This is something you will want to do as it gives you the ability to rollback your BIOS should you need to.
Click the Yes button to save your current BIOS to your computer.
Step 9: We have lift off! Start the BIOS Update
Finally, its time to do what you came here to do and update the BIOS. Once you have backed up your current BIOS, click the OK button to start the update process.
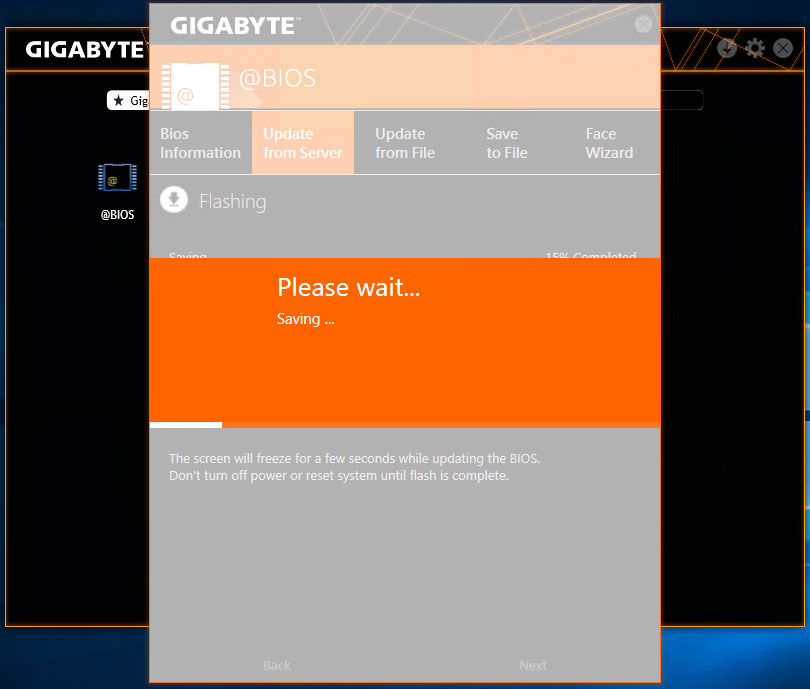
The BIOS update process will take a few minutes, and your computer will restart during this process. Congratulations, you have now updated your motherboards BIOS to the latest version using @BIOS!
In Part 2 of this series, we will take a look at how to use Q-Flash to update your BIOS. We also dive into how DualBIOS can have save a poorly flashed motherboard and how to recover your BIOS should things go wrong.

In Part 2 we looked at how to use the @BIOS update utility for updating your BIOS. Although @BIOS is the most user-friendly way to update your motherboards BIOS, a lot of people prefer the option of accessing the BIOS itself to perform the update.
This is where Q Flash comes in.
Using Q Flash, you can run the update from within your motherboards bios. The benefit of this is that it removes Windows from the update process, which can help make the update a bit safer.
Here is how to update your BIOS through Q Flash.
Step 1: Download the BIOS update
First things first, head on over to the product page for your AORUS motherboard and download the compressed file for the latest BIOS update. It is important to double-check that you have downloaded the correct BIOS version for your motherboard model.
Step 2: Prepare your USB drive
Now that you have downloaded the latest BIOS update, it is time to prepare your USB drive. Ensure that your drive is formatted as FAT32.
Open the compressed BIOS update file that you downloaded and extract the content to the root of your USB drive.
Once the files have been copied across, plug the USB drive into a spare USB slot on your computer.
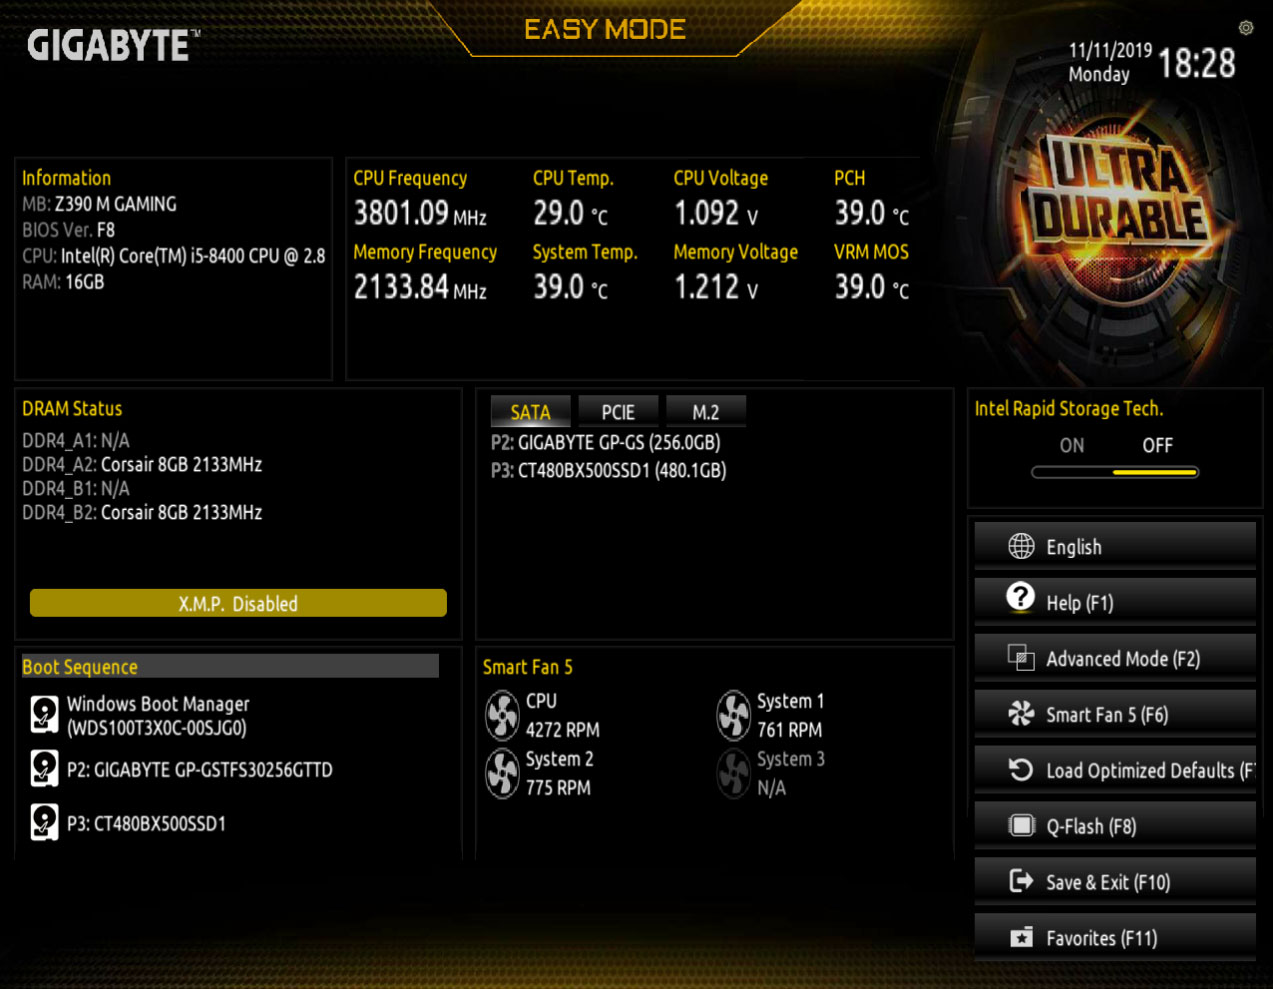
Step 3: Boot into the motherboards BIOS
We are now ready to load the BIOS. Reboot your computer and during the boot process, press the DELETE key on your keyboard to boot into the BIOS.
Step 4: Update the BIOS with Q Flash
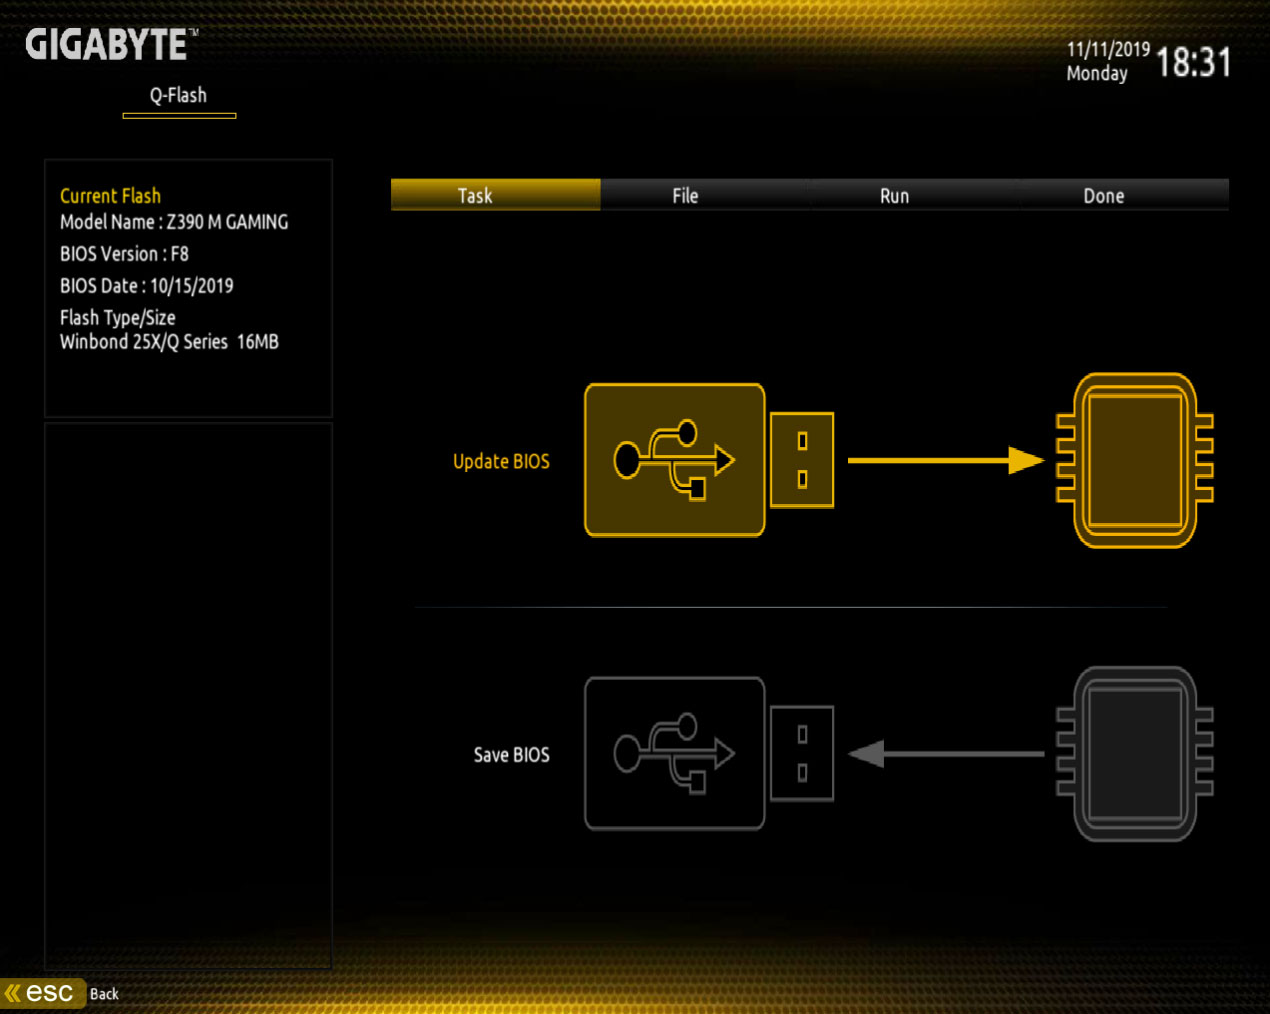
Now that you are in the BIOS, press F8 on your keyboard to load Q-Flash. Once Q Flash has been loaded, select the Update Bios option.
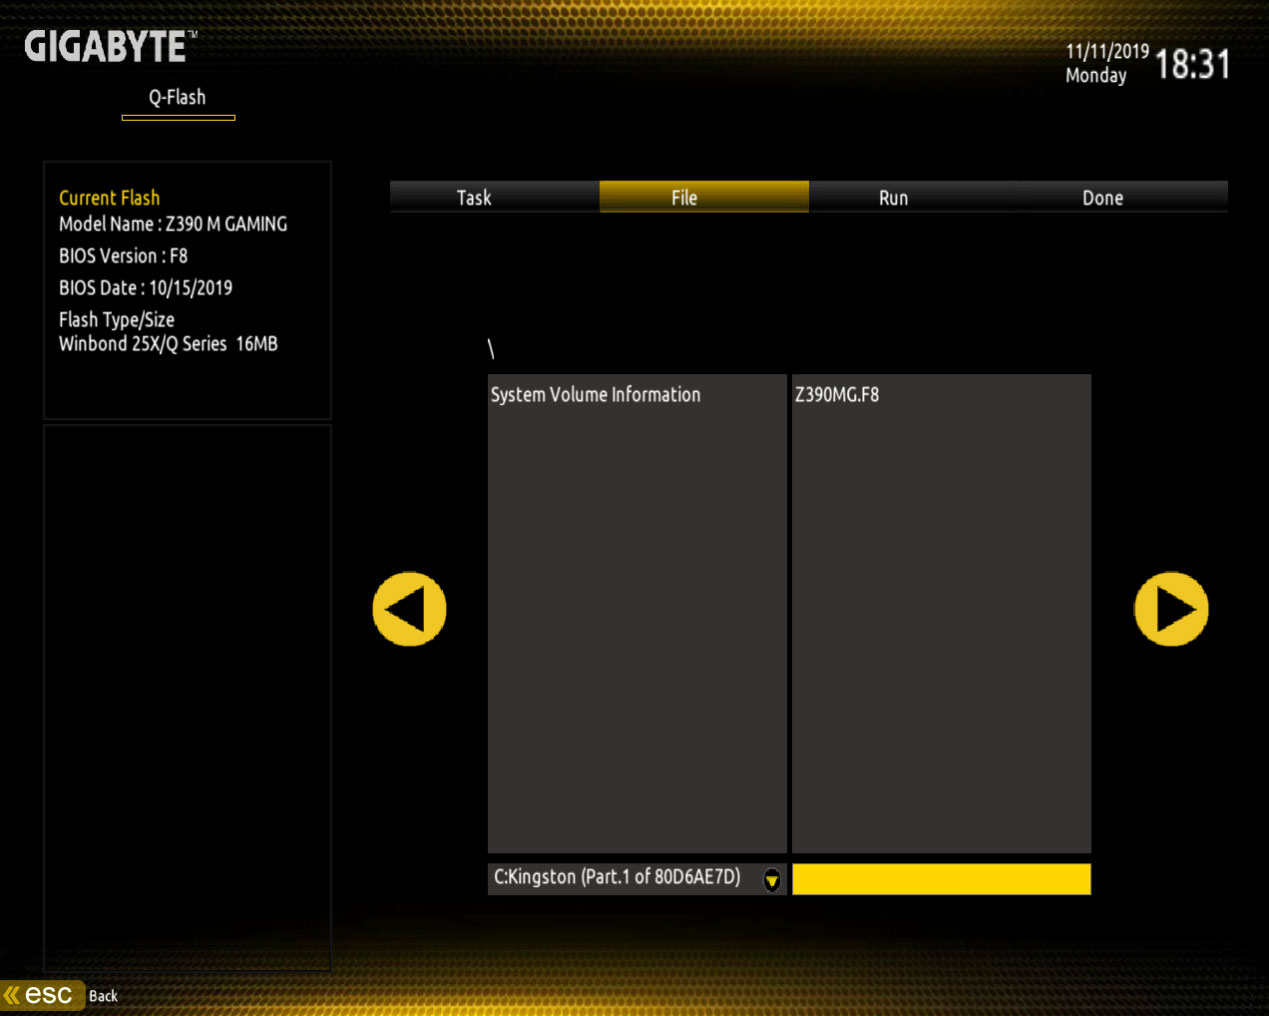
Next, select the BIOS update that you have stored on your USB drive.
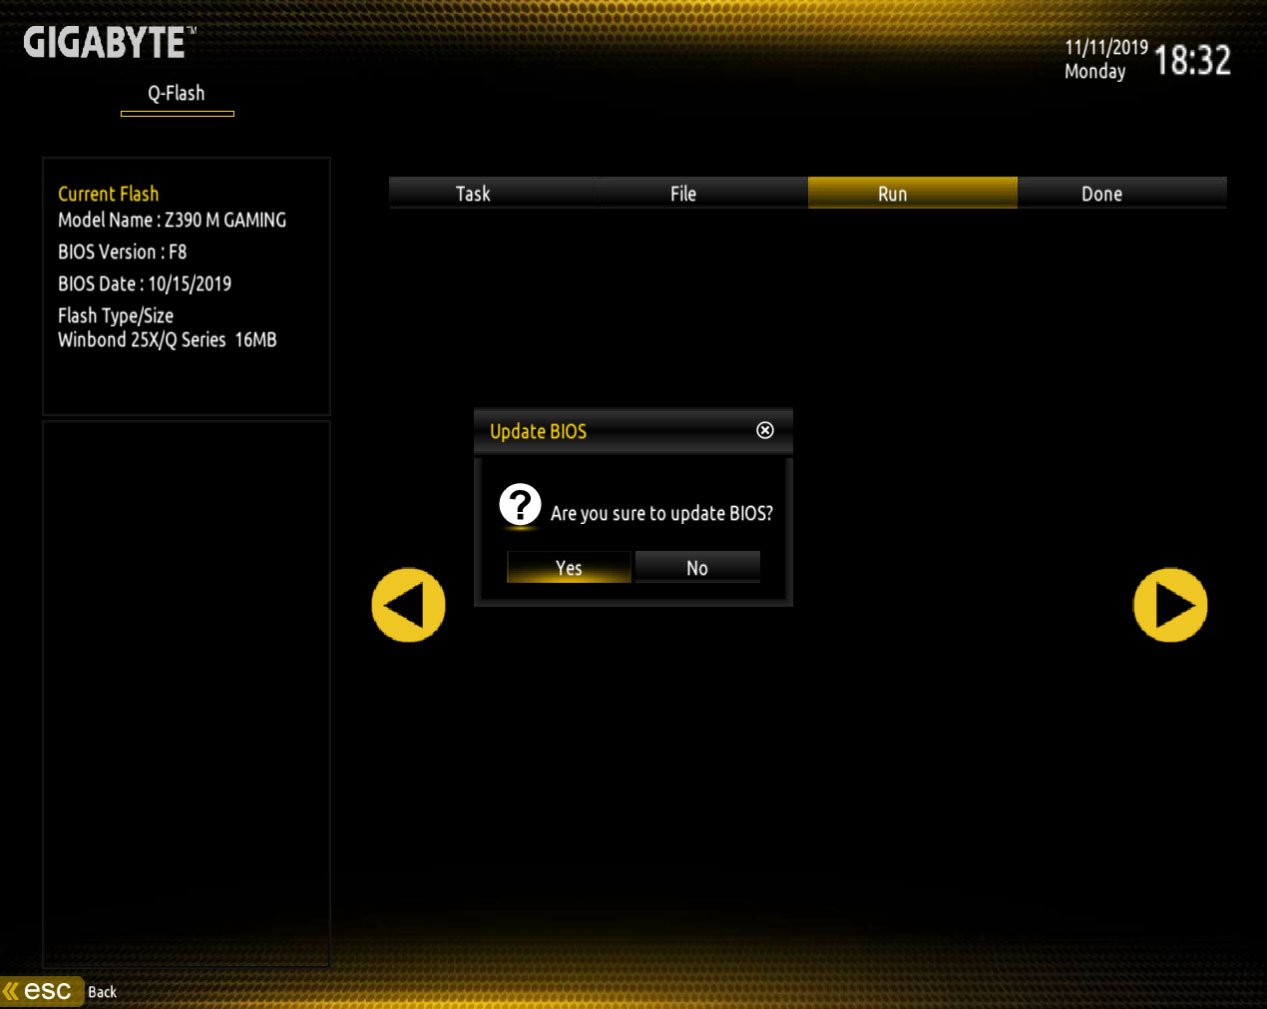
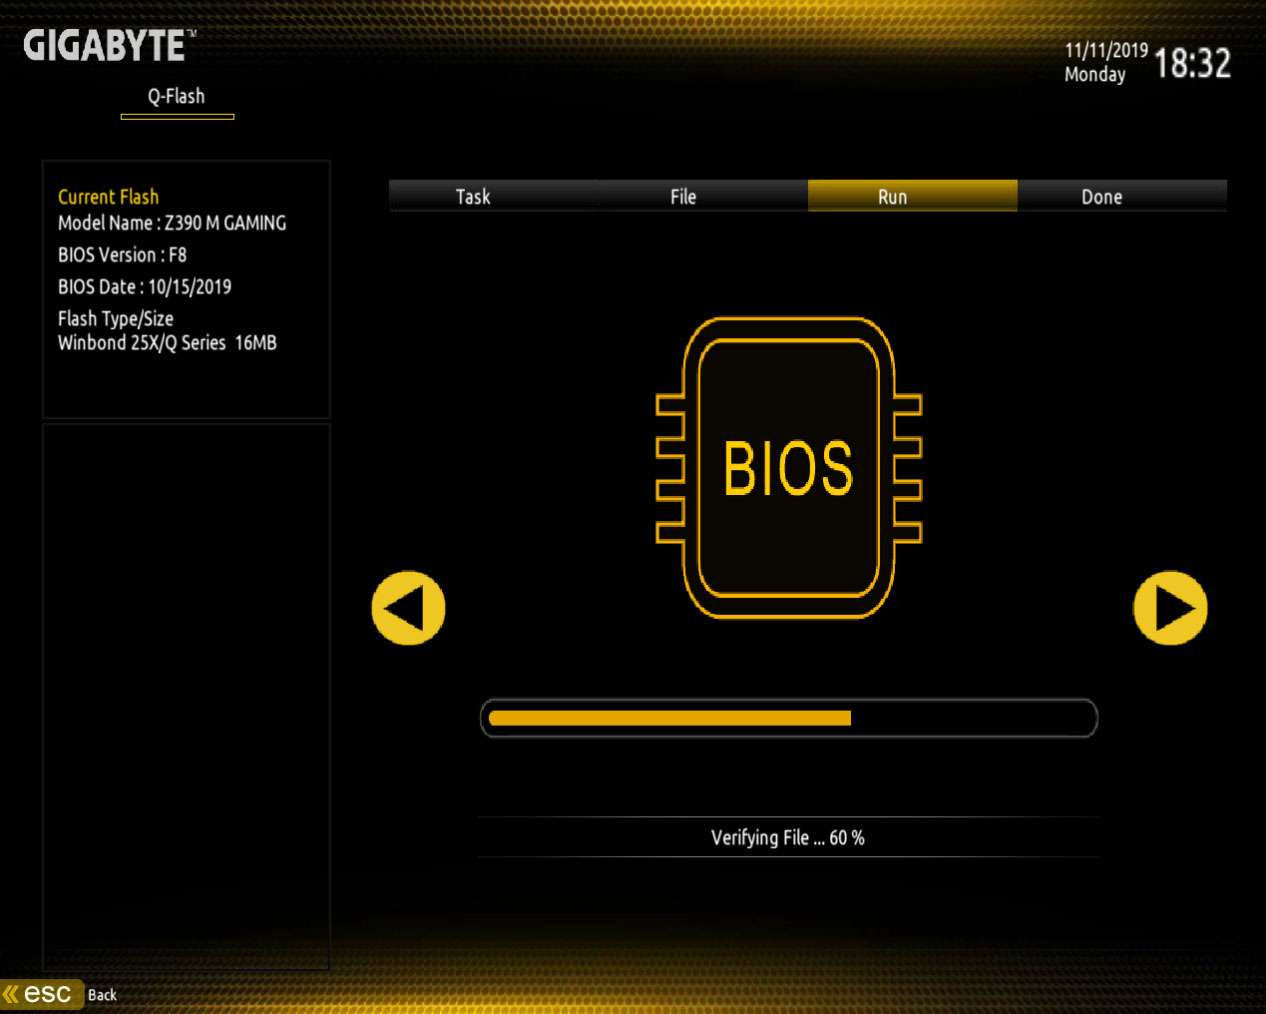
Once you have selected the BIOS update, you will be asked if you would like to proceed with the BIOS update.
Click Yes, and the BIOS update shall be loaded and verified.
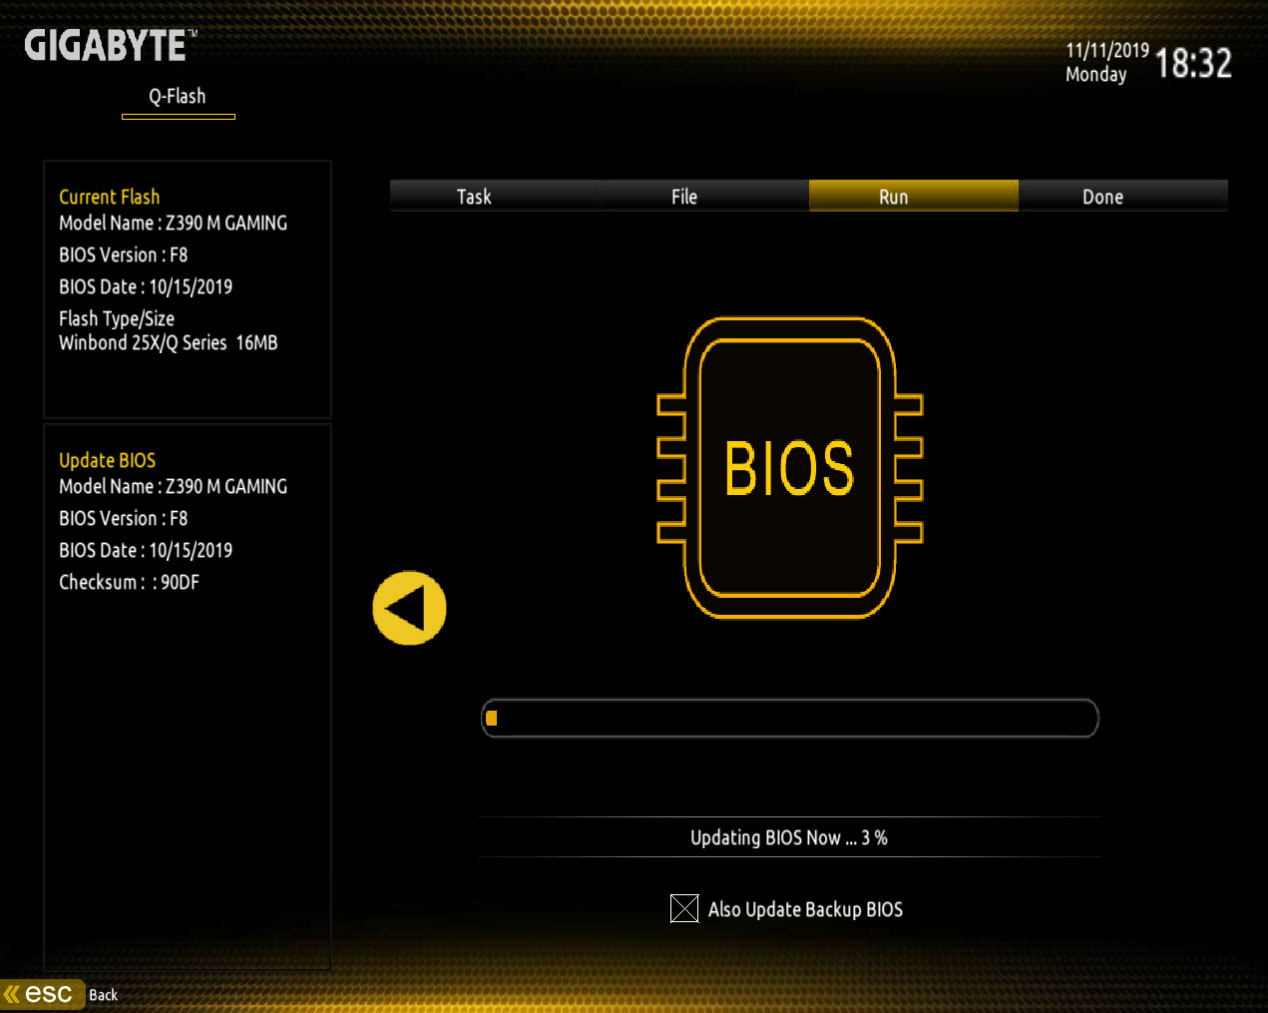
Once the file verification process has finished, click the Start button to start the update.
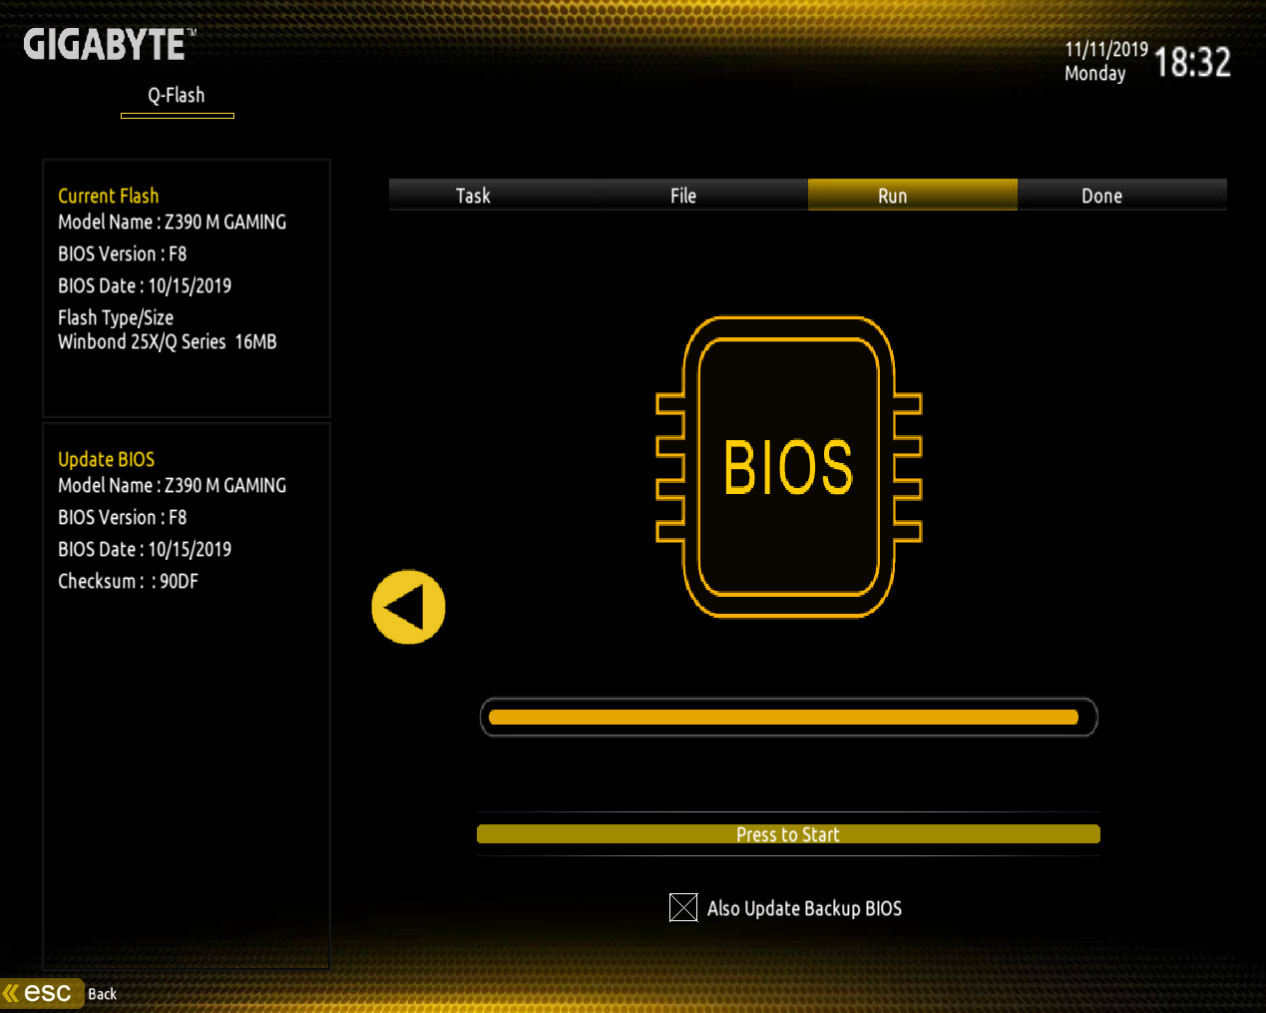
Q Flash shall now update the motherboard BIOS. The update may save several minutes and once completed, your computer will reboot.
Q Flash has now finished updating your motherboards BIOS.
The amazing DualBIOS and how to restore your BIOS should there be an issue
Sometimes things don’t always go according to plan, and mistakes can happen. There is often the time when someone mistakingly flashes the BIOS of the wrong motherboard, or some other unforeseen issue arises. Thankfully, AORUS has got you covered thanks to DualBIOS.
DualBIOS is a great feature whereby your motherboard has two BIOS onboard. There is the main BIOS that you use every day, and there is a backup BIOS.
The backup BIOS is there should your main BIOS ever encounter any issues. Should your main BIOS ever have an issue or become corrupted, the DualBIOS will kick in to save the day.
In the instance that your BIOS becomes corrupted, when you boot your computer, the backup BIOS will be loaded instead. This allows you to resume using your computer and allows you to work on fixing any main BIOS issues.
So, how do you go about fixing your BIOS issues should you encounter any? Well, the first thing to try is reflashing your BIOS with the latest, correct BIOS update using the @BIOS or Q Flash methods that we spoke about earlier. Generally, this is enough to resolve any issues you may be experiencing.
But what if both your main BIOS and the backup BIOS has stopped functioning? This is where Q flash Plus comes in.
Q-Flash Plus allows you to flash a working BIOs even your computer won't boot. It doesn’t even need a CPU or RAM to be installed!
The steps to utilizing Q-Flash Plus is very simple. Should your computer fail to boot, follow these steps.
Step 1: Prepare the USB drive
Download the latest BIOS version for your motherboard from the motherboard product page. Extract the downloaded BIOS file to the root of your flash drive. We need to rename the BIOS file so that Q-Flash Plus can find it. Rename the BIOS file to GIGABYTE.bin.
Step 2: Plug the USB drive into your computer
Now you need to plug the USB drive into the USB port that supports Q-Flash Plus. You will be able to find this in the manual of your motherboard.
Step 3: Flash the BIOS using Q-Flash Plus
Ensure that your power supply is connected to your motherboard and try and boot your computer. After about 20 seconds, Q-Flash Plus will notice that the computer is not booting correctly and will start the BIOS flashing process automatically.
You will see that the BIOS LED will start flashing on your motherboard which indicates that the BIOS flash is currently in progress. After a few minutes, the LED shall stop flashing which means that the BIOS flash has been completed.
Читайте также: