
Background blur в фотошопе где
Как использовать инструменты размытия в Photoshop для создания нужных и просто интересных эффектов?
Сегодня мы попытаемся показать несколько эффектов, которые можно создать при помощи инструментов размытия и фокуса.
Перемещение точки фокуса
Переснять на месте уже не выйдет. Зато довести фото до идеала можно в Photoshop. Для этого нужно перенести фокус с области груди «обратно» на лицо. Будем делать следующее:
- Размоем существующую точку фокуса чуть больше, чем лицо модели.
- Повысим резкость нового фокуса.
1. Размытие.
Создаем копию фонового слоя. Можно назвать ее «Размытие». Далее воспользуемся фильтром «Размытие диафрагмы» (Iris blur). Выбираем Фильтр — Размытие — Размытие диафрагмы (Filter — Blur — Iris Blur). Этот фильтр позволит имитировать на фото эффект как при съемке с малой глубиной резкости.
Далее фото откроется в окне эффекта размытия, и вы увидите маркеры управления фильтром. Нужно будет расставить их.
Маркер 1 позволяет перетаскивать область размытия и при помощи кольцевого регулятора усиливать или ослаблять эффект размытия.
Маркер 2 обозначает область резкости, где эффект размытия не будет применен.
Маркер 3 — область частичного размытия с нарастанием эффекта.
Маркер 4 — область полного размытия.
Отрегулируйте маркеры по своему желанию. Для еще более выразительного вида можно добавить «Боке». Настройки видны на панели эффектов в правом нижнем углу.
Теперь нажимаем Enter и попадаем в обычное окно с изображением.
2. Резкость.
Эффект размытия уже помог переместить точку фокуса, но для еще более явного эффекта сделаем еще акцент на глазах модели при помощи добавления резкости.
Создаем две копии слоя и назовем их, например, Sharp и Blur.
На слое Blur применяем размытие по Гауссу (Filter — Blur — Gaussian Blur). Выбираем небольшой радиус. Для данного примера подойдет 0,9 пикс.
Размытие позволило оставить все детали крупнее этого радиуса на слое Blur.
Далее нужно будет убрать их со слоя Sharp. Для этого используем команду Apply Image (Внешний Канал) из меню Image (Изображение).
Теперь слой Blur можно просто убрать. Он больше не нужен. А на слое Sharp добавляем контраст при помощи режима наложения Vivid light.
Зажимаем клавишу Alt и создаем маску слоя. При помощи мягкой кисти проявляем эффект на глазах модели. Все, работа завершена.
Движущийся автомобиль
Теперь при помощи инструментов размытия попробуем добиться эффекта движения на статичном изображении автомобиля.
- Откройте изображение и продублируйте слой (Ctrl + J).
- Применяем фильтр Размытие в Движении (Motion Blur): Фильтр- Размытие — Размытие в Движении (Filter > Blur > Motion Blur).
- Добавляем слой-маску в дубликат слоя с размытием: Слой — Слой-маска — Показать всё (Layer — Layer Mask — Reveal All). Чтобы эффект размытия в движении был виден только на заднем слое обрабатываем изображение автомобиля мягкой чёрной кистью (на фото для наглядности эта область обведена не черной, а красной кистью).
Получится вот так:
- Объединяем все видимые слои в один при помощи команды Ctrl + Shift + Alt + E. Далее выделяем переднее колесо автомобиля Овальной кистью (Elliptical Marquee Tool).
- Теперь создадим иллюзию быстрого вращения колес. Применяем фильтр Радиальное размытие (Radial Blur) к выделенной области: Фильтр — Размытие — Радиальное Размытие (Filter > Blur > Radial Blur). В появившемся окне ищем параметр Метод (Method Blur) и выбираем опцию Кольцевой (Spin). Бегунок Степени (Amount) продвигаем в крайнее правое положение.
Проделываем эти операции как для переднего, так и для заднего колеса.
- Теперь скрываем неаккуратные и грубые линии. Для этого добавляем слой-маску к слою с радиальным размытием: Слой — Слой-маска — Показать всё (Layer > Layer Mask > Reveal All). Теперь воспользуемся черной мягкой кистью с непрозрачностью 50%. Прокрашиваем ею вокруг колёс, маскируя недочеты.
- Еще раз объединяем все видимые слои нажатием комбинации Ctrl + Shift + Alt + E. К объединенному слою добавляем Размытие в Движении (Motion blur) и устанавливаем Смещение (Distance) на 700px.
Промежуточный результат будет вот такой:
- Меняем режим наложения на Осветление (Screen). Теперь добавляем слой-маску: Слой- Слой-маска — Скрыть всё (Layer > Layer Mask > Hide All).
Создаем эффект движения, белой кистью прокрасив на слой-маске слоя поверх задней части автомобиля. Этим вы снова проявите размытие в движении из прошлого этапа, но только на задней части авто.
- Теперь дублируем этот слой клавишами Ctrl + J. Теперь заливаем слой-маску черным цветом. Для этого нажимаем Alt + Backspace. Далее слегка смещаем слой наверх (удерживаем Ctrl + Shift и нажимаем 1 раз клавишу «вверх»).
- Прокрашиваем на слой-маске белой кистью как показано на фото.
Теперь все готово. Смотрим на результат.
Бегущий человек
Еще один эффект движения можно получить, если применить Линейное размытие (Zoom Blur). Если применить к фото человека, получится, как будто он очень быстро бежит.
-
Откройте изображение и продублируйте слой (Ctrl + J).
Выбираем опцию Радиальное размытие: Фильтр — Размытие — Радиальное Размытие (Filter > Blur > Radial Blur).
Выбираем опцию Линейное Размытие (Zoom Blur) в параметре Метод (Method Blur).
-
Добавляем слой-маску к дубликату размытого слоя: Слой- Слой-маска — Скрыть всё (Layer > Layer Mask > Hide All).
Осторожно прокрашиваем белой кистью по слой-маске, чтобы получилось изображение бегущего человека. Еще немного прокрашиваем участок земли перед человеком.
Должно получиться вот так.
На самом деле, можно создать гораздо больше эффектов при помощи инструментов размытия в Photoshop. Мы лишь показали несколько приёмов, которые выручат вас в ситуации, когда фото нужно срочно, а экстренно провести съемку не получится. Вспомнив эти несколько советов, вы быстро получите отличный результат. А исходные фото в хорошем качестве всегда найдутся на PressFoto.

How to apply the Iris Blur effect in the Photoshop Blur Gallery, so that you can blur a specific part of your photo and create a focal point.
In Photoshop, go to File > Open. and select a photo from your computer, or, if you're following along with the sample go to “selective-focus-blur.jpg”. Click Open.

Open the Blur Gallery
Go to Filter > Blur Gallery and select Iris Blur from the Blur Gallery options.
Use Iris Blur to define a focal point in the image while bluring the rest of the photo.

Define a focal point
When Iris Blur opens, you'll see a large blur preview ring and several dots in the image.
In the middle of the ring is a “pin.” The pin is like a target: At the center of the target, the image is sharp and clear; further away from the target, the image increases in blurriness.
Click the center of the pin and drag it to the figure. Release your mouse to place the pin.

Adjust the blur area
The outer ring of the blur preview defines the point at which the blur effect reaches 100%. Everything outside of the ring has a maximum blur effect applied.
Along the outer ring of the blur preview are four small dots. Hover your mouse over one of the small dots until your cursor changes to a curved double-ended arrow. For the sample photo, click and drag to elongate the blur preview ellipse, and rotate it slightly counter-clockwise.
To resize the blur area while constraining the shape, click and drag the line (rather than one of the dots) on the blur preview ring.

Adjust the blur transition
Inside the blur preview ring, see the four larger white dots, which define the blur transition area. Between these larger white dots and the blur preview (outer ring), the blur effect goes from 0% blur to 100% blur.
Click and drag the white dots to adjust the size of the blur transition area. Move the dots closer to the focal point to make the blur transition smoother, or, move the dots away from the focal point to make the blur transition sharper.
For the sample photo, move the large white dots slightly closer to the figure to make the blur transiton smoother.

Adjust the blur amount
You can adjust the blur dial, which is around the pin at the center of the blur preview area, to control the amount of blur applied.
Click and drag the blur dial clockwise to increase the blur, or, drag the blur dial counterclockwise to reduce the blur. For the sample, apply a blur of 8.
You can also adust the blur by using the Blur slider in the Blur Tools panel to the right of your workspace.

When you're finished, press Enter or click OK at the top of the Blur Gallery window.
Applying the Iris Blur effect is a creative way to make the subject of your photo stand out, and give a unique look to the image. Try using this effect to frame a face in a portrait, or to highlight a specific area of a landscape.
Even when you’ve captured the perfect moment, you can add some drama to your still image using a variety of Blur filters.

Convert your image to a Smart Object
In the Layers panel, right-click near the image name and choose Convert to Smart Object so you can add effects without permanently changing your original.

Blur the background
To play with depth of field, choose Filter > Blur Gallery > Field Blur. You’ll see a pin in place blurring the entire image. Click an area you want to keep in focus to create a second pin, and then drag its blur dial to zero. Add more pins to set different amounts of blur for other areas.

Add a motion blur
Create a sense of speed by adding a blur that flows in one direction. Choose Filter > Blur > Motion Blur and adjust the Angle to match the direction of your subject’s motion. Use the Distance setting to control the amount of blur.

Refine and define
Isolate the blur effect by masking the areas where you want to keep detail. In the Layers panel, click the Smart Filter mask thumbnail and use the Brush tool to paint over areas that should not be blurred, like in this example, where we kept the racer in focus.
To learn more about masking, see Mask out part of an image.

Add motion along a path
To create movement in multiple directions or along a curved path, choose Filter > Blur Gallery > Path Blur. Drag the controls to create a blur in the direction of the arrow. Click and drag in other areas of the image to create blur paths in other directions.
For more on adjusting Path Blur options, see Path Blur.
For more on image selection techniques, see Easily and accurately select image areas.
How to apply the Iris Blur effect in the Photoshop Blur Gallery, so that you can blur a specific part of your photo and create a focal point.
In Photoshop, go to File > Open. and select a photo from your computer, or, if you're following along with the sample go to “selective-focus-blur.jpg”. Click Open.
Open the Blur Gallery
Go to Filter > Blur Gallery and select Iris Blur from the Blur Gallery options.
Use Iris Blur to define a focal point in the image while bluring the rest of the photo.
Define a focal point
When Iris Blur opens, you'll see a large blur preview ring and several dots in the image.
In the middle of the ring is a “pin.” The pin is like a target: At the center of the target, the image is sharp and clear; further away from the target, the image increases in blurriness.
Click the center of the pin and drag it to the figure. Release your mouse to place the pin.
Adjust the blur area
The outer ring of the blur preview defines the point at which the blur effect reaches 100%. Everything outside of the ring has a maximum blur effect applied.
Along the outer ring of the blur preview are four small dots. Hover your mouse over one of the small dots until your cursor changes to a curved double-ended arrow. For the sample photo, click and drag to elongate the blur preview ellipse, and rotate it slightly counter-clockwise.
To resize the blur area while constraining the shape, click and drag the line (rather than one of the dots) on the blur preview ring.
Adjust the blur transition
Inside the blur preview ring, see the four larger white dots, which define the blur transition area. Between these larger white dots and the blur preview (outer ring), the blur effect goes from 0% blur to 100% blur.
Click and drag the white dots to adjust the size of the blur transition area. Move the dots closer to the focal point to make the blur transition smoother, or, move the dots away from the focal point to make the blur transition sharper.
For the sample photo, move the large white dots slightly closer to the figure to make the blur transiton smoother.
Adjust the blur amount
You can adjust the blur dial, which is around the pin at the center of the blur preview area, to control the amount of blur applied.
Click and drag the blur dial clockwise to increase the blur, or, drag the blur dial counterclockwise to reduce the blur. For the sample, apply a blur of 8.
You can also adust the blur by using the Blur slider in the Blur Tools panel to the right of your workspace.
When you're finished, press Enter or click OK at the top of the Blur Gallery window.
Applying the Iris Blur effect is a creative way to make the subject of your photo stand out, and give a unique look to the image. Try using this effect to frame a face in a portrait, or to highlight a specific area of a landscape.
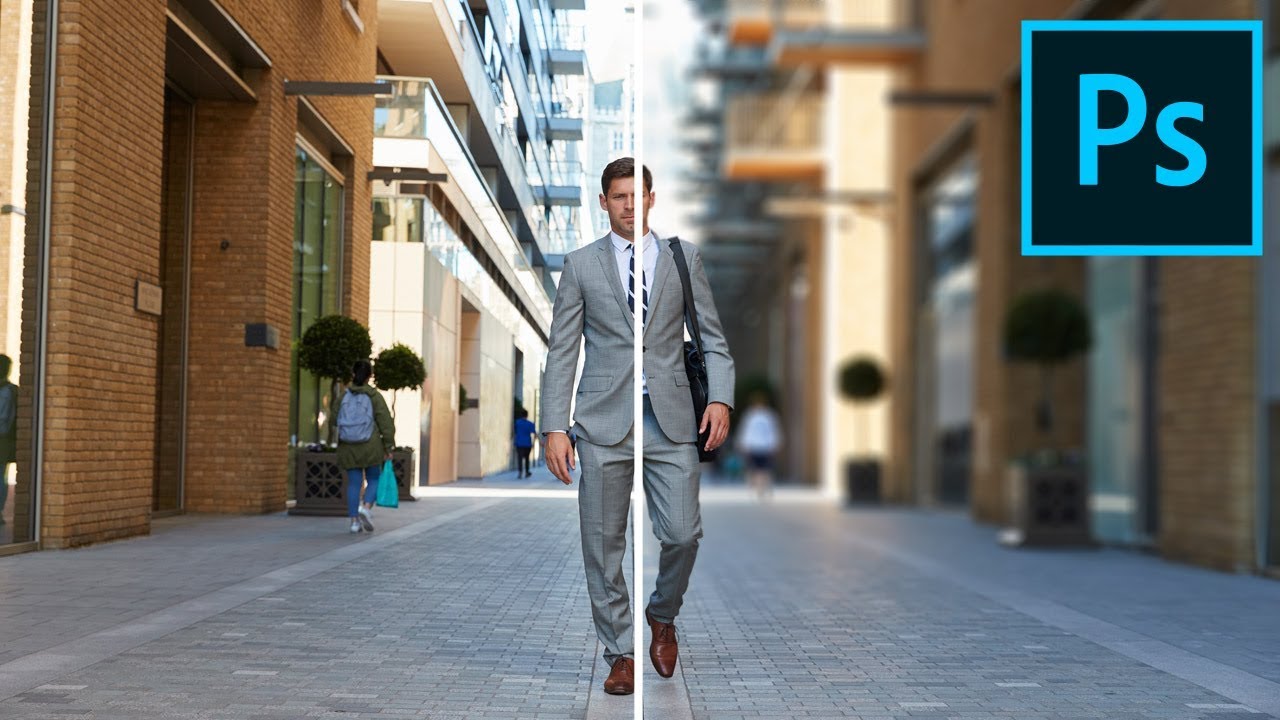
What You'll Be Creating
A blurred background is a great way to bring attention to the objects in the foreground. If your photo has a large depth of field, you can still get the photo effect of a blurred background by using Photoshop. Today I'll show you how to create an action in Photoshop to blur the background with a single click. This Photoshop action will work like a filter that you can use on various photos to create special effects for pictures.
Follow along with us over on our Envato Tuts+ YouTube Channel:
How to Create a Photoshop Action to Blur the Background in a Photograph
Step 1
Open your photo (I used this one). Use any selection tool to select the part of the image that is supposed to stay sharp. Here I used the Magnetic Lasso Tool with Refine Edge option (Select > Refine Edge). It's really important to make a precise selection for this action.
If you want to learn how to create precise selections, even including hair, try this tutorial:
Step 2
Create a New Layer and fill the selection with any color using the Paint Bucket Tool (G). Name the layer mask 1.


Step 3
Create a New Layer below and paint a black and white gradient on it using the Gradient Tool (G). The black part marks the area that will stay sharp. The white one will be blurred. The grey gradient between them will be a transition of these two. Adjust the angle and the position of the colors to the effect that you want to create. Name this layer mask 2.


Step 4
Click somewhere outside of the layers. Open the Actions (Windows > Actions) panel and click the white card icon to create a new action. Give it a name. From now on, your actions will be recorded.


Step 5
Go to Image > Image Size and make the image 5000 px wide. This will allow us to achieve similar results in all photos.


Step 6
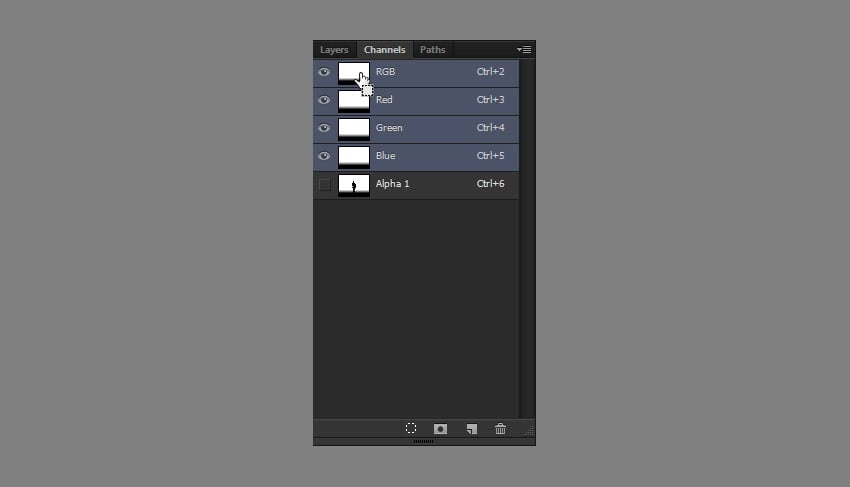
Select the whole canvas (Control-A), and then go to Edit > Copy Merged (Control-Shift-C). Go to the Channels tab, Create a New Channel, and paste the selection. Go back to the RGB channel and go to the Layers tab.


Step 7
Hide both masks. Select the background layer and duplicate it (Control-J). Then go to Filter > Blur > Lens Blur. A new window will open. Set the Source to Alpha 1, which is the name of the new channel that we've just created. Then change the settings to achieve the result you want.


Step 8
The background is blurred, but our character in the foreground looks unnaturally sharp. Let's do something about it. Hold Control and click mask 1 to create a selection out of it. Then go to Select > Modify > Expand and Expand by 10 px.


Step 9
Select the copied background and go to Layer > New > Layer via Copy to duplicate the selection. Then go to Filter > Blur > Gaussian Blur. When adjusting the blur, pay attention to the edges of the character. We want to blend them softly with the background.


Step 10
Again, hold Control and create a selection of this layer. Then go to Select > Modify > Contract and Contract by 15 pixels. If you press Delete now, you'll remove most of the blur, leaving only a nicely blended edge.


Step 11
But there's one more problem. The soft edge has been applied to the whole body, even to the part that is actually in focus. To fix it, show mask 2 for a moment and go to the Channels tab. Use the Control key to create a selection out of the RGB channel, and then go back to the layers, hide the mask, and add a New Layer Mask to Layer 1.


Step 12
Finally, click Stop Recording to save the action.


Step 13
If you want to use this action on any other photo, just create the two masks and click Play. Photoshop will repeat all your steps, blurring the background automatically in every photo. That's the magic of Photoshop actions!


Photoshop Actions With Special Photo Effects
Disperse Photo Effect
Photoshop actions are very powerful, but it's quite time-consuming to create one. If you want to save time, you can use actions created by professionals on Envato Elements. For example, this action creates a disperse photo effect. The selected part of the photo turns into a cloud of glitter, which looks very natural. You just need to paint the mask and click Play.
Crystal Photo Effect
Here's another magical photo effect created with an action. Select an area and let Photoshop create a beautiful crystal background, reflecting the subject in a realistic way. This action creates unique results with every photo you use!
Double Exposure Photo Effect
This Photoshop action creates a trendy double exposure effect. Open two photos and let the action combine them with a series of adjustments and filters. The photo is turned into an artwork, and all this with a single click!
Glitch Photo Effect
This Photoshop action is very simple, too. You don't have to paint any mask, because the whole photo is used here. Through a series of complex adjustments, your image gets a neat glitch look.
Good Job!
Now you know how to create and use a Photoshop action to blur a background in Photoshop. If you're interested in creating Photoshop actions, you may also like these tutorials:
Читайте также: